Centos7-mqtt消息中间件mosquitto的安装和配置
在以前发布的博客“菜鸟是如何打造智能家居系统的”文章最后我提到了使用MQTT协议作为云平台和设备之间的通信协议以达到消息传递的实时性,手机的消息推送也大多基于这种平台,首先搬来一段简介。
MQTT(MQ Telemetry Transport),消息队列遥测传输协议,轻量级的发布/订阅协议, 适用于一些条件比较苛刻的环境,进行低带宽、不可靠或间歇性的通信。目前已经是物联网消息通信事实上的标准协议了。值得一提的是mqtt提供三种不同质量的消息服务:
- “至多一次”:消息发布完全依赖底层 TCP/IP 网络。会发生消息丢失或重复。这一级别可用于如下情况,环境传感器数据,丢失一次读记录无所谓,因为不久后还会有第二次发送。
- “至少一次”:确保消息到达,但消息重复可能会发生。
- “只有一次”:确保消息到达一次。这一级别可用于如下情况,在计费系统中,消息重复或丢失会导致不正确的结果。
一直没时间搭建这个平台,前段时间到MQTT官网发现了一些很好的资源。
software
· mqtt/mqtt.github.io Wiki
资源里既有基于MQTT(但不仅限于)开源消息代理中间件(Brokers/servers),又有测试客户端,看了几个代理中间件,也百度了一下,应用比较多的有ActiveMQ、Apollo、Mosquitto等。先选择一个没那么复杂的Mosquitto来尝尝鲜。
Mosquitto是一款实现了消息推送协议 MQTT
v3.1 的开源消息代理软件,提供轻量级的,支持可发布/可订阅的的消息推送模式,使设备对设备之间的短消息通信变得简单,比如现在应用广泛的低功耗传感器,手机、嵌入式计算机、微型控制器等移动设备。
安装:(参考官网 http://mosquitto.org/download/)
服务器操作系统为CentOS7.0,使用最简单的yum安装
1.先加入yum源:
在/etc/yum.repos.d/目录中新建一个mosquitto.repo文件,里面写入:
[home_oojah_mqtt]- name=mqtt (CentOS_CentOS-7)
type=rpm-mdbaseurl=http://download.opensuse.org/repositories/home:/oojah:/mqtt/CentOS_CentOS-7/gpgcheck=1gpgkey=http://download.opensuse.org/repositories/home:/oojah:/mqtt/CentOS_CentOS-7//repodata/repomd.xml.keyenabled=1
熟悉命令的可以直接下载到服务器中重命名http://download.opensuse.org/repositories/home:/oojah:/mqtt/CentOS_CentOS-7/home:oojah:mqtt.repo
不熟悉命令操作的(比如说我 )就直接新建文件ftp上传吧。
2.开始安装
yum search all mosquittoyum install mosquitto mosquitto-clients
第一步先查找一下所有关于mosquitto的模块。
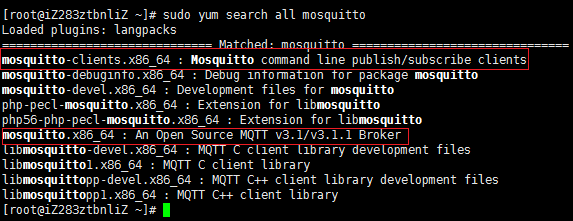
显现的模块后面功能简介,这里我先安装了mosquitto mosquitto-clients两个模块用于后面的测试,以后要用上什么模块我再安装。
3.配置
安装完成之后,所有配置文件会被放置于/etc/mosquitto/目录下,

其中最重要的就是Mosquitto的配置文件,即mosquitto.conf
# Place your local configuration in /etc/mosquitto/conf.d/pid_file /var/run/mosquitto.pidpersistence truepersistence_location /var/lib/mosquitto/#log_dest file /var/log/mosquitto/mosquitto.loginclude_dir /etc/mosquitto/conf.d
自定义的配置文件是放在/etc/mosquitto/conf.d/文件夹中,文件以.conf为扩展名。详细的配置参数参考mosquitto.conf.example
# =================================================================# General configuration# =================================================================# 客户端心跳的间隔时间#retry_interval 20# 系统状态的刷新时间#sys_interval 10# 系统资源的回收时间,0表示尽快处理#store_clean_interval 10# 服务进程的PID#pid_file /var/run/mosquitto.pid# 服务进程的系统用户#user mosquitto# 客户端心跳消息的最大并发数#max_inflight_messages 10# 客户端心跳消息缓存队列#max_queued_messages 100# 用于设置客户端长连接的过期时间,默认永不过期#persistent_client_expiration# =================================================================# Default listener# =================================================================# 服务绑定的IP地址#bind_address# 服务绑定的端口号#port 1883# 允许的最大连接数,-1表示没有限制#max_connections -1# cafile:CA证书文件# capath:CA证书目录# certfile:PEM证书文件# keyfile:PEM密钥文件#cafile#capath#certfile#keyfile# 必须提供证书以保证数据安全性#require_certificate false# 若require_certificate值为true,use_identity_as_username也必须为true#use_identity_as_username false# 启用PSK(Pre-shared-key)支持#psk_hint# SSL/TSL加密算法,可以使用“openssl ciphers”命令获取# as the output of that command.#ciphers# =================================================================# Persistence# =================================================================# 消息自动保存的间隔时间#autosave_interval 1800# 消息自动保存功能的开关#autosave_on_changes false# 持久化功能的开关persistence true# 持久化DB文件#persistence_file mosquitto.db# 持久化DB文件目录#persistence_location /var/lib/mosquitto/# =================================================================# Logging# =================================================================# 4种日志模式:stdout、stderr、syslog、topic# none 则表示不记日志,此配置可以提升些许性能log_dest none# 选择日志的级别(可设置多项)#log_type error#log_type warning#log_type notice#log_type information# 是否记录客户端连接信息#connection_messages true# 是否记录日志时间#log_timestamp true# =================================================================# Security# =================================================================# 客户端ID的前缀限制,可用于保证安全性#clientid_prefixes# 允许匿名用户#allow_anonymous true# 用户/密码文件,默认格式:username:password#password_file# PSK格式密码文件,默认格式:identity:key#psk_file# pattern write sensor/%u/data# ACL权限配置,常用语法如下:# 用户限制:user <username># 话题限制:topic [read|write] <topic># 正则限制:pattern write sensor/%u/data#acl_file# =================================================================# Bridges# =================================================================# 允许服务之间使用“桥接”模式(可用于分布式部署)#connection <name>#address <host>[:<port>]#topic <topic> [[[out | in | both] qos-level] local-prefix remote-prefix]# 设置桥接的客户端ID#clientid# 桥接断开时,是否清除远程服务器中的消息#cleansession false# 是否发布桥接的状态信息#notifications true# 设置桥接模式下,消息将会发布到的话题地址# $SYS/broker/connection/<clientid>/state#notification_topic# 设置桥接的keepalive数值#keepalive_interval 60# 桥接模式,目前有三种:automatic、lazy、once#start_type automatic# 桥接模式automatic的超时时间#restart_timeout 30# 桥接模式lazy的超时时间#idle_timeout 60# 桥接客户端的用户名#username# 桥接客户端的密码#password# bridge_cafile:桥接客户端的CA证书文件# bridge_capath:桥接客户端的CA证书目录# bridge_certfile:桥接客户端的PEM证书文件# bridge_keyfile:桥接客户端的PEM密钥文件#bridge_cafile#bridge_capath#bridge_certfile#bridge_keyfile# 自己的配置可以放到以下目录中include_dir /etc/mosquitto/conf.d
4.启动服务,两种方式
mosquitto -c /etc/mosquitto/mosquitto.conf -dsudo /etc/init.d/mosquitto start
演示部分:
前面已经开启了服务,如果没有请参考前面步骤。在本例中,发布者、代理和订阅者均为localhsot,但是在实际的情况下三种并不是同一个设备,在mosquitto中可通过-h(--host)设置主机名称(hostname)。为了实现这个简单的测试案例,需要在linux中打开三个控制台,分别代表代理服务器、发布者和订阅者。

一、开启另一个终端窗口,运行订阅程序mosquitto_sub:
注意:
消息推送的发布和订阅要有主题,选项[-t] 主题,即:mosquitto -t 主题
如需指定用户名称则加选项[-i] 用户名,即:mosquitto_sub -t 主题 -i 订阅端
mosquitto_sub -t mqtt
二、开启另一个终端窗口,运行发布程序mosquitto_pub:
指定消息推送的主题,发布端用户名和消息:
mosquitto_pub -t 主题
-i 发布端 -h 主机 -m 你好
*注意:如果消息中间有空格则消息要用引号括起来。
mosquitto_pub -h localhost -t mqtt -m "hello world."
这时候前面那个订阅窗口就可以收到”hello world”的消息了。
Python的安装环境就不讲了。最新的paho-mqtt1.1使用下面的命令安装
pip install paho-mqtt
import paho.mqtt.client as mqtt# The callback for when the client receives a CONNACK response from the server.def on_connect(client, userdata, flags, rc):print("Connected with result code "+str(rc))# Subscribing in on_connect() means that if we lose the connection and# reconnect then subscriptions will be renewed.client.subscribe("mqtt")#订阅,第一个参数是订阅的主题# The callback for when a PUBLISH message is received from the server.def on_message(client, userdata, msg):print(msg.topic+" "+str(msg.payload))client = mqtt.Client()client.on_connect = on_connectclient.on_message = on_messageclient.connect("XXXXXXXXXX", 1883, 60)#第一个参数为主机名,及Mosquitto所在服务器,第二个参数是端口# Blocking call that processes network traffic, dispatches callbacks and# handles reconnecting.# Other loop*() functions are available that give a threaded interface and a# manual interface.client.loop_forever()

接下来我在服务器控制台发布一个消息

回头看订阅方

已经收到了推送的消息。
Centos7-mqtt消息中间件mosquitto的安装和配置的更多相关文章
- MQTT消息中间件Mosquitto的安装和配置
特别提示:本人博客部分有参考网络其他博客,但均是本人亲手编写过并验证通过.如发现博客有错误,请及时提出以免误导其他人,谢谢!欢迎转载,但记得标明文章出处:http://www.cnblogs.com/ ...
- centos7下mysql5.7的安装与配置
centos7下MySQL5.7的安装与配置 下载 下载地址 根据系统和版本选择红框中的四个RPM包下载即可,然后放到centos7系统中的/opt目录下,等待稍后安装. 安装前的准备 1. 检查系统 ...
- nginx在Centos7.5下源码安装和配置
安装nginx 安装nginx依赖包 yum install -y pcre-devel zlib-devel openssl-devel wget gcc tree vim 进入目录/root/se ...
- Linux操作系统CentOS7.2发行版本的安装与配置(安装是选择服务器类型)
原文地址:http://1130739.blog.51cto.com/1120739/1738791 由于CentOS 7出来不久,对于这个版本的系统安装与配置的教程较少,今天就索性介绍一下CentO ...
- Springboot 2.0.x 集成基于Centos7的Redis集群安装及配置
Redis简介 Redis是一个基于C语言开发的开源(BSD许可),开源高性能的高级内存数据结构存储,用作数据库.缓存和消息代理.它支持数据结构,如 字符串.散列.列表.集合,带有范围查询的排序集,位 ...
- 【MQTT】Mosquitto的安装与使用流水记
最近使用MQTT,安装Mosquitto试一下,并记录下来. 软件准备 从官网获取安装包: wget http://mosquitto.org/files/source/mosquitto-1.4.1 ...
- Springboot 1.5.x 集成基于Centos7的RabbitMQ集群安装及配置
RabbitMQ简介 RabbitMQ是实现了高级消息队列协议(AMQP)的开源消息代理软件(亦称面向消息的中间件). RabbitMQ是一套开源(MPL)的消息队列服务软件,是由LShift提供的一 ...
- CentOS7下SVN server的安装与配置
CentOS7通过yum install命令进行安装SVN(参考:http://subversion.apache.org/packages.html#centos) $ yum install su ...
- CentOS7 64位下MySQL安装与配置(YUM)
安装环境:腾讯云CentOS7 64位安装MySQL5.7 1.配置YUM源 在MySQL官网中下载YUM源rpm安装包:http://dev.mysql.com/downloads/repo/yum ...
随机推荐
- Sublime text2 插件推荐
HTML-CSS-JS Prettify: 前端插件,使用 ctrl+shift+h 格式化代码
- [转载]Python-第三方库requests详解
Requests 是用Python语言编写,基于 urllib,采用 Apache2 Licensed 开源协议的 HTTP 库.它比 urllib 更加方便,可以节约我们大量的工作,完全满足 HTT ...
- java -jar jenkins.war
//设置jenkins主目录,并启动 #! /bin/sh CurrentDir=`dirname $` export JENKINS_HOME=$CurrentDir/jenkins_home ec ...
- C# 读写十六进制bin 文件
读一个十六进制的bin文件,在bin文件添加四行头,生成新的bin文件.bin文件可以用vs打开查看. using System; using System.Collections.Generic; ...
- ajax与后台交互传输数据的工具类
public class Result<T> implements Serializable { private static final long serialVersionUID = ...
- codeforces 515B. Drazil and His Happy Friends 解题报告
题目链接:http://codeforces.com/problemset/problem/515/B 题目意思:有 n 个 boy 和 m 个 girl,有 b 个 boy 和 g 个 girl ( ...
- MySQL 获得当前日期时间\时间戳 函数 ( 转自传智播客)
MySQL 获得当前日期时间 函数 1.1 获得当前日期+时间(date + time)函数:now() mysql> select now(); +-------+ | now() | +-- ...
- supersr--图形上下文的注意点
- (void)test { // 不要自己调用drawRect:方法的原因: // 当系统调用drawRect:方法之前, 会创建一个与当前UIView的layer相关的图形上下文, 这样就可以保证 ...
- [Android Pro] app_process command in Android
reference to : http://blog.csdn.net/wangkaiblog/article/details/46050587 本来以为存放在/systen/bin/下的monkey ...
- loadrunner备忘
1.超时设置 2. 可能是操作系统的环境不适合或者浏览器的版本有出入,具体的loadrunner版本支持的IE版本版本如下所示,请仔细核对是否正确.LR版本和IE版本兼容性问题,这个问题是我们安装环境 ...