Ubuntu18.04 + NVidia显卡 + Anaconda3 + Tensorflow-GPU 安装、配置、测试 (无需手动安装CUDA)
其中其决定作用的是这篇文章 https://www.pugetsystems.com/labs/hpc/Install-TensorFlow-with-GPU-Support-the-Easy-Way-on-Ubuntu-18-04-without-installing-CUDA-1170/
注意兼容版本:https://devtalk.nvidia.com/default/topic/1047898/cuda-setup-and-installation/cuda-10-1-tensorflow-1-13/2
1-安装显卡驱动
在终端执行如下命令,建议先切换到国内源,如huaweicloud mirrors。
sudo apt purge nvidia*

ubuntu-drivers devices            # 可以看到显卡等设备,和推荐的驱动

sudo ubuntu-drivers autoinstall   # 安装推荐驱动,通常是最新版
如果通过ubuntu-drivers devices看不到NVidia显卡,则添加
sudo add-apt-repository ppa:graphics-drivers

sudo apt-get update
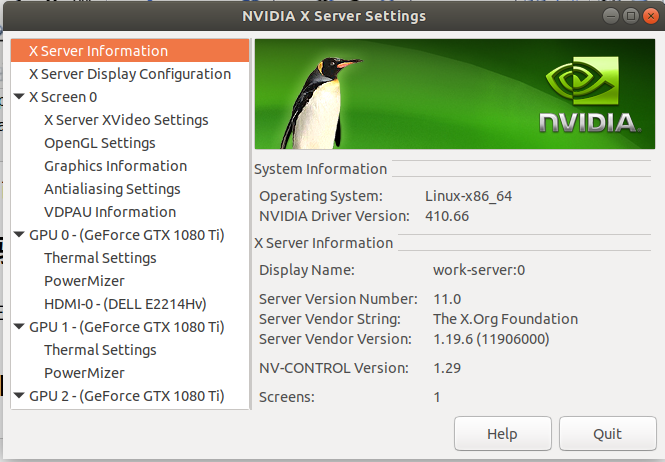
安装完后,重启系统, 启动后,在图形界面运行Nvidia X Server Settings,可以看到显卡情况,如下图。
2-安装Anaconda+Tensorflow-GPU
安装 Anaconda
bash Anaconda3-5.3.0-Linux-x86_64.sh # make sure append the Anaconda executable directory to your PATH environment variable in .bashrc

source ~/.bashrc

python --version # to show the python version
装之前,推荐切换到国内源:
anaconda的源改为国内镜像, 配置文件是~/.condarc
conda config --add channels https://mirrors.tuna.tsinghua.edu.cn/anaconda/pkgs/free/

conda config --add channels https://mirrors.tuna.tsinghua.edu.cn/anaconda/pkgs/main/

conda config --add channels https://mirrors.tuna.tsinghua.edu.cn/anaconda/cloud/conda-forge/

conda config --set show_channel_urls yes
pip源改为国内镜像, 配置文件是~/.pip/pip.conf, 该后的文件内容如下:
[global]

index-url = https://pypi.tuna.tsinghua.edu.cn/simple/

[install]

trusted-host=https://pypi.tuna.tsinghua.edu.cn
update conda
conda update conda -y

conda update anaconda -y

conda update python -y

conda update --all -y
安装tensorflow
conda create --name tf-gpu   # Create a Python "virtual environment" for TensorFlow using conda

conda activate tf-gpu       # 注意运行此命令后,命令行开头的提示变为(tf-gpu) user@computer:~$,表示tf-gpu环境处于激活状态
# 后面的命令,都在tf-gpu环境下执行,我保留了命令行的提示,以示区别

(tf-gpu) user@computer:~$ conda install tensorflow-gpu -y # install TensorFlow with GPU acceleration and all of the dependencies.
为Tensorflow环境创建Jupyter Notebook Kernel
(tf-gpu) user@computer:~$ conda install ipykernel -y
(tf-gpu) user@computer:~$ conda install jupyter

(tf-gpu) user@computer:~$ python -m ipykernel install --user --name tf-gpu --display-name "TensorFlow-GPU"
安装keras
(tf-gpu) user@computer:~$ conda install keras -y
3-测试安装结果
用Keras 例程(Keras内部会用到Tensorflow)
打开Jupyter Notebook
jupyter notebook
创建新笔记: New下拉菜单 -> 选择TensorFlow-GPU
输入如下测试代码,并运行:
# Import dependencies

import keras

from keras.datasets import mnist

from keras.models import Sequential

from keras.layers import Dense, Dropout

from keras.layers import Flatten,  MaxPooling2D, Conv2D

from keras.callbacks import TensorBoard

# Load and process the MNIST data

# 推荐先下载mnist.npz到目录~/.keras/datasets/

(X_train,y_train), (X_test, y_test) = mnist.load_data(path="mnist.npz")

X_train = X_train.reshape(60000,28,28,1).astype('float32')

X_test = X_test.reshape(10000,28,28,1).astype('float32')

X_train /= 255

X_test /= 255

n_classes = 10

y_train = keras.utils.to_categorical(y_train, n_classes)

y_test = keras.utils.to_categorical(y_test, n_classes)

# Create the LeNet-5 neural network architecture

model = Sequential()

model.add(Conv2D(32, kernel_size=(3,3), activation='relu', input_shape=(28,28,1)) )

model.add(Conv2D(64, kernel_size=(3,3), activation='relu'))

model.add(MaxPooling2D(pool_size=(2,2)))

model.add(Dropout(0.25))

model.add(Flatten())

model.add(Dense(128, activation='relu'))

model.add(Dropout(0.5))
model.add(Dense(n_classes, activation='softmax')) # Compile the model

model.compile(loss='categorical_crossentropy', optimizer='adam', metrics=['accuracy']) # Set log data to feed to TensorBoard for visual analysis

tensor_board = TensorBoard('./logs/LeNet-MNIST-1') # Train the model

model.fit(X_train, y_train, batch_size=128, epochs=15, verbose=1,

          validation_data=(X_test,y_test), callbacks=[tensor_board])
运行完后查看误差曲线
(tf-gpu) dbk@i9:~$ tensorboard --logdir=./logs --port 6006
效果如下图

Ubuntu18.04 + NVidia显卡 + Anaconda3 + Tensorflow-GPU 安装、配置、测试 (无需手动安装CUDA)的更多相关文章
- Ubuntu18.04 NVIDIA显卡驱动 安装大全
离线安装NVIDIA显卡驱动 费了一天的劲,走了好多的坑,最主要的原因是gcc版本的问题,一定要用最新版本的gcc!!! 1)官网下载显卡驱动 2)apt 下载gcc包及其依赖包,可用apt-cach ...
- Ubuntu16.04 Nvidia显卡驱动简明安装指南
简单得整理了一下Ubuntu16.04 Nvidia显卡驱动的安装步骤: 查看当前系统显卡参数: sudo lspci | grep -i nvidia 删除之前的驱动: sudo apt-get - ...
- Hadoop2.2集群安装配置-Spark集群安装部署
配置安装Hadoop2.2.0 部署spark 1.0的流程 一.环境描写叙述 本实验在一台Windows7-64下安装Vmware.在Vmware里安装两虚拟机分别例如以下 主机名spark1(19 ...
- 从subversion开始(svn安装配置全过程(+全套安装文件与配置文件))…..
从subversion开始(svn安装配置全过程(+全套安装文件与配置文件))-.. 博客分类: 工具使用 SVNsubversion配置管理Apache应用服务器 </div> 花了一 ...
- MySQL 5.7.33 超级详细下载安装配置测试教程(可以安装成功版)
目录 1.引言及注意事项 (1) 引言: (2) 注意: 2.MySQL下载 3.配置环境变量 4.配置my.ini文件(重点) 5.安装MySQL(重点) 6.设置密码 7.测试MySQL是否安装成 ...
- (解决某些疑难杂症)Ubuntu16.04 + NVIDIA显卡驱动 + cuda10 + cudnn 安装教程
一.NVIDIA显卡驱动 打开终端,输入: sudo nautilus 在新打开的文件夹中,进入以下路径(不要用命令行): 左下角点计算机,lib,modules 这时会有几个文件夹,对每个文件夹都进 ...
- Ubuntu 14.04 Nvidia显卡驱动手动安装及设置
更换主板修复grub 引导后,无法从Nvidia进入系统(光标闪烁), 可能是显卡驱动出了问题. 1. 进入BIOS设置, 从集成显卡进入系统 将显示器连接到集显的VGI口, 并在BIOS中设置用 ...
- Ubuntu 14.04 Nvidia显卡驱动安装及设置
更换主板修复grub 引导后,无法从Nvidia进入系统(光标闪烁), 可能是显卡驱动出了问题. 1. 进入BIOS设置, 从集成显卡进入系统 将显示器连接到集显的VGI口, 并在BIOS中设置用集显 ...
- nginx安装配置+清缓存模块安装
经过一段时间的使用,发现nginx在并发与负载能力方面确实优于apache,现在已经将大部分站点从apache转到了nginx了.以下是nginx的一些简单的安装配置. 环境 操作系统:CentOS. ...
随机推荐
- python基础问题
包安装相关问:如何安装Python三方包?在命令行如何检查一个包是否已安装?答:安装用pip install 卸载用 pip uninstall 直接import 这个包问:环境变量PATH的作用是什 ...
- 用Pygal画一个英雄能力的图
效果图: 这是在google浏览器下打开的html. play.py #!/usr/bin/env python # _*_ coding: UTF-8 _*_ """= ...
- PhotoShop CC2015(64位)下载链接和破解教程
photoshop如今有cc和cs两种版本,之前出了一个cs的破解教程和扣圆形图,有很多朋友说cc比cs好用的多,希望出个cc的下载链接和破解教程,故推出2015pscc版破解教程和下载链接. 百度云 ...
- MySQL Shell import_table数据导入
目录 1. import_table介绍 2. Load Data 与 import table功能示例 2.1 用Load Data方式导入数据 2.2 用import_table方式导入数据 3. ...
- Linux的链接(入门)
Linux的链接分为两种:硬链接和软链接 硬链接:如果B是A的硬链接,那么B和A指向同一个文件,但是删除A并不会影响B->允许一个文件有多个路径 软链接:类似Windows下的快捷方式,删除原文 ...
- 题解AGC004C
题目 . 样例 AGC 好评. 题意:让你在一个 \(H \times W\) 的方格纸上找两个连通块,使得他们的重合部分就是输入中给的部分. 先放个样例. 输入: 5 5 ..... .#.#. . ...
- Java 线程安全的实现方法
概述 在软件业发展的初期,程序编写都是以算法为核心的,程序员会把数据和过程分别作为独立的部分来考虑,数据代表问题空间中的客体, 程序代码则用于处理这些数据,这种思维方式直接站在计算机的角度去抽象问题和 ...
- MapReduce框架原理-MapTask和ReduceTask工作机制
MapTask工作机制 并行度决定机制 1)问题引出 maptask的并行度决定map阶段的任务处理并发度,进而影响到整个job的处理速度.那么,mapTask并行任务是否越多越好呢? 2)MapTa ...
- JQuery常用属性操作,动画,事件绑定
jQuery 的属性操作 html() 它可以设置和获取起始标签和结束标签中的内容. 跟 dom 属性 innerHTML 一样. text() 它可以设置和获取起始标签和 ...
- Linux命令(四)之常用文件拷贝/移动,文件解压缩,文件查找等相关的操作
.personSunflowerP { background: rgba(51, 153, 0, 0.66); border-bottom: 1px solid rgba(0, 102, 0, 1); ...