SpringMVC学习笔记---依赖配置和简单案例实现
初识SpringMVC
实现步骤:
- 新建一个web项目
- 导入相关jar包
- 编写web.xml,注册DispatcherServlet
- 编写springmvc配置文件
- 接下来就是去创建对应的控制类 , controller
- 最后完善前端视图和controller之间的对应
- 测试运行调试
使用springMVC必须配置的三大件:
处理器映射器、处理器适配器、视图解析器
通常,我们只需要手动配置视图解析器,而处理器映射器和处理器适配器只需要开启注解驱动即可,而省去了大段的xml配置
注解实现SpringMVC
常见注解
@Component	组件

@Service	服务

@Controller	控制

@Respository	dao层
控制器
package com.kuang.controller;

import org.springframework.stereotype.Controller;

import org.springframework.ui.Model;

import org.springframework.web.bind.annotation.RequestMapping;

//@Controller注解的类会自动添加到Spring上下文中

@Controller

@RequestMapping("/test2")

public class ControllerTest2{

	//映射访问路径

	@RequestMapping("/t2")

	public String index(Model model){

		//Spring MVC会自动实例化一个Model对象用于向视图中传值

		model.addAttribute("msg", "ControllerTest2");

		//返回视图位置

		return "test";

	}

}
- @Controller是为了让Spring IOC容器初始化时自动扫描到;
- @RequestMapping是为了映射请求路径,这里因为类与方法上都有映射所以访问时应该是/test2/t2;
标准maven依赖
<?xml version="1.0" encoding="UTF-8"?>

<project xmlns="http://maven.apache.org/POM/4.0.0"

         xmlns:xsi="http://www.w3.org/2001/XMLSchema-instance"

         xsi:schemaLocation="http://maven.apache.org/POM/4.0.0 http://maven.apache.org/xsd/maven-4.0.0.xsd">

    <modelVersion>4.0.0</modelVersion>

    <groupId>com.reliable</groupId>

    <artifactId>SpringMVC2</artifactId>

    <packaging>pom</packaging>

    <version>1.0-SNAPSHOT</version>

    <modules>

        <module>springmvc-04-controller</module>

    </modules>

    <dependencies>

        <dependency>

            <groupId>junit</groupId>

            <artifactId>junit</artifactId>

            <version>4.12</version>

        </dependency>

        <dependency>

            <groupId>org.springframework</groupId>

            <artifactId>spring-webmvc</artifactId>

            <version>5.1.9.RELEASE</version>

        </dependency>

        <dependency>

            <groupId>javax.servlet</groupId>

            <artifactId>servlet-api</artifactId>

            <version>2.5</version>

        </dependency>

        <dependency>

            <groupId>javax.servlet.jsp</groupId>

            <artifactId>jsp-api</artifactId>

            <version>2.2</version>

        </dependency>

        <dependency>

            <groupId>javax.servlet</groupId>

            <artifactId>jstl</artifactId>

            <version>1.2</version>

        </dependency>

    </dependencies>

    <build>

        <resources>

            <resource>

                <directory>src/main/java</directory>

                <includes>

                    <include>**/*.properties</include>

                    <include>**/*.xml</include>

                </includes>

                <filtering>false</filtering>

            </resource>

            <resource>

                <directory>src/main/resources</directory>

                <includes>

                    <include>**/*.properties</include>

                    <include>**/*.xml</include>

                </includes>

                <filtering>false</filtering>

            </resource>

        </resources>

    </build>

</project>
一、配置pom.xml
<?xml version="1.0" encoding="UTF-8"?>

<project xmlns="http://maven.apache.org/POM/4.0.0"

         xmlns:xsi="http://www.w3.org/2001/XMLSchema-instance"

         xsi:schemaLocation="http://maven.apache.org/POM/4.0.0 http://maven.apache.org/xsd/maven-4.0.0.xsd">

    <parent>

        <artifactId>SpringMVC2</artifactId>

        <groupId>com.reliable</groupId>

        <version>1.0-SNAPSHOT</version>

    </parent>

    <modelVersion>4.0.0</modelVersion>

    <artifactId>springmvc-04-controller</artifactId>

    <dependencies>

        <dependency>

            <groupId>javax.servlet</groupId>

            <artifactId>servlet-api</artifactId>

            <version>2.5</version>

        </dependency>

        <dependency>

            <groupId>javax.servlet.jsp</groupId>

            <artifactId>jsp-api</artifactId>

            <version>2.2</version>

        </dependency>

    </dependencies>

    <build>

        <resources>

            <resource>

                <directory>src/main/java</directory>

                <includes>

                    <include>**/*.properties</include>

                    <include>**/*.xml</include>

                </includes>

                <filtering>false</filtering>

            </resource>

            <resource>

                <directory>src/main/resources</directory>

                <includes>

                    <include>**/*.properties</include>

                    <include>**/*.xml</include>

                </includes>

                <filtering>false</filtering>

            </resource>

        </resources>

    </build>

</project>
二、配置web.xml
<?xml version="1.0" encoding="UTF-8"?>

<web-app xmlns="http://xmlns.jcp.org/xml/ns/javaee"

         xmlns:xsi="http://www.w3.org/2001/XMLSchema-instance"

         xsi:schemaLocation="http://xmlns.jcp.org/xml/ns/javaee http://xmlns.jcp.org/xml/ns/javaee/web-app_4_0.xsd"

         version="4.0">

    <!--1.注册servlet-->

    <servlet>

        <servlet-name>SpringMVC</servlet-name>

        <servlet-class>org.springframework.web.servlet.DispatcherServlet</servlet-class>

        <!--通过初始化参数指定SpringMVC配置文件的位置,进行关联-->

        <init-param>

            <param-name>contextConfigLocation</param-name>

            <param-value>classpath:springmvc-servlet.xml</param-value>

        </init-param>

        <!-- 启动顺序,数字越小,启动越早 -->

        <load-on-startup>1</load-on-startup>

    </servlet>

    <!--所有请求都会被springmvc拦截 -->

    <servlet-mapping>

        <servlet-name>SpringMVC</servlet-name>

        <url-pattern>/</url-pattern>

    </servlet-mapping>

</web-app>
三、配置springmvc-servlet.xml
<?xml version="1.0" encoding="UTF-8"?>

<beans xmlns="http://www.springframework.org/schema/beans"

       xmlns:xsi="http://www.w3.org/2001/XMLSchema-instance"

       xmlns:context="http://www.springframework.org/schema/context"

       xmlns:mvc="http://www.springframework.org/schema/mvc"

       xsi:schemaLocation="http://www.springframework.org/schema/beans

        http://www.springframework.org/schema/beans/spring-beans.xsd

        http://www.springframework.org/schema/context

        https://www.springframework.org/schema/context/spring-context.xsd

        http://www.springframework.org/schema/mvc

        https://www.springframework.org/schema/mvc/spring-mvc.xsd">

    <!-- 自动扫描包,让指定包下的注解生效,由IOC容器统一管理 -->

    <context:component-scan base-package="com.kuang.controller"/>

    <!-- 让Spring MVC不处理静态资源:html 等-->

    <mvc:default-servlet-handler/>

    <!--

    支持mvc注解驱动

        在spring中一般采用@RequestMapping注解来完成映射关系

        要想使@RequestMapping注解生效

        必须向上下文中注册DefaultAnnotationHandlerMapping

        和一个AnnotationMethodHandlerAdapter实例

        这两个实例分别在类级别和方法级别处理。

        而annotation-driven配置帮助我们自动完成上述两个实例的注入。

		<mvc:annotation-driven /> 完成了映射和适配(支持用注解完成)

     -->

    <mvc:annotation-driven />

    <!-- 视图解析器 -->

    <bean class="org.springframework.web.servlet.view.InternalResourceViewResolver"

          id="internalResourceViewResolver">

        <!-- 前缀 -->

        <property name="prefix" value="/WEB-INF/jsp/" />

        <!-- 后缀 -->

        <property name="suffix" value=".jsp" />

    </bean>

</beans>
RestFul 风格
概念
Restful就是一个资源定位及资源操作的风格。不是标准也不是协议,只是一种风格。基于这个风格设计的软件可以更简洁,更有层次,更易于实现缓存等机制。
功能
资源:互联网所有的事物都可以被抽象为资源
资源操作:使用POST、DELETE、PUT、GET,使用不同方法对资源进行操作。
分别对应 添加、 删除、修改、查询。
RestFulController(@PathVariable)
package com.kuang.controller;
import org.springframework.stereotype.Controller;
import org.springframework.ui.Model;
import org.springframework.web.bind.annotation.PathVariable;
import org.springframework.web.bind.annotation.RequestMapping;
import org.springframework.web.bind.annotation.RequestMethod;
@Controller
public class RestFulController {
//映射访问路径
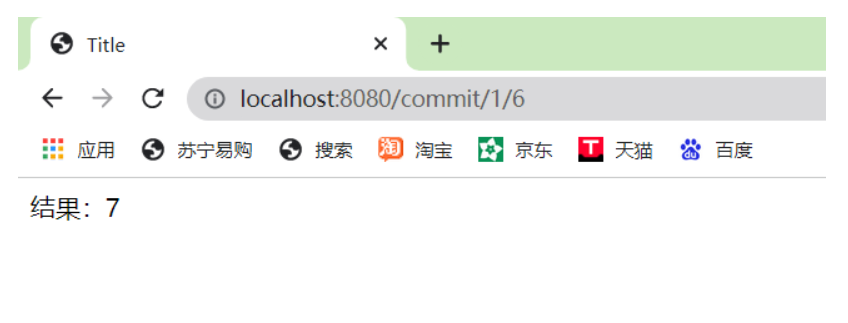
@RequestMapping("/commit/{p1}/{p2}")
public String index(@PathVariable int p1, @PathVariable int p2, Model model){
int result = p1+p2;
//Spring MVC会自动实例化一个Model对象用于向视图中传值
model.addAttribute("msg", "结果:"+result);
//返回视图位置
return "test";
}
//映射访问路径,必须是Get请求
@RequestMapping(value = "/hello",method = {RequestMethod.GET})
public String index2(Model model){
model.addAttribute("msg", "hello!");
return "test";
}
}
使用method属性指定请求类型
用于约束请求的类型,可以收窄请求范围。指定请求谓词的类型如GET, POST, HEAD, OPTIONS, PUT, PATCH, DELETE, TRACE等。
	//映射访问路径,必须是Get请求

	@RequestMapping(value = "/hello",method = {RequestMethod.GET})

	public String index2(Model model){

		model.addAttribute("msg", "hello!");

		return "test";

	}
除了添加method,还可以使用注解
@GetMapping
@PostMapping
@PutMapping
@DeleteMapping
@PatchMapping
	//映射访问路径,必须是Get请求

	@GetMapping(value = "/hello")

	public String index2(Model model){

		model.addAttribute("msg", "hello!");

		return "test";

	}
SpringMVC学习笔记---依赖配置和简单案例实现的更多相关文章
- SpringMVC:学习笔记(11)——依赖注入与@Autowired
SpringMVC:学习笔记(11)——依赖注入与@Autowired 使用@Autowired 从Spring2.5开始,它引入了一种全新的依赖注入方式,即通过@Autowired注解.这个注解允许 ...
- springmvc学习笔记---面向移动端支持REST API
前言: springmvc对注解的支持非常灵活和飘逸, 也得web编程少了以往很大一坨配置项. 另一方面移动互联网的到来, 使得REST API变得流行, 甚至成为主流. 因此我们来关注下spring ...
- springmvc学习笔记(简介及使用)
springmvc学习笔记(简介及使用) 工作之余, 回顾了一下springmvc的相关内容, 这次也为后面复习什么的做个标记, 也希望能与大家交流学习, 通过回帖留言等方式表达自己的观点或学习心得. ...
- springMVC 学习笔记(一):springMVC 入门
springMVC 学习笔记(一):spring 入门 什么是 springMVC springMVC 是 spring 框架的一个模块,springMVC 和 spring 无需通过中间整合层进行整 ...
- springmvc学习笔记(18)-json数据交互
springmvc学习笔记(18)-json数据交互 标签: springmvc springmvc学习笔记18-json数据交互 springmvc进行json交互 环境准备 加入json转换的依赖 ...
- springmvc学习笔记--REST API的异常处理
前言: 最近使用springmvc写了不少rest api, 觉得真是一个好框架. 之前描述的几篇关于rest api的文章, 其实还是不够完善. 比如当遇到参数缺失, 类型不匹配的情况时, 直接抛出 ...
- SpringMVC:学习笔记(8)——文件上传
SpringMVC--文件上传 说明: 文件上传的途径 文件上传主要有两种方式: 1.使用Apache Commons FileUpload元件. 2.利用Servlet3.0及其更高版本的内置支持. ...
- springmvc学习笔记(常用注解)
springmvc学习笔记(常用注解) 1. @Controller @Controller注解用于表示一个类的实例是页面控制器(后面都将称为控制器). 使用@Controller注解定义的控制器有如 ...
- 史上最全的SpringMVC学习笔记
SpringMVC学习笔记---- 一.SpringMVC基础入门,创建一个HelloWorld程序 1.首先,导入SpringMVC需要的jar包. 2.添加Web.xml配置文件中关于Spring ...
随机推荐
- javascript-jquery介绍
jquery优势 1.轻量级 2.强大的选择器 3.出色的DOM封装 4.可靠的事件处理机制 5.完善的Ajax 6.不污染顶级变量 7.出色的浏览器兼容 8.链式操作方式 9.隐式迭代 10.行为层 ...
- Hive面试题整理(一)
1.Hive表关联查询,如何解决数据倾斜的问题?(☆☆☆☆☆) 1)倾斜原因:map输出数据按key Hash的分配到reduce中,由于key分布不均匀.业务数据本身的特.建表时考虑不周.等原因 ...
- MAC 安装 apache ab 压力测试工具以及遇到的坑
ab 是apache对 http服务器进行压力测试的工具,它可以测试出服务器每秒可以处理多少请求.本文记录mac版本安装 ab 的步骤以及遇到的坑. 下载 进入 apache ab官网 下载页面. 安 ...
- [Git系列] 前言
Git 简介 Git 是一个重视速度的分布式版本控制和代码管理系统,最初是由 Linus Torvalds 为开发 Linux 内核而设计并开发的,是一款遵循二代 GUN 协议的免费软件.这一教程会向 ...
- Java-基础-ArrayList
1. 简介 ArrayList 实现了 List 接口,其底层基于数组实现容量大小动态可变.既然是数组,那么元素存放一定是有序的,并允许包括 null 在内的所有元素. 每个 ArrayList 实例 ...
- C++ Boost signal2信号/插槽
#include "stdafx.h" #include "boost/signals2.hpp" #include "boost/bind.hpp& ...
- Linux入门必须养成的七大习惯
对于很多Linux初学者来说,在刚开始使用linux系统时会感到很多的不适.这里为大家整理了自己以前linux入门时别人告诉我的七个习惯.我相信如果你运用了这七个习惯,在你使用Linux时你会感觉更安 ...
- JVM:垃圾收集器与对象的"存活"问题
垃圾收集器垃圾收集(Garbage Collection,GC).当需要排查各种内存溢出.内存泄露问题时,当垃圾收集成为系统更高并发量的瓶颈时,我们需要去了解GC和内存分配. 检查对象的"存 ...
- Matlab+Qt开发笔记(一):matlab搭建Qt开发matlib环境以及Demo测试
前言 做一些数据处理软件,使用matlab文件,.mat文件. 准备条件 安装matlab2016,发现是vs 12(是vs2011版本),Qt5.9.3是支持vs 14(是vs2015版 ...
- single-number-ii leetcode C++
Given an array of integers, every element appears three times except for one. Find that single one. ...