VUE:路由
VUE:路由
一、说明
1)官方提供的用来实现SPA的vue插件
2)github:https://github.com/vuejs/vue-router
3)中文文档:http://router.vuejs.org/zh-cn/
4)下载:npm install vue-router --save
二、相关API
1)VueRouter():用于创建路由器的构建函数
new VueRouter{{

    //多个配置项

}}
2)路由配置:
routes:[

    {//一般路由

        path:'/about',

        component:About

    },

    {//自动跳转路由

        path:'/',

        redirect:'/about'

    },

]
3)注册路由器:
import router from './router'

new Vue({

    router

})
4)使用路由组件标签
1.<router-link>:用来生成路由链接
<router-link to='/xxx'>Go to XXX</router-link>
2.<router-view>:用来显示当前路由组件界面
<router-view></router-view>
三、基本路由
<template>

    <div>

        About

    </div>

</template>

<script>

    export default{

    }

</script>

<style>

</style>
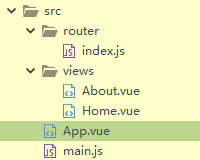
About.vue
<template>

    <div>

        Home

    </div>

</template>

<script>

    export default{

    }

</script>

<style>

</style>
Home.vue
<template>

    <div>

        <div>

            <h2>Taosir is studying...</h2></div>

        <div>

            <router-link to="/about">About</router-link>

            <router-link to="/home">Home</router-link>

        </div>

        <div>

            <router-view></router-view>

        </div>

    </div>

    </div>

    </div>

</template>

<script>

    export default {

    }

</script>

<style>

</style>
App.vue
import Vue from 'vue'

import App from './App.vue'

import router from './router'

new Vue({    //配置对象的属性名都是一些确定的名称,不能随便修改

  el: '#app',

  router,

  components: { App },

  template: '<App/>',

  router

})
main.js
/*

 * 路由器模块

 */

import Vue from 'vue'

import VueRouter from 'vue-router'

import About from '../views/About.vue'

import Home from '../views/Home.vue'

Vue.use(VueRouter)

export default new VueRouter({

    //n个路由

    routes:[

        {

            path:'/about',

            component:About

        },{

            path:'/home',

            component:Home

        },{

            path:'/',

            redirect:'/about'

        }

    ]

})
index.js
四、嵌套路由
在上面的基础上Home加了一层嵌套

<template>

    <div>

        <ul>

            <li v-for="(news,index) in newsArr" :key="index">{{news}}</li>

        </ul>

    </div>

</template>

<script>

    export default{

        data(){

            return{

                newsArr:['news001','news002','news003','news004']

            }

        }

    }

</script>

<style>

</style>
News.vue
<template>

    <div>

        <ul>

            <li v-for="(message,index) in messages" :key="message.id">

                <a href="???">{{message.title}}</a>

            </li>

        </ul>

    </div>

</template>

<script>

    export default{

        data(){

            return {

                messages:[]

            }

        },

        mounted(){

            //模拟ajax请求从后台获取数据

            setTimeout(()=>{

                const messages=[

                    {

                        id:1,

                        title:'message001',

                    },{

                        id:3,

                        title:'message003',

                    },{

                        id:5,

                        title:'message005',

                    }

                ]

                this.messages=messages

            },1000)

        }

    }

</script>

<style>

</style>
Message.vue
<template>

    <div>

        <h2>Home</h2>

        <div>

            <ul>

                <li><router-link to="/home/news">News</router-link></li>

                <li><router-link to="/home/message">Message</router-link></li>

            </ul>

            <div>

                <router-view></router-view>

                <hr />

            </div>

        </div>

    </div>

</template>

<script>

    export default{

    }

</script>

<style>

</style>
Home.vue
/*

 * 路由器模块

 */

import Vue from 'vue'

import VueRouter from 'vue-router'

import About from '../views/About.vue'

import Home from '../views/Home.vue'

import News from '../views/News.vue'

import Message from '../views/Message.vue'

Vue.use(VueRouter)

export default new VueRouter({

    //n个路由

    routes:[

        {

            path:'/about',

            component:About

        },{

            path:'/home',

            component:Home,

            children:[

                {

                    path:'/home/news',

                    component:News

                },{

                    path:'message',

                    component:Message

                },{

                    path:"",

                    redirect:"/home/news"

                }

            ]

        },{

            path:'/',

            redirect:'/about'

        }

    ]

})
index.js
    <style>

        .router-link-active{

            color:red !important;

        }

    </style>
在index.html加入该样式可以使选中的变红
五、缓存路由的实现
<keep-alive>

    <router-view></router-view>

</keep-alive>
六、向路由组件传参

1)通过path
2)通过标签<router-view>
<template>

    <div>

        <p>ID:{{$route.params.id}}</p>

        <ul>

            <li>id:{{messageDetail.id}}</li>

            <li>title:{{messageDetail.title}}</li>

            <li>content:{{messageDetail.content}}</li>

        </ul>

    </div>

</template>

<script>

    export default {

        data() {

            return {

                messageDetail: {}

            }

        },

        mounted() {

            setTimeout(() => {

                const allMessageDetails = [{

                    id: 1,

                    title: 'message001',

                    content: 'message001 content...'

                }, {

                    id: 2,

                    title: 'message002',

                    content: 'message002 content...'

                }, {

                    id: 4,

                    title: 'message004',

                    content: 'message004 content...'

                }]

                this.allMessageDetails=allMessageDetails

                const id=this.$route.params.id*1

                this.messageDetail=allMessageDetails.find(detail=>detail.id===id)

            },1000)

        },

        watch:{

            $route:function(value){//路由路径(param)发生了改变

                const id=value.params.id*1

                this.messageDetail=this.allMessageDetails.find(detail=>detail.id===id)

            }

        }

    }

</script>

<style>

</style>
MessageDetail.vue
/*

 * 路由器模块

 */

import Vue from 'vue'

import VueRouter from 'vue-router'

import About from '../views/About.vue'

import Home from '../views/Home.vue'

import News from '../views/News.vue'

import Message from '../views/Message.vue'

import MessageDetail from '../views/MessageDetail.vue'

Vue.use(VueRouter)

export default new VueRouter({

    //n个路由

    routes:[

        {

            path:'/about',

            component:About

        },{

            path:'/home',

            component:Home,

            children:[

                {

                    path:'/home/news',

                    component:News

                },{

                    path:'message',

                    component:Message,

                    children:[

                        {

                            path:'detail/:id',

                            component:MessageDetail

                        }

                    ]

                },{

                    path:"",

                    redirect:"/home/news"

                }

            ]

        },{

            path:'/',

            redirect:'/about'

        }

    ]

})
index.js
<template>

    <div>

        <ul>

            <li v-for="(message,index) in messages" :key="message.id">

                <router-link :to="`/home/message/detail/${message.id}`">{{message.title}}</router-link>

            </li>

        </ul>

        <hr />

        <router-view></router-view>

    </div>

</template>

<script>

    export default{

        data(){

            return {

                messages:[]

            }

        },

        mounted(){

            //模拟ajax请求从后台获取数据

            setTimeout(()=>{

                const messages=[

                    {

                        id:1,

                        title:'message001',

                    },{

                        id:2,

                        title:'message002',

                    },{

                        id:4,

                        title:'message004',

                    }

                ]

                this.messages=messages

            },1000)

        }

    }

</script>

<style>

</style>
Message.vue
<template>

    <div>

        <div>

            <h2>Taosir is studying...</h2></div>

        <div>

            <router-link to="/about">About</router-link>

            <router-link to="/home">Home</router-link>

        </div>

        <div>

            <router-view msg="abc"></router-view>

        </div>

    </div>

    </div>

    </div>

</template>

<script>

    export default {

    }

</script>

<style>

</style>
App.vue
<template>

    <div>

        <h2>About</h2>

        <p>{{msg}}</p>

    </div>

</template>

<script>

    export default{

        props:{

            msg:String

        }

    }

</script>

<style>

</style>
About.vue
七、编程式路由导航
<template>

    <div>

        <ul>

            <li v-for="(message,index) in messages" :key="message.id">

                <router-link :to="`/home/message/detail/${message.id}`">{{message.title}}</router-link>

                <button @click="pushShow(message.id)">push查看</button>

                <button @click="replaceShow(message.id)">replace查看</button>

            </li>

        </ul>

        <button @click="$router.back()">回退</button>

        <hr />

        <router-view></router-view>

    </div>

</template>

<script>

    export default{

        data(){

            return {

                messages:[]

            }

        },

        mounted(){

            //模拟ajax请求从后台获取数据

            setTimeout(()=>{

                const messages=[

                    {

                        id:1,

                        title:'message001',

                    },{

                        id:2,

                        title:'message002',

                    },{

                        id:4,

                        title:'message004',

                    }

                ]

                this.messages=messages

            },1000)

        },

        methods:{

            pushShow(id){

                this.$router.push(`/home/message/detail/${id}`)

            },

            replaceShow(id){

                this.$router.replace(`/home/message/detail/${id}`)

            }

        }

    }

</script>

<style>

</style>
1)this.$router.push(path):相当于点击路由链接(可以返回到当前的路由界面)
2)this.$router.replace(path):用新路由替换当前路由(不可以返回当前的路由界面)
3)this.$router.back():请求(返回)上一个记录路由
4)this.$router.go(1):请求(返回)上一个记录路由
VUE:路由的更多相关文章
- Vue路由vue-router
前面的话 在Web开发中,路由是指根据URL分配到对应的处理程序.对于大多数单页面应用,都推荐使用官方支持的vue-router.Vue-router通过管理URL,实现URL和组件的对应,以及通过U ...
- 攻克vue路由
先下手 路由是个好功能,但是每次都感觉没法开始下手,愣愣的看半天官方文档,所以做个快速开始教程. 首先先搭好HTML文件结构: <!--link和view在一个父元素下--> <di ...
- Vue路由学习心得
GoodBoy and GoodGirl~进来了就看完点个赞再离开,写了这么多也不容易的~ 一.介绍 1.概念:路由其实就是指向的意思,当我们点击home按钮时,页面中就要显示home的内容,点击l ...
- VUE路由新页面打开的方法总结
平常做单页面的场景比较多,所以大部分的业务是在同一个页面进行跳转.要通过VUE路由使用新页面打开且传递参数,可以采用以下两个方法: 1.router-link的target <router-li ...
- vue路由参数变化刷新数据
当路由到某个组件时,由于组件会复用,所以生命周期函数不会再次执行, 如果这个组件是模板组件,靠传入不同数据来显示的.那么,可能会发生参数变化了但页面数据却不变化. 问题 假如有个组件 info.vue ...
- 10.3 Vue 路由系统
Vue 路由系统 简单示例 main.js import Vue from 'vue' import App from './App.vue' //https://router.vuejs.or ...
- vue路由原理剖析
单页面应用(SPA)的核心之一是: 更新视图而不重新请求页面, 实现这一点主要是两种方式: 1.Hash: 通过改变hash值 2.History: 利用history对象新特性(详情可出门左拐见: ...
- 3种vue路由传参的基本模式
路由是连接各个页面的桥梁,而参数在其中扮演者异常重要的角色,在一定意义上,决定着两座桥梁是否能够连接成功. 在vue路由中,支持3中传参方式. 场景,点击父组件的li元素跳转到子组件中,并携带参数,便 ...
- 14.vue路由&脚手架
一.vue路由:https://router.vuejs.org/zh/ 1.定义 let router = new VueRouter({ mode:"history/hash" ...
- react router @4 和 vue路由 详解(八)vue路由守卫
完整版:https://www.cnblogs.com/yangyangxxb/p/10066650.html 13.vue路由守卫 a.beforeEach 全局守卫 (每个路由调用前都会触发,根据 ...
随机推荐
- 小松之LINUX 驱动学习笔记(二)
这两天一直在看字符驱动那块,后来从网上找啦几个例子,自己编译啦下,安装啥的都挺正常,就是用测试程序测试的时候总出问题,现在找到一个能测试的代码,自己先看看和原来的那个代码有啥不同,后面会继续更新,说下 ...
- Python hangman小游戏
hangman # words.py 使用pickle永久性存储数据 import pickle filename = 'words.pk' data = ['cat', 'dog', 'perro' ...
- asp.net MVC 自定义模型绑定 从客户端中检测到有潜在危险的 Request.QueryString 值
asp.net mvc 自定义模型绑定 有潜在的Requset.Form 自定义了一个模型绑定器.前端会传过来一些敏感字符.调用bindContext. valueProvider.GetValue( ...
- html--onreadystatechange属性
- 折腾开源WRT的AC无线路由之路-5
-在Mac上设置无password连接SSH 1. 生成SSH密钥对 <pre name="code" class="html">ssh-keyge ...
- 有关计数问题的DP 划分数
有n个无差别的物品,将它们划分成不超过m组.求出划分方法数模M的余数. 输入: 3 4 10000 输出: 4(1+1+2=1+3=2+2=4) 定义:dp[i][j] = j的i划分的总数 #inc ...
- wifi破解不是真黑客不靠谱?
Wifi破解神器骗局:摆地摊+网络兜售 近日,"万能wifipassword破解器"风靡全国地摊.各地小贩開始兜售这样的蹭网卡.声称可破解各种wifipassword,当场測试也是 ...
- 英语发音规则---Q字母
英语发音规则---Q字母 一.总结 一句话总结: 1.Q/que发[k]音? Iraq [ɪ'rɑ:k] n. 伊拉克 cheque [tʃek] n. 支票 2.Qu-发[kw]? quality ...
- HTML5学习笔记(三):标识文本的语义元素
1.<time>元素:标注日期和时间 日期格式:YYYY-MM-DD,如2016-04-13: 时间格式(24小时制):HH-MM,如15:31: 最后,组合以上规则就可以制定具体的日期和 ...
- 10.QT程序框架与connect
MainWindow::MainWindow(QWidget *parent) : QMainWindow(parent), ui(new Ui::MainWindow) { ui->setup ...