App开发流程之图像处理工具类
先罗列一下工具类中提供的方法:
/**

 *  根据原始view和毛玻璃样式,获取模糊视图,并自动作为原view的subview(如果不需要作为子视图,自行调用removeFromSuperview)

 */

+ (UIView *)getBlurEffectViewWithOriginalView:(UIView *)originalView style:(ImageHelperBlurEffectStyle)style;

/**

 *  根据原始图像和毛玻璃样式,获取新图像

 */

+ (UIImage *)getBlurEffectImageWithOriginalImage:(UIImage *)originalImage style:(ImageHelperBlurEffectStyle)style;

/**

 *  根据原始图像,等比缩放系数,得到新图像

 */

+ (UIImage *)getImageWithOriginalImage:(UIImage *)originalImage scale:(CGFloat)scale;

/**

 *  根据原始图像,等比缩放最大尺寸,得到新图像

 */

+ (UIImage *)getImageWithOriginalImage:(UIImage *)originalImage scaleMaxSize:(CGSize)scaleMaxSize;

/**

 *  根据原始图像,等比缩放最大尺寸,得到新尺寸

 */

+ (CGSize)getImageSizeWithOriginalImage:(UIImage *)originalImage scaleMaxSize:(CGSize)scaleMaxSize;

/**

 *  根据原始图像,完全填充尺寸,得到新图像

 */

+ (UIImage *)getImageWithOriginalImage:(UIImage *)originalImage fillSize:(CGSize)fillSize;

/**

 *  根据原始图像,裁剪区域,得到新图像

 */

+ (UIImage *)getImageWithOriginalImage:(UIImage *)originalImage cutFrame:(CGRect)cutFrame;

/**

 *  根据颜色,得到单位尺寸的纯色新图像

 */

+ (UIImage *)getImageWithColor:(UIColor *)color;

/**

 *  根据view,得到快照

 */

+ (UIImage *)getSnapshotWithView:(UIView *)view;

/**

 *  全屏截图,但不包括状态栏

 */

+ (UIImage *)getFullScreenSnapshot;
说明:
1.获取毛玻璃效果(高斯模糊)图像
在iOS8以后,提供了类UIBlurEffect、UIVisualEffectView,可以方便的生成高斯模糊的视图,然后只需要作为目标视图的subview即可看到效果。在iOS7上需要自行实现,不过苹果在WWDC 2013上提供了一个UIImage+ImageEffects的分类,可以生成高斯模糊的图像。将分类加入项目Categories目录后,在ImageHelper中引用。因为UIBlurEffectStyle是在iOS8以后出现的,所以自定义了一个与其对应的枚举类型ImageHelperBlurEffectStyle,以便在iOS7中也可以正常使用。实现代码如下:
+ (UIView *)getBlurEffectViewWithOriginalView:(UIView *)originalView style:(ImageHelperBlurEffectStyle)style

{

    if (DeviceIOSVersionAbove()) {

        UIBlurEffectStyle blurStyle;

        switch (style) {

            case ImageHelperBlurEffectStyleExtraLight: {

                blurStyle = UIBlurEffectStyleExtraLight;

                break;

            }

            case ImageHelperBlurEffectStyleLight: {

                blurStyle = UIBlurEffectStyleLight;

                break;

            }

            case ImageHelperBlurEffectStyleDark: {

                blurStyle = UIBlurEffectStyleDark;

                break;

            }

        }

        UIBlurEffect *effect = [UIBlurEffect effectWithStyle:blurStyle];

        UIVisualEffectView *effectView = [[UIVisualEffectView alloc] initWithEffect:effect];

        effectView.frame = originalView.bounds;

        [originalView addSubview:effectView];

        return effectView;

    } else {

        UIImage *originalImage = [self getSnapshotWithView:originalView];

        UIImage *blurImage = [self getBlurEffectImageWithOriginalImage:originalImage style:style];

        UIImageView *effectView = [[UIImageView alloc] initWithFrame:originalView.bounds];

        [effectView setImage:blurImage];

        [originalView addSubview:effectView];

        return effectView;

    }

}

+ (UIImage *)getBlurEffectImageWithOriginalImage:(UIImage *)originalImage style:(ImageHelperBlurEffectStyle)style

{

    UIImage *newImage;

    switch (style) {

        case ImageHelperBlurEffectStyleExtraLight: {

            newImage = [originalImage applyExtraLightEffect];

            break;

        }

        case ImageHelperBlurEffectStyleLight: {

            newImage = [originalImage applyLightEffect];

            break;

        }

        case ImageHelperBlurEffectStyleDark: {

            newImage = [originalImage applyDarkEffect];

            break;

        }

    }

    return newImage;

}
2.提供了将图像等比例缩放的系列方法,以及裁剪的方法。基本思路就是在当前图像上下文中,指定绘制尺寸(即位图的尺寸),然后将相应图像绘制到指定位置,然后生成最终图像。例如裁剪图像示例代码:
+ (UIImage *)getImageWithOriginalImage:(UIImage *)originalImage cutFrame:(CGRect)cutFrame

{

    CGSize newSize = cutFrame.size;

    UIGraphicsBeginImageContext(newSize);

    [originalImage drawInRect:CGRectMake(-cutFrame.origin.x, -cutFrame.origin.y, cutFrame.size.width, cutFrame.size.height)];

    UIImage *newImage = UIGraphicsGetImageFromCurrentImageContext();

    UIGraphicsEndImageContext();

    return newImage;

}
3.截屏方法
需要用到方法:
UIGraphicsBeginImageContextWithOptions(CGSize size, BOOL opaque, CGFloat scale)。第一个参数仍然是指定图像上下文绘制尺寸;第二个参数指定是否不透明;第三个为等比例缩放系数,如果为0.0,表示与设备主屏幕的系数一致。
CALayer的renderInContext:(CGContextRef)ctx方法,将图层全部渲染到某个上下文中,建议为当前图像上下文。最后得到图像。
+ (UIImage *)getSnapshotWithView:(UIView *)view

{

    UIGraphicsBeginImageContextWithOptions(view.bounds.size, YES, 0.0);

    [view.layer renderInContext:UIGraphicsGetCurrentContext()];

    UIImage *newImage = UIGraphicsGetImageFromCurrentImageContext();

    UIGraphicsEndImageContext();

    return newImage;

}

+ (UIImage *)getFullScreenSnapshot

{

    return [self getSnapshotWithView:[UIApplication sharedApplication].keyWindow];

}
全屏截图时候,不包括状态栏,因为状态栏不在应用的window上,无法直接获取。但是可以通过私有Api拿到系统截屏图像,在此不展开探究。
测试内容
    UIImage *icon = LOADIMAGE(AppIcon);

    UIImage *testImg;

    testImg = [ImageHelper getImageWithOriginalImage:icon scale:];

    LOG(@"%@", testImg);

    testImg = [ImageHelper getImageWithOriginalImage:icon scaleMaxSize:CGSizeMake(, )];

    LOG(@"%@", testImg);

    testImg = [ImageHelper getImageWithOriginalImage:icon fillSize:CGSizeMake(, )];

    LOG(@"%@", testImg);

    testImg = [ImageHelper getImageWithOriginalImage:icon cutFrame:CGRectMake(, , , )];

    LOG(@"%@", testImg);

    testImg = [ImageHelper getImageWithColor:COLOR(, , )];

    LOG(@"%@", testImg);

    testImg = [ImageHelper getSnapshotWithView:self.view];

    LOG(@"%@", testImg);

    testImg = [ImageHelper getFullScreenSnapShot];

    LOG(@"%@", testImg);

    testImg = [ImageHelper getBlurEffectImageWithOriginalImage:testImg style:ImageHelperBlurEffectStyleDark];

    LOG(@"%@", testImg);

    UIView *coverView = [ImageHelper getBlurEffectViewWithOriginalView:[UIApplication sharedApplication].keyWindow style:ImageHelperBlurEffectStyleDark];
-- ::11.995 base[:] <UIImage: 0x7ffaf97e8d00>, {, }

-- ::11.997 base[:] <UIImage: 0x7ffaf97e9610>, {, }

-- ::11.999 base[:] <UIImage: 0x7ffaf950a330>, {, }

-- ::12.001 base[:] <UIImage: 0x7ffaf9463630>, {, }

-- ::12.002 base[:] <UIImage: 0x7ffaf950a330>, {, }

-- ::12.007 base[:] <UIImage: 0x7ffaf96004b0>, {, }

-- ::12.013 base[:] <UIImage: 0x7ffaf950a330>, {, }

-- ::12.040 base[:] <UIImage: 0x7ffaf9506f30>, {, }
1.可以单步调试代码,查看testImg图像内容:
2.[ImageHelper getSnapshotWithView:self.view];这行代码中的self.view生成快照后,尺寸为{375, 667},但如果在viewDidLoad方法中加入代码:
self.edgesForExtendedLayout = UIRectEdgeNone;
重新输出的尺寸为{375, 603},因为edgesForExtendedLayout属性默认为UIRectEdgeAll,这在处理UI布局时候需要注意。后续记录的UIViewContoller父类也会提到。
base项目已更新:git@github.com:ALongWay/base.git
======================================
2016.09.14更新
1.修改了UIGraphicsBeginImageContext为UIGraphicsBeginImageContextWithOptions方法,设置不透明为NO,scale系数为0.0。即处理后为高质量的图像,包括原图alpha值。截屏方法区别在于没有包括透明度值
2.图像裁剪方法更新:
+ (UIImage *)getImageWithOriginalImage:(UIImage *)originalImage cutFrame:(CGRect)cutFrame

{

    CGImageRef cgimageRef = CGImageCreateWithImageInRect(originalImage.CGImage, cutFrame);

    UIImage *newImage = [UIImage imageWithCGImage:cgimageRef];

    CGImageRelease(cgimageRef);

    return newImage;

}
裁剪区域可以任意设定。之前的方法,当偏移区域加上裁剪区域没有覆盖原图全部区域时候,图像在上下文中绘制会失败。
3.增加了图像合并方法,可以合并任意数量的图像
+ (UIImage *)getImageMergedWithOriginalImageArray:(NSArray<ImageHelperMergeImage *> *)imageArray

{

    if (!imageArray

        || imageArray.count == ) {

        return nil;

    }

    ImageHelperMergeImage *firstMergeImage = [imageArray firstObject];

    //将第一张图作为背景放置

    CGRect firstMergeRect = firstMergeImage.mergeRect;

    firstMergeRect.origin = CGPointZero;

    firstMergeImage.mergeRect = firstMergeRect;

    UIGraphicsBeginImageContextWithOptions(firstMergeImage.mergeRect.size, NO, 0.0);

    for (ImageHelperMergeImage *mergeImage in imageArray) {

        [mergeImage.image drawInRect:mergeImage.mergeRect];

    }

    UIImage *newImage = UIGraphicsGetImageFromCurrentImageContext();

    UIGraphicsEndImageContext();

    return newImage;

}
定义了一个合并图像的对象ImageHelperMergeImage,有一个UIImage属性存储图像,和CGRect属性储存合并的位置。
===================================
2016.09.23更新
之前的全屏截图方法,受限于状态栏无法获取,导致截图无状态栏。
后来,打印了一下UIApplication的全部私有变量和方法,找到一个名为“_statusBar”的私有变量,类型名为UIStatusBar。
猜测为UIView的子类,使用getSnapshotWithView:方法,得到了一个(375,20)的黑条,将方法中代码:
UIGraphicsBeginImageContextWithOptions(view.bounds.size, YES, 0.0);
第二个参数修改为NO,得到了想要的状态栏截图:
代码如下:
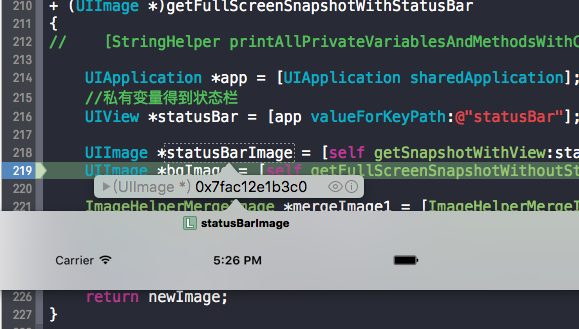
+ (UIImage *)getFullScreenSnapshotWithStatusBar

{

//    [StringHelper printAllPrivateVariablesAndMethodsWithClassName:@"UIApplication"];

    UIApplication *app = [UIApplication sharedApplication];

    //私有变量得到状态栏

    UIView *statusBar = [app valueForKeyPath:@"statusBar"];

    UIImage *statusBarImage = [self getSnapshotWithView:statusBar];

    UIImage *bgImage = [self getFullScreenSnapshotWithoutStatusBar];

    ImageHelperMergeImage *mergeImage1 = [ImageHelperMergeImage getImageHelperMergeImageWithImage:bgImage];

    ImageHelperMergeImage *mergeImage2 = [ImageHelperMergeImage getImageHelperMergeImageWithImage:statusBarImage];

    UIImage *newImage = [self getImageMergedWithOriginalImageArray:@[mergeImage1, mergeImage2]];

    return newImage;

}
base项目已更新:git@github.com:ALongWay/base.git
App开发流程之图像处理工具类的更多相关文章
- App开发流程之加密工具类
科技优家 2016-09-08 18:10 从这篇记录开始,记录的都算是干货了,都是一些编程日常的积累. 我建议先将基础的工具加入项目,后续的开发效率会呈指数增长.如果在专注功能开发过程中,才发现缺少 ...
- 20个可以帮你简化iOS app开发流程的工具
这里推荐20个可以帮你简化iOS app开发流程的工具.很多开发者都使用过这些工具,涉及原型和设计.编程.测试以及最后的营销,基本上涵盖了整个开发过程. 原型和设计 有了一个很好的创意后,你要做的不是 ...
- iOS开发之工具篇-20个可以帮你简化移动app开发流程的工具
如果想进入移动app开发这个领域,你总能从别的开发者或者网上或者书上找到各种各样的方法和工具,对于新手来说,还没有摸清门路就已经陷入迷茫了.这里推荐20个可以帮你简化app开发流程的工具.很多开发者都 ...
- JBPM4入门——4.封装流程管理的工具类(JbpmUtil)
本博文只是简要对JBPM4进行介绍,如需更详细内容请自行google 链接: JBPM入门系列文章: JBPM4入门——1.jbpm简要介绍 JBPM4入门——2.在eclipse中安装绘制jbpm流 ...
- 跨平台app开发(引擎)工具的选择【转】
跨平台app开发(引擎)工具的选择 1.html5执行速度慢,用户体验不好 2.原生应用开发,即ios和安卓分别开发,需要两种技术人员,后期代码维护困难,很难达到统一. 3.xamarin是一款c#的 ...
- app开发流程有哪些
app开发流程是需求方和供求方相互协调的过程,一般分为需求分析.功能设计.功能实现.项目测试.上线等几个步骤,下面我们就来一起看看ytkah团队进行app开发各个流程主要做哪些事情,让您对app开发设 ...
- Android开发之常用必备工具类图片bitmap转成字符串string与String字符串转换为bitmap图片格式
作者:程序员小冰,CSDN博客:http://blog.csdn.net/qq_21376985 QQ986945193 博客园主页:http://www.cnblogs.com/mcxiaobing ...
- 深度讲解智能硬件手机APP开发流程
常州做APP开发公司紫竹云科技分析,智能硬件产品的软件开发,除了APP和后台之外还有一个固件端的开发,由于固件是要运行产品上的,不过此时的硬件也是刚开始进行研发,所以是无法提供硬件来运行固件的.因此在 ...
- javaEE开发之导出excel工具类
web开发中,一个系统的普通需求也包含导出excel,一般採用POI做统计报表导出excel. 导出excel工具类: import java.io.FileOutputStream; import ...
随机推荐
- iOS开发中一些常见的并行处理(转)
本文主要探讨一些常用多任务的最佳实践.包括Core Data的多线程访问,UI的并行绘制,异步网络请求以及一些在运行态内存吃紧的情况下处理大文件的方案等. 其实编写异步处理的程序有很多坑!所以,本文 ...
- LOD设置
Level of detail: 使用多个不同复杂度的mesh来表示一个object,当物体离摄像机越远时,就是用更加low-detail的mesh,反之越近就越使用越精细的mesh. 组件:LOD ...
- fzu 2107 Hua Rong Dao(状态压缩)
Problem 2107 Hua Rong Dao Accept: 106 Submit: 197 Time Limit: 1000 mSec Memory Limit : 32768 K ...
- jquery 按钮效果 正常、移上、按下
在网页设计过程中,经常遇见按钮的各状态效果.写了一个jquery扩展,使这个过程更方便! 使用前注意引用Jquery: JqueryExtend.js: (function ($) { // Butt ...
- Mybatis对MySQL中BLOB字段的读取
1.在sqlMapConfig中,定义一个typeHandlers <typeHandlers> <typeHandler jdbcType="BLOB" jav ...
- Java定位CPU使用高问题--转载
原文地址:http://www.cnblogs.com/guoyuqiangf8/p/3545687.html 1.TOP命令,查询消耗CPU高的进程号 PID,并记录下来,按下键盘"H&q ...
- Hadoop第1~2周练习—Hadoop1.X和2.X安装
练习题目 Hadoop1.X安装 2.1 准备工作 2.1.1 硬软件环境 2.1.2 集群网络环境 2.1.3 安装使用工具 2.2 环境搭建 2.2.1 安 ...
- [编辑器]走上atom之路1
祝大家新年快乐 我就是来卖个萌,逃- 正文 我最开始用atom是因为它看起来比较酷,我工作中主力还是使用pycharm,毕竟atom只是一个编辑器.我一 般只是用atom来写Markdown的文件.随 ...
- java io系列15之 DataOutputStream(数据输出流)的认知、源码和示例
本章介绍DataOutputStream.我们先对DataOutputStream有个大致认识,然后再深入学习它的源码,最后通过示例加深对它的了解. 转载请注明出处:http://www.cnblog ...
- 环信SDK与Apple Watch的结合(1)
该系列是记录在apple watch上开发IM,用到了最近挺流行的环信IM SDK. 一.先来一段网上随处可查到的信息: 1.两种分辨率 1.65寸 312*390 1.5寸 272*340 2.开发 ...