zabbix-web切换为nginx及https
zabbix-web切换为nginx及https
1、背景和环境
zabbix使用了很久,安装的时候并没有选择复杂的源码编译安装,所以默认采用了apache的httpd提供web服务。由于对httpd并没有深入研究,而且个人对httpd的配置文件格式很不感冒,怎么办?当然是换nginx呀!顺便加上https证书安全安全。
本文中的环境如下:
系统版本:CentOS Linux release 7.4.1708 (Core)
软件版本:
zabbix 4.0.0
nginx 1.16.0
php 5.6.40
2、安装nginx
2.1、编译参数
apache httpd通过模块来使用php,nginx连接php则需要单独安装php,首先编译安装nginx
编译参数和步骤如下,来自我的github
#!/bin/bash

#定义版本

VERSION=1.16.0

#安装依赖包

yum install gcc gcc-c++ glibc pcre-devel zlib-devel openssl-devel -y

#用户创建

/usr/sbin/useradd -M -s /sbin/nologin www

#编译安装

cd ~

wget http://nginx.org/download/nginx-${VERSION}.tar.gz

tar xf nginx-${VERSION}.tar.gz

cd nginx-${VERSION}

./configure --prefix=/usr/local/nginx --pid-path=/usr/local/nginx/run/nginx.pid --user=www --group=www --with-http_stub_status_module --with-http_ssl_module --with-http_gzip_static_module --with-http_realip_module

make && make install

cd /usr/local/nginx/conf/

grep -Ev '^$|#' nginx.conf.default > nginx.conf

#清除包

cd ~

rm -rf nginx-${VERSION} nginx-${VERSION}.tar.gz
2.2、修改配置文件并配置https
/usr/local/nginx/confnginx.conf
[root@zabbix ~]# cat /usr/local/nginx/conf/nginx.conf

worker_processes  1;

events {

    worker_connections  1024;

}

http {

    include       mime.types;

    default_type  application/octet-stream;

    sendfile        on;

    keepalive_timeout  65;

    server_tokens   off;

    include /usr/local/nginx/conf/Include/*.conf;

}
cat /usr/local/nginx/conf/Include/zabbix.conf
[root@zabbix ~]# cat /usr/local/nginx/conf/Include/zabbix.conf

server {

    listen       80;

    server_name  www.zabbix.cn;

    return 301   https://www.zabbix.cn$request_uri;

}

server {

    listen       443 ssl;

    server_name  www.zabbix.cn

    if ($host != 'www.zabbix.cn') {

        return 403;

    }

    root /usr/share/zabbix;

    index index.php index.html index.htm;

    ssl_certificate     /usr/local/nginx/ssl-certs/2505454_www.zabbix.cn.pem;

    ssl_certificate_key /usr/local/nginx/ssl-certs/2505454_www.zabbix.cn.key;

    ssl_session_timeout 5m;

    ssl_ciphers ECDHE-RSA-AES128-GCM-SHA256:ECDHE:ECDH:AES:HIGH:!NULL:!aNULL:!MD5:!ADH:!RC4;

    ssl_protocols TLSv1 TLSv1.1 TLSv1.2;

    ssl_prefer_server_ciphers on;

    access_log      /var/log/nginx/ngnix_access.log;

    error_log       /var/log/nginx/ngnix_error.log;

    location / {

        try_files $uri $uri/ /index.php?$query_string;

    }

    location ^~ /app {

        deny all;

    }

    location ^~ /conf {

        deny all;

    }

    location ^~ /local {

        deny all;

    }

    location ^~ /include {

        deny all;

    }

    location ~ \.php$ {

        try_files $uri =404;

        fastcgi_split_path_info ^(.+\.php)(/.+)$;

        fastcgi_pass   127.0.0.1:9000;

        fastcgi_index  index.php;

        fastcgi_param SCRIPT_FILENAME $document_root$fastcgi_script_name;

        include        fastcgi_params;

    }

}
2.3、配置nginx为系统服务
vim /lib/systemd/system/nginx.service

[Unit]

Description=nginx - high performance web server

Documentation=http://nginx.org/en/docs/

After=network.target

[Service]

Type=forking

ExecStart=/usr/local/nginx/sbin/nginx

ExecReload=/usr/local/nginx/sbin/nginx -s reload

ExecStop=/usr/local/nginx/sbin/nginx -s stop

PrivateTmp=true

[Install]

WantedBy=multi-user.target
- 加载系统服务
systemctl daemon-reload
- 设置开机启动
systemctl enable nginx
- 启动 nginx
systemctl start nginx
- 停止
systemctl stop nginx
- 加载配置文件
systemctl reload nginx
3、安装php
3.1、编译安装
3.1.1、编译参数
php的编译安装稍微复杂,复杂点就在于它的编译参数,php的编译参数很多,这里尽量最小化安装,如何选择参数,可通过在第一次安装zabbix的时候环境检测查看到,参数不满足是无法正常安装使用的,我通过本地虚拟机重新安装了一遍zabbix,得到具体环境参数如下,每列可依次理解为:名称、检测结果、需满足的结果、检测是否通过。
PHP version		5.6.40					5.4.0		OK

PHP option 		"memory_limit"			128M	128M	OK

PHP option 		"post_max_size"			8M	16M	Fail

PHP option 		"upload_max_filesize"	2M	2M	OK

PHP option 		"max_execution_time"	30	300	Fail

PHP option 		"max_input_time"	    -1	300	OK

PHP option 		"date.timezone"			unknown		Fail

PHP databases support					MySQL 			OK

PHP bcmath		on						OK

PHP mbstring	on						OK

PHP option 		"mbstring.func_overload"	off	off	OK

PHP option 		"always_populate_raw_post_data"	on	off	Fail

PHP sockets		on				OK

PHP gd			2.1.0	2.0		OK

PHP gd PNG 		support	on		OK

PHP gd JPEG 	support	on		OK

PHP gd FreeType support	on		OK

PHP libxml		2.9.1			2.6.15	OK

PHP xmlwriter	on				OK

PHP xmlreader	on				OK

PHP LDAP		off				Warning

PHP ctype		on				OK

PHP session		on				OK

PHP option 		"session.auto_start"	off	off	OK

PHP gettext		off		Warning

PHP option 		"arg_separator.output"	&	&	OK
查看上述参数,最后确认一个合适的编译参数,如果第一次编译少了某些参数,也可通过不重新编译添加模块的方法,最终编译参数如下:
./configure --prefix=/usr/local/php-5.6.40 \

--enable-opcache \

--with-config-file-path=/usr/local/php-5.6.40/etc \

--with-mysql=mysqlnd \

--with-mysqli=mysqlnd \

--with-pdo-mysql=mysqlnd \

--enable-fpm \

--enable-static \

--enable-inline-optimization \

--enable-sockets \

--enable-wddx \

--enable-zip \

--enable-calendar \

--enable-bcmath \

--enable-soap \

--with-zlib \

--with-iconv \

--with-gd \

--with-xmlrpc \

--enable-mbstring \

--with-curl \

--with-gettext \

--with-ldap \

--enable-ftp \

--with-mcrypt  \

--with-freetype-dir=/usr/local/freetype.2.1.10 \

--with-jpeg-dir=/usr/local/jpeg.6 \

--with-png-dir=/usr/local/libpng.1.2.50 \

--disable-ipv6 \

--disable-debug \

--with-openssl \

--disable-maintainer-zts \

--disable-fileinfo
3.1.2、排错
编译安装时可能出现的报错和解决办法如下,具体不做分析
报错一:
configure: error: Cannot find ldap.h
解决办法:
yum install -y openldap openldap-devel
报错二:
configure: error: Cannot find ldap libraries in /usr/lib.
解决办法:
cp -frp /usr/lib64/libldap* /usr/lib/
报错三:
//.usrlibs//lib64ldap.o/:liblber -undefined2.4.so.2 :reference  errorto  addingsymbol  symbols':ber_scanf 'DSO

 /missingusr /fromlib64 /commandliblber -line2.4.so.2

: error adding symbols: DSO missing from command line

collect2: error: ld returned 1 exit status

collect2: error: ld returned 1 exit status

make: *** [sapi/cli/php] Error 1

make: *** Waiting for unfinished jobs....

make: *** [sapi/cgi/php-cgi] Error 1

/usr/bin/ld: ext/ldap/.libs/ldap.o: undefined reference to symbol 'ber_scanf'

/usr/lib64/liblber-2.4.so.2: error adding symbols: DSO missing from command line

collect2: error: ld returned 1 exit status
解决办法:
vim Makefile 在这行最后添加-llber

EXTRA_LIBS = -lcrypt -lz -lresolv -lcrypt -lrt -lmcrypt -lldap -lpng -lz -ljpeg -lcurl -lz -lrt -lm -ldl -lnsl -lxml2 -lz -lm -ldl -lssl -lcrypto -lcurl -lxml2 -lz -lm -ldl -lssl -lcrypto -lfreetype -lxml2 -lz -lm -ldl -lxml2 -lz -lm -ldl -lcrypt -lxml2 -lz -lm -ldl -lxml2 -lz -lm -ldl -lxml2 -lz -lm -ldl -lxml2 -lz -lm -ldl -lxml2 -lz -lm -ldl -lssl -lcrypto -lcrypt -llber
3.2、配置
编译安装完php后,需要修改配置文件php.ini中的内容以满足上述检测:
post_max_size = 16M

max_input_time = 300

max_execution_time = 300

date.timezone = Asia/Shanghai

always_populate_raw_post_data = -1
3.3、配置php为系统服务
编译安装php的,会在php目录生成很多二进制文件,找到init.d.php-fpm,拷贝到init.d下。
cp /usr/local/src/php-5.6.33/sapi/fpm/init.d.php-fpm /etc/init.d/php-fpm
设置权限
chmod 755 /etc/init.d/php-fpm
配置php-fpm.conf
vim /usr/local/etc/php-fpm.conf
如果打开了pid配置,需要将pid(;pid = run/php-fpm.pid)前的;去掉。
启动
/etc/init.d/php-fpm start
3.4、启动
编译配置没有问题,可正常启动
4、访问及排错
访问时出现的报错及解决办法如下
报错一:
FastCGI sent in stderr: "PHP message: PHP Warning:  require_once(/etc/zabbix/web/maintenance.inc.php):   failed to open stream: Permission denied in /app/nginx/html/zabbix/include/classes/core/ZBase.php on line 292

PHP message: PHP Fatal error:  require_once(): Failed opening required '/etc/zabbix/web/mainte‘
解决办法:
chmod -R 755 /etc/zabbix/web
报错二:
Database error

Error connecting to database: No such file or directory
解决办法:修改php.ini
mysqli.default_socket = /var/lib/mysql/mysql.sock
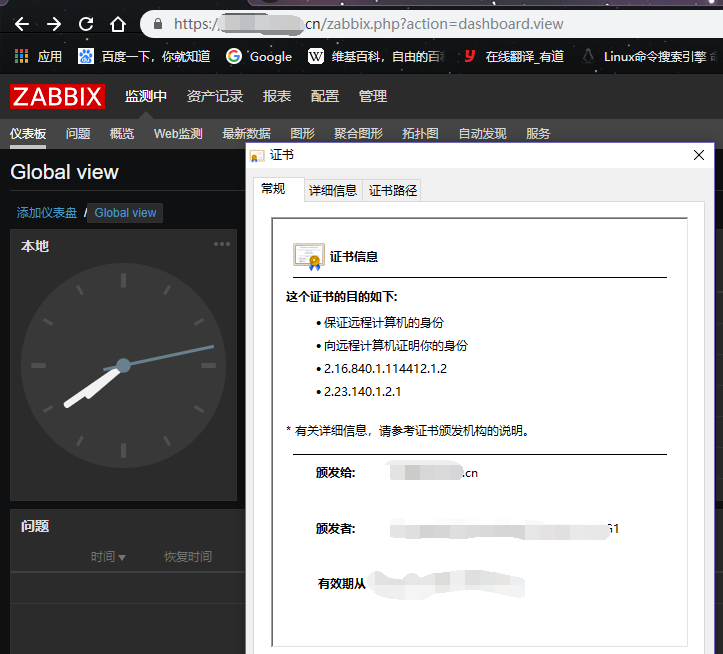
最终,切换nginx及配置https成功:
zabbix-web切换为nginx及https的更多相关文章
- [web][nginx] 初识nginx -- 使用nginx搭建https DPI解码测试环境
环境 CentOS 7 X86 文档: https://nginx.org/en/docs/ 安装: [root@dpdk ~]# cat /etc/yum.repos.d/nginx.repo [n ...
- tomcat 安装配置部署到nginx+tomcat+https
目录 1 Tomcat简介 2.下载并安装Tomcat服务 2.2 部署java环境 2.3 安装Tomcat 2.4 Tomcat目录介绍 (关注点 bin conf logs webapps) 2 ...
- nginx代理https站点(亲测)
nginx代理https站点(亲测) 首先,我相信大家已经搞定了nginx正常代理http站点的方法,下面重点介绍代理https站点的配置方法,以及注意事项,因为目前大部分站点有转换https的需要所 ...
- [C#]使用 C# 代码实现拓扑排序 dotNet Core WEB程序使用 Nginx反向代理 C#里面获得应用程序的当前路径 关于Nginx设置端口号,在Asp.net 获取不到的,解决办法 .Net程序员 初学Ubuntu ,配置Nignix 夜深了,写了个JQuery的省市区三级级联效果
[C#]使用 C# 代码实现拓扑排序 目录 0.参考资料 1.介绍 2.原理 3.实现 4.深度优先搜索实现 回到顶部 0.参考资料 尊重他人的劳动成果,贴上参考的资料地址,本文仅作学习记录之用. ...
- 3 监控项、触发器、web监控、nginx监控
1.自定义监控项 Item 参数文档 https://www.zabbix.com/documentation/3.0/manual/config/items/itemtypes/zabbix_age ...
- zabbix监控多个nginx vhost网站状态码
需求 假设一台服务器运行了N个vhost网站,如何确定在大流量并发时候找到是哪个网站的问题呢? 这似乎是每个运维都会遇到的问题,方法有很多比如:1.看nginx日志大小确定访问量.2.通过前端代理确定 ...
- zabbix 3.0.3 (nginx)安装过程中的问题排错记录
特殊注明:安装zabbix 2.4.8和2.4.6遇到2个问题,如下:找了很多解决办法,实在无解,只能换版本,尝试换(2.2.2正常 | 3.0.3正常)都正常,最后决定换3.0.3 1.Error ...
- nginx 采用https 协议通信配置
在网络通信中,使用抓包软件可以对网络请求进行分析,并进行重放攻击,重放攻击的解决方案一般是使用一个变化的参数,例如RSA加密的时间戳,但考虑到网络传输时延,时间戳需要有一定的误差容限,这样仍然不能从根 ...
- nginx实现https网站设置
一.HTTPS简介 1.https简介 HTTPS其实是有两部分组成:HTTP + SSL / TLS,也就是在HTTP上又加了一层处理加密信息的模块.服务端和客户端的信息传输都会通过TLS进行加密, ...
随机推荐
- [LeetCode] 112. Path Sum 路径和
Given a binary tree and a sum, determine if the tree has a root-to-leaf path such that adding up all ...
- vscode插件Power Mode
Power Mode官网 设置里添加 "powermode.enabled": true, "powermode.presets": "flames& ...
- k8s 使用本地镜像的时候
k8s默认会从远端拉取镜像,其配置参数imagePullPolicy为Always containers: - name: demo image: image imagePullPolicy: Nev ...
- C++中int型数据的十六进制写法
C++中int类型数据的十六进制写法 在C++中,int类型一般表示一个有符号的32位整数.在一些情况下(例如进行位操作时)我们需要使用十六进制的方式来表示int类型.int32的取值范围:最大值:2 ...
- spring security的BCryptPasswordEncoder加密和对密码验证的原理
目录 BCryptPasswordEncoder加密和对密码验证的原理 一.加密算法和hash算法的区别 二.源码解析 1. encode方法 2. BCrypt.hashpw方法 3. matche ...
- appium通过index查找目标控件
2.1 通过判断控件属性获取控件 控件的所有属性都可以用作判断,比如它的text,index,resource-id是否clickable等,例如: 2.1.1 通过文本查找目标控件 1 2 el = ...
- npm包的语义版本控制(Semantic Versioning of Packages)
本文删改自Node.js 8 the Right Way Part I Chapter 3 npm 使用语义版本控制(SemVer)来寻找包的最佳可用兼容版本. 以安装测试框架mocha为例 $ ...
- stm32F103片上串口USART1通信实验
硬件说明:如原理图所示, 103的PA10 PA11分别接CP2102usb转串口芯片的TXD RXD引脚.CP2102芯片是将串口和电脑USB接口进行了转接,方便应用灵活. 片上串口驱动代码如下. ...
- Django content-type组件
介绍 Django包含一个contenttypes应用程序(app),可以跟踪Django项目中安装的所有模型(Model),提供用于处理模型的高级通用接口. Contenttypes应用的核心是Co ...
- 【题解】Luogu P4910 帕秋莉的手环
原题传送门 "连续的两个中至少有1个金的"珂以理解为"不能有两个木相连" 我们考虑一个一个将元素加入手环 设f\([i][0/1]\)表示长度为\(i\)手环末 ...