SSM-网站后台管理系统制作(2)---SSM基本工作原理
SSM基本工作原理
讲解网站:https://www.w3cschool.cn/wkspring/dcu91icn.html
构建基本工作环境:
mysql
eclipse(tomcat8.0)
Hbulider(前端页面展示)
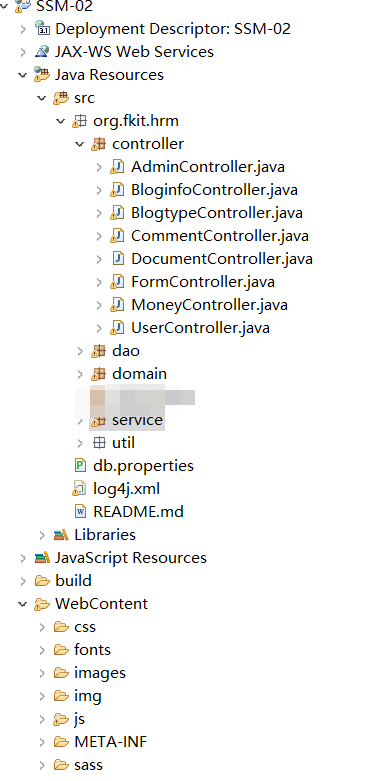
构建Dynamic Web Project,然后写基本所需的domain,dao,service,到此,基本功能即可实行,然后加入db.properties链接数据库,(applicationContext.xml,springmvc-config.xml,web.xml)就构建好了一个基本的ssm框架了。然后在Controller层里面加入所需要的代码即可,到此,一个基本的ssm就可以跑起来了,当然,这是简单讲解,3个xml里面还有很多需要学习的地方,相关问题见代码
applicationContext.xml
 <?xml version="1.0" encoding="UTF-8"?>

 <beans xmlns="http://www.springframework.org/schema/beans"

     xmlns:mybatis="http://mybatis.org/schema/mybatis-spring"

     xmlns:xsi="http://www.w3.org/2001/XMLSchema-instance"

     xmlns:p="http://www.springframework.org/schema/p"

     xmlns:context="http://www.springframework.org/schema/context"

     xmlns:mvc="http://www.springframework.org/schema/mvc"

     xmlns:tx="http://www.springframework.org/schema/tx"

     xsi:schemaLocation="http://www.springframework.org/schema/beans

                         http://www.springframework.org/schema/beans/spring-beans.xsd

                         http://www.springframework.org/schema/context

                         http://www.springframework.org/schema/context/spring-context.xsd

                         http://www.springframework.org/schema/mvc

                         http://www.springframework.org/schema/mvc/spring-mvc.xsd

                         http://www.springframework.org/schema/tx

                         http://www.springframework.org/schema/tx/spring-tx.xsd

                         http://mybatis.org/schema/mybatis-spring

                         http://mybatis.org/schema/mybatis-spring.xsd ">

      <!-- mybatis:scan会扫描org.fkit.dao包里的所有接口当作Spring的bean配置,之后可以进行依赖注入-->

     <mybatis:scan base-package="org.fkit.hrm.dao"/>

      <!-- 扫描org.fkit包下面的java文件,有Spring的相关注解的类,则把这些类注册为Spring的bean -->

     <context:component-scan base-package="org.fkit.hrm"/>

     <!-- 使用PropertyOverrideConfigurer后处理器加载数据源参数 -->

     <context:property-override location="classpath:db.properties"/>

     <!-- 配置c3p0数据源 -->

     <bean id="dataSource" class="com.mchange.v2.c3p0.ComboPooledDataSource"/>

     <!-- 配置SqlSessionFactory,org.mybatis.spring.SqlSessionFactoryBean是Mybatis社区开发用于整合Spring的bean -->

     <bean id="sqlSessionFactory" class="org.mybatis.spring.SqlSessionFactoryBean"

         p:dataSource-ref="dataSource"/>

     <!-- JDBC事务管理器 -->

     <bean id="transactionManager"

     class="org.springframework.jdbc.datasource.DataSourceTransactionManager"

          p:dataSource-ref="dataSource"/>

     <!-- 启用支持annotation注解方式事务管理 -->

     <tx:annotation-driven transaction-manager="transactionManager"/>

 </beans>
springmvc-config.xml
 <?xml version="1.0" encoding="UTF-8"?>

 <beans xmlns="http://www.springframework.org/schema/beans"

     xmlns:xsi="http://www.w3.org/2001/XMLSchema-instance"

     xmlns:mvc="http://www.springframework.org/schema/mvc"

     xmlns:p="http://www.springframework.org/schema/p"

     xmlns:context="http://www.springframework.org/schema/context"

     xsi:schemaLocation="

         http://www.springframework.org/schema/beans

         http://www.springframework.org/schema/beans/spring-beans.xsd

         http://www.springframework.org/schema/mvc

         http://www.springframework.org/schema/mvc/spring-mvc.xsd

         http://www.springframework.org/schema/context

         http://www.springframework.org/schema/context/spring-context.xsd">

     <!-- 自动扫描该包,SpringMVC会将包下用了@controller注解的类注册为Spring的controller -->

     <context:component-scan base-package="org.fkit.hrm.controller"/>

     <!-- 设置默认配置方案 -->

     <mvc:annotation-driven/>

     <!-- 使用默认的Servlet来响应静态文件 -->

     <mvc:default-servlet-handler/>

 <!--     定义Spring MVC的拦截器 -->

     <mvc:interceptors>

         <mvc:interceptor>

 <!--             拦截所有请求 -->

             <mvc:mapping path="/*"/>

 <!--             自定义判断用户权限的拦截类   -->

              <bean class="org.fkit.hrm.interceptor.AuthorizedInterceptor"/>

         </mvc:interceptor>

     </mvc:interceptors>

     <!-- 视图解析器   -->

      <bean id="viewResolver"

           class="org.springframework.web.servlet.view.InternalResourceViewResolver"

           p:prefix="/WEB-INF/jsp/" p:suffix=".jsp"/>

     <!-- 文件上传下载   -->

      <bean id="multipartResolver"

         class="org.springframework.web.multipart.commons.CommonsMultipartResolver">

         <!-- 上传文件大小上限,单位为字节(10MB) -->

         <property name="maxUploadSize">

             <value>10485760</value>

         </property>

         <!-- 请求的编码格式,必须和jSP的pageEncoding属性一致,以便正确读取表单的内容,默认为ISO-8859-1 -->

         <property name="defaultEncoding">

             <value>UTF-8</value>

         </property>

     </bean>

 </beans>
web.xml
 <?xml version="1.0" encoding="UTF-8"?>

 <web-app xmlns:xsi="http://www.w3.org/2001/XMLSchema-instance" xmlns="http://xmlns.jcp.org/xml/ns/javaee" xsi:schemaLocation="http://xmlns.jcp.org/xml/ns/javaee http://xmlns.jcp.org/xml/ns/javaee/web-app_3_1.xsd" id="WebApp_ID" version="3.1">

  <!-- 配置spring核心监听器,默认会以 /WEB-INF/applicationContext.xml作为配置文件 -->

     <listener>

         <listener-class>org.springframework.web.context.ContextLoaderListener</listener-class>

     </listener>

     <!-- contextConfigLocation参数用来指定Spring的配置文件 -->

     <context-param>

         <param-name>contextConfigLocation</param-name>

         <param-value>/WEB-INF/applicationContext*.xml</param-value>

     </context-param>

     <!-- 定义Spring MVC的前端控制器 -->

   <servlet>

     <servlet-name>springmvc</servlet-name>

     <servlet-class>

         org.springframework.web.servlet.DispatcherServlet

     </servlet-class>

     <init-param>

       <param-name>contextConfigLocation</param-name>

       <param-value>/WEB-INF/springmvc-config.xml</param-value>

     </init-param>

     <load-on-startup>1</load-on-startup>

   </servlet>

   <!-- 让Spring MVC的前端控制器拦截所有请求 -->

   <servlet-mapping>

     <servlet-name>springmvc</servlet-name>

     <url-pattern>/</url-pattern>

   </servlet-mapping>

   <!-- 编码过滤器 -->

   <filter>

         <filter-name>characterEncodingFilter</filter-name>

         <filter-class>org.springframework.web.filter.CharacterEncodingFilter</filter-class>

         <init-param>

             <param-name>encoding</param-name>

             <param-value>UTF-8</param-value>

         </init-param>

  </filter>

     <filter-mapping>

         <filter-name>characterEncodingFilter</filter-name>

         <url-pattern>/*</url-pattern>

     </filter-mapping>

     <!-- jsp的配置 -->

   <jsp-config>

     <jsp-property-group>

          <!-- 配置拦截所有的jsp页面  -->

       <url-pattern>*.jsp</url-pattern>

        <!-- 可以使用el表达式  -->

       <el-ignored>false</el-ignored>

       <!-- 不能在页面使用java脚本 -->

       <scripting-invalid>true</scripting-invalid>

       <!-- 给所有的jsp页面导入要依赖的库,tablib.jsp就是一个全局的标签库文件  -->

       <include-prelude>/WEB-INF/jsp/taglib.jsp</include-prelude>

     </jsp-property-group>

   </jsp-config>

   <error-page>

     <error-code>404</error-code>

     <location>/404.html</location>

   </error-page>

   <welcome-file-list>

     <welcome-file>index.jsp</welcome-file>

   </welcome-file-list>

 </web-app>
SSM-网站后台管理系统制作(2)---SSM基本工作原理的更多相关文章
- asp.net mvc+jquery easyui开发实战教程之网站后台管理系统开发4- 后台模板html页面创建
上一篇教程<asp.net mvc+jquery easyui开发实战教程之网站后台管理系统开发3-登录模块开发>完成了本项目的登录模块,登录后就需要进入后台管理首页了,需要准备一个后台模 ...
- asp.net mvc+jquery easyui开发实战教程之网站后台管理系统开发2-Model层建立
上篇(asp.net mvc+jquery easyui开发实战教程之网站后台管理系统开发1-准备工作)文章讲解了开发过程中的准备工作,主要创建了项目数据库及项目,本文主要讲解项目M层的实现,M层这里 ...
- asp.net mvc+jquery easyui开发实战教程之网站后台管理系统开发3-登录模块开发
进行本文之前需要在数据库用户表里面增加一条用户数据,直接手动添加即可,未安全考虑密码一定要使用Md5加密后的,这里提供666666的Md5密文为(c831b04de153469d),本文完成登录模块的 ...
- asp.net mvc+jquery easyui开发实战教程之网站后台管理系统开发1-准备工作
/****** Object: 新闻表 Script Date: 2017/9/2 星期六 15:11:12 ******/ SET ANSI_NULLS ON GO SET QUOTED_IDENT ...
- SSM-网站后台管理系统制作(1)
好久没写博客了,忙于考试和项目答辩,今天整理一下想弄的SSM:本人想做的是博客管理平台,和博客园,CSDN,stackoverflow这些类似. 老师先让做的是后台管理系统,先给出来吧. (讲解内容: ...
- SSM-网站后台管理系统制作(3)---Google的reCaptcha验证码
网上找了好久,也不知道怎么接入,后来看到一篇博客才搞好 reCaptcha官网:https://www.google.com/recaptcha/admin#site/344147946 参考博客:h ...
- SSM-网站后台管理系统制作(4)---Ajax前后端交互
前提:Ajax本身就为前后端交互服务的,实现功能:用户输入信息,实时判断用户的情况,这也是现在登录界面普遍流行的做法.前端js通过注释识别Controller层,该层查询返回,和之前Google验证码 ...
- 用nodejs,express,ejs,mongo,extjs实现了简单了网站后台管理系统
源代码下载地址:http://download.csdn.net/detail/guoyongrong/6498611 这个系统其实是出于学习nodejs的目的而改写的系统. 原来的系统前端使用了ex ...
- 黑色的网站后台管理系统ui界面——后台
链接:http://pan.baidu.com/s/1pLffwE3 密码:m4v6
随机推荐
- Windows下安装配置Yaf框架的方法及创建典型合理的Demo目录结构
Yaf是一个C语言编写的PHP框架,由鸟哥Laruence开发的高性能框架: Yaf官方文档:http://www.laruence.com/manual/index.html 第一步:安装PHP扩展 ...
- js 读秒
<input type="button" value=" 获取验证码 " class="verification right" &qu ...
- linux的基本操作(LAMP环境搭建)
LAMP 环境搭建 经过前部分章节的学习,你已经掌握了linux的基础知识了.但是想成为一名系统管理员恐怕还有点难度,因为好多单位招聘这个职位的时候都要求有一定的工作经验.然而真正的经验一天两天是学不 ...
- js 画布与图片的相互转化(canvas与img)
使用js将图片拷贝进画布 //将图片对象转化为画布,返回画布function ImageToCanvas(image) { var canvas = document.createElement(&q ...
- python argparse sys.argv
python argparse sys.argv class WeiLearningArgumentParser(argparse.ArgumentParser): def __init__(self ...
- javascript的数组之sort()
sort()方法用in-place的算法对原数组进行排序,但不会产生新的数组.这个方法不是一个稳定的排序,默认采用的是安字符串Unicode码点进行排序的. let fruit = ['cherri ...
- SpringBoot定时任务说明
1. 定时任务实现方式 定时任务实现方式: Java自带的java.util.Timer类,这个类允许你调度一个java.util.TimerTask任务.使用这种方式可以让你的程序按照某一个频度执行 ...
- 用SQL快速删除U8账套
一.问题提出 通过"系统管理"来删除999账套,首先要求你备份然后才能删除.头痛的是: 1)备份需要发费很长的时间,特别是账套数据文件比较大时. 2)备份时,你的本本基本处于死机状 ...
- SqlHelper2
public abstract class DBHelper { public static string connectionString = @"DATA SOURCE=.\sqldat ...
- Redis的数据结构之List
存储list: ArrayList使用数组方式 LinkedList使用双向链接方式 双向链接表中增加数据 双向链接表中删除数据 存储list常用命令 两端添加 两端弹出 扩展命令 lpush 方式添 ...