
快速安装nginx
1、创建nignx用户
/usr/sbin/groupadd -f nginx

/usr/sbin/useradd -g nginx nginx
2、安装依赖
yum install gcc  gcc-c++ -y #默认有的话无须安装

yum install -y pcre-devel openssl-devel #依赖(支持Nginx服务访问,以https方式访问)
3、下载软件包&编译安装
wget -q http://nginx.org/download/nginx-1.14.2.tar.gz #下载软件包

tar xf nginx-1.14..tar.gz

cd nginx-1.14.

./configure --prefix=/usr/local/nginx-1.14. --user=nginx --group=nginx --with-http_stub_status_module  --with-http_ssl_module --with-http_realip_module --with-http_gzip_static_module #根据你的需求添加编译时要带的模块

make && make install
4、软链接启动
ln -s /usr/local/nginx-1.14. /usr/local/nginx

# 这条ln命令的意义十分深远重大。这是生产环境的经验。

# 将Nginx安装路径通过软链接方式更改为/usr/local/nginx/,方便人员使用。

# 安装时指定版本号路径是为了便于查看分区当前使用的版本,也方便以后升级。

/usr/local/nginx/sbin/nginx   #启动nginx 若报错说明没有创建nginx用户或者是

ln -s /usr/local/nginx-1.14./sbin/nginx /usr/local/sbin/  #做条软连接直接用nginx启动

在nginx.conf中 把user nobody的注释去掉既可

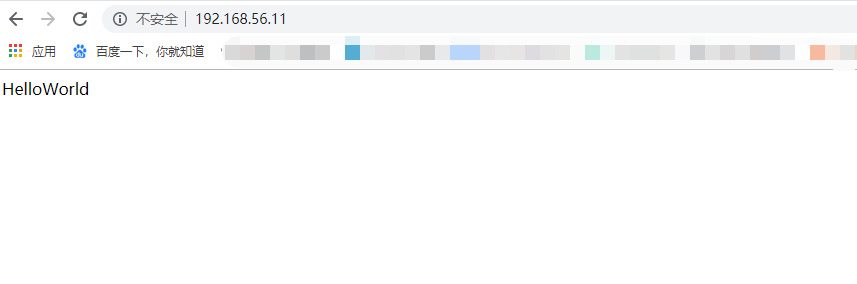
netstat -lntup|grep  查看是否有80端口
5、查看nginx的编译参数
#/usr/local/nginx/sbin/nginx -V

nginx version: nginx/1.14.2

built by gcc 4.4.7 20120313 (Red Hat 4.4.7-18) (GCC)

built with OpenSSL 1.0.1e-fips 11 Feb 2013

TLS SNI support enabled

configure arguments: --prefix=/usr/local/nginx-1.14.2 --user=nginx --group=nginx --with-http_stub_status_module --with-http_ssl_module --with-http_realip_module --with-http_gzip_static_module
6、检查语法&平滑重启
nginx -t   #检查语法是否正常

nginx -s reload  #平滑重启
7、精简nginx配置文件
egrep -v "#|^$" nginx.conf.default >nginx.conf #精简化/最小化默认nginx.conf配置文件信息
8、配置nginx负载均衡
# vim conf/nginx.conf

worker_processes  ;

events {

    worker_connections  ;

}

http {

    include       mime.types;

    default_type  application/octet-stream;

    sendfile        on;

    keepalive_timeout  ;

    upstream wang.com{  #服务器集群的名字

        server 10.10.16.223: weight=;

        server 10.10.16.252: weight=;

 }

    server {

        listen       ;

        server_name  localhost;

        location / {

        proxy_pass http://wang.com;  #以上面对应

        proxy_redirect default;

        }

        error_page        /50x.html;

        location = /50x.html {

            root   html;

        }

    }

}
标准的配置请写在vhost下面:
[root@linux-node1 conf]# cat nginx.conf

#user  www;

worker_processes  auto;

worker_rlimit_nofile ;

events {

    worker_connections  ;

}

http {

    include       mime.types;

    default_type  application/octet-stream;

    sendfile        on;

    keepalive_timeout  ;

    log_format  main  '$remote_addr - $host [$time_local] "$request" '

                    '$status $body_bytes_sent  "$http_referer" '

                   '"$http_user_agent" "$http_x_forwarded_for" $request_time $upstream_addr $upstream_status $upstream_response_time $bytes_sent';

    gzip on ;

    gzip_min_length 1k;

    gzip_buffers  16k;

    gzip_comp_level ;

    gzip_types       text/plain application/x-javascript text/css application/xml application/json application/javascript text/javascript image/jpeg image/gif image/png;

    gzip_disable "MSIE [1-6].";

    gzip_vary on;

    #其他的在着重添加优化参数

   include vhost/*.conf;

}
处理逻辑的放在vhost下面:
[root@shenzhen conf]# pwd

/usr/local/nginx/conf

[root@shenzhen conf]# cat vhost/gunicorn.conf

server {

    listen  ;

    server_name xx.xxx.xxx.xxx;

    #location  / {

    #            root   html;

    #        index  index.html index.htm;

    #    }

    location / {

        proxy_pass http://127.0.0.1:5001;

        proxy_redirect default;

      }

    error_page        /50x.html;

        location = /50x.html {

            root   html;

           }

    access_log /data/logs/nginx/gunicorn_access.log main;

    error_log /data/logs/nginx/gunicorn_error.log;

}
9、终结版
一键安装openresty,配置优化等
[root@linux-node1 ~]# cd /usr/local/src

[root@linux-node1 src]# git clone https://github.com/unixwang/linux-package.git

[root@linux-node1 src]# cd linux-package/

[root@linux-node1 linux-package]# yum localinstall -y jemalloc-4.5.-.x86_64.rpm openresty-1.15.8.1-.x86_64.rpm

[root@linux-node1 vhost]# cd /usr/local/openresty/nginx/conf/vhos

[root@linux-node1 vhost]# /usr/local/openresty/nginx/sbin/nginx
快速安装nginx的更多相关文章
- CentOS 6.4 快速安装Nginx笔记
CentOS 6.4 快速安装Nginx笔记 本系列文章由ex_net(张建波)编写,转载请注明出处. http://blog.csdn.net/ex_net/article/details/9860 ...
- 在Mac OS X 下快速安装Nginx
p.p1 { margin: 0.0px 0.0px 0.0px 0.0px; font: 15.0px Helvetica; color: #8e68ff } p.p2 { margin: 0.0p ...
- CentOS用yum快速安装nginx
增加nginx源 vim /etc/yum.repos.d/nginx.repo [nginx] name=nginx repo baseurl=http://nginx.org/packages/ ...
- centos7下快速安装Nginx服务器
1.添加源 默认情况Centos7中无Nginx的源,最近发现Nginx官网提供了Centos的源地址.因此可以如下执行命令添加源: sudo rpm -Uvh http://nginx.org/pa ...
- Centos下快速安装Nginx
1.准备工作 选首先安装这几个软件:GCC,PCRE(Perl Compatible Regular Expression),zlib,OpenSSL. Nginx是C写的,需要用GCC编译:Ngin ...
- 快速安装Nginx及配置详解(未完待续)
导读: Nginx (engine x) 是一个高性能的HTTP和反向代理服务器,也是一个IMAP/POP3/SMTP服务器,从2007年被德国人开发出来后可以说在市场的占有率一路飙升,因为它支持高并 ...
- CentOS快速安装Nginx的方法,nginx如何启动重启停止
1.防止 make: command not found,提前安装一些插件,取决于当前环境是否已安装,如果已经安装就不需要执行此命令 yum -y install gcc automake autoc ...
- Nginx的快速安装
1. 准备工作 1. CenterOS7.x.vmware虚拟机,安装过程参考 https://jingyan.baidu.com/article/eae0782787b4c01fec548535.h ...
- zabbix快速安装(Ubuntu18.04, Nginx)
ubuntu18.04快速安装zabbix4.0 https://blog.csdn.net/qq_33317586/article/details/83867756 需要安装的东西:nginx,ph ...
随机推荐
- vue2.0项目实战(5)vuex快速入门
Vuex 是一个专为 Vue.js 应用程序开发的状态管理模式.它采用集中式存储管理应用的所有组件的状态,并以相应的规则保证状态以一种可预测的方式发生变化.Vuex 也集成到 Vue 的官方调试工具 ...
- 第一篇-Django建立数据库各表之间的联系(上)
多表操作(一对多) 遇到的问题: 执行python manage.py makemigrations后报如下错误 TypeError: __init__() missing 1 required po ...
- struts2 UI标签 和 主题
四.Struts2的UI标签和主题 1.Struts2中UI标签的优势 自动的数据回显和错误提示功能 自带的简单样式和排版 2.表单标签的通用属性 说明:UI标签中value的取值一般都是字符串. 2 ...
- 【优秀的设计绘图软件】Affinity Designer Beta for Mac 1.7
[简介] Affinity Designer 1.7 beta 中文版本,具有全新的UI界面和功能,支持最新的 macOS Mojave 10.14 系统,Affinity Designer是 ...
- bzoj1875 边点互换+矩乘
https://www.lydsy.com/JudgeOnline/problem.php?id=1875 题意 HH有个一成不变的习惯,喜欢饭后百步走.所谓百步走,就是散步,就是在一定的时间 内,走 ...
- Burrow 服务的安装部署
Burrow 服务的安装部署 作者:尹正杰 版权声明:原创作品,谢绝转载!否则将追究法律责任. 最近协助开发的同时帮忙把10个topic的数据使用5个topic的来工作.结果发现数据flume在手机数 ...
- 6、JPA-映射-单向一对多
一个用户对应多个订单 实体类 Customer package com.jpa.yingshe; import javax.persistence.*; import java.util.HashSe ...
- Kafka权威指南 读书笔记之(四)Kafka 消费者一一从 Kafka读取数据
KafkaConsumer概念 消费者和消费者群组 Kafka 消费者从属于消费者群组.一个群组里的消费者订阅的是同一个主题,每个消费者接收主题一部分分区的消息. 往群组里增加消费者是横向伸缩消费能力 ...
- java深copy (伪深copy)【原】
Teacher.java package test.clone; /** * 老师 * 深copy需要实现Cloneable接口 * @author King * */ public class Te ...
- exp和imp导入导出时表空间问题【未完】
准备工作 第一步: 创建教师和学生用户 教师用户/密码 TEACHER/t123456 学生用户/密码 STUDENT/s123456 参考链接 http://www.cnblogs.com/what ...