centos6.5生产环境编译安装nginx-1.11.3并增加第三方模块ngx_cache_purge、nginx_upstream_check、ngx_devel_kit、lua-nginx
1.安装依赖包
yum install -y gcc gcc-c++ pcre-devel openssl-devel geoip-devel
2.下载需要的安装包
LuaJIT-2.0.4.zip
lua-nginx-module-master.zip
nginx_upstream_check_module-master.zip
nginx-1.11.3.tar.gz
ngx_cache_purge-2.3.tar.gz
ngx_devel_kit-master.zip
3.编译安装LuaJIT-2.0.4.zip(lua-nginx-module-master依赖uaJIT)
unzip LuaJIT-2.0.4.zip
cd LuaJIT-2.0.4
make && make install
ln -s /usr/local/lib/libluajit-5.1.so.2 /usr/lib64/libluajit-5.1.so.2
解压其他第三方模块压缩包
tar -zxvf nginx-1.11.3.tar.gz
tar -zxvf ngx_cache_purge-2.3.tar.gz
unzip nginx_upstream_check_module-master.zip
unzip ngx_devel_kit-master.zip
unzip lua-nginx-module-master.zip
cd nginx-1.11.3
隐藏版本信息
方法1(需要安装成功后修改配置文件缺点是仍然显示nginx):
vim /etc/nginx/nginx.conf
加入:
server_tokens off;
http {
include mime.types;
server_tokens off;

fastcgi.conf
sed -i 's#fastcgi_param SERVER_SOFTWARE nginx/$nginx_version;#fastcgi_param SERVER_SOFTWARE yaya;#g' /etc/nginx/fastcgi.conf
找到:
fastcgi_param SERVER_SOFTWARE nginx/$nginx_version;
改为:
fastcgi_param SERVER_SOFTWARE yaya;
方法2推荐(修改源码头文件信息编译):
vim src/core/nginx.h
#define NGINX_VER "yaya"
#define NGINX_VAR "yaya"

测试环境编译参数(增加--with-debug):
./configure --sbin-path=/usr/sbin/nginx --conf-path=/etc/nginx/nginx.conf --with-debug --pid-path=/var/run/nginx/nginx.pid --with-pcre --with-http_gzip_static_module --with-http_ssl_module --with-http_realip_module --with-http_geoip_module --add-module=../nginx_upstream_check_module-master
--add-module=../ngx_cache_purge-2.3 --add-module=../ngx_devel_kit-master/ --add-module=../lua-nginx-module-master/ --with-http_stub_status_module
生产环境编译参数:
./configure --sbin-path=/usr/sbin/nginx --conf-path=/etc/nginx/nginx.conf --pid-path=/var/run/nginx/nginx.pid --with-pcre --with-http_gzip_static_module --with-http_ssl_module --with-http_realip_module --with-http_geoip_module --add-module=../nginx_upstream_check_module-master
--add-module=../ngx_cache_purge-2.3 --add-module=../ngx_devel_kit-master/ --add-module=../lua-nginx-module-master/ --with-http_stub_status_module
make && make install
4.服务脚本添加/etc/init.d/nginx、隐藏版本信息
/etc/init.d/nginx
#! /bin/bash
#
# nginx - this script starts and stops the nginx daemon
#
# chkconfig: - 85 15
# description: Nginx is an HTTP(S) server, HTTP(S) reverse \
# proxy and IMAP/POP3 proxy server
#
# processname: nginx
# config: /etc/nginx/nginx.conf
# pidfile:/var/run/nginx/nginx.pid
# Source function library.
. /etc/rc.d/init.d/functions
# Source networking configuration.
. /etc/sysconfig/network
# Check that networking is up.
[ "$NETWORKING" = "no" ] && exit 0
nginx="/usr/sbin/nginx"
prog=$(basename $nginx)
NGINX_CONF_FILE="/etc/nginx/nginx.conf"
[ -f /etc/sysconfig/nginx ] && . /etc/sysconfig/nginx
lockfile=/var/lock/nginx.lock
start() {
[ -x $nginx ] || exit 5
[ -f $NGINX_CONF_FILE ] || exit 6
echo -n $"Starting $prog: "
daemon $nginx -c $NGINX_CONF_FILE
retval=$?
echo
[ $retval -eq 0 ] && touch $lockfile
return $retval
}
stop() {
echo -n $"Stopping $prog: "
killproc $prog -QUIT
retval=$?
echo
[ $retval -eq 0 ] && rm -f $lockfile
return $retval
}
restart() {
configtest || return $?
stop
sleep 1
start
}
reload() {
configtest || return $?
echo -n $"Reloading $prog: "
killproc $nginx -HUP
RETVAL=$?
echo
}
force_reload() {
restart
}
configtest() {
$nginx -t -c $NGINX_CONF_FILE
}
rh_status() {
status $prog
}
rh_status_q() {
rh_status >/dev/null 2>&1
}
case "$1" in
start)
rh_status_q && exit 0
$1
;;
stop)
rh_status_q || exit 0
$1
;;
restart|configtest)
$1
;;
reload)
rh_status_q || exit 7
$1
;;
force-reload)
force_reload
;;
status)
rh_status
;;
condrestart|try-restart)
rh_status_q || exit 0
;;
*)
echo $"Usage: $0 {start|stop|status|restart|condrestart|try-restart|reload|force-reload|configtest}"
exit 2
esac
chmod +x /etc/init.d/nginx
groupadd -r nginx
useradd -r -g nginx nginx
5.开启debug测试功能(前提是需要加入--with-debug编译选项)
vim /etc/nginx/nginx.conf
测试环境打开debug:
error_log /data/logs/error.log debug;
生产环境:
error_log /data/logs/error.log info;
access_log /data/logs/access.log;
6.启动服务
/usr/sbin/nginx -c /etc/nginx/nginx.conf
/usr/sbin/nginx -V
显示详细编译信息
configure arguments: --sbin-path=/usr/sbin/nginx --conf-path=/etc/nginx/nginx.conf --pid-path=/var/run/nginx/nginx.pid --with-pcre --with-http_gzip_static_module --with-http_ssl_module --with-http_realip_module --with-http_geoip_module --add-module=../nginx_upstream_check_module-master
--add-module=../ngx_cache_purge-2.3 --add-module=../ngx_devel_kit-master/ --add-module=../lua-nginx-module-master/ --with-http_stub_status_module
重新编译需要删除的文件:
rm -rf /usr/local/nginx/
rm -rf /etc/nginx/
rm -rf /var/run/nginx/
关于debug日志的说明:
一般来讲,Nginx 的错误日志级别是 error,作为 Nginx 用户来讲,你设置成 info 就足够用了。
但有时有些难以挖掘的 bug,需要看到更详细的 debug 级别的日志,这时候,单单把 error_log 级别设置成 debug 是不行的,Nginx 记录下来的还是 info 级别以上的信息。你需要激活 Nginx 的 debug 日志才可以得到 debug 级别的日志信息。本文简要介绍了 Nginx debug 日志的激活和配置使用。官方正文如下:
要激活 debug 日志,Nginx 在构建时需要配置为支持 debug:
./configure --with-debug ...
然后可以通过 error_log 指令设置 debug 级别:
error_log /path/to/log debug;
Windows 下的 Nginx 的二进制版本一般都支持 debug 日志,因此只需设置 debug 级别即可。
注意如果你重新指定日志时没有配置 debug 级别的话,将会禁用 debug 日志。在下面的例子中,在 server 层面上重新指定的日志将会禁用这台服务器的 debug 日志:
error_log /path/to/log debug;
http {
server {
error_log /path/to/log;
...
为了避免这种现象的发生,要么你就注释掉重新定义的那行日志,要么你就在那行也加上 debug 级别:
error_log /path/to/log debug;
http {
server {
error_log /path/to/log debug;
...
也可以只为特定的客户端地址发来的请求开启 debug 日志:
error_log /path/to/log;
events {
debug_connection 192.168.1.1;
debug_connection 192.168.10.0/24;
}
附带一份nginx的参数:
user  nginx;

worker_processes  2;

worker_rlimit_nofile 100000;

#error_log  logs/error.log;

#error_log  logs/error.log  notice;

error_log  /data/logs/error.log  info;

#pid        logs/nginx.pid;

pid	   /var/run/nginx/nginx.pid;

events {

    worker_connections  2024;

    multi_accept on;

    use epoll;

}

http {

    server_tokens off;

    sendfile on;

    tcp_nopush on;

    tcp_nodelay on;

    include       mime.types;

    default_type  application/octet-stream;

    #log_format  main  '$remote_addr - $remote_user [$time_local] "$request" '

    #                  '$status $body_bytes_sent "$http_referer" '

    #                  '"$http_user_agent" "$http_x_forwarded_for"';

    access_log  /data/logs/access.log;

    #keepalive_timeout  0;

    keepalive_timeout  10;

    client_header_timeout 10;

    client_body_timeout 10;

    reset_timedout_connection on;

    send_timeout 10;

    limit_conn_zone $binary_remote_addr zone=addr:5m;

    limit_conn addr 100;

    charset UTF-8;

    gzip on;

    gzip_disable "msie6";

    gzip_proxied any;

    gzip_min_length 1000;

    gzip_comp_level 6;

    open_file_cache max=100000 inactive=20s;

    open_file_cache_valid 30s;

    open_file_cache_min_uses 2;

    open_file_cache_errors on;

    server {

        listen       80;

        server_name  localhost;

        #charset koi8-r;

        #access_log  logs/host.access.log  main;

        location / {

            root   html;

            index  index.html index.htm;

        }

	location /nginx_status {

            stub_status on;

            access_log off;

            allow 127.0.0.1;

            allow 10.19.50.236; #允许监控访问nginx状态

            deny all;

        }

        #error_page  404              /404.html;

        # redirect server error pages to the static page /50x.html

        #

        error_page   500 502 503 504  /50x.html;

        location = /50x.html {

            root   html;

        }

        # proxy the PHP scripts to Apache listening on 127.0.0.1:80

        #

        #location ~ \.php$ {

        #    proxy_pass   http://127.0.0.1;

        #}

        # pass the PHP scripts to FastCGI server listening on 127.0.0.1:9000

        #

        #location ~ \.php$ {

        #    root           html;

        #    fastcgi_pass   127.0.0.1:9000;

        #    fastcgi_index  index.php;

        #    fastcgi_param  SCRIPT_FILENAME  /scripts$fastcgi_script_name;

        #    include        fastcgi_params;

        #}

        # deny access to .htaccess files, if Apache's document root

        # concurs with nginx's one

        #

        #location ~ /\.ht {

        #    deny  all;

        #}

    }

    # another virtual host using mix of IP-, name-, and port-based configuration

    #

    #server {

    #    listen       8000;

    #    listen       somename:8080;

    #    server_name  somename  alias  another.alias;

    #    location / {

    #        root   html;

    #        index  index.html index.htm;

    #    }

    #}

    # HTTPS server

    #

    #server {

    #    listen       443 ssl;

    #    server_name  localhost;

    #    ssl_certificate      cert.pem;

    #    ssl_certificate_key  cert.key;

    #    ssl_session_cache    shared:SSL:1m;

    #    ssl_session_timeout  5m;

    #    ssl_ciphers  HIGH:!aNULL:!MD5;

    #    ssl_prefer_server_ciphers  on;

    #    location / {

    #        root   html;

    #        index  index.html index.htm;

    #    }

    #}

}
日志的记录格式:
log_format access '$http_x_forwarded_for $remote_addr - $remote_user [$time_local] "$request_time" "$request" '

		  '$status $body_bytes_sent "$http_referer" '

		  '"$host" "$upstream_http_a" "$upstream_status" "$upstream_response_time" "$upstream_cache_status" "$http_user_agent"';

access_log  /data/logs/access.log access;
测试Lua是否安装成功
可以在server部分添加如下内容:
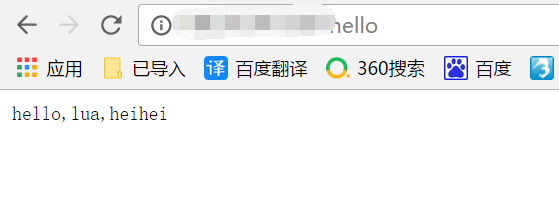
location /hell {
default_type 'text/plain';
content_by_lua 'ngx.say("hello,lua,heihei")';
}
通过访问http://ip/hello即可测试
centos6.5生产环境编译安装nginx-1.11.3并增加第三方模块ngx_cache_purge、nginx_upstream_check、ngx_devel_kit、lua-nginx的更多相关文章
- CentOS 6.5 生产环境编译安装LNMP
一.环境准备 1.操作系统安装:CentOS 6.5 64位最小化安装. 2.配置好IP.DNS.网关.主机名 3.配置防火墙,开启80.3306端口 vim /etc/sysconfig/iptab ...
- Centos6.5 源码编译安装 Mysql5.7.11及配置
安装环境 Linux(CentOS6.5 版).boost_1_59_0.tar.gz.mysql-5.7.11.tar.gzMySQL 5.7主要特性: 更好的性能:对于多核CPU.固态硬盘. ...
- Centos6.5生产环境最小化优化配置
Centos6.5生产环境最小化优化配置,满足业务需求! 01.启动网卡 #centos6.x最小化安装后,网卡默认不是启动状态 ifup eth0 // ifconfig eth0 up /et ...
- Centos7之LNMP环境编译安装
Centos7之LNMP环境编译安装 一.系统环境准备 注:安装时间过长,只做参考!!!1.系统信息 [root@localhost ~]# uname -r 3.10.0-957.el7.x86_6 ...
- Centos6下Python3的编译安装
本文转载自 Centos6下Python3的编译安装 系统环境:CentOS 6.8-Minimal 安装Python依赖包: 1 [root@Python src]# yum install zli ...
- centos7.6编译安装php7.2.11及redis/memcached/rabbitmq/openssl/curl等常见扩展
centos7.6编译安装php7..11及redis/memcached/rabbitmq/openssl/curl等常见扩展 获取Php的编译参数方法: [root@eus-api-cms-bac ...
- nginx增加第三方模块
增加第三方模块 ============================================================ 一.概述nginx文件非常小但是性能非常的高效,这方面完胜ap ...
- Debian 为nginx增加第三方模块
为nginx增加第三方模块需要重新编译nginx的,但是debian在安装nginx的时候做了很多事情,比如systemd,/etc/nginx/里的各种文件,所以我们最好在debian源代码包的基础 ...
- centos6.8服务器配置之编译安装PHP、配置nginx
php version 5.6.31.nginx version: nginx/1.10.2 1.下载: wget http://cn2.php.net/distributions/php-5.6.3 ...
随机推荐
- Linux 常用命令——cat, tac, nl, more, less, head, tail, od
Drecik学习经验分享 转载请注明出处:http://blog.csdn.net/drecik__/article/details/8453584 1. cat 由第一行开始显示文件内容 2. ta ...
- Java中由常量类引发的思考
我们都知道,定义一个常量类是十分简单的.首先差固件一个类,然后类中声明一些public修饰的静态常量.没错就这么简单: 写好之后,在其他地方使用的时候,直接类名.属性名就可以使用了. 而LZ现在想的是 ...
- configParse模块(二十七)
configparser用于处理特定格式的文件,其本质上是利用open来操作文件. # 注释1 ; 注释2 [section1] # 节点 k1 = v1 # 值 k2:v2 # 值 [section ...
- Dubbo 服务治理-mock实例
转: Dubbo 服务治理-mock实例 老生住长亭 2017.02.28 10:56* 字数 514 阅读 2552评论 10喜欢 2 Dubbo的mock自己折腾的实例,配置信息有点简陋,有点粗鄙 ...
- (转)hdu 3436Queue-jumpers--splay+离散化
dalao博客 http://acm.hdu.edu.cn/showproblem.php?pid=3436 题意:初始排列1到N,现在要你实现3种操作: 将x插入到队头去 询问x当前的位置 询问第x ...
- Java面向对象----个人参考资料
Java面向对象 :什么是面向对象.类与对象.封装.构造方法.static关键字.继承.抽象类.接口.多态 一.什么是面向对象 1.面向过程思想 面向过程:(PO,Procedure Oriented ...
- Study 7 —— CSS美化背景和边框
图片透明度属性:opacity 背景图片重复属性:background-repeat背景图片位置属性:background-position background-postion:横坐标 纵坐标; b ...
- Python复习笔记(一)高级变量类型
目标 列表元组 字典 字符串 公共方法 变量高级 01. 列表 02. 元组 03. 字典 04. 字符串 1)判断类型 - 9 2) 查找和替换 - 7 3) 大小写转换 - 5 4) 文本对齐 - ...
- 出栈顺序 与 卡特兰数(Catalan)的关系
一,问题描述 给定一个以字符串形式表示的入栈序列,请求出一共有多少种可能的出栈顺序?如何输出所有可能的出栈序列? 比如入栈序列为:1 2 3 ,则出栈序列一共有五种,分别如下:1 2 3.1 3 2 ...
- div 只显示两行超出部分隐藏
; -webkit-box-orient: vertical;line-height: 26px } <td rowspan="2" colspan="2" ...