基于多主机的Web服务
【Centos7.4版本】
!!!测试环境我们首关闭防火墙和selinux
[root@localhost ~]# systemctl stop firewalld

[root@localhost ~]# systemctl disable firewalld

[root@localhost ~]# sed -i 's/SELINUX=enforcing/SELINUX=disabled/g' /etc/selinux/config

[root@localhost ~]# setenforce 0
一、基于多主机的Web服务
1、首先先看一下本地网卡的信息
[root@localhost ~]# cd /etc/sysconfig/network-scripts/

[root@localhost network-scripts]# cat ifcfg-ens32

    TYPE=Ethernet

    PROXY_METHOD=none

    BROWSER_ONLY=no

    BOOTPROTO=none

    IPADDR=10.0.0.129        //我本机主网卡P地址

    NETMASK=255.255.255.0

    GATEWAY=10.0.0.2

    DNS1=8.8.8.8

    DEFROUTE=yes

    IPV4_FAILURE_FATAL=no

    IPV6INIT=yes

    IPV6_AUTOCONF=yes

    IPV6_DEFROUTE=yes

    IPV6_FAILURE_FATAL=no

    IPV6_ADDR_GEN_MODE=stable-privacy

    NAME=ens32

    UUID=e4b11756-1775-4b6a-adbf-95f3f24f941e

    DEVICE=ens32

    ONBOOT=yes
2、安装HTTP服务,并启动服务
[root@localhost ~]# yum install -y httpd

[root@localhost ~]# systemctl start httpd

[root@localhost ~]# systemctl enable httpd

Created symlink from /etc/systemd/system/multi-user.target.wants/httpd.service to /usr/lib/systemd/system/httpd.service.
3、首先看一下配置模板
[root@localhost ~]# vim /usr/share/doc/httpd-2.4.6/httpd-vhosts.conf

..........                //上面的我省略了

<VirtualHost *:@@Port@@>

    ServerAdmin webmaster@dummy-host.example.com

    DocumentRoot "@@ServerRoot@@/docs/dummy-host.example.com"

    ServerName dummy-host.example.com

    ServerAlias www.dummy-host.example.com

    ErrorLog "/var/log/httpd/dummy-host.example.com-error_log"

    CustomLog "/var/log/httpd/dummy-host.example.com-access_log" common

</VirtualHost>

<VirtualHost *:@@Port@@>

    ServerAdmin webmaster@dummy-host2.example.com

    DocumentRoot "@@ServerRoot@@/docs/dummy-host2.example.com"

    ServerName dummy-host2.example.com

    ErrorLog "/var/log/httpd/dummy-host2.example.com-error_log"

    CustomLog "/var/log/httpd/dummy-host2.example.com-access_log" common

</VirtualHost>

//这几行是配置虚拟主机的模板
4、创建目录,写入测试首页
[root@localhost ~]# mkdir /var/www/aaa
[root@localhost ~]# mkdir /var/www/bbb
[root@localhost ~]# echo '<h1>This servername is aaa.test.com</h1>' > /var/www/aaa/index.html
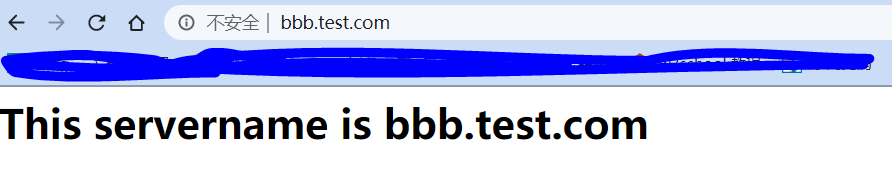
[root@localhost ~]# echo '<h1>This servername is bbb.test.com</h1>' > /var/www/bbb/index.html
5、在本地的/etc/hosts文件下写入两个hostname
[root@localhost ~]# vim /etc/hosts

127.0.0.1   localhost localhost.localdomain localhost4 localhost4.localdomain4

::1         localhost localhost.localdomain localhost6 localhost6.localdomain6

10.0.0.129      aaa.test.com

10.0.0.129      bbb.test.com
//最后两条需要手动添加
6、编辑HTTP的配置文件,添加以下内容
[root@localhost ~]# vim /etc/httpd/conf/httpd.conf

..........                //上面的我就省略

<VirtualHost 10.0.0.129:80>

        documentroot    "/var/www/aaa"

        servername      "aaa.test.com"

        ErrorLog        "/var/log/httpd/aaa.test.com-error_log"

        CustomLog       "/var/log/httpd/aaa.test.com-access_log" common

</VirtualHost>

<VirtualHost 10.0.0.129:80>

        documentroot    "/var/www/bbb"

        servername      "bbb.test.com"

        ErrorLog        "/var/log/httpd/bbb.test.com-error_log"

        CustomLog       "/var/log/httpd/bbb.test.com-access_log" common

</VirtualHost>

//在文件的最后添加上面的内容
7、重启HTTP服务
[root@localhost ~]# systemctl restart httpd
8、在本地C盘的C:\Windows\System32\drivers\etc\hosts这个文件添加两行内容
 1 # Copyright (c) 1993-2009 Microsoft Corp.

 2 #

 3 # This is a sample HOSTS file used by Microsoft TCP/IP for Windows.

 4 #

 5 # This file contains the mappings of IP addresses to host names. Each

 6 # entry should be kept on an individual line. The IP address should

 7 # be placed in the first column followed by the corresponding host name.

 8 # The IP address and the host name should be separated by at least one

 9 # space.

10 #

11 # Additionally, comments (such as these) may be inserted on individual

12 # lines or following the machine name denoted by a '#' symbol.

13 #

14 # For example:

15 #

16 #      102.54.94.97     rhino.acme.com          # source server

17 #       38.25.63.10     x.acme.com              # x client host

18

19 # localhost name resolution is handled within DNS itself.

20 #    127.0.0.1       localhost

21 #    ::1             localhost

22

23 10.0.0.129        aaa.test.com

24 10.0.0.129        bbb.test.com

25 //添加最后两行就行
9、在浏览器的地址栏分别输入两个域名

基于多主机的Web服务的更多相关文章
- 如何快速搭建一个基于ServiceStack框架的web服务
ServiceStack是一个高性能的.NET Web Service 平台,能够简化开发高性能的REST (支持JSON,XML,JSV,HTML,MsgPack,ProtoBuf,CSV等消息格式 ...
- Python flask 基于 Flask 提供 RESTful Web 服务
转载自 http://python.jobbole.com/87118/ 什么是 REST REST 全称是 Representational State Transfer,翻译成中文是『表现层状态转 ...
- 基于多IP地址Web服务
[Centos7.4版本] !!!测试环境我们首关闭防火墙和selinux [root@localhost ~]# systemctl stop firewalld [root@localhost ~ ...
- 基于多端口的Web服务
[Centos7.4版本] !!!测试环境我们首关闭防火墙和selinux [root@localhost ~]# systemctl stop firewalld [root@localhost ~ ...
- 基于IIS构建Pyathon Web服务
本文简单叙述了在Windows下,如何利用IIS构建Python Web服务. 其主要步骤如下: 1.在IIS下构建一个站点,如图: 2.配置Python文件的处理程序,如图: 3.最后,在对应站点根 ...
- Web 服务编程,REST 与 SOAP(转)
原文地址:Web 服务编程,REST 与 SOAP REST 简介 在开始我们的正式讨论之前,让我们简单看一下 REST 的定义. REST(Representational State Transf ...
- Rest风格WEB服务(Rest Style Web Service)的真相
http://blog.csdn.net/jia20003/article/details/8365585 Rest风格WEB服务(Rest Style Web Service)的真相 分类: J2E ...
- Webservices-1.web服务定义简介
一.WEB服务定义(摘自维基百科)详情:http://zh.wikipedia.org/wiki/Web%E6%9C%8D%E5%8A%A1 Web服务是一种服务导向架构的技术,通过标准的Web协议提 ...
- 利用python httplib模块 发送Post请求测试web服务是否正常起来!
最近在学习python,恰好老大最近让我搞个基于post请求测试web服务是否正常启用的小监控,上网查了下资料,发现强大的Python恰好能够用上,所以自己现学现卖,顺便锻炼下自己. 由于本人也刚接触 ...
随机推荐
- Distributed | ZooKeeper
ZooKeeper与之前看的论文不太一样,它主要是描述了一个分布式协调服务,提供了wait-free的api,可以让用户自己设计要求更高的原语.通过Zab协议保证sever之间的一致性,同时让读请求在 ...
- 翻译:《实用的Python编程》08_00_Overview
目录 | 上一节 (7 高级主题) | 下一节 (9 包) 8. 测试和调试 本节介绍与测试.日志和调试有关的基本主题. 8.1 测试 8.2 日志,错误处理和诊断 8.3 调试 目录 | 上一节 ( ...
- 远程线程注入dll,突破session 0
前言 之前已经提到过,远线程注入和内存写入隐藏模块,今天介绍突破session 0的dll注入 其实今天写这个的主要原因就是看到倾旋大佬有篇文章提到:有些反病毒引擎限制从lsass中dump出缓存,可 ...
- Vue Hello World
1 Vue介绍 伟大的项目是从Hello World而来的,Hello World尽管没有什么实际性的作用,但是在于意义重大.(哈哈哈哈) 好了不废话了入正题. Vue是一套用于构建用户界面的渐进式J ...
- helm安装及使用
helm简介 官网文档:https://helm.sh/ helm是kubernetes的包管理器,类似于linux系统下的apt-get或yum 安装 wget https://get.helm.s ...
- 1022 Digital Library
A Digital Library contains millions of books, stored according to their titles, authors, key words o ...
- 1-2 postman工具简介
postman提供了一个多窗口和多选项卡页面用于发送和接受请求,postman努力保持整洁和灵活,提供更多的空间,满足用户的需要.他很简单,能满足大部分接口的测试,性价比特别高.如图所示: 1.侧边 ...
- hdu1526 二分匹配+ floyd
题意: 有N个插座,M个用电器,和K种转换器(每种有无限个),问最少多少个用电器无法充电. 思路 : 总的电器数 减去 电器和插座的最大匹配数 我有的是map去映射每一个串,根据转换器建边,然后跑一 ...
- picpick截屏软件脱壳
0x01 准备 OD 基本查壳软件 picpick可执行文件(不是快捷方式) 0x02 查壳 软件是2018年9月,还是比较新的 显示EP区段是.vmp1,没见过,不知道是压缩壳还是加密壳,搜索所示y ...
- Windows核心编程 第2 4章 异常处理程序和软件异常
异常处理程序和软件异常 C P U引发的异常,就是所谓的硬件异常(hardware exception).操作系统和应用程序 也可以引发相应的异常,称为软件异常(software exception) ...