Android之手机向导以及设置中心模块的开发
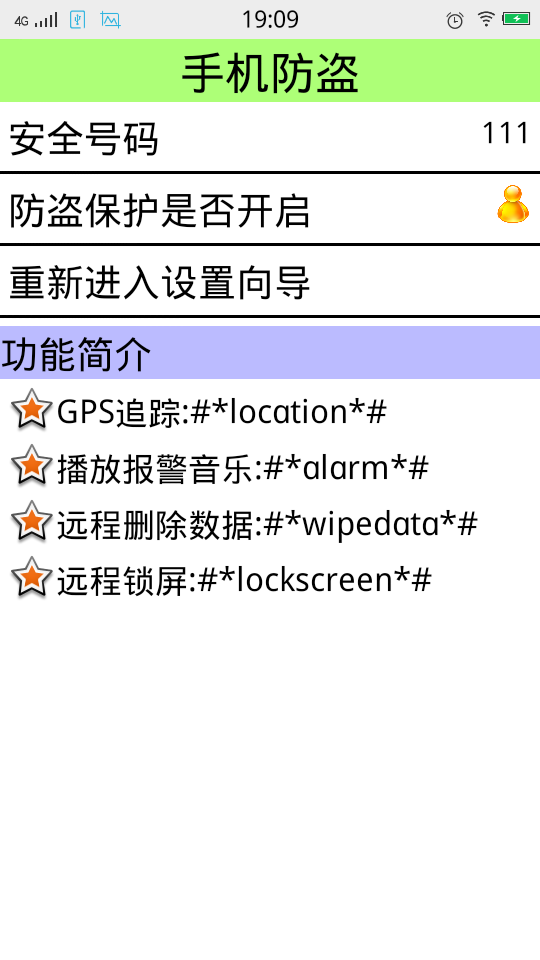
当我们使用的新的软件的时候,我们首先需要教用户如何使用我们的软件,当用户学习完使用教程,下次再登录的时候,我们应该直接跳到我们的功能界面,下面我来展示一下我学习视频做的效果图:手机防盗这个功能模块就是绑定SIM卡,然后通过检测SIM卡开机的时候是否变更,来保护用户的手机是否处于安全状态,如果发现SIM卡变化,这样就需要我们的第二步,设置一个安全号码,当发现SIM卡已经变化,这个时候手机会自动的发送报警短信提示用户的手机已经处于不安全的状态。当我们看完教程仍不知如何操作我们的软件的时候,这个时候就需要设置一个功能,重新让用户再可以看教程。这就是我们防盗模块的思想。

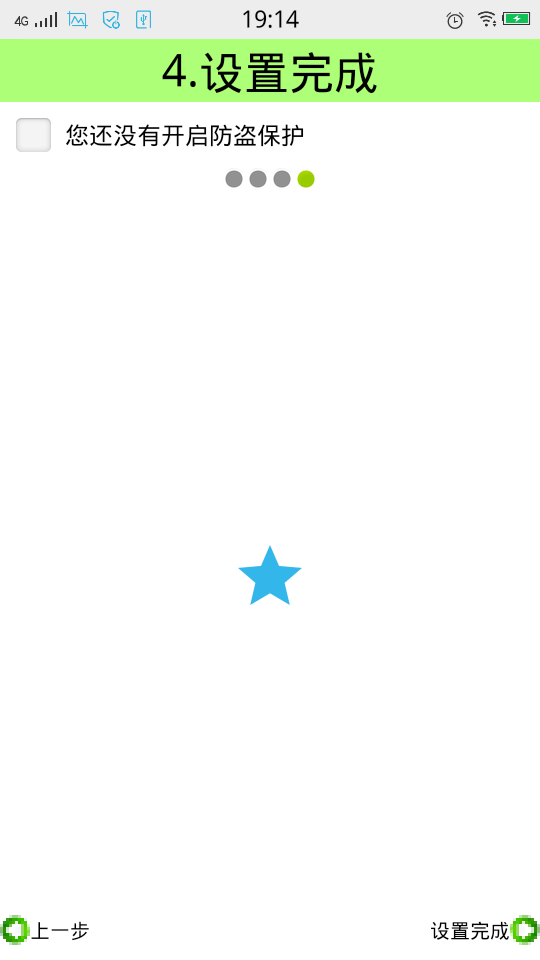
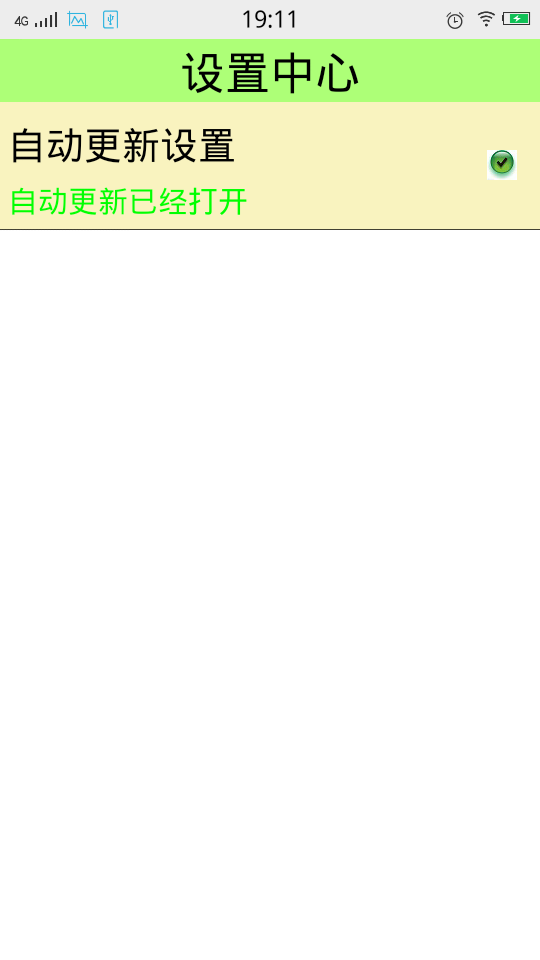
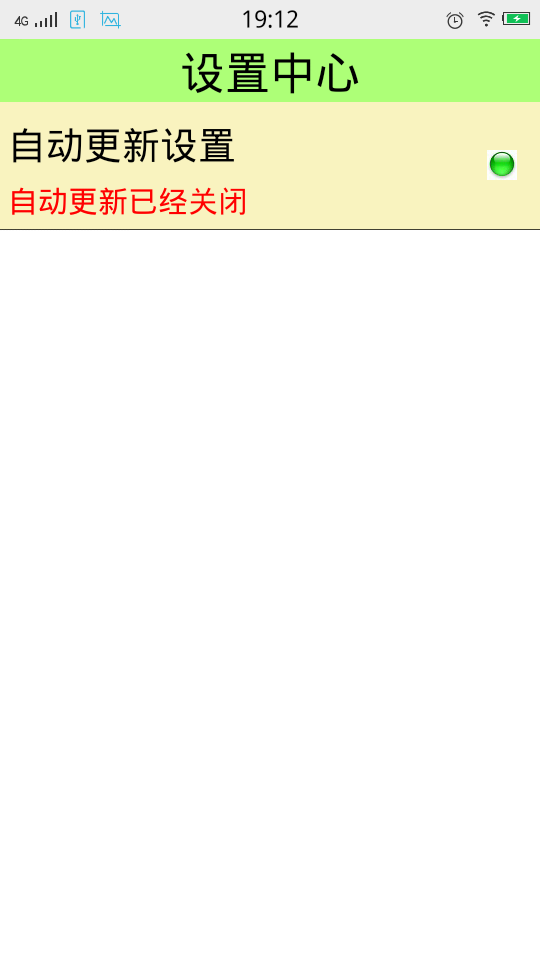
设置中心模块的中心思想就是一些常用的功能是否开启和关闭。例如自动更新的设置,黑名单的设置。。。
当然我们不仅仅需要知道这些设计思想,还需要把这些思想以及功能得以实现。
下面我来记录一下,我学习到的知识点:
先来说一下手机防盗那个页面:
首先我们用的应该是LinearLayout,还有RelativeLayout。
android:drawableLeft="@android:drawable/star_big_on"这个是Android开发自带的星星图片,可以利用左右上下属性来控制星星所在的位置
style="@style/TitleStyle" 当我们的布局文件中出现大量的重复性的代码的时候,我们应该学会把这些代码抽取出来。放在values文件下面。
<LinearLayout xmlns:android="http://schemas.android.com/apk/res/android"

    xmlns:tools="http://schemas.android.com/tools"

    android:layout_width="match_parent"

    android:layout_height="match_parent"

    android:background="@color/white"

    android:orientation="vertical"

    tools:context=".LostAndFindActivity" >

    <TextView

       style="@style/TitleStyle"

        android:text="手机防盗" />

    <RelativeLayout

        android:layout_width="match_parent"

        android:layout_height="wrap_content">

        <TextView

            style="@style/ContentStyle"

            android:text="安全号码"/>

        <TextView

            android:layout_width="wrap_content"

            android:layout_height="wrap_content"

            android:layout_alignParentRight="true"

            android:layout_marginRight="5dp"

            android:layout_centerVertical="true"

            android:textColor="@color/black"

            android:textSize="20dp"

            android:text="111"/>

    </RelativeLayout>

    <View

        android:layout_width="match_parent"

        android:layout_height="2dp"

        android:background="@color/black"

        android:layout_marginTop="5dp"/>

<RelativeLayout

        android:layout_width="match_parent"

        android:layout_height="wrap_content">

        <TextView

            style="@style/ContentStyle"

            android:text="防盗保护是否开启"/>

        <ImageView

            android:layout_width="25dp"

            android:layout_height="25dp"

            android:layout_alignParentRight="true"

            android:layout_marginRight="5dp"

            android:layout_centerVertical="true"

           android:src="@drawable/person"/>

    </RelativeLayout>

    <View

        android:layout_width="match_parent"

        android:layout_height="2dp"

        android:background="@color/black"

        android:layout_marginTop="5dp"/>

    <TextView

        android:layout_width="match_parent"

        android:layout_height="wrap_content"

        android:clickable="true"

        android:onClick="reEnterSetUp"

        android:padding="5dp"

        android:background="@drawable/btn_shape_selector"

        android:text="重新进入设置向导"

        android:textColor="@color/black"

        android:textSize="25sp"/>

     <View

        android:layout_width="match_parent"

        android:layout_height="2dp"

        android:background="@color/black"/>

     <TextView

      style="@style/ContentStyle"

      android:layout_width="match_parent"

      android:background="#bbf"

      android:layout_marginLeft="0dp"

    android:text="功能简介"/>

<TextView

      style="@style/ContentStyle"

      android:drawableLeft="@android:drawable/star_big_on"

      android:gravity="center"

      android:textSize="22sp"

    android:text="GPS追踪:#*location*#"/>

<TextView

      style="@style/ContentStyle"

      android:drawableLeft="@android:drawable/star_big_on"

      android:gravity="center"

      android:textSize="22sp"

    android:text="播放报警音乐:#*alarm*#"/>

<TextView

      style="@style/ContentStyle"

      android:drawableLeft="@android:drawable/star_big_on"

      android:gravity="center"

      android:textSize="22sp"

    android:text="远程删除数据:#*wipedata*#"/>

<TextView

      style="@style/ContentStyle"

      android:drawableLeft="@android:drawable/star_big_on"

      android:gravity="center"

      android:textSize="22sp"

    android:text="远程锁屏:#*lockscreen*#"/>

</LinearLayout>
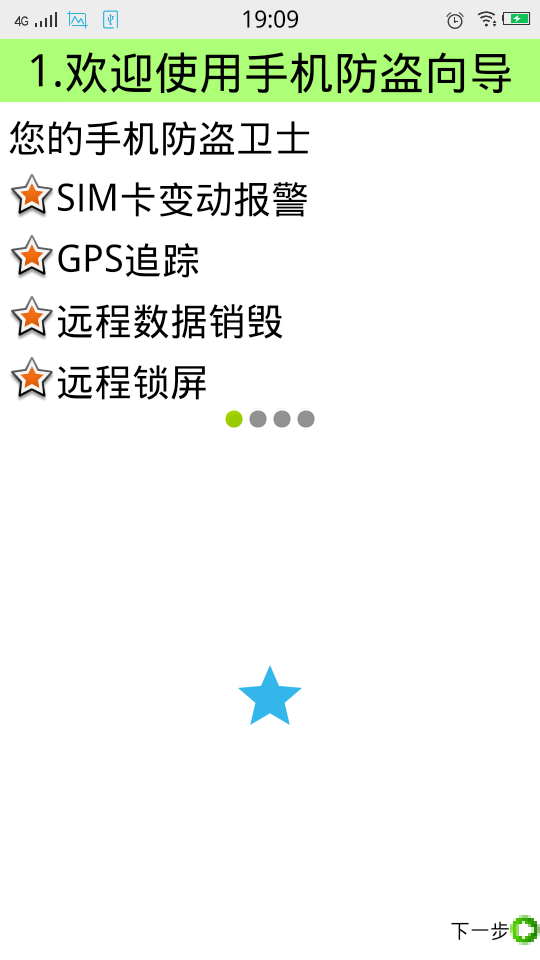
教程的第一步,我们同样用到了上面的一些相似的属性吗,以及控件的样式。重点是:
android:src="@android:drawable/presence_online" 这是那四个小圆点的属性,online是会出现类似于被点击的效果,
android:src="@android:drawable/presence_invisible" 这是类似于没有被点击的效果。这个控件就类似于上面的星星一样,也是自带的效果
<LinearLayout xmlns:android="http://schemas.android.com/apk/res/android"

    xmlns:tools="http://schemas.android.com/tools"

    android:layout_width="match_parent"

    android:layout_height="match_parent"

    android:orientation="vertical"

    android:background="@color/white" >

    <TextView

        style="@style/TitleStyle"

        android:text="1.欢迎使用手机防盗向导" />

<TextView

      style="@style/ContentStyle"

    android:text="您的手机防盗卫士"/>

<TextView

      style="@style/ContentStyle"

      android:drawableLeft="@android:drawable/star_big_on"

      android:gravity="center"

    android:text="SIM卡变动报警"/>

<TextView

      style="@style/ContentStyle"

      android:drawableLeft="@android:drawable/star_big_on"

      android:gravity="center"

    android:text="GPS追踪"/>

<TextView

      style="@style/ContentStyle"

      android:drawableLeft="@android:drawable/star_big_on"

      android:gravity="center"

    android:text="远程数据销毁"/>

<TextView

      style="@style/ContentStyle"

      android:drawableLeft="@android:drawable/star_big_on"

      android:gravity="center"

    android:text="远程锁屏"/>

<LinearLayout

    android:layout_width="match_parent"

    android:layout_height="wrap_content"

    android:gravity="center">

    <ImageView

        android:layout_width="wrap_content"

        android:layout_height="wrap_content"

        android:src="@android:drawable/presence_online"/>

    <ImageView

        android:layout_width="wrap_content"

        android:layout_height="wrap_content"

        android:src="@android:drawable/presence_invisible"/>

    <ImageView

        android:layout_width="wrap_content"

        android:layout_height="wrap_content"

        android:src="@android:drawable/presence_invisible"/>

    <ImageView

        android:layout_width="wrap_content"

        android:layout_height="wrap_content"

        android:src="@android:drawable/presence_invisible"/>

</LinearLayout>

<RelativeLayout

        android:layout_width="match_parent"

        android:layout_height="match_parent">

    <ImageView

        android:id="@+id/imageView1"

        android:layout_width="wrap_content"

        android:layout_height="wrap_content"

        android:layout_centerHorizontal="true"

        android:layout_centerVertical="true"

        android:src="@drawable/ic_launcher" />

    <Button

       style="@style/NextPage"/>

    </RelativeLayout>

</LinearLayout>
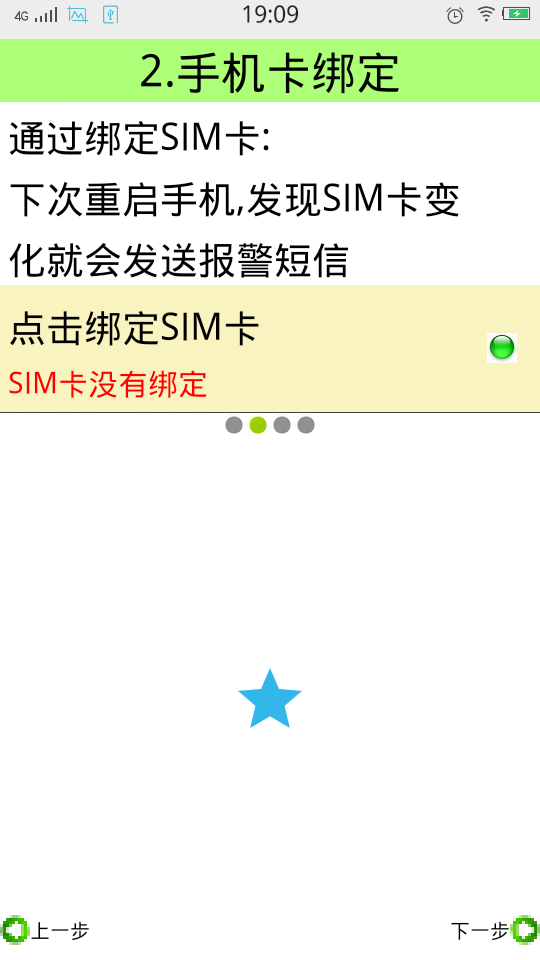
教程第二步:
下面这个内容是视频当中最重要的内容:
自定义属性的步骤:
1.自定义命名空间:(使用自定义控件的布局文件里面写)
 xmlns:itheima(自己随意命名)="http://schemas.android.com/apk/res/包名"
2.自定义属性
在res目录下的values目录里面,创建一个attrs.xml
声明自己定义的属性
<?xml version="1.0" encoding="utf-8"?>

<resources>

    <declare-styleable name="SettingView">

        <attr name="title" format="string" />

        <attr name="descs" format="string" />

    </declare-styleable>

</resources>
属性声明完成以后就会在R文件里面生成id。
3.xml布局文件里面配置这个属性(在使用自定义控件的布局文件里面写)
   itheima:descs="SIM卡已绑定#SIM卡没有绑定"

    itheima:title="点击绑定SIM卡"
4.在代码里面获取属性(在自定义的Java代码里面写)
     String title = attrs.getAttributeValue("http://schemas.android.com/apk/res/com.itcast.mobilesafe58.activity","title");
        String desc = attrs.getAttributeValue(命名空间, 属性的名称);
5.设置这个属性的值 (在自定义的Java代码里面写)
<LinearLayout

    xmlns:android="http://schemas.android.com/apk/res/android"

    xmlns:tools="http://schemas.android.com/tools"

     xmlns:itheima="http://schemas.android.com/apk/res/com.itcast.mobilesafe58.activity"

    android:layout_width="match_parent"

    android:layout_height="match_parent"

    android:background="@color/white"

    android:orientation="vertical"

    tools:context=".SetUp2Activity" >

 <TextView

        style="@style/TitleStyle"

        android:text="2.手机卡绑定" />

<TextView

      style="@style/ContentStyle"

    android:text="通过绑定SIM卡:"/>

 <TextView

      style="@style/ContentStyle"

    android:text="下次重启手机,发现SIM卡变"/>

<TextView

      style="@style/ContentStyle"

    android:text="化就会发送报警短信"/>

 <com.itcast.mobilesafe58.view.SettingItemView

    android:id="@+id/siv_bind"

    android:layout_width="match_parent"

    android:layout_height="wrap_content"

    itheima:descs="SIM卡已绑定#SIM卡没有绑定"

    itheima:title="点击绑定SIM卡"/>

<LinearLayout

    android:layout_width="match_parent"

    android:layout_height="wrap_content"

    android:gravity="center">

    <ImageView

        android:layout_width="wrap_content"

        android:layout_height="wrap_content"

        android:src="@android:drawable/presence_invisible"/>

    <ImageView

        android:layout_width="wrap_content"

        android:layout_height="wrap_content"

        android:src="@android:drawable/presence_online"/>

    <ImageView

        android:layout_width="wrap_content"

        android:layout_height="wrap_content"

        android:src="@android:drawable/presence_invisible"/>

    <ImageView

        android:layout_width="wrap_content"

        android:layout_height="wrap_content"

        android:src="@android:drawable/presence_invisible"/>

</LinearLayout>

<RelativeLayout

        android:layout_width="match_parent"

        android:layout_height="match_parent">

    <ImageView

        android:id="@+id/imageView1"

        android:layout_width="wrap_content"

        android:layout_height="wrap_content"

        android:layout_centerHorizontal="true"

        android:layout_centerVertical="true"

        android:src="@drawable/ic_launcher" />

    <Button

       style="@style/NextPage"/>

    <Button

       style="@style/PreviousPage" />

    </RelativeLayout>

</LinearLayout>
下面还有一个知识点:就是手势滑动的效果:
进入到下一个页面:
<?xml version="1.0" encoding="utf-8"?>

<translate

    xmlns:android="http://schemas.android.com/apk/res/android"

    android:duration="500"

    android:fromXDelta="100%p"

    android:toXDelta="0">

</translate>
回到上一个页面:
<?xml version="1.0" encoding="utf-8"?>

<translate

    xmlns:android="http://schemas.android.com/apk/res/android"

    android:duration="500"

    android:fromXDelta="0"

    android:toXDelta="-100%p">

</translate>
然后在Java文件里面调用这个方法:
overridePendingTransition(R.anim.translate_previous_in, R.anim.translate_previous_out);
最后还有注意的一点是添加权限的问题:
<uses-permission android:name="android.permission.INTERNET" />

    <uses-permission android:name="android.permission.WRITE_EXTERNAL_STORAGE" />

    <uses-permission android:name="android.permission.RECEIVE_BOOT_COMPLETED" />

    <uses-permission android:name="android.permission.READ_PHONE_STATE" />
由于这个项目的代码文件太长,我已经把文件上传到我博客的文件中。
Android之手机向导以及设置中心模块的开发的更多相关文章
- 十问Android NFC手机上的卡模拟(转)
1, 问:能否在AndroidNFC手机上实现卡模拟? 答:在技术上可行,但是,对一般开发人员来讲,目前看来仅仅是技术上可行:( 2, 问:具体如何实现呢? 答:有两种方式:一种是基于硬件的,被称 ...
- Android.KungFu手机病毒原理及清理方法
原文链接:http://jingyan.baidu.com/article/363872ec8ad56b6e4ba16fb1.html Android.KungFu手机病毒清理方法 浏览:3333 | ...
- Android使得手机拍照功能的发展(源共享)
Android系统调用手机拍照功能有两种方法来直接调用手机自带摄像头还有一个就是要当心自己的节拍. 例Camera360 强大的一个在每个操作系统都有一个手机摄影软件:您可以捕捉不同风格,不同特效的照 ...
- Android 个人手机通讯录开发
一.Android 个人手机通讯录开发 数据存储:SQLite 数据库 开发工具:Android Studio 二.Phone Module 简介 1. 界面展示 2. ...
- RomUtil【Android判断手机ROM,用于判断手机机型】
参考资料 Android判断手机ROM 正文 有时候需要判断手机系统的ROM,检测ROM是MIUI.EMUI还是Flyme,可以使用getprop命令,去系统build.prop文件查找是否有对应属性 ...
- Android/IOS手机使用Fiddler抓包
对于Android和IOS开发及测试的同事来说抓包是一个很重要的事,有利于排查问题所在,快速定位问题.但长期以来一直没有一款可以快速抓包的工具,直到有了Fiddler2. 使用步骤: 1. Fidd ...
- Android 判定手机是否root
Android获取手机root的状态 package com.app.demo; import java.io.File; import android.app.Activity; import an ...
- Android 获取手机信息,设置权限,申请权限,查询联系人,获取手机定位信息
Android 获取手机信息,设置权限,申请权限,查询联系人,获取手机定位信息 本文目录: 获取手机信息 设置权限 申请权限 查询联系人 获取手机定位信息 调用高德地图,设置显示2个坐标点的位置,以及 ...
- 基于C/S模式的android手机与PC机通信系统的开发
原文链接: http://blog.csdn.net/nupt123456789/article/details/8213486 基于C/S模式的android手机与PC机通信系统的开发 作者:郑海波 ...
随机推荐
- Python 3.0(一) 简介
Python 3.0(一) 简介 [目录] 1.简介 2.python特点 3.安装 简介: Python是可以称得上即简单又功能强大的少有的语言中的一种.你将会惊喜地发现,专注于问题的解决方案而不是 ...
- APPSCAN使用外部浏览器
在使用appscan扫描时,自带浏览器可能存在兼容性问题(比如HTML5),故需要用到其他浏览器.在做139邮箱HTML5项目,需要使用chrome浏览器进行扫描.因此分享下如何使用外部浏览器,将之前 ...
- MFC抓网页
CString chinachar_str("读取的东西:"); CInternetSession sion(NULL,); CHttpFile *http=NULL; CStri ...
- 实现iOS图片等资源文件的热更新化(零): 序
必要的序 以后在写系列文章,准备把基本的规划和动机等,单独作为一个小的序言部分给独立出来.序言部分,可以较为完整地交待系列文章的写作动机,所展示的编码技术可能的应用场景等.个人,我还是比较看重文章或者 ...
- Fundamentals of MVC
Chapter 1 Fundamentals of MVC Microsoft's Web Development Platforms Understanding the past can b ...
- 安装windows系统的installutil
/// 该服务必须在它可以执行之前安装. /// 服务的安装和卸载“installutil.exe”“installutil.exe / U”的服务可执行文件作为最后一个参数. /// ...
- Emit学习(1) - HelloWorld
之前看过Dapper(使用到了Emit), CYQ.Data(另一种思路,没有使用Emit)类的框架之后, 也想自己做一个小框架玩一下, 不过此时能力太过欠缺, 做不了Cyq.Data或者PDF.Ne ...
- VS10x CodeMap 注册码 key VS插件CodeMap
VS10x CodeMap 注册码(key): #$aCN/L/ra73OaqCJENXc2JIDL61IMawNWBBX+PxhBzobE9w3QlcrwoXeB3DWBC2f56y9r0Hx2XP ...
- javascript常用判断写法
js验证表单大全,用JS控制表单提交 ,javascript提交表单 目录:1:js 字符串长度限制.判断字符长度 .js限制输入.限制不能输入.textarea 长度限制 2.:js判断汉字.判断是 ...
- 后缀名为properties,config和xml的文件内容读取
1.先建立文件(后缀名为properties和config) 2.读取类建立 public class Read{ public static Properties properties = new ...