恕我直言!!!对于Maven,菜鸟玩dependency,神仙玩plugin
打包是一项神圣、而庄严的工作。package意味着我们离生产已经非常近了。它会把我们之前的大量工作浓缩成为一个、或者多个文件。接下来,运维的同学就可以拿着这些个打包文件在生产上纵横四海了。
这么一项庄严、神圣的工作,却没有受到多数人的关注,大家习惯去网上随意copy一段pom的xml代码,往自己项目里面一扔,然后就开始执行package打包了。大多数只知道,Maven帮助我管理了JAR包的依赖,可以自动下载,很方便。确实,因为它太方便了,很多时候,我们几乎是没有感知它的存在。想起来某个功能的时候,直接去使用就可以了。
而构建的工作其实并不简单!例如:
- 打包后的程序,与生产环境JAR包冲突
- 依赖中有多个版本的依赖,如何选择、排除依赖
- 编译scala,某些JAR包的调用存在兼容问题
- 如何根据不同的环境来加载不同的配置,例如:本地环境、集群环境。
- 编译开源项目报错,根本无从下手解决。
- ...
其实,稍微离生产环境近一些,我们会发现很多的问题都暴露了出来。碰到这些问题的时候,当然可以第一时间百度。但为了能够更精准的定位问题、减少打包时候给别人挖坑,我们还是很有必要来了解一些关于Maven的细节。
目录
菜鸟玩dependency,神仙玩plugin
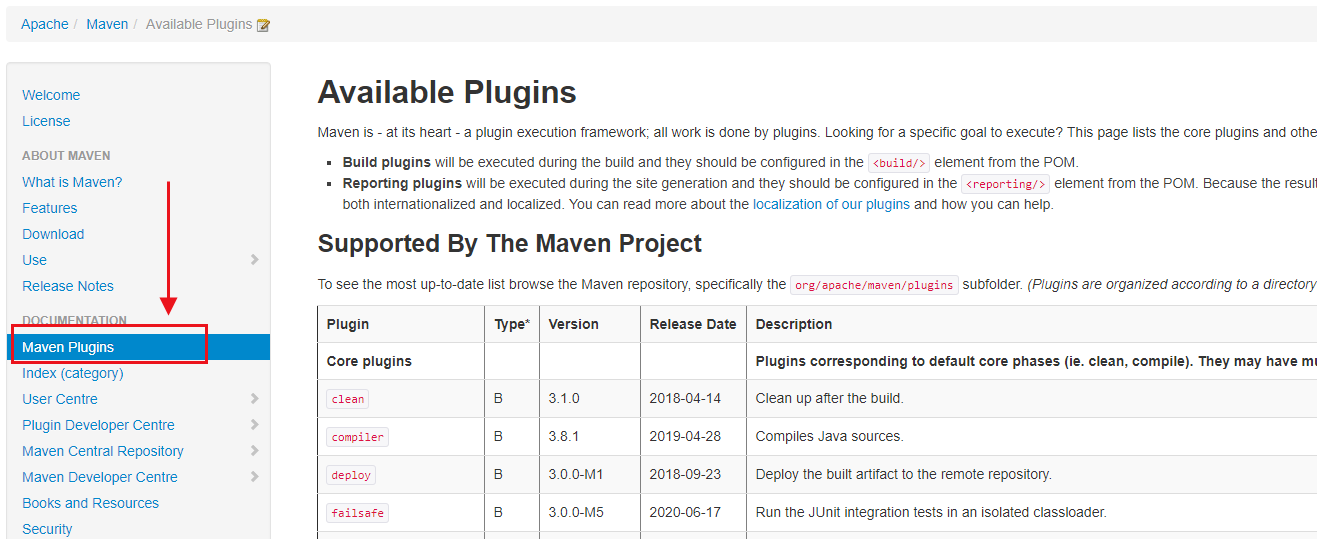
我们使用Maven的时候,95%的时候关注是dependency,而很少有人真正会花时间去研究Maven的plugin。但小猴要告诉大家,其实Maven工作的核心是plugin,而不是dependency。好吧!再直接一点,菜鸟玩dependency,神仙玩plugin。是不是拼命想要反驳我,大家看看官网Plugin在Maven文档的位置,这意味着什么?
灵魂拷问:大家留意过吗?是不是只去官网上下载Maven,然后随便百度一个教程就开始用Maven了?
分析Hadoop Example模块打包
学习的一种最好方式就是借鉴,借鉴优秀的开源项目。看看别人是怎么做的。所以,接下来,我们就来看看Hadoop是如何打包的。为了方便给大家演示,小猴特意用Maven给大家演示一遍编译、打包。这样效果会明显些。
操作步骤:
- 在github上找到Apahce/hadoop项目(https://github.com/apache/hadoop)
- 找到hadoop-mapreduce-project / hadoop-mapreduce-examples模块。
- 打开pom.xml文件。
<project xmlns="http://maven.apache.org/POM/4.0.0"

  xmlns:xsi="http://www.w3.org/2001/XMLSchema-instance"

  xsi:schemaLocation="http://maven.apache.org/POM/4.0.0

                      https://maven.apache.org/xsd/maven-4.0.0.xsd">

  <modelVersion>4.0.0</modelVersion>

  <parent>

    <groupId>org.apache.hadoop</groupId>

    <artifactId>hadoop-project</artifactId>

    <version>3.4.0-SNAPSHOT</version>

    <relativePath>../../hadoop-project</relativePath>

  </parent>

  <artifactId>hadoop-mapreduce-examples</artifactId>

  <version>3.4.0-SNAPSHOT</version>

  <description>Apache Hadoop MapReduce Examples</description>

  <name>Apache Hadoop MapReduce Examples</name>

  <packaging>jar</packaging>

  <properties>

    <mr.examples.basedir>${basedir}</mr.examples.basedir>

  </properties>

  <dependencies>

    <dependency>

      <groupId>commons-cli</groupId>

      <artifactId>commons-cli</artifactId>

    </dependency>

    <dependency>

      <groupId>commons-logging</groupId>

      <artifactId>commons-logging</artifactId>

    </dependency>

    <dependency>

      <groupId>org.apache.hadoop</groupId>

      <artifactId>hadoop-mapreduce-client-jobclient</artifactId>

      <scope>provided</scope>

    </dependency>

    <dependency>

      <groupId>org.apache.hadoop</groupId>

      <artifactId>hadoop-mapreduce-client-jobclient</artifactId>

      <scope>test</scope>

      <type>test-jar</type>

    </dependency>

    <dependency>

      <groupId>org.apache.hadoop</groupId>

      <artifactId>hadoop-common</artifactId>

      <scope>provided</scope>

    </dependency>

    <dependency>

      <groupId>org.apache.hadoop</groupId>

      <artifactId>hadoop-common</artifactId>

      <scope>test</scope>

      <type>test-jar</type>

    </dependency>

    <dependency>

      <groupId>org.apache.hadoop</groupId>

      <artifactId>hadoop-hdfs-client</artifactId>

      <scope>runtime</scope>

    </dependency>

    <dependency>

       <groupId>org.apache.hadoop</groupId>

       <artifactId>hadoop-hdfs</artifactId>

       <scope>test</scope>

       <type>test-jar</type>

     </dependency>

     <dependency>

       <groupId>org.apache.hadoop</groupId>

       <artifactId>hadoop-yarn-server-tests</artifactId>

       <scope>test</scope>

       <type>test-jar</type>

     </dependency>

     <dependency>

       <groupId>org.apache.hadoop</groupId>

       <artifactId>hadoop-mapreduce-client-app</artifactId>

       <scope>provided</scope>

     </dependency>

     <dependency>

       <groupId>org.apache.hadoop</groupId>

       <artifactId>hadoop-mapreduce-client-app</artifactId>

       <type>test-jar</type>

       <scope>test</scope>

     </dependency>

    <dependency>

      <groupId>com.sun.jersey.jersey-test-framework</groupId>

      <artifactId>jersey-test-framework-grizzly2</artifactId>

      <scope>test</scope>

    </dependency>

     <dependency>

       <groupId>org.apache.hadoop</groupId>

       <artifactId>hadoop-mapreduce-client-hs</artifactId>

       <scope>test</scope>

     </dependency>

     <dependency>

       <groupId>org.hsqldb</groupId>

       <artifactId>hsqldb</artifactId>

       <scope>provided</scope>

     </dependency>

     <dependency>

      <groupId>org.apache.hadoop.thirdparty</groupId>

      <artifactId>hadoop-shaded-guava</artifactId>

      <scope>provided</scope>

     </dependency>

    <dependency>

      <groupId>org.slf4j</groupId>

      <artifactId>slf4j-api</artifactId>

    </dependency>

    <dependency>

      <groupId>org.assertj</groupId>

      <artifactId>assertj-core</artifactId>

      <scope>test</scope>

    </dependency>

  </dependencies>

  <build>

   <plugins>

    <plugin>

    <groupId>org.apache.maven.plugins</groupId>

     <artifactId>maven-jar-plugin</artifactId>

      <configuration>

       <archive>

         <manifest>

           <mainClass>org.apache.hadoop.examples.ExampleDriver</mainClass>

         </manifest>

       </archive>

     </configuration>

    </plugin>

      <plugin>

        <groupId>org.codehaus.mojo</groupId>

        <artifactId>findbugs-maven-plugin</artifactId>

         <configuration>

          <findbugsXmlOutput>true</findbugsXmlOutput>

          <xmlOutput>true</xmlOutput>

          <excludeFilterFile>${mr.examples.basedir}/dev-support/findbugs-exclude.xml</excludeFilterFile>

          <effort>Max</effort>

        </configuration>

      </plugin>

      <plugin>

        <groupId>org.apache.rat</groupId>

        <artifactId>apache-rat-plugin</artifactId>

        <configuration>

          <excludes>

            <exclude>src/main/java/org/apache/hadoop/examples/dancing/puzzle1.dta</exclude>

          </excludes>

        </configuration>

      </plugin>

   </plugins>

   </build>

</project>
通过浏览hadoop example的xml文件,我们发现了以下几点:
所有的依赖都在父工程hadoop-project的pom.xml中定义好了。在hadoop example项目中,没有出现任何一个版本号。
Hadoop使用了三个插件,一个是maven-jar-plugin、一个是findbugs-maven-plugin、还有一个是apache-rat-plugin。
我们进入到example模块中pom.xml所在的目录中,直接执行mvn package试试看。
[root@compile hadoop-mapreduce-examples]# mvn package

[INFO] Scanning for projects...

[INFO]

[INFO] ------------< org.apache.hadoop:hadoop-mapreduce-examples >-------------

[INFO] Building Apache Hadoop MapReduce Examples 3.2.1

[INFO] --------------------------------[ jar ]---------------------------------

Downloading from apache.snapshots.https: https://repository.apache.org/content/repositories/snapshots/org/apache/hadoop/hadoop-mapreduce-client-app/3.2.1/hadoop-mapreduce-client-app-3.2.1-tests.jar

.....

[INFO]

[INFO] --- maven-antrun-plugin:1.7:run (create-testdirs) @ hadoop-mapreduce-examples ---

[INFO] Executing tasks

main:

[INFO] Executed tasks

[INFO]

[INFO] --- maven-resources-plugin:2.6:resources (default-resources) @ hadoop-mapreduce-examples ---

[INFO] Using 'UTF-8' encoding to copy filtered resources.

[INFO] skip non existing resourceDirectory /opt/hadoop-3.2.1-src/hadoop-mapreduce-project/hadoop-mapreduce-examples/src/main/resources

[INFO]

[INFO] --- maven-compiler-plugin:3.1:compile (default-compile) @ hadoop-mapreduce-examples ---

[INFO] Nothing to compile - all classes are up to date

[INFO]

[INFO] --- maven-resources-plugin:2.6:testResources (default-testResources) @ hadoop-mapreduce-examples ---

[INFO] Using 'UTF-8' encoding to copy filtered resources.

[INFO] skip non existing resourceDirectory /opt/hadoop-3.2.1-src/hadoop-mapreduce-project/hadoop-mapreduce-examples/src/test/resources

[INFO]

[INFO] --- maven-compiler-plugin:3.1:testCompile (default-testCompile) @ hadoop-mapreduce-examples ---

[INFO] Nothing to compile - all classes are up to date

[INFO]

[INFO] --- maven-surefire-plugin:3.0.0-M1:test (default-test) @ hadoop-mapreduce-examples ---

Downloading from central: http://maven.aliyun.com/nexus/content/groups/public/org/apache/maven/surefire/surefire-junit4/3.0.0-M1/surefire-junit4-3.0.0-M1.jar

..........

[INFO]

[INFO] -------------------------------------------------------

[INFO]  T E S T S

[INFO] -------------------------------------------------------

[INFO] Running org.apache.hadoop.examples.TestBaileyBorweinPlouffe

[INFO] Tests run: 2, Failures: 0, Errors: 0, Skipped: 0, Time elapsed: 0.536 s - in org.apache.hadoop.examples.TestBaileyBorweinPlouffe

..........

[INFO]

[INFO] Results:

[INFO]

[INFO] Tests run: 11, Failures: 0, Errors: 0, Skipped: 0

[INFO]

[INFO]

[INFO] --- maven-jar-plugin:2.5:jar (default-jar) @ hadoop-mapreduce-examples ---

[INFO]

[INFO] --- maven-site-plugin:3.6:attach-descriptor (attach-descriptor) @ hadoop-mapreduce-examples ---

[INFO] Skipping because packaging 'jar' is not pom.

[INFO] ------------------------------------------------------------------------

[INFO] BUILD SUCCESS

[INFO] ------------------------------------------------------------------------

[INFO] Total time:  01:11 min

[INFO] Finished at: 2021-02-06T10:49:18+08:00

[INFO] ------------------------------------------------------------------------
很快就编译成功了,我们来看看Maven做了什么:
1、执行maven-antrun-plugin插件的run create-testdirs任务。奇怪的是,Example模块中并没有引入该插件。一会来看看该插件在何处配置的。
[INFO] --- maven-antrun-plugin:1.7:run (create-testdirs) @ hadoop-mapreduce-examples ---

[INFO] Executing tasks
2、执行maven-resources-plugin插件的resources任务,这个插件应该是拷贝resource目录到target的。
[INFO] --- maven-resources-plugin:2.6:resources (default-resources) @ hadoop-mapreduce-examples ---

[INFO] Using 'UTF-8' encoding to copy filtered resources.

[INFO] skip non existing resourceDirectory /opt/hadoop-3.2.1-src/hadoop-mapreduce-project/hadoop-mapreduce-examples/src/main/resources
3、执行maven-compiler-plugin插件的compile任务,注意:现在才开始编译代码。因为发现我们之前已经编译过了,所以此处并没有重新编译class。
[INFO] --- maven-compiler-plugin:3.1:compile (default-compile) @ hadoop-mapreduce-examples ---

[INFO] Compiling 47 source files to /opt/hadoop-3.2.1-src/hadoop-mapreduce-project/hadoop-mapreduce-examples/target/classes
4、执行maven-resources-plugin插件的testResources任务,顾名思义,就是将单元测试相关的resource目录拷贝到target。
[INFO] --- maven-resources-plugin:2.6:testResources (default-testResources) @ hadoop-mapreduce-examples ---

[INFO] Using 'UTF-8' encoding to copy filtered resources.

[INFO] skip non existing resourceDirectory /opt/hadoop-3.2.1-src/hadoop-mapreduce-project/hadoop-mapreduce-examples/src/test/resources
5、执行maven-compiler-plugin插件的testCompile任务,同样,将单元测试的文件编译一遍。
[INFO] --- maven-compiler-plugin:3.1:testCompile (default-testCompile) @ hadoop-mapreduce-examples ---

[INFO] Compiling 7 source files to /opt/hadoop-3.2.1-src/hadoop-mapreduce-project/hadoop-mapreduce-examples/target/test-classes
6、执行maven-surefire-plugin插件的test任务,开始执行单元测试。确保编译的代码没有问题。
INFO] -------------------------------------------------------

[INFO]  T E S T S

[INFO] -------------------------------------------------------

[INFO] Running org.apache.hadoop.examples.TestBaileyBorweinPlouffe

[INFO] Tests run: 2, Failures: 0, Errors: 0, Skipped: 0, Time elapsed: 0.436 s - in org.apache.hadoop.examples.TestBaileyBorweinPlouffe

[INFO] Running org.apache.hadoop.examples.TestWordStats

[INFO] Tests run: 3, Failures: 0, Errors: 0, Skipped: 0, Time elapsed: 4.332 s - in org.apache.hadoop.examples.TestWordStats

[INFO] Running org.apache.hadoop.examples.pi.math.TestLongLong

[INFO] Tests run: 2, Failures: 0, Errors: 0, Skipped: 0, Time elapsed: 0.163 s - in org.apache.hadoop.examples.pi.math.TestLongLong

[INFO] Running org.apache.hadoop.examples.pi.math.TestModular

[INFO] Tests run: 1, Failures: 0, Errors: 0, Skipped: 0, Time elapsed: 0.164 s - in org.apache.hadoop.examples.pi.math.TestModular

[INFO] Running org.apache.hadoop.examples.pi.math.TestSummation

[INFO] Tests run: 1, Failures: 0, Errors: 0, Skipped: 0, Time elapsed: 0.091 s - in org.apache.hadoop.examples.pi.math.TestSummation

[INFO] Running org.apache.hadoop.examples.terasort.TestTeraSort

[INFO] Tests run: 2, Failures: 0, Errors: 0, Skipped: 0, Time elapsed: 4.449 s - in org.apache.hadoop.examples.terasort.TestTeraSort
7、执行maven-jar-plugin插件的jar任务,这个任务是打包成jar文件。
[INFO] --- maven-jar-plugin:2.5:jar (default-jar) @ hadoop-mapreduce-examples ---

[INFO] Building jar: /opt/hadoop-3.2.1-src/hadoop-mapreduce-project/hadoop-mapreduce-examples/target/hadoop-mapreduce-examples-3.2.1.jar
8、执行maven-site-plugin的attach-descriptor任务。该任务只有项目是pom打包时候才可用,将site.xml(site描述符)添加到部署的文件列表中。
[INFO] --- maven-site-plugin:3.6:attach-descriptor (attach-descriptor) @ hadoop-mapreduce-examples ---

[INFO] Skipping because packaging 'jar' is not pom.
由此,我们可以发现,当我们执行一个package、compile、或者clean命令时,其实背后都是执行Maven的一个插件。只不过有的插件是Maven自带的,直接可以使用,当我们需要自定义插件的行为时,就需要显示在pom.xml中显式配置插件了。
Maven中有大量的、丰富的插件供开发人员使用。
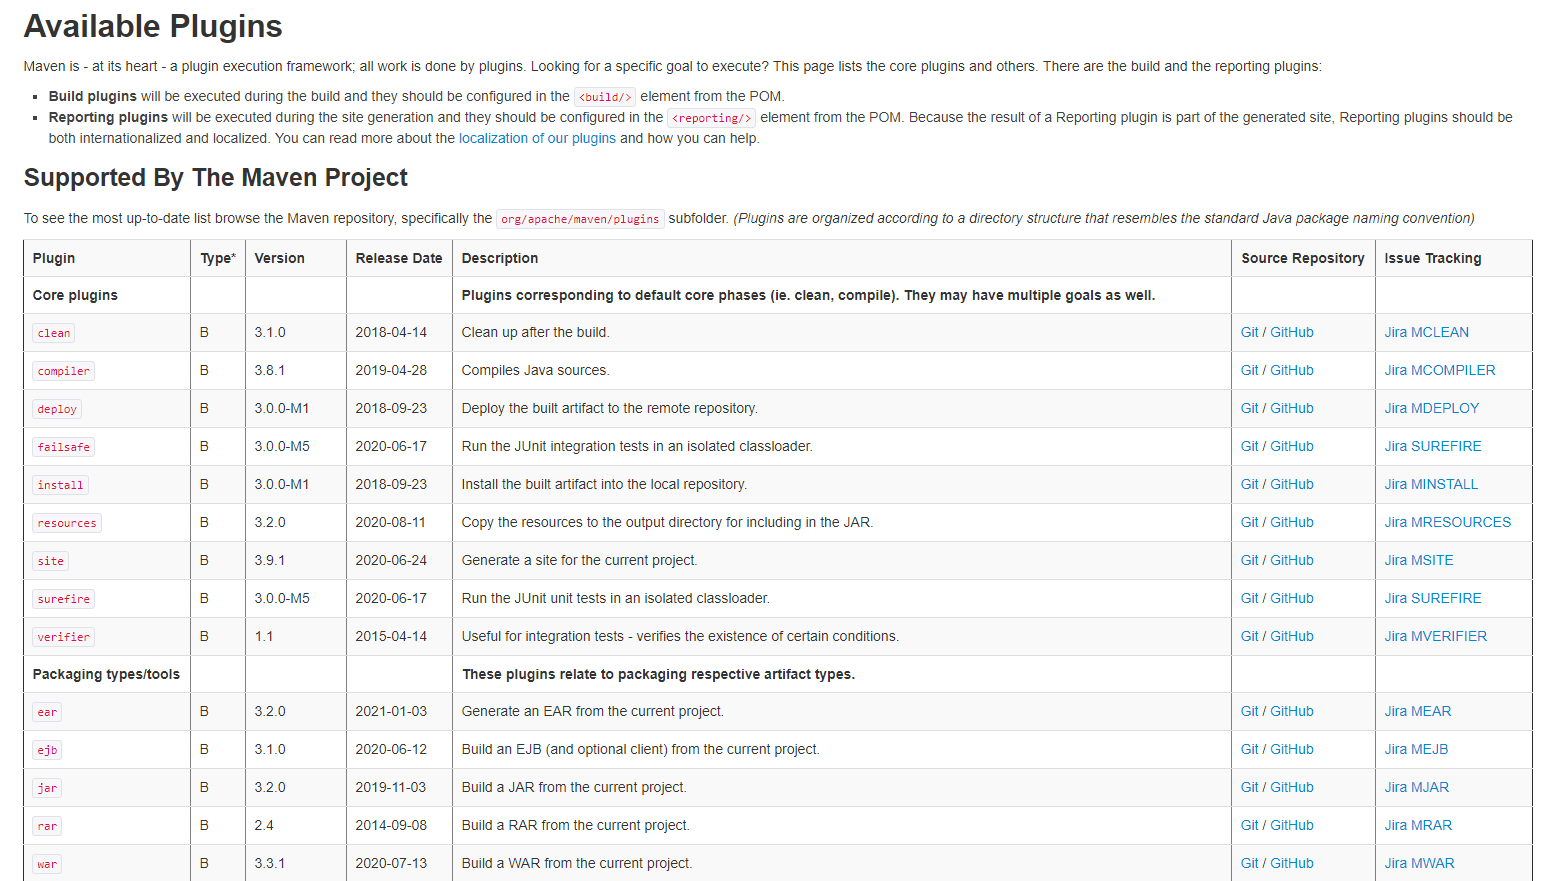
地址:https://maven.apache.org/plugins/
我们可以点击任意一个plugin,查看其具体的内容。
maven-antrun-plugin插件
我们发现在example模块的父模块hadoop-project中有一个pom.xml。
 <plugin>

     <groupId>org.apache.maven.plugins</groupId>

     <artifactId>maven-antrun-plugin</artifactId>

     <executions>

         <execution>

             <id>create-testdirs</id>

             <phase>validate</phase>

             <goals>

                 <goal>run</goal>

             </goals>

             <configuration>

                 <target>

                     <mkdir dir="${test.build.dir}"/>

                     <mkdir dir="${test.build.data}"/>

                 </target>

             </configuration>

         </execution>

     </executions>

</plugin>
我们看到这里面有配置一些插件,其中就个maven-antrun-plugin。该插件会执行run#create-testdirs任务,并且在validate阶段执行。我们看到,该插件执行了两次mkdir。
maven-jar-plugin插件
插件配置如下:
<plugin>

    <groupId>org.apache.maven.plugins</groupId>

    <artifactId>maven-jar-plugin</artifactId>

    <configuration>

        <archive>

            <manifest>

                <mainClass>org.apache.hadoop.examples.ExampleDriver</mainClass>

            </manifest>

        </archive>

    </configuration>

</plugin>
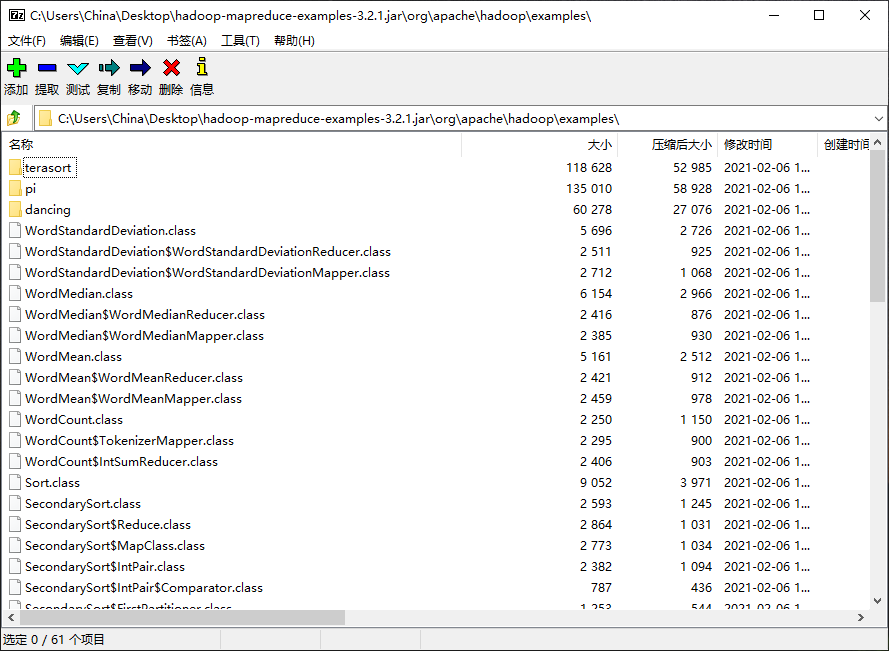
前面,我们看到了是在执行package阶段时自动执行的。并且指定了运行的主类是ExampleDriver。通过查看打包后的JAR文件,我们可以发现,JAR插件只会将项目中的class文件打包到JAR文件中,并不会打包其他的依赖。
并且,在JAR包的META-INF(元数据中),可以看到MAINFEST.MF文件,已经生成了运行主类:
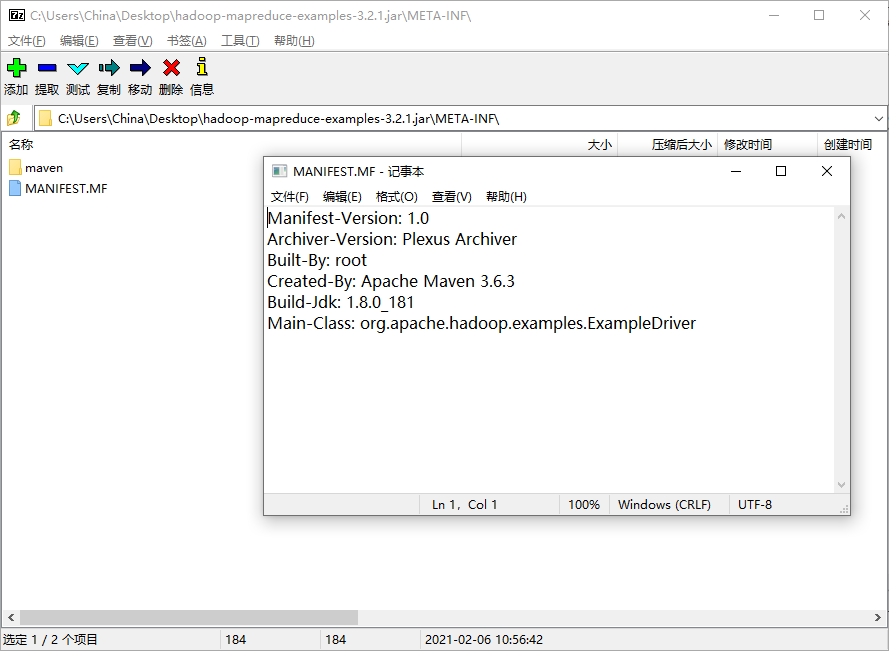
这个插件的相关说明,可以参看官网:https://maven.apache.org/plugins/maven-jar-plugin/
JAR包中的META-INF目录
在每个jar包中有一个META-INF目录,顾名思义。它肯定是包含了JAR文件的元数据相关。Java基于META-INF目录中的文件来配置Java应用程序、类加载器以及其他服务。它包含以下内容:
MANIFEST.MF
用于定义扩展名以及打包相关的清单。
Manifest-Version: 1.0

Archiver-Version: Plexus Archiver

Built-By: China

Created-By: Apache Maven 3.5.0

Build-Jdk: 1.8.0_241

Main-Class: cn.monkey.StreamingJob
该文件中显示了文件的版本、由哪个用户构建的、由哪个应用创建的、构建的JDK版本、以及非常重要的Main-Class。
INDEX.LIST
该文件由JAR工具的-i选项生成,包括了应用程序或者扩展中定义的包的位置。用于类加载器加速类加载过程。
xxx.SF
JAR包的签名文件
xxx.DSA
与SF文件关联的签名块文件。该文件存储了签名文件对应的数字签名。
Maven插件
Maven构建生命周期
Maven是一个项目管理工具,它把项目的构建主要分为了以下阶段:
- validate:验证项目是否正确,所有必要的信息是否均已经提供
- compile:编译项目的源代码。
- test:运行单元测试。
- package:打包已编译的代码。
- verify:对集成测试结果进行检查,确保符合质量标准。
- install:将软件包安装到本地仓库。
- deploy:将最终的软件包复制到远程仓库,方便和其他开发人员共享。
也就是说,只要是一个Maven项目,从源代码到一个可运行的程序,需要经历着一系列的构建阶段。而每个阶段的背后,是Maven提供了一个构建过程的核心执行引擎,这个核心的项目构建执行引擎是由大量的插件来执行具体的任务。
重新定义Maven
让我们从技术角度,重新定义Maven——一个包含了很多插件的框架。真正执行各种Maven操作的其实都是插件。例如:
- 构建JAR包
- 构建WAR包
- 编译代码
- 执行单元测试
- 创建项目文档
等等。只要是能够想到需要在项目上执行的所有操作,其背后都是插件实现的。
插件是Maven的核心功能,一旦定义好了插件,就可以在多个项目中重用。想想,我们是不是在每个pom.xml配置打包插件、编译插件等等。找到pom.xml的位置,然后执行 package、comile、clean等操作即可。当我们执行:
mvn compile
的时候,Maven得知道,哦!当前要执行编译了。由此可以知道,Maven的插件是由mvn的参数来驱动的。这些参数定义了插件的目标(或者Mojo)。
Mojo
Maven中最简单的插件是Clean Plugin。它只是负责删除Maven项目的target目录。但运行mvn clean时,Maven将执行Clean插件中定义的clean目标(Goal),并删除目标目录。Clean插件还定义了可用于自定义插件行为的参数,长概述为outputDirectory,默认为${project.build.directory}。
Mojo实际上是Maven插件中的一个目标(Goal),一个插件可以包含许多的Goal。我们可以用带注解的Java类或者BeanShell脚本来定义Mojo。它指定了Goal相关的元数据:Goal名称、以及Goal所运行的生命周期、以及参数。
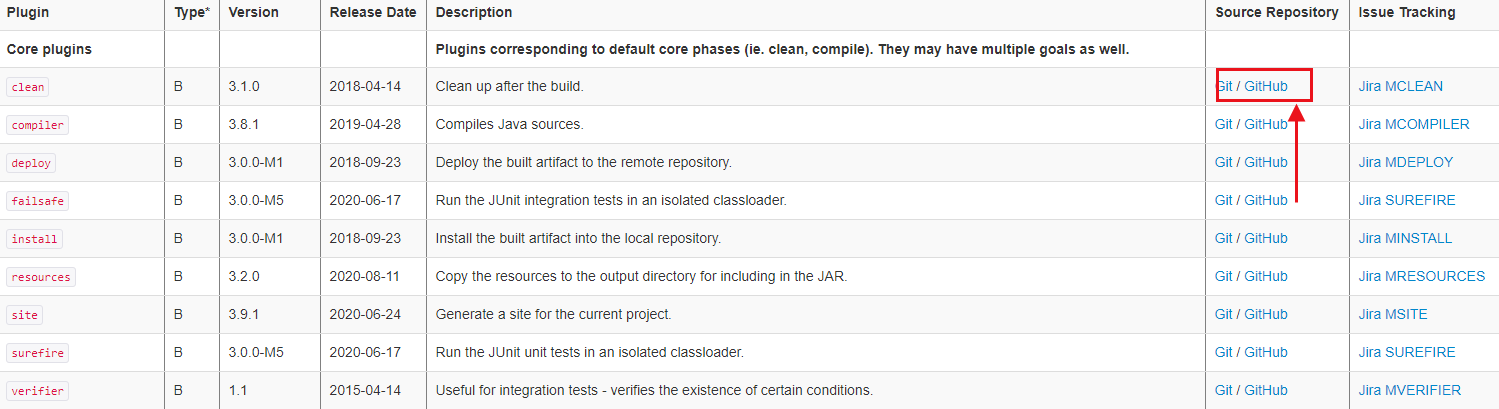
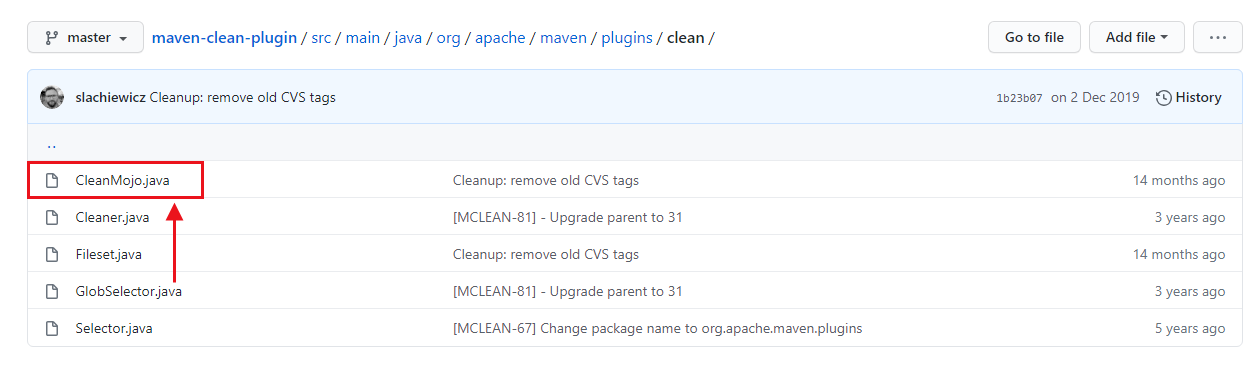
查看clean插件源码
通过Maven官网的plugins链接,我们可以找到clean插件在github的地址。
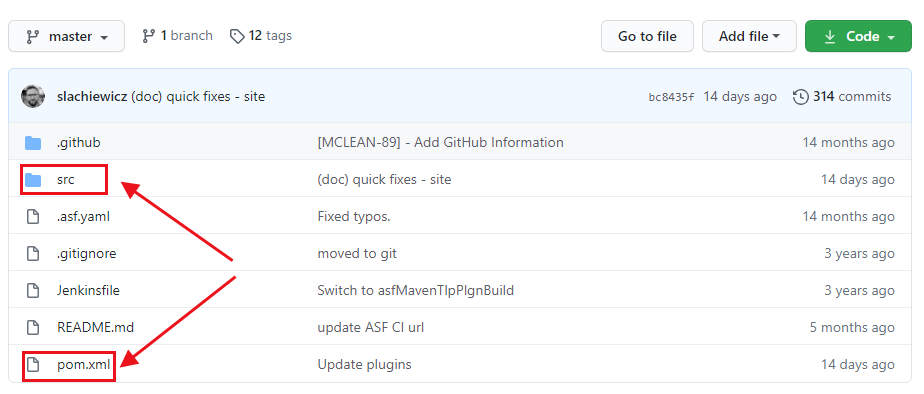
看到src目录和pom.xml,我们就可以知道,原来Maven的plugin也是一个Maven标准项目。先来看看pom.xml里面有什么。为了方便观察,我删除了一些代码。
<project>

  <modelVersion>4.0.0</modelVersion>

  <parent>

    <groupId>org.apache.maven.plugins</groupId>

    <artifactId>maven-plugins</artifactId>

    <version>34</version>

    <relativePath/>

  </parent>

  <properties>

    <mavenVersion>3.1.1</mavenVersion>

    <javaVersion>7</javaVersion>

    <surefire.version>2.22.2</surefire.version>

    <mavenPluginToolsVersion>3.6.0</mavenPluginToolsVersion>

    <project.build.outputTimestamp>2020-04-07T21:04:00Z</project.build.outputTimestamp>

  </properties>

  <dependencies>

    <dependency>

      <groupId>org.apache.maven</groupId>

      <artifactId>maven-plugin-api</artifactId>

      <version>${mavenVersion}</version>

    </dependency>

    <dependency>

      <groupId>org.apache.maven.shared</groupId>

      <artifactId>maven-shared-utils</artifactId>

      <version>3.2.1</version>

    </dependency>

    <!-- dependencies to annotations -->

    <dependency>

      <groupId>org.apache.maven.plugin-tools</groupId>

      <artifactId>maven-plugin-annotations</artifactId>

      <scope>provided</scope>

    </dependency>

  <build>

    <pluginManagement>

      <plugins>

        <!-- remove with next parent upgrade -->

        <plugin>

          <artifactId>maven-project-info-reports-plugin</artifactId>

          <version>3.1.1</version>

        </plugin>

        <plugin>

          <artifactId>maven-enforcer-plugin</artifactId>

          <version>3.0.0-M3</version>

        </plugin>

        <plugin>

          <artifactId>maven-javadoc-plugin</artifactId>

          <version>3.2.0</version>

        </plugin>

        <plugin>

          <artifactId>maven-site-plugin</artifactId>

          <version>3.9.1</version>

        </plugin>

      </plugins>

    </pluginManagement>

  </build>

  <profiles>

    <profile>

      <id>run-its</id>

      <build>

        <pluginManagement>

          <plugins>

            <plugin>

              <groupId>org.apache.maven.plugins</groupId>

              <artifactId>maven-invoker-plugin</artifactId>

              <configuration>

                <debug>true</debug>

                <addTestClassPath>true</addTestClassPath>

                <projectsDirectory>src/it</projectsDirectory>

                <cloneProjectsTo>${project.build.directory}/it</cloneProjectsTo>

                <pomIncludes>

                  <pomInclude>*/pom.xml</pomInclude>

                </pomIncludes>

                <preBuildHookScript>setup</preBuildHookScript>

                <postBuildHookScript>verify</postBuildHookScript>

                <localRepositoryPath>${project.build.directory}/local-repo</localRepositoryPath>

                <settingsFile>src/it/settings.xml</settingsFile>

                <goals>

                  <goal>clean</goal>

                </goals>

              </configuration>

            </plugin>

          </plugins>

        </pluginManagement>

      </build>

    </profile>

  </profiles>

</project>
我们看到,pom.xml中引入了一些必要的依赖、以及定义了一些其他插件的版本、在profile中,还定义了maven-invoker-plugin的配置。里面配置了
Invoker插件:用于运行一组Maven项目,该插件可以确定每个项目执行是否成功,并且可以选择验证从给定项目执行生成的输出。比较适合用于集成测试。
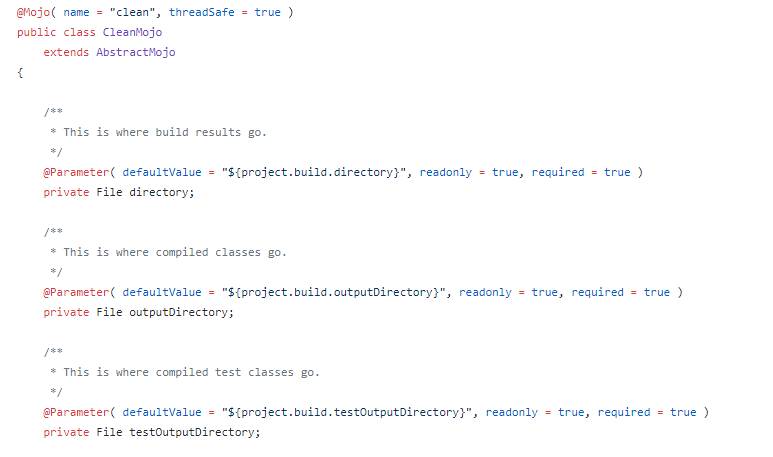
我们看到了源码中有一个CleanMojo的源文件,代码中使用了注解来定义插件的Goal和参数。
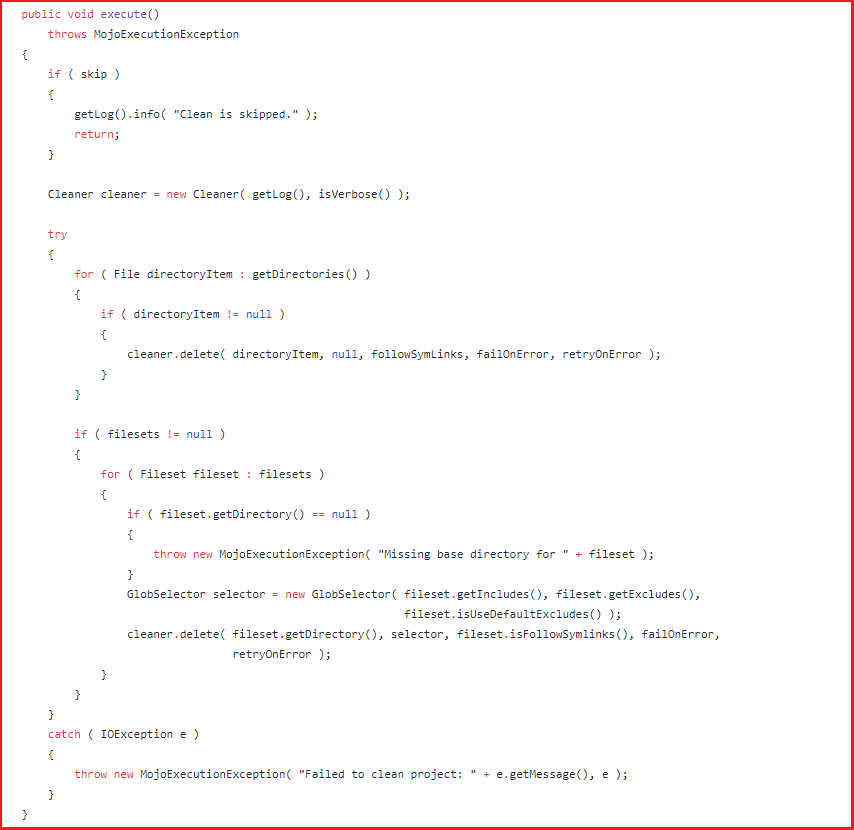
我们看到execute中就是执行clean目标,里面调用了Cleaner来清理文件。再查看下install插件的Mojo
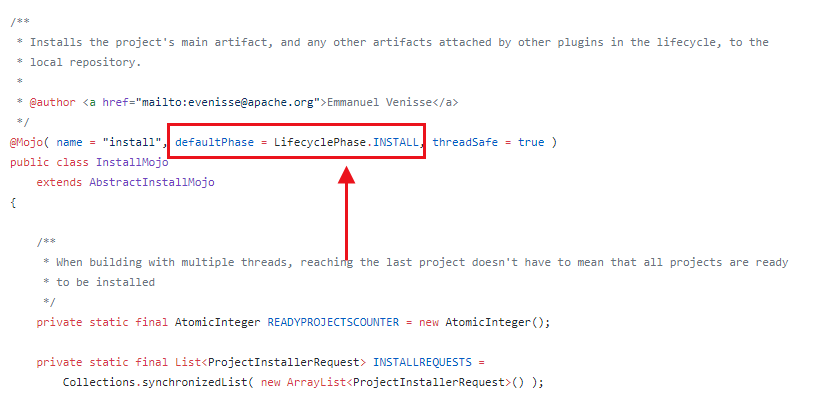
install默认绑定的是INSTALL阶段。
看完上面的源码,我们知道:以后使用插件,可以看看它的Mojo文件就知道它对应的目标是什么、参数是什么。我们还可以通过插件的源码来进行错误排查。
分析Flink Archetype中的pom.xml
scala版本的pom.xml依赖要比Java版本要复杂,因为Maven默认就是用于构建Java的。而针对scala的构建,需要进行额外配置Maven支持。
mvn archetype:generate \

-DarchetypeGroupId=org.apache.flink \

-DarchetypeArtifactId=flink-quickstart-scala \

-DarchetypeVersion=1.12.1
Flink自动生成的代码如下:
<project xmlns="http://maven.apache.org/POM/4.0.0"

         xmlns:xsi="http://www.w3.org/2001/XMLSchema-instance"

         xsi:schemaLocation="http://maven.apache.org/POM/4.0.0 http://maven.apache.org/xsd/maven-4.0.0.xsd">

	<modelVersion>4.0.0</modelVersion>

	<groupId>cn.monkey</groupId>

	<artifactId>flink_scala_demo_1.12.1</artifactId>

	<version>1.0-SNAPSHOT</version>

	<packaging>jar</packaging>

	<name>Flink Quickstart Job</name>

	<repositories>

		<repository>

			<id>apache.snapshots</id>

			<name>Apache Development Snapshot Repository</name>

			<url>https://repository.apache.org/content/repositories/snapshots/</url>

			<releases>

				<enabled>false</enabled>

			</releases>

			<snapshots>

				<enabled>true</enabled>

			</snapshots>

		</repository>

	</repositories>

	<properties>

		<project.build.sourceEncoding>UTF-8</project.build.sourceEncoding>

		<flink.version>1.12.1</flink.version>

		<scala.binary.version>2.11</scala.binary.version>

		<scala.version>2.11.12</scala.version>

		<log4j.version>2.12.1</log4j.version>

	</properties>

	<dependencies>

		<!-- Apache Flink dependencies -->

		<!-- These dependencies are provided, because they should not be packaged into the JAR file. -->

		<dependency>

			<groupId>org.apache.flink</groupId>

			<artifactId>flink-scala_${scala.binary.version}</artifactId>

			<version>${flink.version}</version>

			<scope>provided</scope>

		</dependency>

		<dependency>

			<groupId>org.apache.flink</groupId>

			<artifactId>flink-streaming-scala_${scala.binary.version}</artifactId>

			<version>${flink.version}</version>

			<scope>provided</scope>

		</dependency>

		<dependency>

			<groupId>org.apache.flink</groupId>

			<artifactId>flink-clients_${scala.binary.version}</artifactId>

			<version>${flink.version}</version>

			<scope>provided</scope>

		</dependency>

		<!-- Scala Library, provided by Flink as well. -->

		<dependency>

			<groupId>org.scala-lang</groupId>

			<artifactId>scala-library</artifactId>

			<version>${scala.version}</version>

			<scope>provided</scope>

		</dependency>

		<!-- Add connector dependencies here. They must be in the default scope (compile). -->

		<!-- Example:

		<dependency>

			<groupId>org.apache.flink</groupId>

			<artifactId>flink-connector-kafka_${scala.binary.version}</artifactId>

			<version>${flink.version}</version>

		</dependency>

		-->

		<!-- Add logging framework, to produce console output when running in the IDE. -->

		<!-- These dependencies are excluded from the application JAR by default. -->

		<dependency>

			<groupId>org.apache.logging.log4j</groupId>

			<artifactId>log4j-slf4j-impl</artifactId>

			<version>${log4j.version}</version>

			<scope>runtime</scope>

		</dependency>

		<dependency>

			<groupId>org.apache.logging.log4j</groupId>

			<artifactId>log4j-api</artifactId>

			<version>${log4j.version}</version>

			<scope>runtime</scope>

		</dependency>

		<dependency>

			<groupId>org.apache.logging.log4j</groupId>

			<artifactId>log4j-core</artifactId>

			<version>${log4j.version}</version>

			<scope>runtime</scope>

		</dependency>

	</dependencies>

	<build>

		<plugins>

			<!-- We use the maven-shade plugin to create a fat jar that contains all necessary dependencies. -->

			<!-- Change the value of <mainClass>...</mainClass> if your program entry point changes. -->

			<plugin>

				<groupId>org.apache.maven.plugins</groupId>

				<artifactId>maven-shade-plugin</artifactId>

				<version>3.1.1</version>

				<executions>

					<!-- Run shade goal on package phase -->

					<execution>

						<phase>package</phase>

						<goals>

							<goal>shade</goal>

						</goals>

						<configuration>

							<artifactSet>

								<excludes>

									<exclude>org.apache.flink:force-shading</exclude>

									<exclude>com.google.code.findbugs:jsr305</exclude>

									<exclude>org.slf4j:*</exclude>

									<exclude>org.apache.logging.log4j:*</exclude>

								</excludes>

							</artifactSet>

							<filters>

								<filter>

									<!-- Do not copy the signatures in the META-INF folder.

									Otherwise, this might cause SecurityExceptions when using the JAR. -->

									<artifact>*:*</artifact>

									<excludes>

										<exclude>META-INF/*.SF</exclude>

										<exclude>META-INF/*.DSA</exclude>

										<exclude>META-INF/*.RSA</exclude>

									</excludes>

								</filter>

							</filters>

							<transformers>

								<transformer implementation="org.apache.maven.plugins.shade.resource.ManifestResourceTransformer">

									<mainClass>cn.monkey.StreamingJob</mainClass>

								</transformer>

							</transformers>

						</configuration>

					</execution>

				</executions>

			</plugin>

			<!-- Java Compiler -->

			<plugin>

				<groupId>org.apache.maven.plugins</groupId>

				<artifactId>maven-compiler-plugin</artifactId>

				<version>3.1</version>

				<configuration>

					<source>1.8</source>

					<target>1.8</target>

				</configuration>

			</plugin>

			<!-- Scala Compiler -->

			<plugin>

				<groupId>net.alchim31.maven</groupId>

				<artifactId>scala-maven-plugin</artifactId>

				<version>3.2.2</version>

				<executions>

					<execution>

						<goals>

							<goal>compile</goal>

							<goal>testCompile</goal>

						</goals>

					</execution>

				</executions>

				<configuration>

					<args>

						<arg>-nobootcp</arg>

					</args>

				</configuration>

			</plugin>

			<!-- Eclipse Scala Integration -->

			<plugin>

				<groupId>org.apache.maven.plugins</groupId>

				<artifactId>maven-eclipse-plugin</artifactId>

				<version>2.8</version>

				<configuration>

					<downloadSources>true</downloadSources>

					<projectnatures>

						<projectnature>org.scala-ide.sdt.core.scalanature</projectnature>

						<projectnature>org.eclipse.jdt.core.javanature</projectnature>

					</projectnatures>

					<buildcommands>

						<buildcommand>org.scala-ide.sdt.core.scalabuilder</buildcommand>

					</buildcommands>

					<classpathContainers>

						<classpathContainer>org.scala-ide.sdt.launching.SCALA_CONTAINER</classpathContainer>

						<classpathContainer>org.eclipse.jdt.launching.JRE_CONTAINER</classpathContainer>

					</classpathContainers>

					<excludes>

						<exclude>org.scala-lang:scala-library</exclude>

						<exclude>org.scala-lang:scala-compiler</exclude>

					</excludes>

					<sourceIncludes>

						<sourceInclude>**/*.scala</sourceInclude>

						<sourceInclude>**/*.java</sourceInclude>

					</sourceIncludes>

				</configuration>

			</plugin>

			<plugin>

				<groupId>org.codehaus.mojo</groupId>

				<artifactId>build-helper-maven-plugin</artifactId>

				<version>1.7</version>

				<executions>

					<!-- Add src/main/scala to eclipse build path -->

					<execution>

						<id>add-source</id>

						<phase>generate-sources</phase>

						<goals>

							<goal>add-source</goal>

						</goals>

						<configuration>

							<sources>

								<source>src/main/scala</source>

							</sources>

						</configuration>

					</execution>

					<!-- Add src/test/scala to eclipse build path -->

					<execution>

						<id>add-test-source</id>

						<phase>generate-test-sources</phase>

						<goals>

							<goal>add-test-source</goal>

						</goals>

						<configuration>

							<sources>

								<source>src/test/scala</source>

							</sources>

						</configuration>

					</execution>

				</executions>

			</plugin>

		</plugins>

	</build>

</project>
这是一个标准Flink Maven脚手架,Flink清晰地告诉了我们,哪些依赖是需要设置为provided、哪些是runtime,如果需要使用connector,需要自己额外引入对应不同存储库的connector。我们重点来分析插件:
- maven-shade-plugin:可以看到,Flink是使用shade插件进行fat jar打包的。可以通过mainClass参数配置jar包的入口。
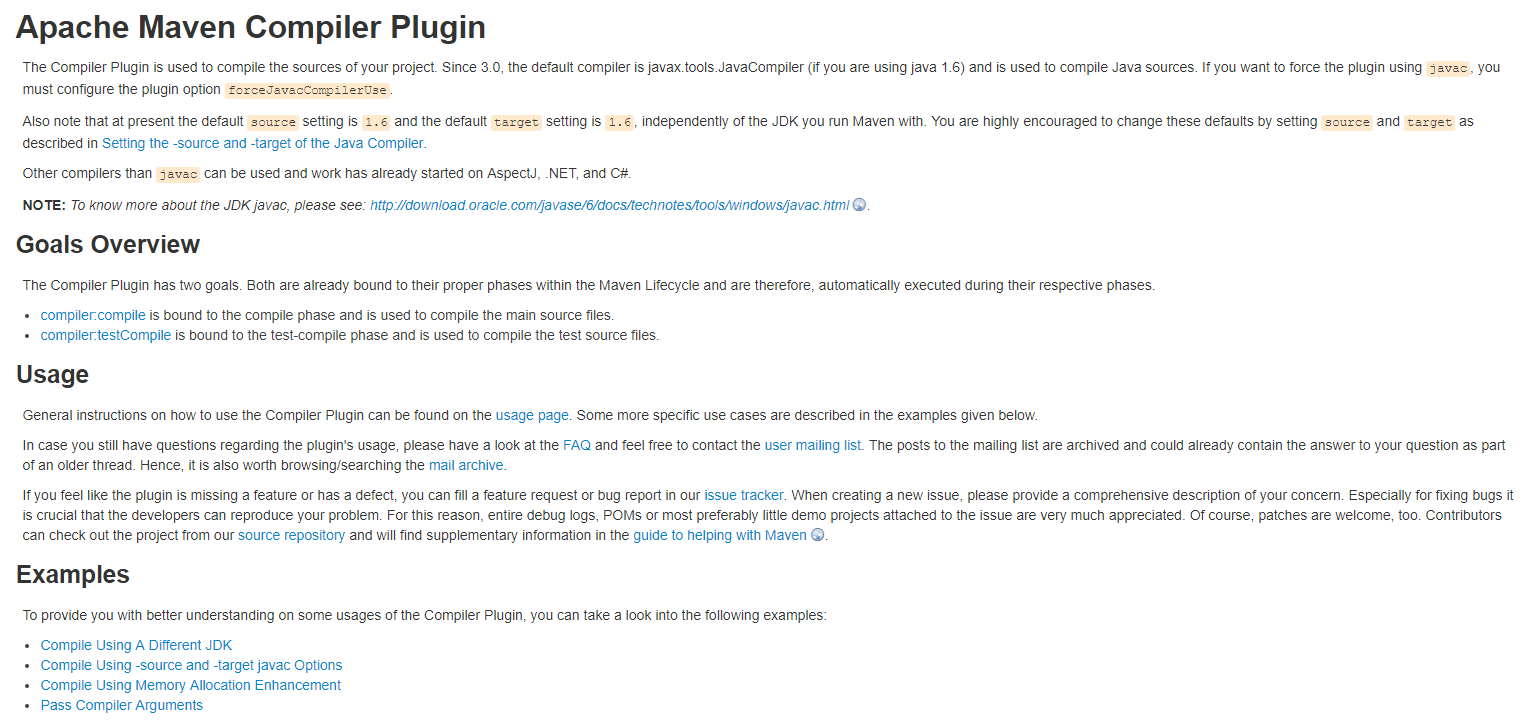
- maven-compiler-plugin:配置Java编译器。Flink默认使用1.8进行编译。
- scala-maven-plugin:配置Scala编译器。
- maven-eclipse-plugin:该插件定义了编译scala和java文件
我们重点来看shade插件。
注意:
如果多个插件配置的生命周期阶段为package,那么会按照pom.xml的顺序依次执行。
Shade插件
<plugin>

    <groupId>org.apache.maven.plugins</groupId>

    <artifactId>maven-shade-plugin</artifactId>

    <version>3.1.1</version>

    <executions>

        <!-- Run shade goal on package phase -->

        <execution>

            <phase>package</phase>

            <goals>

                <goal>shade</goal>

            </goals>

            <configuration>

                <artifactSet>

                    <excludes>

                        <exclude>org.apache.flink:force-shading</exclude>

                        <exclude>com.google.code.findbugs:jsr305</exclude>

                        <exclude>org.slf4j:*</exclude>

                        <exclude>org.apache.logging.log4j:*</exclude>

                    </excludes>

                </artifactSet>

                <filters>

                    <filter>

                        <!-- Do not copy the signatures in the META-INF folder.

         Otherwise, this might cause SecurityExceptions when using the JAR. -->

                        <artifact>*:*</artifact>

                        <excludes>

                            <exclude>META-INF/*.SF</exclude>

                            <exclude>META-INF/*.DSA</exclude>

                            <exclude>META-INF/*.RSA</exclude>

                        </excludes>

                    </filter>

                </filters>

                <transformers>

                    <transformer implementation="org.apache.maven.plugins.shade.resource.ManifestResourceTransformer">

                        <mainClass>cn.monkey.StreamingJob</mainClass>

                    </transformer>

                </transformers>

            </configuration>

        </execution>

    </executions>

</plugin>
Shade插件可以将打包所有的artifact到一个uber-jar(uber-jar表示在一个JAR文件中包含自身、以及所有的依赖)。Shade插件只有一个goal:shade:shade。
可以看到,该插件的生命周期配置在package,也就是执行package时,会自动运行。
在configuration中配置了要排除哪些artifacts。filter中配置了排除所有JAR包中的签名文件。我们可以在artifactSet、filter中来解决包冲突问题。
Assembly插件
简介
很多时候我们需要把项目打包成一个tar.gz包,就像Apache的一些组件一样。通过使用Assembly插件可以将程序、文档、配置文件等等打包成一个“assemblies”。使用一个assembly descriptor可以描述整个过程。使用该插件,可以把应用打包成以下类型:
zip

tar

tar.gz (or tgz)

tar.bz2 (or tbz2)

tar.snappy

tar.xz (or txz)

jar

dir

war
而如果要打包成user-jar,assembly插件提供了一些基本的支持。官方建议还是使用shade插件。Assembly插件的使用步骤如下:
- 选择或编写一个assembly descriptor
- 在pom.xml文件中配置assembly插件
- 运行mvn assembly:single
Assembly介绍
Assembly(程序集)指的是一组文件、目录以及相关的依赖,为了方便软件的安装、部署、以及分发,我们可以把Assembly组织成一个zip包、或者tar.gz这种类型的包。例如:一个Maven项目中包含了控制台应用和FX桌面客户端应用。可以定义两个Assembly,将应用和不同的脚本、依赖绑定到一起。
针对Assembly,需要有一个Assembly Descriptor(程序集描述符),通过assembly descripor文件可以描述将哪些文件复制到bin目录,并且可以修改目录中文件的权限。
Goal
每一个Maven插件都会有一个Goal,Assembly插件也有一个Goal,那就是single,表示创建所有的Assembly。
分析Hadoop项目的Assembly插件
Maven插件配置
我们来看一下Hadoop中如何使用该插件的。
<plugin>

    <groupId>org.apache.maven.plugins</groupId>

    <artifactId>maven-assembly-plugin</artifactId>

    <inherited>false</inherited>

    <executions>

        <execution>

            <id>src-dist</id>

            <phase>package</phase>

            <goals>

                <goal>single</goal>

            </goals>

            <configuration>

                <appendAssemblyId>false</appendAssemblyId>

                <attach>false</attach>

                <finalName>hadoop-${project.version}-src</finalName>

                <outputDirectory>hadoop-dist/target</outputDirectory>

                <!-- Not using descriptorRef and hadoop-assembly dependency -->

                <!-- to avoid making hadoop-main to depend on a module      -->

                <descriptors>

                    <descriptor>hadoop-assemblies/src/main/resources/assemblies/hadoop-src.xml</descriptor>

                </descriptors>

            </configuration>

        </execution>

    </executions>

</plugin>
解释下每个XML节点的意义:
| 配置项 | 说明 |
|---|---|
| appendAssemblyId | 设置为false表示从最终的输出程序集中排除src-dist名字 |
| attach | 控制Assembly插件是否将生成的assembly附加到项目中 |
| finalName | Assembly发行版最终的文件名 |
| outputDirectory | Assembly文件的最终输出目录 |
| descriptors | 默认会从bin、jar-with-dependencies、src、project中加载内置描述符。 |
内置的descriptors可以从assembly.jar中加载。
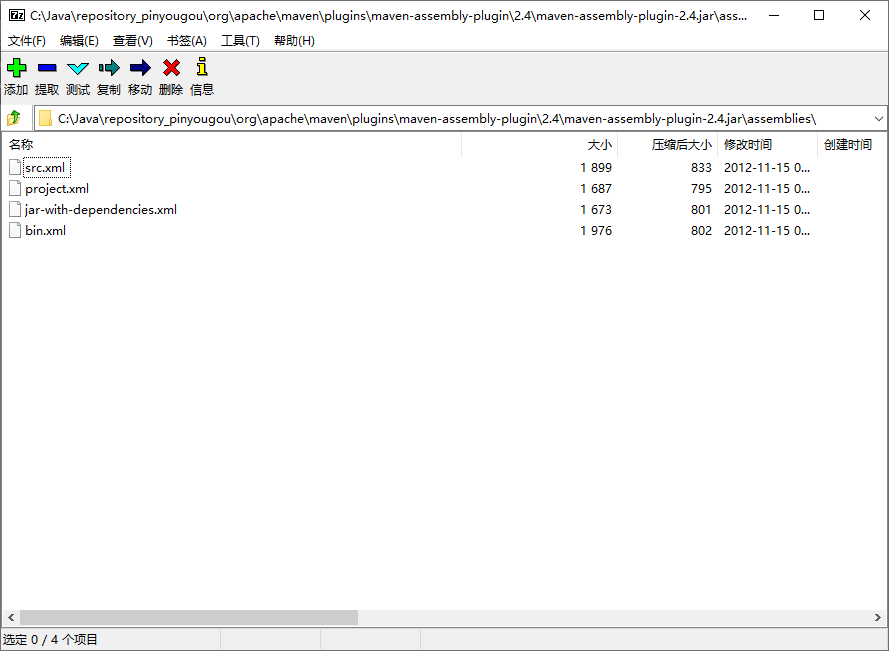
可以参考https://maven.apache.org/plugins/maven-assembly-plugin/descriptor-refs.html看到所有内置的descriptor中说明。这里Hadoop配置的是自己的descriptor。
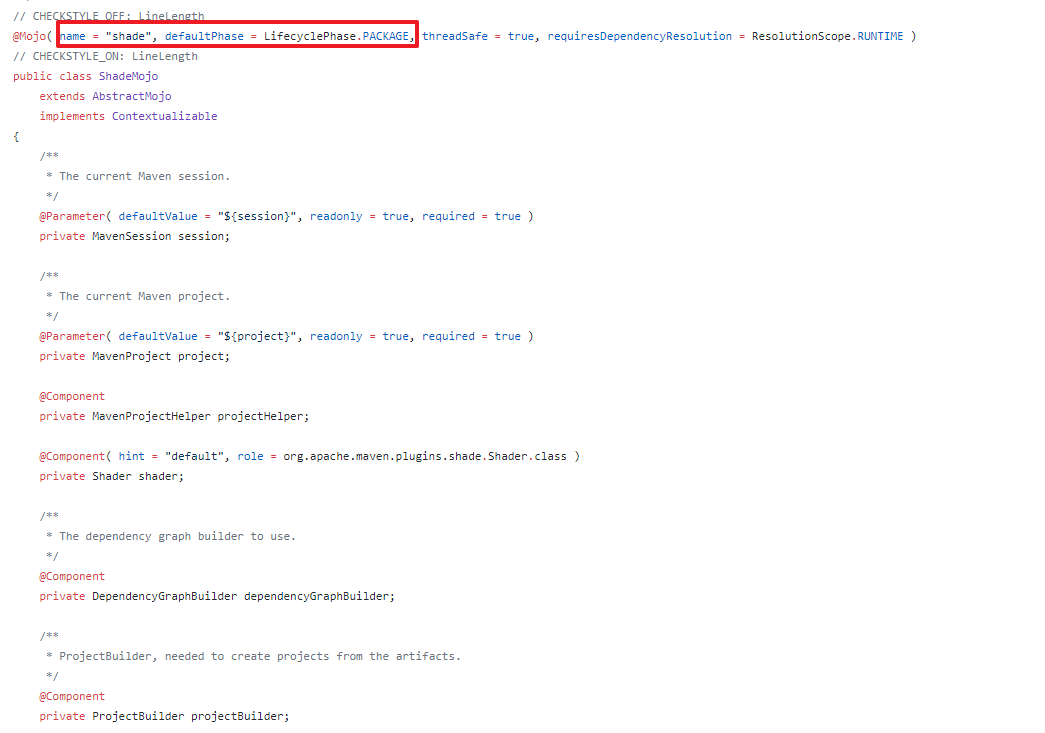
大家可以参考插件的AbstractAssemblyMojo.java中的定义。
hadoop-src.xml Assembly配置
<assembly xmlns="http://maven.apache.org/plugins/maven-assembly-plugin/assembly/1.1.3"

  xmlns:xsi="http://www.w3.org/2001/XMLSchema-instance"

  xsi:schemaLocation="http://maven.apache.org/plugins/maven-assembly-plugin/assembly/1.1.3 http://maven.apache.org/xsd/assembly-1.1.3.xsd">

  <id>hadoop-src</id>

  <formats>

    <format>tar.gz</format>

  </formats>

  <includeBaseDirectory>true</includeBaseDirectory>

  <fileSets>

    <fileSet>

      <directory>.</directory>

      <includes>

        <include>LICENCE.txt</include>

        <include>README.txt</include>

        <include>NOTICE.txt</include>

      </includes>

    </fileSet>

    <fileSet>

      <directory>./licenses</directory>

      <includes>

        <include>*</include>

      </includes>

    </fileSet>

    <fileSet>

      <directory>.</directory>

      <useDefaultExcludes>true</useDefaultExcludes>

      <excludes>

        <exclude>.git/**</exclude>

        <exclude>**/.gitignore</exclude>

        <exclude>**/.svn</exclude>

        <exclude>**/*.iws</exclude>

        <exclude>**/*.ipr</exclude>

        <exclude>**/*.iml</exclude>

        <exclude>**/.classpath</exclude>

        <exclude>**/.project</exclude>

        <exclude>**/.settings</exclude>

        <exclude>**/target/**</exclude>

        <!-- until the code that does this is fixed -->

        <exclude>**/*.log</exclude>

        <exclude>**/build/**</exclude>

        <exclude>**/file:/**</exclude>

        <exclude>**/SecurityAuth.audit*</exclude>

        <exclude>patchprocess/**</exclude>

      </excludes>

    </fileSet>

  </fileSets>

</assembly>
我们可以参考:https://maven.apache.org/plugins/maven-assembly-plugin/assembly.html看到assembly相关的所有配置。
| 配置项 | 配置 | 说明 |
|---|---|---|
| id | hadoop-src | 设置Assembly的id。 |
| formats/format* | tar.gz | 指定assembly的最终格式。这里hadoop配置的是tar.gz,表示最终打包出来一个tar.gz文件,当然可以配置多个。例如:zip、tar、jar等。 |
| includeBaseDirectory | true | 在tar.gz中包括一个base目录。就是tar.gz会包含一个文件夹。而不是直接把大量的文件直接放在tar.gz中。(这个一定要配置true,不然解压安装的时候会很蛋疼。) |
| fileSets | fileset | 指定要包含在Assembly中的模块文件。就是最终要将哪些文件复制到tar.gz中。 |
| fileset/useDefaultExcludes | true | 是否应使用标准排除模式。对于向后兼容性,默认值为true。 |
| fileset/directory | . | 设置模块目录中的绝对或相对位置。例如,“src/main/bin”将选择定义此依赖项的项目的子目录。该目录配置表示要打包哪个目录下的文件。 |
| includes/include* | LICENCE.txt | 定义一组要包含的文件和目录。如果没有配置,表示所有target内容 |
| excludes/exclude* | **/.settings | 定义一组要排除的文件和目录。 |
制作一个属于我们自己的打包程序
需求
我们通过编写一个简单的代码,然后将代码打包成类似于Apache的软件包。代码非常简单:
public class HelloMaven {

    public static void main(String[] args) {

        System.out.println("Hello! Maven Assembly Plugin!");

    }

}
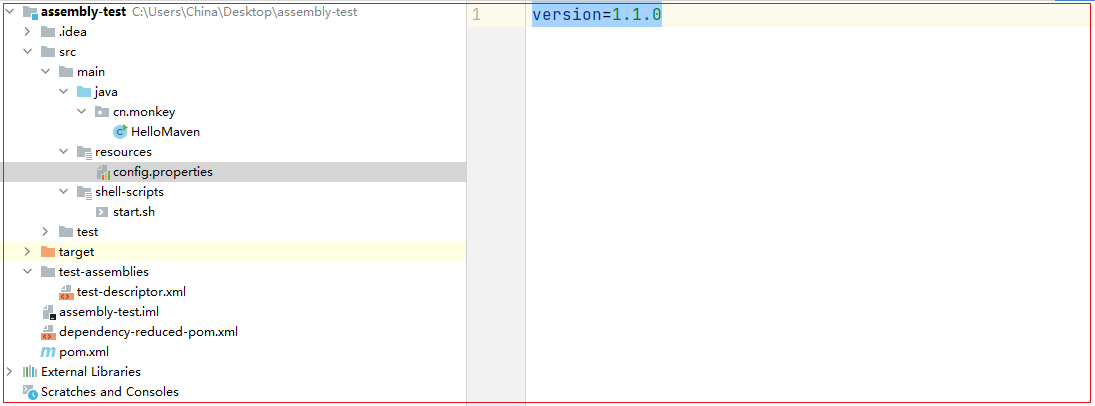
有一个配置文件,我们也需要打包:
version=1.1.0
添加一个测试依赖
在pom.xml中添加以下:
<dependencies>

    <dependency>

        <groupId>commons-cli</groupId>

        <artifactId>commons-cli</artifactId>

        <version>1.2</version>

    </dependency>

</dependencies>
一会我们会用shade插件,将该依赖直接打成uber-jar。
配置shade插件
<plugin>

    <groupId>org.apache.maven.plugins</groupId>

    <artifactId>maven-shade-plugin</artifactId>

    <version>3.1.1</version>

    <executions>

        <!-- Run shade goal on package phase -->

        <execution>

            <phase>package</phase>

            <goals>

                <goal>shade</goal>

            </goals>

            <configuration>

                <filters>

                    <filter>

                        <artifact>*:*</artifact>

                        <excludes>

                            <exclude>META-INF/*.SF</exclude>

                            <exclude>META-INF/*.DSA</exclude>

                            <exclude>META-INF/*.RSA</exclude>

                            <exclude>shell-scripts/*</exclude>

                        </excludes>

                    </filter>

                </filters>

                <transformers>

                    <transformer implementation="org.apache.maven.plugins.shade.resource.ManifestResourceTransformer">

                        <mainClass>cn.monkey.HelloMaven</mainClass>

                    </transformer>

                </transformers>

            </configuration>

        </execution>

    </executions>

</plugin>
执行package时,会先执行maven-jar-plugin。然后就会执行shade插件了。注意:因为我们一会要使用assembly打包,将shade打包的user-jar直接打进tar.gz。所以,shade要配置在assembly插件之前。
注意配置mainClass,也就是JAR的运行主类
配置Assembly插件
配置Maven pom.xml
<plugin>

    <groupId>org.apache.maven.plugins</groupId>

    <artifactId>maven-assembly-plugin</artifactId>

    <inherited>false</inherited>

    <executions>

        <execution>

            <id>assembly-test</id>

            <phase>package</phase>

            <goals>

                <goal>single</goal>

            </goals>

            <configuration>

                <appendAssemblyId>false</appendAssemblyId>

                <attach>false</attach>

                <finalName>${project.artifactId}-bin</finalName>

                <outputDirectory>${project.build.directory}</outputDirectory>

                <!-- Not using descriptorRef and hadoop-assembly dependency -->

                <!-- to avoid making hadoop-main to depend on a module      -->

                <descriptors>

                    <descriptor>test-assemblies/test-descriptor.xml</descriptor>

                </descriptors>

            </configuration>

        </execution>

    </executions>

</plugin>
- finalName为最终打包的文件名,此处为artifactId加上bin后缀
- outputDirectory配置为Maven默认的输出目录,也就是一会打包完会自动在target目录生成tar.gz
配置assembly descriptor
<assembly xmlns="http://maven.apache.org/ASSEMBLY/2.1.0"

          xmlns:xsi="http://www.w3.org/2001/XMLSchema-instance"

          xsi:schemaLocation="http://maven.apache.org/ASSEMBLY/2.1.0 http://maven.apache.org/xsd/assembly-2.1.0.xsd">

<id>assembly-test</id>

<formats>

    <format>tar.gz</format>

</formats>

<fileSets>

    <fileSet>

        <directory>${project.build.directory}</directory>

        <useDefaultExcludes></useDefaultExcludes>

        <outputDirectory>lib</outputDirectory>

        <includes>

            <include>*-shaded.jar</include>

        </includes>

    </fileSet>

    <fileSet>

        <directory>${project.build.directory}/classes</directory>

        <outputDirectory>conf</outputDirectory>

        <includes>

            <include>**/config.properties</include>

        </includes>

    </fileSet>

    <fileSet>

        <directory>${project.build.directory}/classes/shell-scripts</directory>

        <outputDirectory>bin</outputDirectory>

        <fileMode>755</fileMode>

        <includes>

            <include>**/start.sh</include>

        </includes>

    </fileSet>

</fileSets>

</assembly>
- 我们最终的文件以tar.gz方式打包
- 第一个fileset为打包lib,我们最终的程序以jar包形式存放在tar.gz的lib文件夹中
- 第二个fileset打包配置文件,这里直接打包config.properties
- 第三个fileset打包运行的shell脚本,并且配置了755可执行权限
创建运行脚本
在main目录中添加shell-scripts/start.sh,要执行程序直接执行start.sh即可
#!/bin/bash

java -jar lib/${artifact.name}
配置资源打包
<build>

    <resources>

        <resource>

            <directory>src/main/resources</directory>

            <includes>

                <include>**/*</include>

            </includes>

        </resource>

        <resource>

            <targetPath>${project.build.outputDirectory}/shell-scripts</targetPath>

            <directory>src/main/shell-scripts</directory>

            <filtering>true</filtering>

            <includes>

                <include>**/*</include>

            </includes>

        </resource>

    </resources>

    ....

</build>
我们需要对shell-scriptrs下的脚本进行变量替换。
配置profile
<project>

	<profiles>

        <profile>

            <id>pro</id>

            <properties>

                <artifact.name>${project.artifactId}-${project.version}-shaded.jar</artifact.name>

            </properties>

            <activation>

                <!-- 默认激活该profile -->

                <activeByDefault>true</activeByDefault>

            </activation>

        </profile>

    </profiles>

</project>
此处配置默认的Profile为pro,当打包时会用artifact.name属性直接对shell-script中的脚本进行替换。
执行打包
我把Maven的执行过程给大家解析一遍。
# 注意此处自动指定了profile为pro

C:\opt\jdk1.8.0_241\bin\java.exe -Dmaven.multiModuleProjectDirectory=C:\Users\China\Desktop\assembly-test -Dmaven.multiModuleProjectDirectory=$MAVEN_HOME -Dmaven.wagon.http.ssl.insecure=true -Dmaven.wagon.http.ssl.allowall=true -Dmaven.wagon.http.ssl.ignore.validity.dates=true -Dmaven.home=C:\Java\apache-maven-3.5.0 -Dclassworlds.conf=C:\Java\apache-maven-3.5.0\bin\m2.conf "-Dmaven.ext.class.path=C:\Program Files\JetBrains\IntelliJ IDEA Community Edition 2020.3.2\plugins\maven\lib\maven-event-listener.jar" "-javaagent:C:\Program Files\JetBrains\IntelliJ IDEA Community Edition 2020.3.2\lib\idea_rt.jar=58840:C:\Program Files\JetBrains\IntelliJ IDEA Community Edition 2020.3.2\bin" -Dfile.encoding=UTF-8 -classpath C:\Java\apache-maven-3.5.0\boot\plexus-classworlds-2.5.2.jar org.codehaus.classworlds.Launcher -Didea.version=2020.3.2 package -P pro

[INFO] Scanning for projects...

[INFO]

[INFO] ------------------------------------------------------------------------

[INFO] Building assembly-test 1.0-SNAPSHOT

[INFO] ------------------------------------------------------------------------

[INFO]

# 拷贝resoource资源文件

[INFO] --- maven-resources-plugin:2.6:resources (default-resources) @ assembly-test ---

[WARNING] File encoding has not been set, using platform encoding UTF-8, i.e. build is platform dependent!

[WARNING] Using platform encoding (UTF-8 actually) to copy filtered resources, i.e. build is platform dependent!

[INFO] Copying 1 resource

[INFO] Copying 1 resource to C:\Users\China\Desktop\assembly-test\target\classes/shell-scripts

[INFO]

# 执行编译插件

[INFO] --- maven-compiler-plugin:3.1:compile (default-compile) @ assembly-test ---

[INFO] Nothing to compile - all classes are up to date

[INFO]

# 执行test资源拷贝,当前为空

[INFO] --- maven-resources-plugin:2.6:testResources (default-testResources) @ assembly-test ---

[WARNING] Using platform encoding (UTF-8 actually) to copy filtered resources, i.e. build is platform dependent!

[INFO] skip non existing resourceDirectory C:\Users\China\Desktop\assembly-test\src\test\resources

[INFO]

# 执行编译测试用例代码

[INFO] --- maven-compiler-plugin:3.1:testCompile (default-testCompile) @ assembly-test ---

[INFO] Nothing to compile - all classes are up to date

[INFO]

# 执行单元测试

[INFO] --- maven-surefire-plugin:2.12.4:test (default-test) @ assembly-test ---

[INFO] No tests to run.

[INFO]

# 执行Maven的默认jar打包

[INFO] --- maven-jar-plugin:2.4:jar (default-jar) @ assembly-test ---

[INFO] Building jar: C:\Users\China\Desktop\assembly-test\target\assembly-test-1.0-SNAPSHOT.jar

[INFO]

# 执行shade插件打包

[INFO] --- maven-shade-plugin:3.1.1:shade (default) @ assembly-test ---

[INFO] Including commons-cli:commons-cli:jar:1.2 in the shaded jar.

[INFO] Replacing original artifact with shaded artifact.

[INFO] Replacing C:\Users\China\Desktop\assembly-test\target\assembly-test-1.0-SNAPSHOT.jar with C:\Users\China\Desktop\assembly-test\target\assembly-test-1.0-SNAPSHOT-shaded.jar

[INFO] Dependency-reduced POM written at: C:\Users\China\Desktop\assembly-test\dependency-reduced-pom.xml

[INFO]

# 执行assembly插件打包

[INFO] --- maven-assembly-plugin:2.2-beta-5:single (assembly-test) @ assembly-test ---

[INFO] Reading assembly descriptor: test-assemblies/test-descriptor.xml

[INFO] Building tar : C:\Users\China\Desktop\assembly-test\target\assembly-test-bin.tar.gz

[WARNING] Assembly file: C:\Users\China\Desktop\assembly-test\target\assembly-test-bin.tar.gz is not a regular file (it may be a directory). It cannot be attached to the project build for installation or deployment.

[INFO] ------------------------------------------------------------------------

[INFO] BUILD SUCCESS

[INFO] ------------------------------------------------------------------------

[INFO] Total time: 2.202 s

[INFO] Finished at: 2021-02-06T21:19:21+08:00

[INFO] Final Memory: 15M/491M

[INFO] ------------------------------------------------------------------------

Process finished with exit code 0
是不是一目了然?
一顿操作后,我们发现确实打包成了tar.gz了。
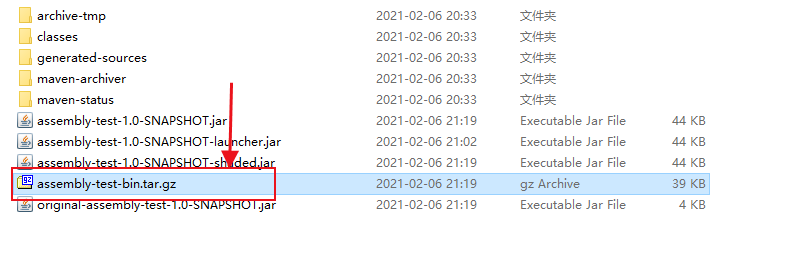
用压缩软件打开看一下:
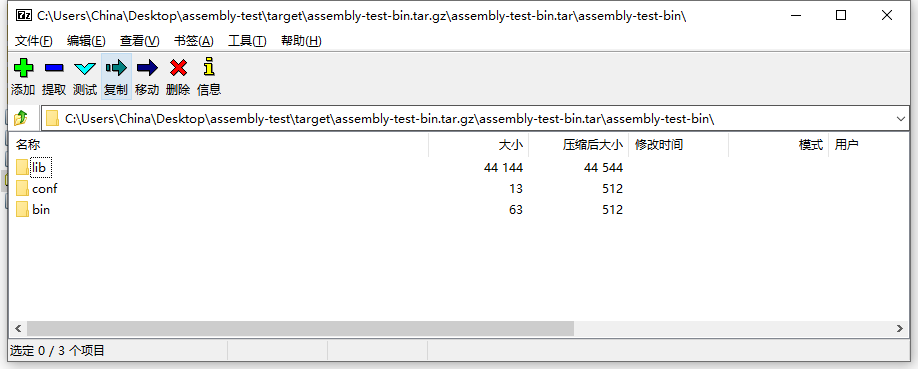
全部都已经打包好了。而且shell脚本已经进行了变量替换。
在Linux上部署
# 上传到Linux服务器

[root@compile assembly-test]# ll

总用量 40

-rw-r--r--. 1 root root 39611 2月   6 21:19 assembly-test-bin.tar.gz

# 解压

[root@compile assembly-test]# tar -xvzf assembly-test-bin.tar.gz

assembly-test-bin/lib/assembly-test-1.0-SNAPSHOT-shaded.jar

assembly-test-bin/conf/config.properties

assembly-test-bin/bin/start.sh

# 执行

[root@compile assembly-test-bin]# pwd

/root/assembly-test/assembly-test-bin

[root@compile assembly-test-bin]# bin/start.sh

Hello! Maven Assembly Plugin!
是不是很酷~这样的程序才是真正的、很正式的程序。
打包源代码
最后为了方便小伙伴们测试,我们把Maven项目的源码打包一份。还是使用assembly插件。
在Assembly中创建一个新的execution
<execution>

    <id>test-source-descriptor</id>

    <phase>compile</phase>

    <goals>

        <goal>single</goal>

    </goals>

    <configuration>

        <appendAssemblyId>false</appendAssemblyId>

        <attach>false</attach>

        <finalName>${project.artifactId}-source</finalName>

        <outputDirectory>${project.build.directory}</outputDirectory>

        <!-- Not using descriptorRef and hadoop-assembly dependency -->

        <!-- to avoid making hadoop-main to depend on a module      -->

        <descriptors>

            <descriptor>test-assemblies/test-source-descriptor.xml</descriptor>

        </descriptors>

    </configuration>

</execution>
注意:我当前配置的phase为compile,也就是编译阶段就会打包好maven的源代码.
为打包源码配置assembly descriptor
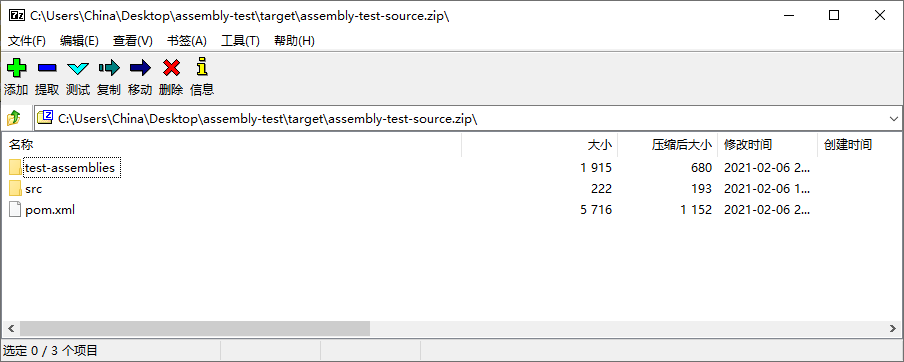
<assembly xmlns="http://maven.apache.org/ASSEMBLY/2.1.0"

          xmlns:xsi="http://www.w3.org/2001/XMLSchema-instance"

          xsi:schemaLocation="http://maven.apache.org/ASSEMBLY/2.1.0 http://maven.apache.org/xsd/assembly-2.1.0.xsd">

<id>test-source-descriptor</id>

<formats>

    <format>zip</format>

</formats>

<fileSets>

    <fileSet>

        <directory>${project.basedir}</directory>

        <useDefaultExcludes></useDefaultExcludes>

        <outputDirectory>.</outputDirectory>

        <includes>

            <include>src/**/*</include>

            <include>test-assemblies/**/*</include>

            <include>pom.xml</include>

        </includes>

    </fileSet>

</fileSets>

</assembly>
此处j将src源码目录、test-assemblies下的所有文件、以及pom.xml一块打包给小伙伴。
执行compile
[INFO] Scanning for projects...

[INFO]

[INFO] ------------------------------------------------------------------------

[INFO] Building assembly-test 1.0-SNAPSHOT

[INFO] ------------------------------------------------------------------------

[INFO]

[INFO] --- maven-resources-plugin:2.6:resources (default-resources) @ assembly-test ---

[WARNING] File encoding has not been set, using platform encoding UTF-8, i.e. build is platform dependent!

[WARNING] Using platform encoding (UTF-8 actually) to copy filtered resources, i.e. build is platform dependent!

[INFO] Copying 1 resource

[INFO] Copying 1 resource to C:\Users\China\Desktop\assembly-test\target\classes/shell-scripts

[INFO]

[INFO] --- maven-compiler-plugin:3.1:compile (default-compile) @ assembly-test ---

[INFO] Nothing to compile - all classes are up to date

[INFO]

[INFO] --- maven-assembly-plugin:2.2-beta-5:single (test-source-descriptor) @ assembly-test ---

[INFO] Reading assembly descriptor: test-assemblies/test-source-descriptor.xml

[INFO] Building zip: C:\Users\China\Desktop\assembly-test\target\assembly-test-source.zip

[INFO] ------------------------------------------------------------------------

[INFO] BUILD SUCCESS

[INFO] ------------------------------------------------------------------------

[INFO] Total time: 1.274 s

[INFO] Finished at: 2021-02-06T21:38:37+08:00

[INFO] Final Memory: 13M/491M

[INFO] ------------------------------------------------------------------------

Process finished with exit code 0
大家看到assembly插件已经执行,并将代码打包好了。
大家看到了,这才是我们做为一个开发应该玩的Maven。本次的案例代码在我公众号上回复:maven-plugin即可获取下载链接。大家自取之。
我们下期再见!
以上
参考文献
[1] https://maven.apache.org/plugins/
[2] https://github.com/apache/hadoop
[3] https://maven.apache.org/guides/introduction/introduction-to-plugins.html
[4] https://github.com/apache/spark
[5] https://stackoverflow.com/questions/11947037/what-is-an-uber-jar
[6] https://docs.oracle.com/javase/8/docs/technotes/guides/jar/jar.html
[7] https://maven.apache.org/plugins/maven-assembly-plugin/index.html
[8] https://github.com/cko/predefined_maven_properties/blob/master/README.md
恕我直言!!!对于Maven,菜鸟玩dependency,神仙玩plugin的更多相关文章
- 草根玩微博 中产玩微信 土豪玩什么?支持Yo的iWatch?
<中国新媒体发展报告(2014)>发布了一些新媒体的使用情况数据,25.6%无收入群体人数在玩微博,32.0%的微信用户属于月收入3000~5000元的中产阶层,那么土豪会玩什么新媒体呢? ...
- Maven手动添加dependency(以Oracle JDBC为例)
由于Oracle授权问题,Maven不提供Oracle JDBC driver,为了在Maven项目中应用Oracle JDBC driver,必须手动添加到本地仓库.首先需要到Oracle官网上下载 ...
- maven中,dependency 中的 classifier属性
classifier元素用来帮助定义构件输出的一些附属构件.附属构件与主构件对应,比如主构件是 kimi-app-2.0.0.jar 该项目可能还会通过使用一些插件生成 如 kimi-app-2.0. ...
- 【Maven】Select Dependency 无法检索
问题: 在 “pom.xml” 中,点击 “Dependencies” -> “Add” 添加依赖时,无法检索. 如下图所示: 解决办法: 依次点击 “Windows”->“Show ...
- maven error: element dependency can not have character children
就是Mavn pom.xml的解析错误,因为dependency这个标签中有不可见的垃圾字符,解决方法就是删掉重新打字进去就可以了. references: https://stackoverflow ...
- Maven中的dependency详解
<dependency> <groupId>junit</groupId> <artifactId>junit</artifactId> & ...
- 玩转PIL >>> 玩转photo
前:1.使用图片放在文件最后,需要的请自行下载 2.运行环境win10家庭版,已经安装好pillow库 一.学习总结 PIL库支持图像的储存,显示和处理,几乎能处理所有的图片格式,可以完成对图像的缩放 ...
- requests 模块入门玩法和高级玩法
1.安装 pip install requests 2. http://docs.python-requests.org/zh_CN/latest/user/quickstart.html http: ...
- Maven中的dependency的scope作用域详解
1.test范围指的是测试范围有效,在编译和打包时都不会使用这个依赖 2.compile范围指的是编译范围有效,在编译和打包时都会将依赖存储进去 3.provided依赖:在编译和测试的过程有效,最后 ...
随机推荐
- 打包遇到错误Failed to execute goal org.apache.maven.plugins:maven-surefire-plugin:2.22.2:test
引自:https://blog.csdn.net/xiexiangyan/article/details/107936774 遇到的问题 有一个maven项目,我clone一下最新的代码.准备打包(m ...
- 转 Fiddler1 简单使用
Fiddler1 简单使用 文章转自:https://www.cnblogs.com/zhengna/p/9008014.html 1.Fiddler下载地址:https://www.tele ...
- GIT常用命令:
1.安装好Git之后,点击鼠标右键即可看到有Git bush选项,点击即可进入Git命令行操作. 2.使用命令: git config --global user.name "lyh&q ...
- 大白话入门 Spring Cloud
首先我给大家看一张图,如果大家对这张图有些地方不太理解的话,我希望你们看完我这篇文章会恍然大悟. 什么是Spring cloud 构建分布式系统不需要复杂和容易出错.Spring Cloud 为最常见 ...
- BIO,NIO,AIO 总结
BIO,NIO,AIO 总结 Java 中的 BIO.NIO和 AIO 理解为是 Java 语言对操作系统的各种 IO 模型的封装.程序员在使用这些 API 的时候,不需要关心操作系统层面的知识,也不 ...
- Elasticsearch从0到千万级数据查询实践(非转载)
1.es简介 1.1 起源 https://www.elastic.co/cn/what-is/elasticsearch,es的起源,是因为程序员Shay Banon在使用Apache Lucene ...
- vscode 刚安装运行cnpm命令报错
平时的开发工具什么都用,最近手贱把vscode卸载掉了,然而重新安装时,自已以前的什么配置都没了~~~~~~,又开始从头搞起,但是一切安装配置完毕,执行cnpm命令时报错,晕!!!!!! 解决办法:执 ...
- Centos7服务器安装Docker及Docker镜像加速,Docker删除
Centos7服务器安装Docker及Docker镜像加速,Docker删除 1.Centos7服务器安装Docker 1.1 root账户登录,查看内核版本如下 1.1.1 卸载服务器旧版本Dock ...
- Mysql 5.5升级5.8
前言,因为升级跳板机,需要将mariadb 升级到10.2,也就是对应MySQL的5.8,废话不多说下面开始进行mariadb 5.5 的升级 Welcome to the MariaDB monit ...
- nginx教程<一>
2020最新Nginx教程全面讲解教程,感觉讲的很不错但是需要有docker基础,因为是基于docker快速搭建的nginx. 1.为什么要学习Nginx 肯定是工作和业务需求催生的学习需要哈哈,不过 ...