
DevExtreme 搭建Node.js开发环境
简介
DevExtreme is a component suite for creating highly responsive web applications for touch devices and traditional desktops.
创建Angular应用
$ ng new DevExtremeDemo --skip-install --skip-git
$ cnpm install

安装DevExtreme
$ cnpm install --save devextreme devextreme-angular

设置angular-cli.json 文件
"styles": [
"styles.scss",
"../node_modules/devextreme/dist/css/dx.common.css",
"../node_modules/devextreme/dist/css/dx.spa.css",
"../node_modules/devextreme/dist/css/dx.carmine.css"
],
参考源码
index.html
<!doctype html>
<html
lang="en">
<head>
<meta
charset="utf-8">
<title>DevExtremeDemo</title>
<base
href="/">
<meta
name="viewport"
content="width=device-width, initial-scale=1">
<link
rel="icon"
type="image/x-icon"
href="favicon.ico">
<link
rel="stylesheet"
type="text/css"
href="assets/css/dx.common.css" />
<link
rel="stylesheet"
type="text/css"
href="assets/css/dx.spa.css" />
<link
rel="stylesheet"
type="text/css"
href="assets/css/dx.carmine.css" />
</head>
<body
class="dx-viewport">
<app-root></app-root>
</body>
</html>
app.module.ts
import { BrowserModule } from
'@angular/platform-browser';
import { NgModule } from
'@angular/core';
import { DxButtonModule } from
'devextreme-angular';
import { AppComponent } from
'./app.component';
@NgModule({
declarations: [
AppComponent
],
imports: [
DxButtonModule,
BrowserModule
],
providers: [],
bootstrap: [AppComponent]
})
export
class AppModule { }
app.component.html
<!--The content below is only a placeholder and can be replaced.-->
<div
style="text-align:center">
<h1>
Welcome to DevExtreme!
</h1>
</div>
<dx-button
text="Press me" (onClick)="hello()"></dx-button>
<div
class="dx-fieldset">
<div
class="dx-field">
<div
class="dx-field-label">Normal</div>
<div
class="dx-field-value">
<dx-button [text]="okButtonOptions.text" [type]="okButtonOptions.type" (onClick)="okButtonOptions.onClick()"></dx-button>
</div>
</div>
<div
class="dx-field">
<div
class="dx-field-label">Success</div>
<div
class="dx-field-value">
<dx-button [text]="applyButtonOptions.text" [type]="applyButtonOptions.type" (onClick)="applyButtonOptions.onClick()"></dx-button>
</div>
</div>
<div
class="dx-field">
<div
class="dx-field-label">Default</div>
<div
class="dx-field-value">
<dx-button [text]="doneButtonOptions.text" [type]="doneButtonOptions.type" (onClick)="doneButtonOptions.onClick()"></dx-button>
</div>
</div>
<div
class="dx-field">
<div
class="dx-field-label">Danger</div>
<div
class="dx-field-value">
<dx-button [text]="deleteButtonOptions.text" [type]="deleteButtonOptions.type" (onClick)="deleteButtonOptions.onClick()"></dx-button>
</div>
</div>
<div
class="dx-field">
<div
class="dx-field-label">Back</div>
<div
class="dx-field-value">
<dx-button [type]="backButtonOptions.type" (onClick)="backButtonOptions.onClick()"></dx-button>
</div>
</div>
</div>
app.component.html
<!--The content below is only a placeholder and can be replaced.-->
<div
style="text-align:center">
<h1>
Welcome to DevExtreme!
</h1>
</div>
<dx-button
text="Press me" (onClick)="hello()"></dx-button>
<div
class="dx-fieldset">
<div
class="dx-field">
<div
class="dx-field-label">Normal</div>
<div
class="dx-field-value">
<dx-button [text]="okButtonOptions.text" [type]="okButtonOptions.type" (onClick)="okButtonOptions.onClick()"></dx-button>
</div>
</div>
<div
class="dx-field">
<div
class="dx-field-label">Success</div>
<div
class="dx-field-value">
<dx-button [text]="applyButtonOptions.text" [type]="applyButtonOptions.type" (onClick)="applyButtonOptions.onClick()"></dx-button>
</div>
</div>
<div
class="dx-field">
<div
class="dx-field-label">Default</div>
<div
class="dx-field-value">
<dx-button [text]="doneButtonOptions.text" [type]="doneButtonOptions.type" (onClick)="doneButtonOptions.onClick()"></dx-button>
</div>
</div>
<div
class="dx-field">
<div
class="dx-field-label">Danger</div>
<div
class="dx-field-value">
<dx-button [text]="deleteButtonOptions.text" [type]="deleteButtonOptions.type" (onClick)="deleteButtonOptions.onClick()"></dx-button>
</div>
</div>
<div
class="dx-field">
<div
class="dx-field-label">Back</div>
<div
class="dx-field-value">
<dx-button [type]="backButtonOptions.type" (onClick)="backButtonOptions.onClick()"></dx-button>
</div>
</div>
</div>
app.component.ts
import { Component } from
'@angular/core';
import notify from
'devextreme/ui/notify';
@Component({
selector: 'app-root',
templateUrl: './app.component.html',
styleUrls: ['./app.component.css']
})
export
class AppComponent {
title = 'app';
okButtonOptions: any;
applyButtonOptions: any;
doneButtonOptions: any;
deleteButtonOptions: any;
backButtonOptions: any;
constructor(){
this.okButtonOptions = {
text: 'OK',
type: 'normal',
onClick: function (e) {
notify("The OK button was clicked");
}
};
this.applyButtonOptions = {
text: "Apply",
type: "success",
onClick: function (e) {
notify("The Apply button was clicked");
}
};
this.doneButtonOptions = {
text: "Done",
type: "default",
onClick: function (e) {
notify("The Done button was clicked");
}
};
this.deleteButtonOptions = {
text: "Delete",
type: "danger",
onClick: function (e) {
notify("The Delete button was clicked");
}
};
this.backButtonOptions = {
type: "back",
onClick: function (e) {
notify("The Back button was clicked");
}
};
}
hello() {
alert('Hello DevExtreme!');
}
}
运行
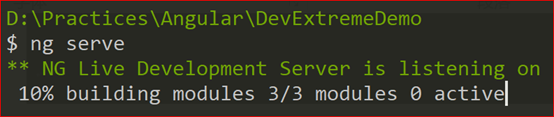
$ ng serve
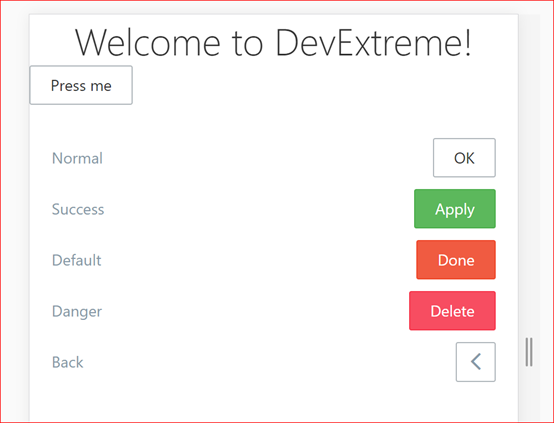
浏览器中打开网址 http://localhost:4200/
参考资源
https://github.com/devexpress/DevExtreme-angular
DevExtreme 搭建Node.js开发环境的更多相关文章
- 快速搭建 Node.js 开发环境以及加速 npm
如何快速搭建 node 开发环境 npm 超慢 github 无法打开的问题 于是我觉得应该写一篇文章解答所有这些起步问题,让新同学也能顺顺利利入门. 快速搭建 Node.js 开发环境 如果你想长期 ...
- 【转】使用nvm快速搭建 Node.js 开发环境
原文链接:http://www.cnblogs.com/shuoer/p/7802891.html 快速搭建 Node.js 开发环境 如果你想长期做 node 开发, 或者想快速更新 node 版本 ...
- ES6 学习笔记 (2)-- Liunx环境安装Node.js 与 搭建 Node.js 开发环境
笔记参考来源:廖雪峰老师的javascript全栈教程 一.安装Node.js 目前Node.js的最新版本是6.2.x.首先,从Node.js官网下载对应平台的安装程序. 1.下载 选择对应的Liu ...
- 手把手教你学node之搭建node.js开发环境
搭建node.js开发环境 本文只针对在Linux或者Mac下面.至于使用 Windows 并坚持玩新技术的同学,我坚信他们一定有着过人的.甚至是不可告人的兼容性 bug 处理能力,所以这部分同学麻烦 ...
- 1.0搭建 Node.js 开发环境
<搭建 Node.js 开发环境> 本课程假设大家都是在 Linux 或者 Mac 下面.至于使用 Windows 并坚持玩新技术的同学,我坚信他们一定有着过人的.甚至是不可告人的兼容性 ...
- MongoDB 搭建Node.js开发环境
理解Mongoose Elegant MongoDB object modeling for Node.js 安装Mongoose $ cnpm install --save mongoose ...
- Oracle 搭建Node.js开发环境
先决条件 安装oralce客户端驱动. 安装node.js. 创建项目 安装oracledb模块 $npm install oracledb 如果失败了,你可能要爬墙. 参考package ...
- Linux虚拟机中 Node.js 开发环境搭建
Node.js 开发环境搭建: 1.下载CentOS镜像文件和VMWare虚拟机程序; 2.安装VMWare——>添加虚拟机——>选择CentOS镜像文件即可默认安装带有桌面的Linux虚 ...
- [转载]Sublime Text 3 搭建 React.js 开发环境
[转载]Sublime Text 3 搭建 React.js 开发环境 Sublime有很强的自定义功能,插件库很庞大,针对新语言插件更新很快,配合使用可以快速搭建适配语言的开发环境. 1. babe ...
随机推荐
- 使用metasploit进行栈溢出攻击-3
有了shellcode,就可以进行攻击了,但是要有漏洞才行,真实世界中的漏洞很复杂,并且很难发现,因此我专门做一个漏洞来进行攻击. 具体来说就是做一个简单的tcp server,里面包含明显的栈溢出漏 ...
- Vue.js 的几点总结Watchers/router key/render
Vue.js 的几点总结,下面就是实战案例,一起来看一下. 第一招:化繁为简的Watchers 场景还原: 1 2 3 4 5 6 7 8 created(){ this.fetchPostLis ...
- sql开发技巧总结-2
---恢复内容开始--- 1.如何进行行列转换 需求: 列转换成行 select a.`user_name`,sum(b.kills) from user1 a join user_kills b o ...
- Python学习之路--1.0 Python概述及基本数据类型
Python是一门解释性语言,弱类型语言 python程序的两种编写方式: 1.进入cmd控制台,输入python进入编辑模式,即可直接编写python程序 2.在.朋友文件中编写python代码,通 ...
- VUE使用微信JDK(附踩坑记录)
VUE使用微信分享SDK(附踩坑记录) 微信分享官方文档 安装JS-SDK npm i -S weixin-jsapi 引入包 ES5 写法 const wx = require('weixin-js ...
- max Count Group by
select UserName ,Max(LoginTime),count(1) from LoginLog group by UserName 只 group by UserName就行 可以得到L ...
- git基础命令整理
首先安装git,然后选择一个文件夹做初始化!! yum -y install git ### 安装 git init ...
- react常用开发工具
https://www.cnblogs.com/vipstone/p/7125338.html
- javascript 中function(){}(),new function(),new Function(),Function
和java比起来,javascript真的是松散的无以复加,不过这也让我们在无聊之余,有精力去探讨一些复杂的应用,从而在开发之路上,获得一些新的想法. javascript中的类的构造 javascr ...
- 图片滚动插件jquery bxslider
https://www.cnblogs.com/axl234/p/4167196.html