SpringMVC(二) SpringMVC Hello World
准备条件:
STS(集成了Spring相关工具的Eclipse)
Spring软件包 spring-framework-4.3.3.RELEASE-dist.zip。
步骤:
- 加入jar包。
Eclipse中新建一个动态的web工程。选择Tomcat 7.0,在WebContent-->WEB-INF-->lib目录下添加以下jar包。
spring-aop-4.3.3.RELEASE.jar
spring-beans-4.3.3.RELEASE.jar
spring-context-4.3.3.RELEASE.jar
spring-core-4.3.3.RELEASE.jar
pring-expression-4.3.3.RELEASE.jar
spring-web-4.3.3.RELEASE.jar
spring-webmvc-4.3.3.RELEASE.jar
另外还需要commons-logging-1.2.jar文件。
2. 在web.xml中添加dispatcherServlet相关内容(使用快捷键Alt+/,在自动弹出的下拉条中,选择#dispatcherservlet)。web.xml配置文件内容可以参考如下内容:
<?xml version="1.0" encoding="UTF-8"?>

<web-app xmlns:xsi="http://www.w3.org/2001/XMLSchema-instance" xmlns="http://java.sun.com/xml/ns/javaee" xsi:schemaLocation="http://java.sun.com/xml/ns/javaee http://java.sun.com/xml/ns/javaee/web-app_3_0.xsd" version="3.0">

  <display-name>HelloWorld</display-name>

  <welcome-file-list>

    <welcome-file>index.html</welcome-file>

    <welcome-file>index.htm</welcome-file>

    <welcome-file>index.jsp</welcome-file>

    <welcome-file>default.html</welcome-file>

    <welcome-file>default.htm</welcome-file>

    <welcome-file>default.jsp</welcome-file>

  </welcome-file-list>

  <!-- The front controller of this Spring Web application, responsible for handling all application requests -->

<servlet>

<servlet-name>springDispatcherServlet</servlet-name>

<servlet-class>org.springframework.web.servlet.DispatcherServlet</servlet-class>

<!-- 配置dispathcerservlet的一个初始化参数,设置配置文件的名称和位置 -->

<init-param>

<param-name>contextConfigLocation</param-name>

<param-value>classpath:springmvc.xml</param-value>

</init-param>

<load-on-startup>1</load-on-startup>

</servlet>

<!-- Map all requests to the DispatcherServlet for handling -->

<servlet-mapping>

<servlet-name>springDispatcherServlet</servlet-name>

<url-pattern>/</url-pattern>

</servlet-mapping>

</web-app>
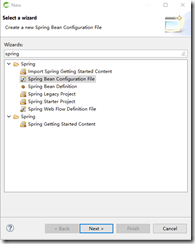
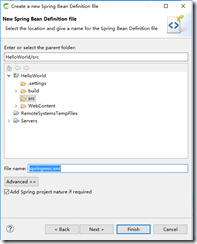
3. 加入SpringMVC的配置文件。在src目录下,参照以下关键步骤创建springmvc.xml文件。
参考如下代码:
<?xml version="1.0" encoding="UTF-8"?>

<beans xmlns="http://www.springframework.org/schema/beans"

xmlns:xsi="http://www.w3.org/2001/XMLSchema-instance"

xmlns:context="http://www.springframework.org/schema/context"

xmlns:mvc="http://www.springframework.org/schema/mvc"

xsi:schemaLocation="http://www.springframework.org/schema/beans http://www.springframework.org/schema/beans/spring-beans.xsd

http://www.springframework.org/schema/context http://www.springframework.org/schema/context/spring-context-4.3.xsd

http://www.springframework.org/schema/mvc http://www.springframework.org/schema/mvc/spring-mvc-4.3.xsd">

<!-- 配置自动扫描包 -->

<context:component-scan base-package="com.tiekui.springmvc.*"></context:component-scan>

<!-- 配置视图解析器:如何把handler方法返回给视图 -->

<bean class="org.springframework.web.servlet.view.InternalResourceViewResolver">

<property name="prefix" value="/WEB-INF/views/"></property>

<property name="suffix" value=".jsp"></property>

</bean>

</beans>
4.编写请求的处理器。参考如下代码:
package com.tiekui.springmvc.handlers;

import org.springframework.stereotype.Controller;

import org.springframework.web.bind.annotation.RequestMapping;

@Controller

public class HelloWorld {

  @RequestMapping("/helloworld")

  public String hello(){

  System.out.println("hello world");

  return "success";

  }

}
5. 编写视图。在WebContent目录下创建index.jsp文件,参考如下代码:
<%@ page language="java" contentType="text/html; charset=ISO-8859-1"

pageEncoding="ISO-8859-1"%>

<!DOCTYPE html PUBLIC "-//W3C//DTD HTML 4.01 Transitional//EN" "http://www.w3.org/TR/html4/loose.dtd">

<html>

  <head>

    <meta http-equiv="Content-Type" content="text/html; charset=ISO-8859-1">

    <title>Insert title here</title>

  </head>

  <body>

    <a href="helloworld">Hello World</a>

  </body>

</html>
在/WEB-INF/views目录下创建success.jsp。内容参考如下代码:
<%@ page language="java" contentType="text/html; charset=ISO-8859-1"

pageEncoding="ISO-8859-1"%>

<!DOCTYPE html PUBLIC "-//W3C//DTD HTML 4.01 Transitional//EN" "http://www.w3.org/TR/html4/loose.dtd">

<html>

  <head>

  <meta http-equiv="Content-Type" content="text/html; charset=ISO-8859-1">

  <title>Insert title here</title>

  </head>

  <body>

    <h1>Hello SpringMVC View</h1>

  </body>


</html>
SpringMVC(二) SpringMVC Hello World的更多相关文章
- Spring+SpringMVC+MyBatis深入学习及搭建(十二)——SpringMVC入门程序(一)
转载请注明出处:http://www.cnblogs.com/Joanna-Yan/p/6999743.html 前面讲到:Spring+SpringMVC+MyBatis深入学习及搭建(十一)——S ...
- (转)SpringMVC学习(十二)——SpringMVC中的拦截器
http://blog.csdn.net/yerenyuan_pku/article/details/72567761 SpringMVC的处理器拦截器类似于Servlet开发中的过滤器Filter, ...
- (二)springMvc原理和手写springMvc框架
我们从两个方面了解springmvc执行原理,首先我们去熟悉springmvc执行的过程,然后知道原理后通过手写springmvc去深入了解代码中执行过程. (一)SpringMVC流程图 (二)Sp ...
- SpringMvc基础知识(二) springmvc和mybatis整合
1 springmvc和mybatis整合 1.1 需求 使用springmvc和mybatis完成商品列表查询. 1.2 整合思路 springmvc+mybaits的系统架构: 第一步:整合dao ...
- (转)SpringMVC学习(二)——SpringMVC架构及组件
http://blog.csdn.net/yerenyuan_pku/article/details/72231385 相信大家通过前文的学习,已经对SpringMVC这个框架多少有些理解了.还记得上 ...
- SpringMVC学习(二)——SpringMVC架构及组件(及其运行原理)-转载
相信大家通过前文的学习,已经对SpringMVC这个框架多少有些理解了.还记得上一篇文章中SpringMVC的处理流程吗? 这个图大致描述了SpringMVC的整个处理流程,这个流程图还是相对来说比 ...
- 零基础学习java------38---------spring中关于通知类型的补充,springmvc,springmvc入门程序,访问保护资源,参数的绑定(简单数据类型,POJO,包装类),返回数据类型,三大组件,注解
一. 通知类型 spring aop通知(advice)分成五类: (1)前置通知[Before advice]:在连接点前面执行,前置通知不会影响连接点的执行,除非此处抛出异常. (2)正常返回通知 ...
- SpringMVC(二)——流程控制
SpringMVC主要就是用来做流程控制的,这篇博客总结一下如何在流程控制添加Interceptor(拦截器),如何将进行流程Mapping映射解析,如何编写Controller(控制器). 一,首先 ...
- Spring+SpringMVC+MyBatis深入学习及搭建(十二)——SpringMVC入门程序
转载请注明出处:http://www.cnblogs.com/Joanna-Yan/p/6999743.html 前面讲到:Spring+SpringMVC+MyBatis深入学习及搭建(十一)--S ...
随机推荐
- MySql简易配置
选择standard configuration ,然后next Service Name :服务名字 Launch the MySQL Server automatically:是否开机启动mysq ...
- Azure上的那些IP
相信第一次接触Azure的读者都会碰到这样一个问题,就是Azure的IP地址,笔者第一次接触Azure也是被搞懵逼了,一会儿VIP,不知道的还以为是会员的意思呢,一会儿又是DIP,后来又来了个PIP, ...
- elastic search使用总结
1. elasticsearch安装 官方下载地址:https://www.elastic.co/downloads/elasticsearch 解压文件 elasticsearch-2.4.0.zi ...
- python2.7 学习笔记--列表的使用
同其它编程语言一样,python也提供了丰富的数据结构,以方便数据的处理.本文介绍两种最基本的数据集合,列表和元组的使用. 一.列表使用介绍 可以理解为一个有序的序列.其使用方式举例如下: list= ...
- jquery 页面滚动到底部自动加载插件集合
很多社交网站都使用无限滚动的翻页技术来提高用户体验,当你页面滑到列表底部时候无需点击就自动加载更多的内容.下面为你推荐 10 个 jQuery 的无限滚动的插件: 1. jQuery ScrollPa ...
- springmvc拦截器验证登录时间
在前一篇[Filter实现用户名验证]的随笔里,记录了如何使用filter 这次增加了拦截器实现 ①filter实现用户登陆时验证用户名是否为null ②interceptor实现用户登陆时时间判断, ...
- mysql使用load导入csv文件所遇到的问题及解决方法
使用navicat的客户端插入csv的数据文件,有一种非常简单的方式,即使用导入向导,直接根据数据匹配即可. 使用load的方式. 由于本项目中插入数据表量大而且格式统一,故首先使用创建字段creat ...
- DLL 生成与使用的全过程(2010-01-18 14:50:17)
转载自 水滴的博客http://blog.sina.com.cn/spiritofwater 个人学习用 转载▼ 分类: 技术 由dll导出的lib文件: 包含了每一个dll导出函数的符号名和 ...
- Hadoop学习记录
http://blog.csdn.net/m_star_jy_sy/article/details/26476907配置windows里eclipse连接hadoop集群 hadoop常见命令 启动H ...
- tcp_tw_reuse、tcp_tw_recycle 使用场景及注意事项
linux TIME_WAIT 相关参数: net.ipv4.tcp_tw_reuse = 表示开启重用.允许将TIME-WAIT sockets重新用于新的TCP连接,默认为0,表示关闭 net.i ...