Tensorflow可视化MNIST手写数字训练
【简述】
我们在学习编程语言时,往往第一个程序就是打印“Hello World”,那么对于人工智能学习系统平台来说,他的“Hello World”小程序就是MNIST手写数字训练了。MNIST是一个手写数字的数据集,官网是Yann LeCun's website。数据集总共包含了60000行的训练数据集(mnist.train)和10000行的测试数据集(mnist.test),每一个数字的大小为28*28像素。通过利用Tensorflow人工智能平台,我们可以学习到人工智能学习平台是如何通过数据进行学习的。
【数据准备】
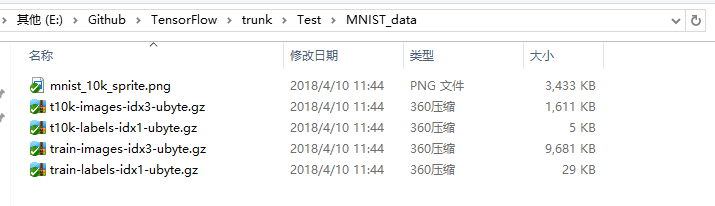
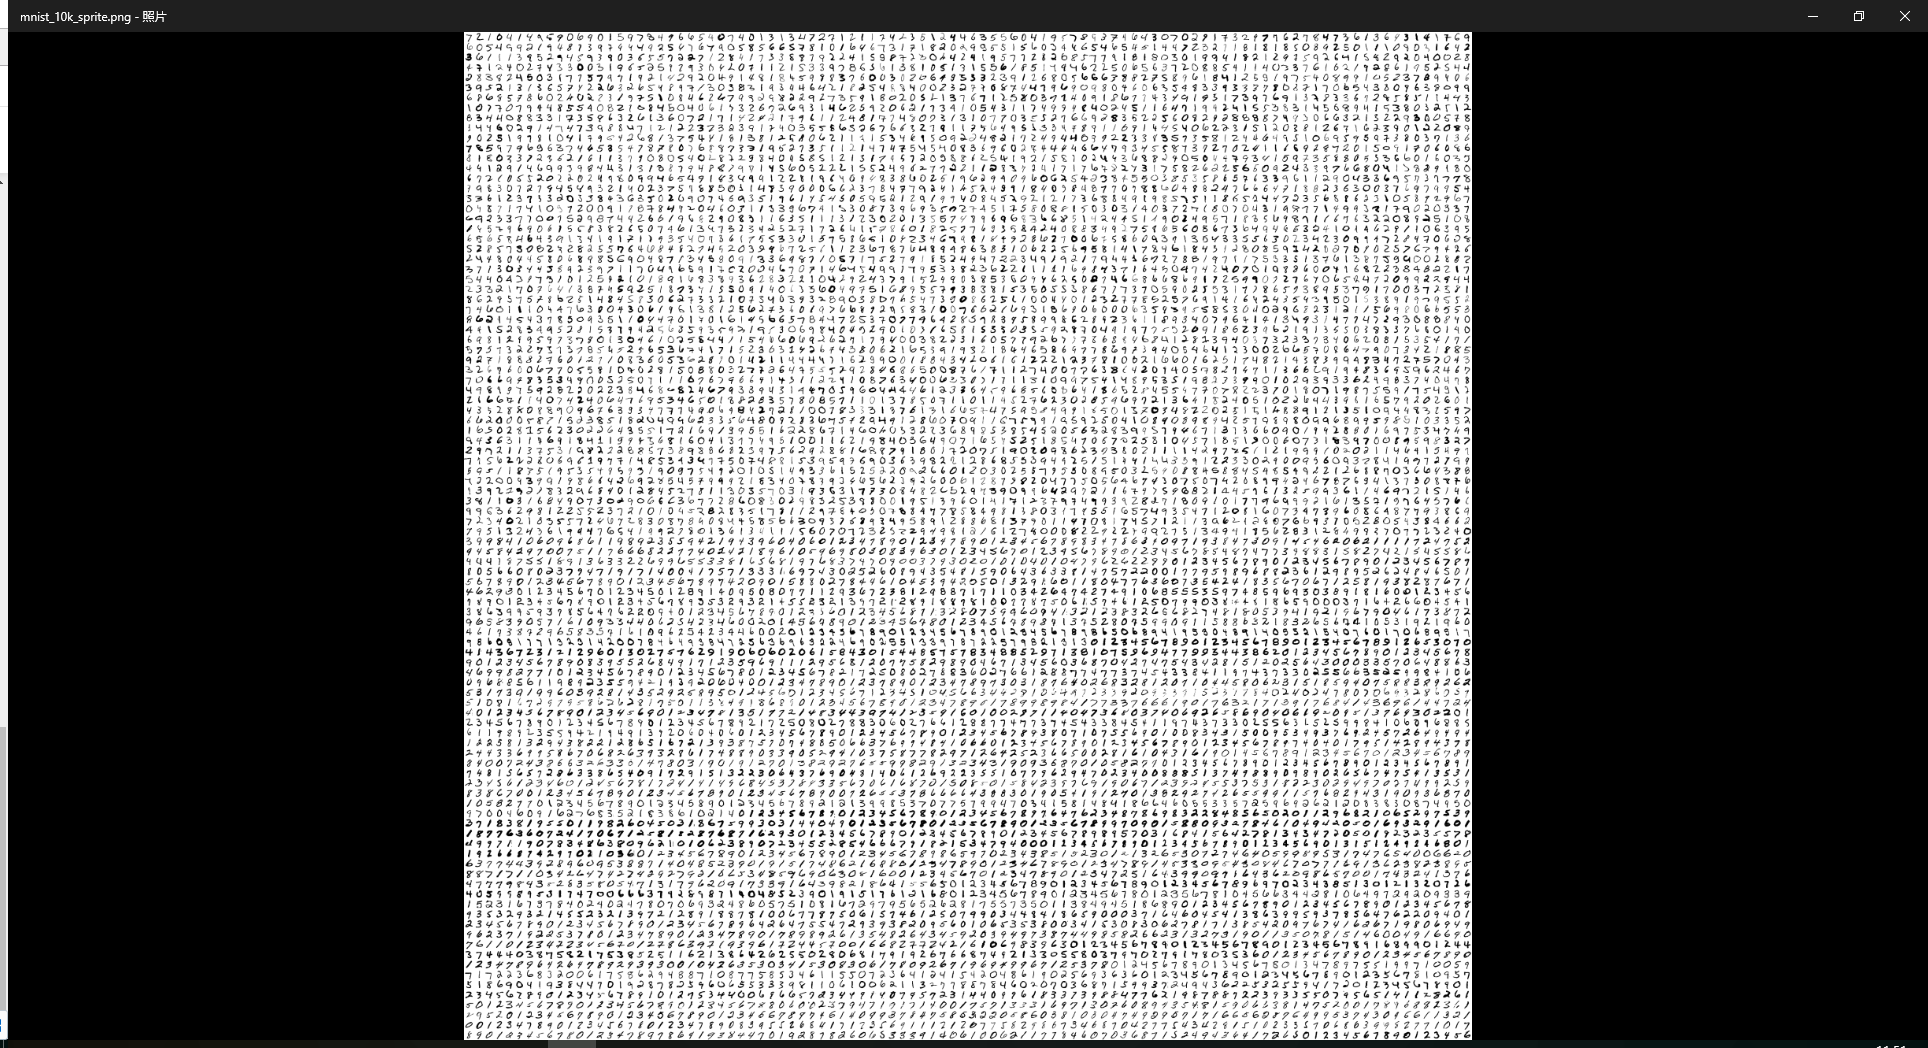
下载mnist数据集,和mnist_10k_sprite.png图片,分别放在MNIST_data文件夹和projector/data文件夹下。
【代码】
import tensorflow as tf
from tensorflow.examples.tutorials.mnist import input_data
from tensorflow.contrib.tensorboard.plugins import projector #载入数据集
mnist = input_data.read_data_sets("MNIST_data/",one_hot=True)
#运行次数
max_steps = 1001
#图片数量
image_num = 3000
#文件路径
DIR = "E:/Github/TensorFlow/trunk/Test/" #定义会话
sess = tf.Session() #载入图片
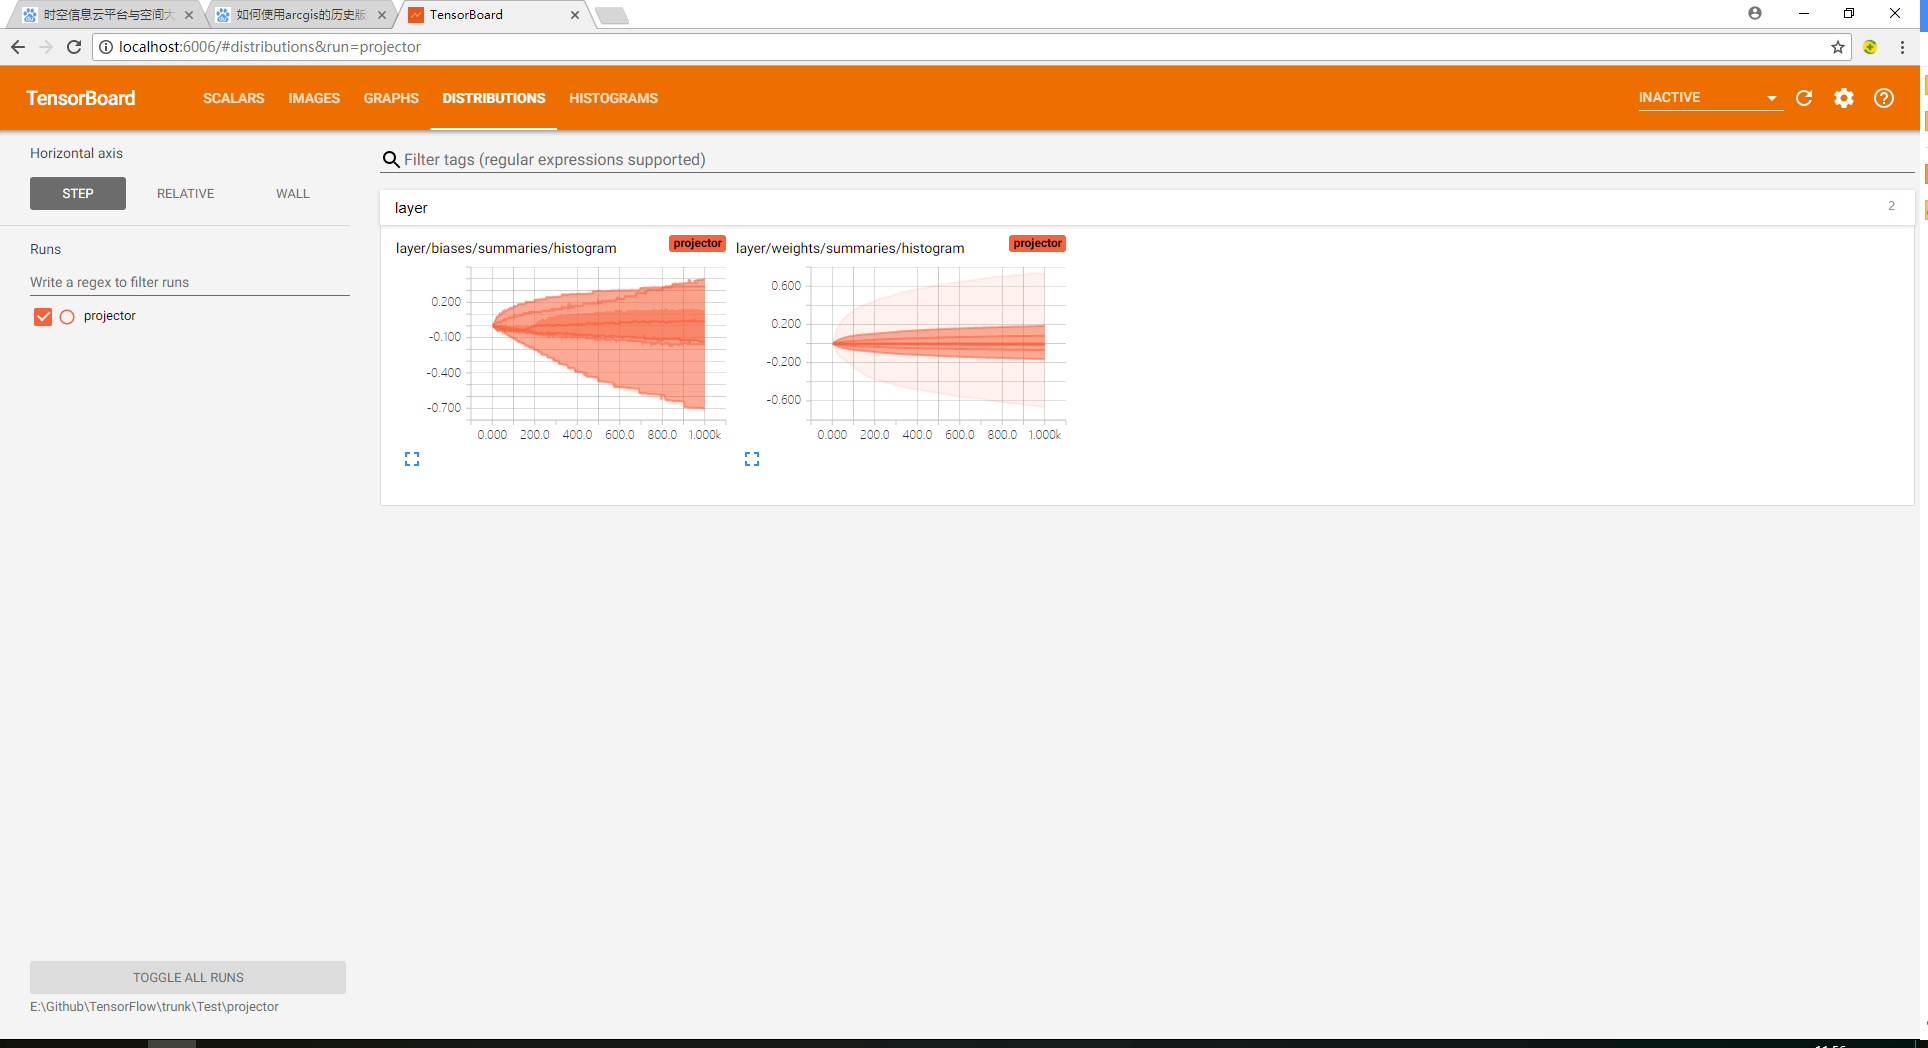
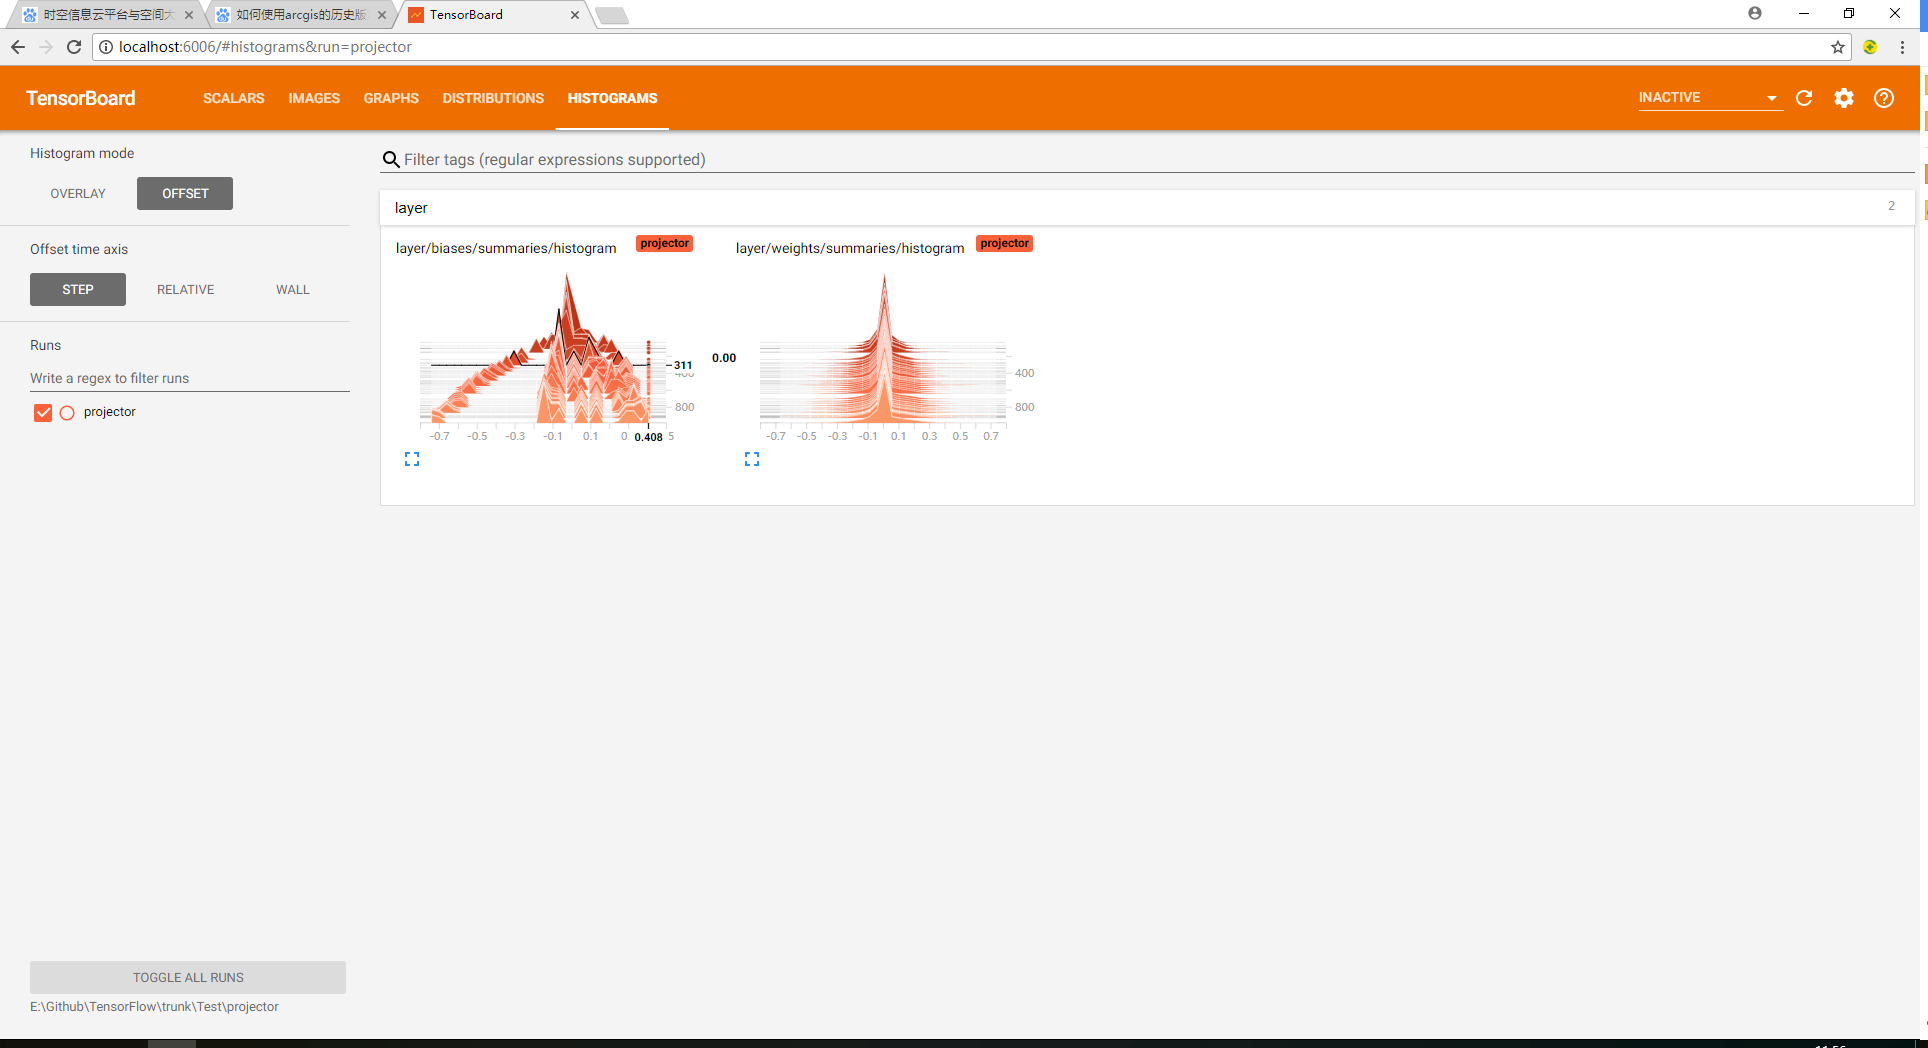
embedding = tf.Variable(tf.stack(mnist.test.images[:image_num]), trainable=False, name='embedding') #参数概要
def variable_summaries(var):
with tf.name_scope('summaries'):
mean = tf.reduce_mean(var)
tf.summary.scalar('mean', mean)#平均值
with tf.name_scope('stddev'):
stddev = tf.sqrt(tf.reduce_mean(tf.square(var - mean)))
tf.summary.scalar('stddev', stddev)#标准差
tf.summary.scalar('max', tf.reduce_max(var))#最大值
tf.summary.scalar('min', tf.reduce_min(var))#最小值
tf.summary.histogram('histogram', var)#直方图 #命名空间
with tf.name_scope('input'):
#这里的none表示第一个维度可以是任意的长度
x = tf.placeholder(tf.float32,[None,784],name='x-input')
#正确的标签
y = tf.placeholder(tf.float32,[None,10],name='y-input') #显示图片
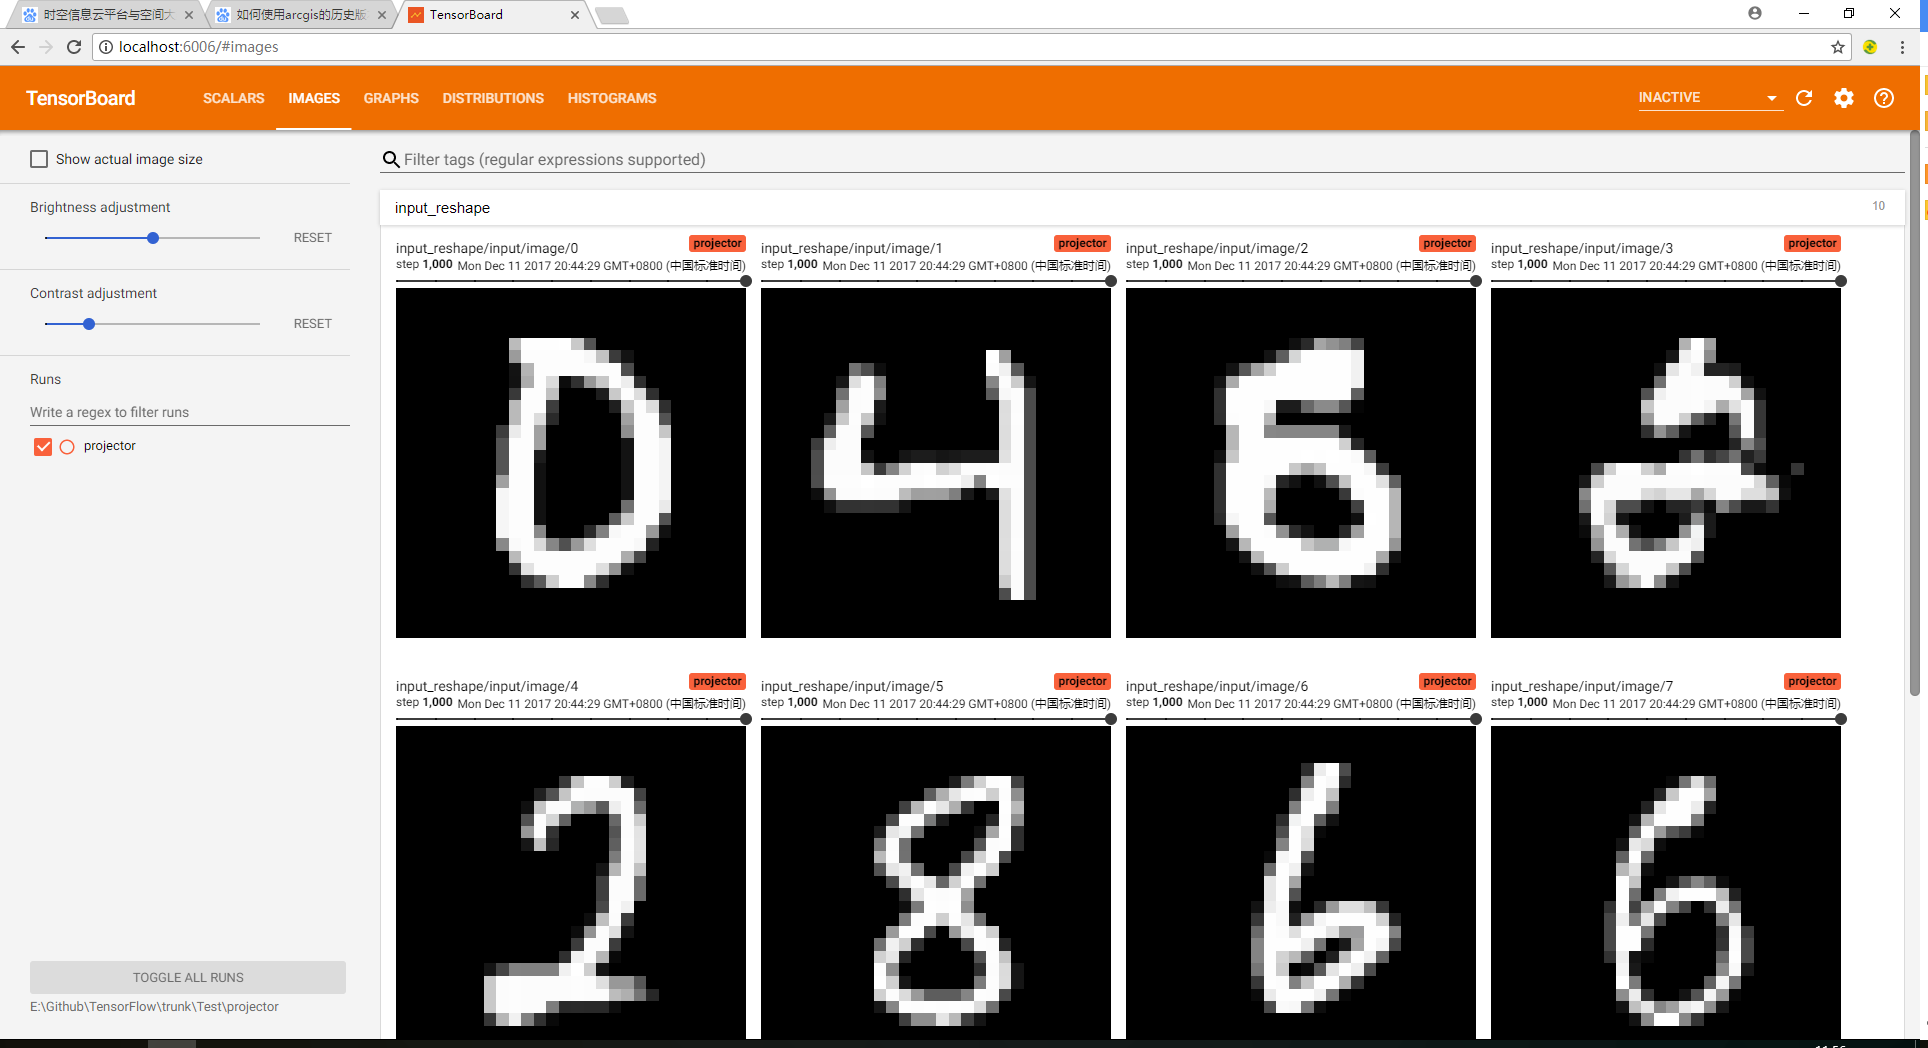
with tf.name_scope('input_reshape'):
image_shaped_input = tf.reshape(x, [-1, 28, 28, 1])
tf.summary.image('input', image_shaped_input, 10) with tf.name_scope('layer'):
#创建一个简单神经网络
with tf.name_scope('weights'):
W = tf.Variable(tf.zeros([784,10]),name='W')
variable_summaries(W)
with tf.name_scope('biases'):
b = tf.Variable(tf.zeros([10]),name='b')
variable_summaries(b)
with tf.name_scope('wx_plus_b'):
wx_plus_b = tf.matmul(x,W) + b
with tf.name_scope('softmax'):
prediction = tf.nn.softmax(wx_plus_b) with tf.name_scope('loss'):
#交叉熵代价函数
loss = tf.reduce_mean(tf.nn.softmax_cross_entropy_with_logits(labels=y,logits=prediction))
tf.summary.scalar('loss',loss)
with tf.name_scope('train'):
#使用梯度下降法
train_step = tf.train.GradientDescentOptimizer(0.5).minimize(loss) #初始化变量
sess.run(tf.global_variables_initializer()) with tf.name_scope('accuracy'):
with tf.name_scope('correct_prediction'):
#结果存放在一个布尔型列表中
correct_prediction = tf.equal(tf.argmax(y,1),tf.argmax(prediction,1))#argmax返回一维张量中最大的值所在的位置
with tf.name_scope('accuracy'):
#求准确率
accuracy = tf.reduce_mean(tf.cast(correct_prediction,tf.float32))#把correct_prediction变为float32类型
tf.summary.scalar('accuracy',accuracy) #产生metadata文件
if tf.gfile.Exists(DIR + 'projector/projector/metadata.tsv'):
tf.gfile.DeleteRecursively(DIR + 'projector/projector/metadata.tsv')
with open(DIR + 'projector/projector/metadata.tsv', 'w') as f:
labels = sess.run(tf.argmax(mnist.test.labels[:],1))
for i in range(image_num):
f.write(str(labels[i]) + '\n') #合并所有的summary
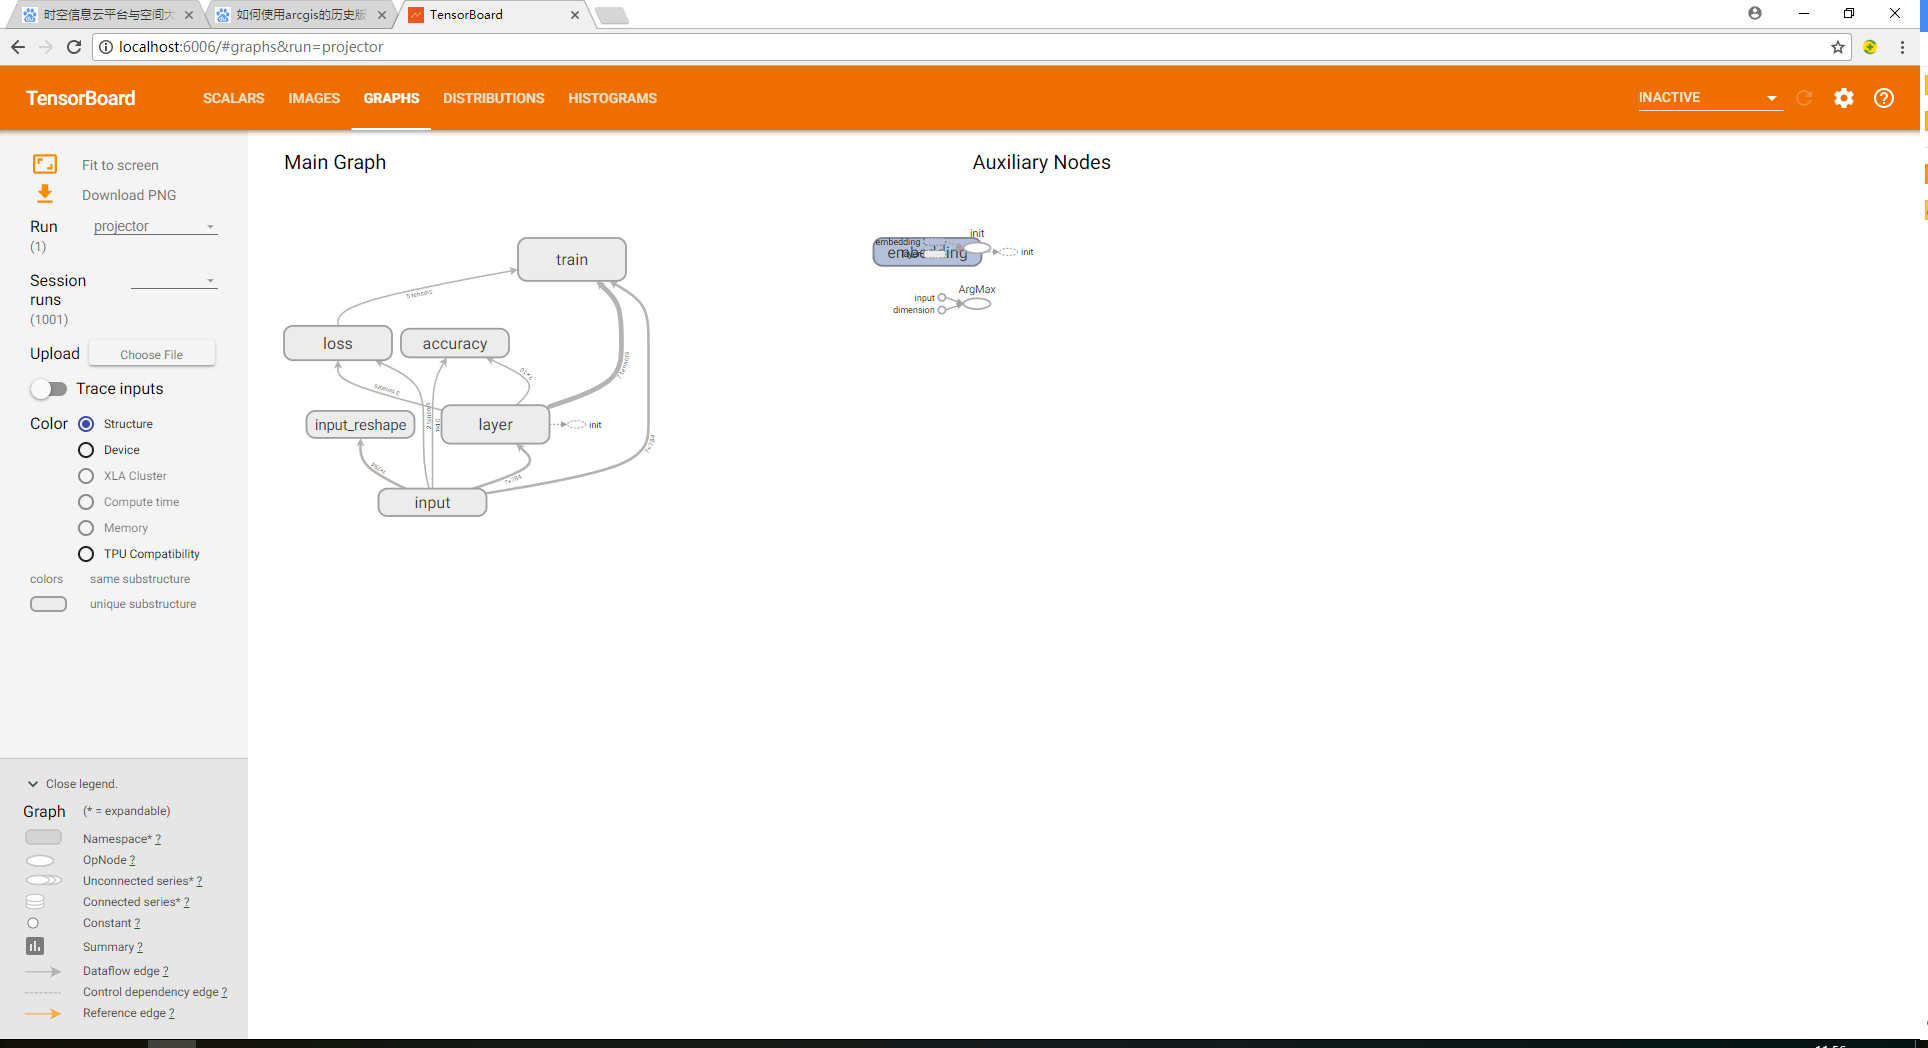
merged = tf.summary.merge_all() projector_writer = tf.summary.FileWriter(DIR + 'projector/projector',sess.graph)
saver = tf.train.Saver()
config = projector.ProjectorConfig()
embed = config.embeddings.add()
embed.tensor_name = embedding.name
embed.metadata_path = DIR + 'projector/projector/metadata.tsv'
embed.sprite.image_path = DIR + 'projector/data/mnist_10k_sprite.png'
embed.sprite.single_image_dim.extend([28,28])
projector.visualize_embeddings(projector_writer,config) for i in range(max_steps):
#每个批次100个样本
batch_xs,batch_ys = mnist.train.next_batch(100)
run_options = tf.RunOptions(trace_level=tf.RunOptions.FULL_TRACE)
run_metadata = tf.RunMetadata()
sess.run(train_step,feed_dict={x:batch_xs,y:batch_ys},options=run_options,run_metadata=run_metadata)
summary = sess.run(merged,feed_dict={x:batch_xs,y:batch_ys},options=run_options,run_metadata=run_metadata)
projector_writer.add_run_metadata(run_metadata, 'step%03d' % i)
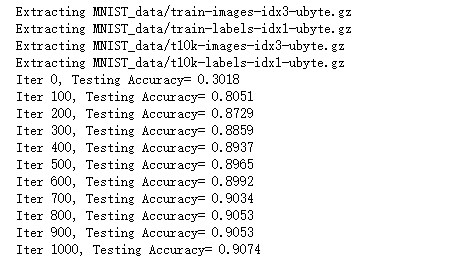
projector_writer.add_summary(summary, i) if i%100 == 0:
acc = sess.run(accuracy,feed_dict={x:mnist.test.images,y:mnist.test.labels})
print ("Iter " + str(i) + ", Testing Accuracy= " + str(acc)) saver.save(sess, DIR + 'projector/projector/a_model.ckpt', global_step=max_steps)
projector_writer.close()
sess.close()
【运行】
直接运行代码
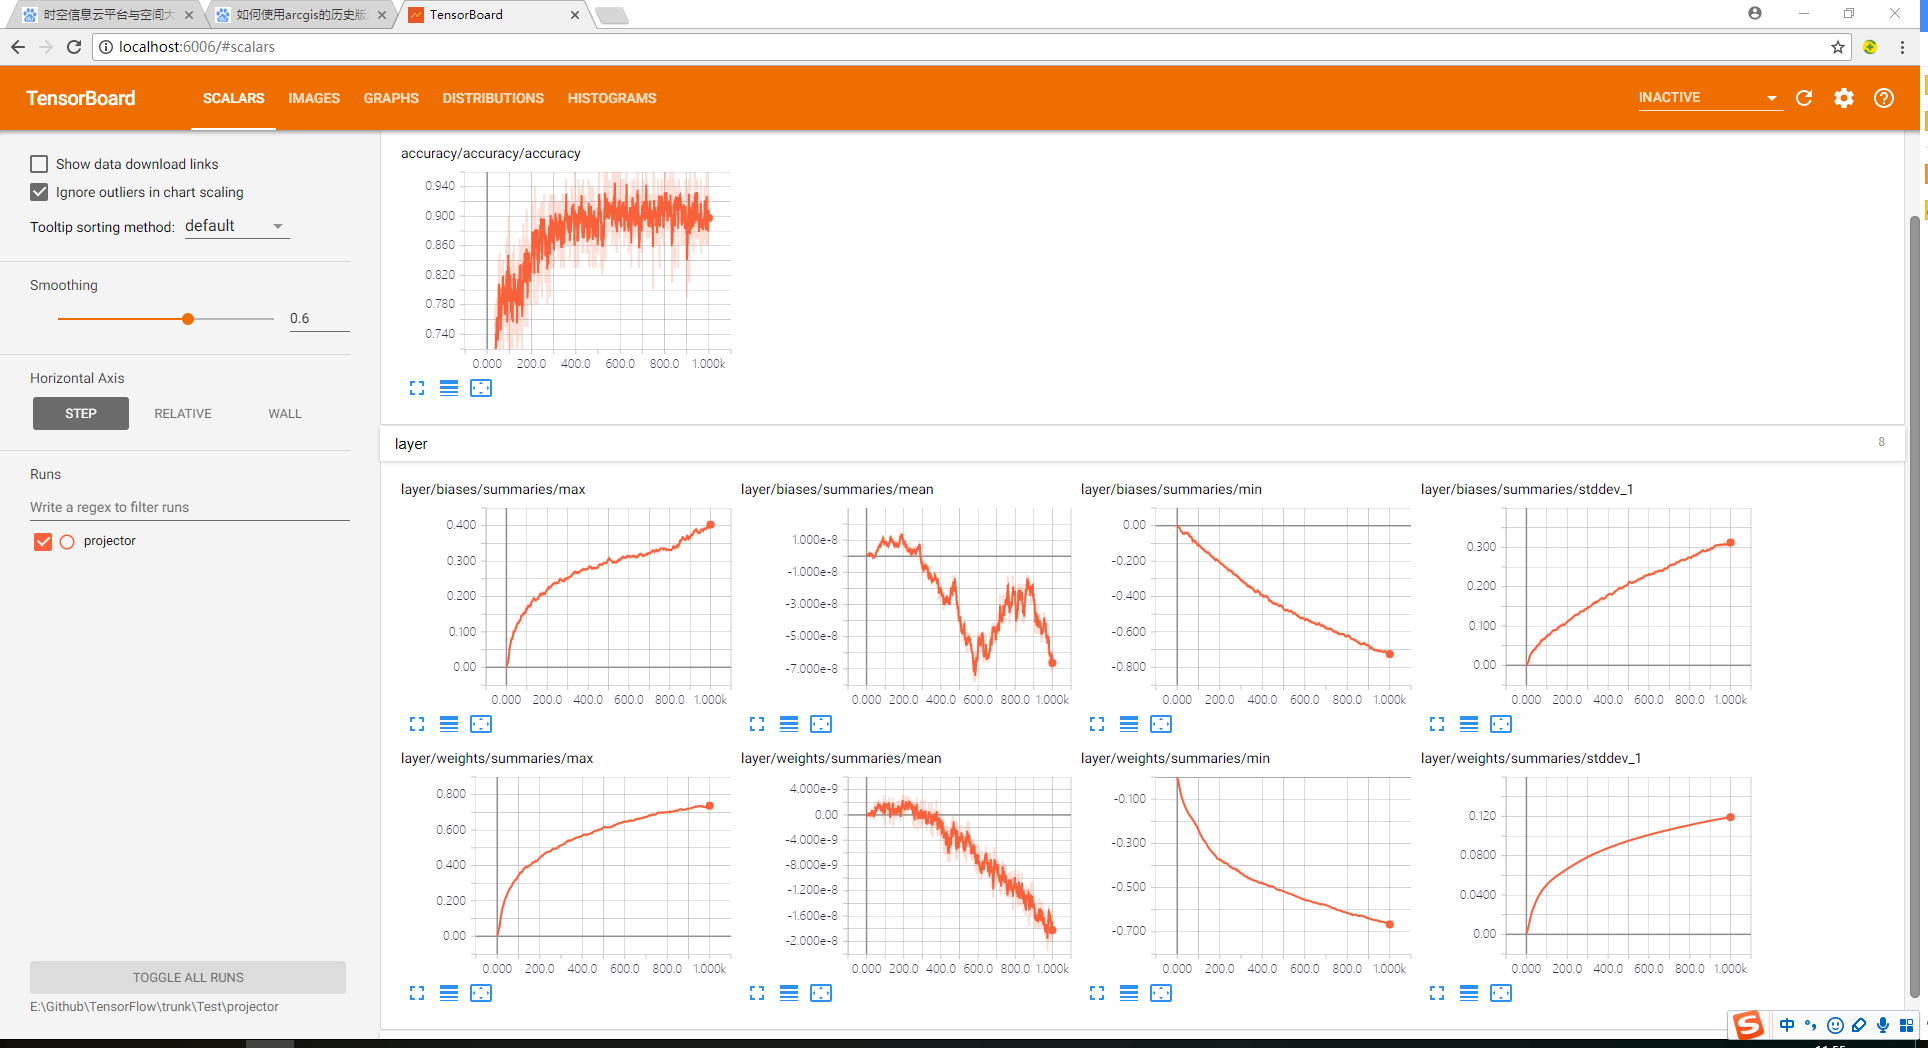
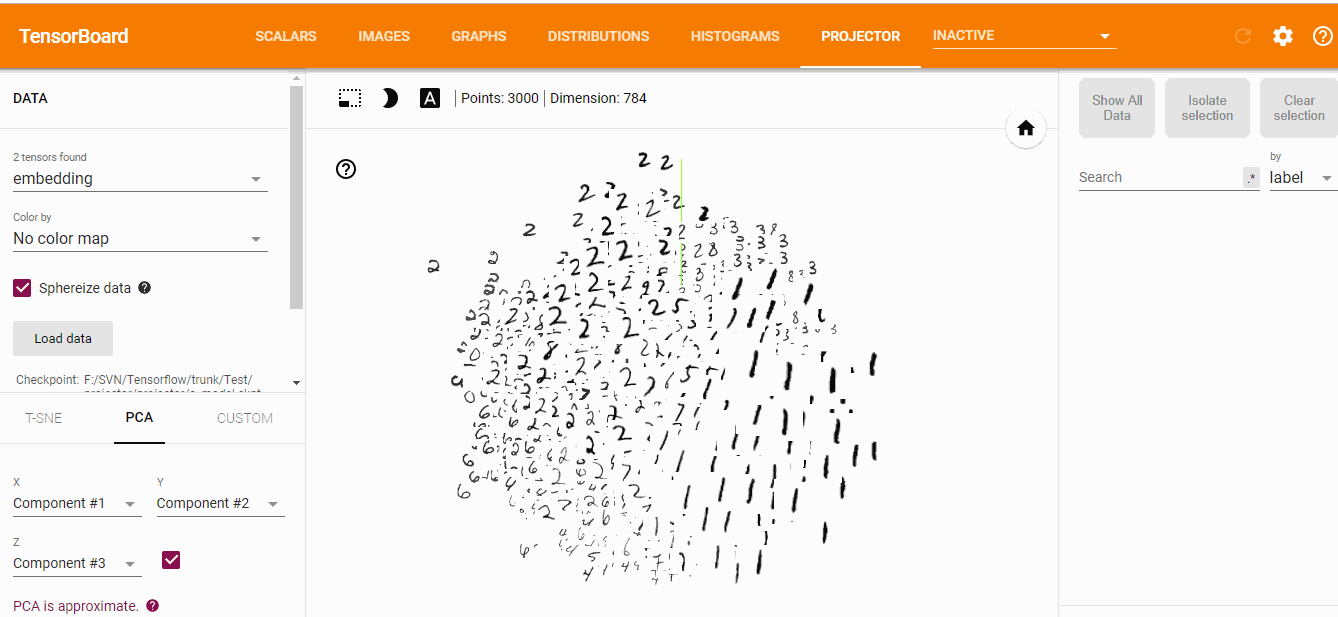
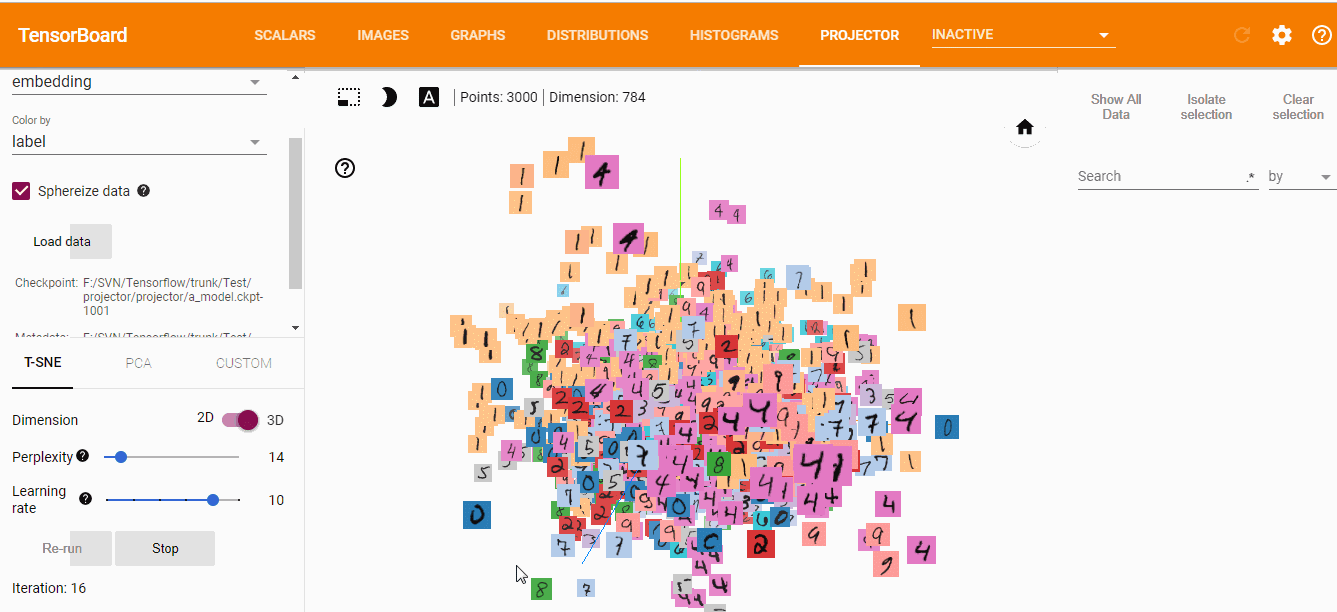
【可视化界面】
1、在cmd命令行输入tensorboard --logdir=progector文件夹路径;
2、在浏览器打开http://localhost:6006路径即可查看可视化效果。

源码获取方式,关注公总号RaoRao1994,查看往期精彩-所有文章,即可获取资源下载链接

更多资源获取,请关注公总号RaoRao1994
Tensorflow可视化MNIST手写数字训练的更多相关文章
- Android+TensorFlow+CNN+MNIST 手写数字识别实现
Android+TensorFlow+CNN+MNIST 手写数字识别实现 SkySeraph 2018 Email:skyseraph00#163.com 更多精彩请直接访问SkySeraph个人站 ...
- 基于tensorflow的MNIST手写数字识别(二)--入门篇
http://www.jianshu.com/p/4195577585e6 基于tensorflow的MNIST手写字识别(一)--白话卷积神经网络模型 基于tensorflow的MNIST手写数字识 ...
- 基于TensorFlow的MNIST手写数字识别-初级
一:MNIST数据集 下载地址 MNIST是一个包含很多手写数字图片的数据集,一共4个二进制压缩文件 分别是test set images,test set labels,training se ...
- Tensorflow之MNIST手写数字识别:分类问题(1)
一.MNIST数据集读取 one hot 独热编码独热编码是一种稀疏向量,其中:一个向量设为1,其他元素均设为0.独热编码常用于表示拥有有限个可能值的字符串或标识符优点: 1.将离散特征的取值扩展 ...
- Tensorflow实现MNIST手写数字识别
之前我们讲了神经网络的起源.单层神经网络.多层神经网络的搭建过程.搭建时要注意到的具体问题.以及解决这些问题的具体方法.本文将通过一个经典的案例:MNIST手写数字识别,以代码的形式来为大家梳理一遍神 ...
- Tensorflow之MNIST手写数字识别:分类问题(2)
整体代码: #数据读取 import tensorflow as tf import matplotlib.pyplot as plt import numpy as np from tensorfl ...
- 基于TensorFlow的MNIST手写数字识别-深入
构建多层卷积神经网络时需要多组W和偏移项b,我们封装2个方法来产生W和b 初级MNIST中用0初始化W和b,这里用噪声初始化进行对称打破,防止产生梯度0,同时用一个小的正值来初始化b避免dead ne ...
- TensorFlow——MNIST手写数字识别
MNIST手写数字识别 MNIST数据集介绍和下载:http://yann.lecun.com/exdb/mnist/ 一.数据集介绍: MNIST是一个入门级的计算机视觉数据集 下载下来的数据集 ...
- 用tensorflow搭建RNN(LSTM)进行MNIST 手写数字辨识
用tensorflow搭建RNN(LSTM)进行MNIST 手写数字辨识 循环神经网络RNN相比传统的神经网络在处理序列化数据时更有优势,因为RNN能够将加入上(下)文信息进行考虑.一个简单的RNN如 ...
随机推荐
- 一个简单的AXIS远程调用Web Service示例
我们通常都将编写好的Web Service发布在Tomcat或者其他应用服务器上,然后通过浏览器调用该Web Service,返回规范的XML文件.但是如果我们不通过浏览器调用,而是通过客户端程序调用 ...
- oracle一个创建用户、创建表空间、授权、建表的完整过程
1.首先我们可以用scott用户以sysdba的身份登录oracle. conn scott/tiger as sysdba 2.然后我就可以来创建用户了. create user zzg ident ...
- Leetcode:Longest Palindromic Substring分析和实现
问题大意是在给定字符串中查找最长的回文子串,所谓的回文就是依据中间位置对称的字符串,比如abba,aba都是回文. 这个问题初一看,非常简单,但是会很快发现那些简单的思路都会带来O(n^3)级别的时间 ...
- LoadRunner 脚本开发和常用函数
开发性能测试脚本原则.简单 正确 高效 在lr中,脚本运行是解释执行的.所以在运行时,需要先编译. 局部变量和全局变量 1.在init.action.end中定义的变量就是局部变量 2.在global ...
- WebFlux02 SpringBoot WebFlux项目骨架搭建
1 环境搭建 1.1 版本说明 jdk -> 1.8 maven -3.5 springboot -> 2.0.3 开发工具 -> IDEA 1.2 创建项目 利用 IDEA 或者 ...
- https://github.com/ildoonet/tf-pose-estimation
https://github.com/ildoonet/tf-pose-estimation
- 在Win7 64位电脑上安装Sql Server 2008 R2 Express
安装环境说明: 操作系统:Win7 64位 英文版 安装步骤: 1.准备安装文件 下载网址:https://www.microsoft.com/zh-CN/download/details.aspx? ...
- Mips下交叉编译dropbear
1. 编译zlib-1.2.8 在编译dropbear的时候,会遇到“configure: error: *** zlib missing - install first or check confi ...
- win32 多线程 (五)Event
Event是内核对象,他可以分为自动和手动两种模式. HANDLE CreateEvent( LPSECURITY_ATTRIBUTES lpEventAttributes, BOOL bManual ...
- Linux下chmod 777 修改权限
在linux操作系统下,使用shell命令来操作: 关于权限的问题用chmod命令来修改权限 -rw-r-r-- 1 root root 可参考:http://zhidao.baidu.com/lin ...