CoreData (三)备
NSFetchedResultsController
什么是NSFetchedResultsController
NSFetchedResultsController是一个让人爱恨交加的一个类。如果使用得当,NSFetchedResultsController能帮组减少很多代码。如果使用不当,整个App就随时崩溃。
NSFetchedResultsController我觉得最初的设计应该是为了配合UITableView来使用的。因为UITableView在iOS的应用App中出场次数实在是太高了.而且UITableView是重要的数据展示View,所以需要频繁的向Model去请求数据,但是根据MVC来说,V不应该直接跟M联系的.这样就在Core Data下面出现了一个C—NSFetchedResultsController来把V和M协调起来. NSFetchedResultsController就是这个C.
NSFetchedResultsController是有两个重要的功能。
第一:NSFetchedResultsController是作用在Core Data上的,通过NSFetchRequest来查询Core Data里面的数据.可以返回按照组分好的数据.这样便于UITableView来显示.
第二:但Modle改变的时候NSFetchedResultsController能及时的发出通知.准确的说,应该是当NSManagedObjectContext发生改变的时候,NSFetchedResultsController能知道这些变化,然后发出通知出来.以便UITableview能及时的更新.
实现一个NSFetchedResultsController作为Data source的UITableView
创建一个最小带Core Data的工程

选择Master-Detail Application

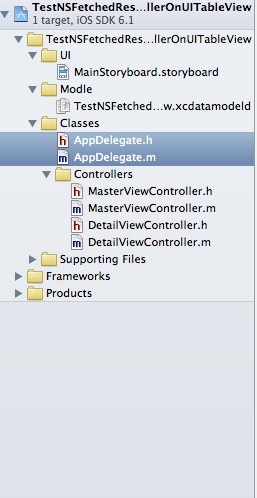
整理一下显示层级和结构使其看起来顺眼一些
确立目标
打开看以后 发现建立的工程是已经使用了NSFetchedResultsController
我们的目标是改写这个项目支持UITableView分组显示
首先修改Data Model
增加一个字段用来分组. 我们增加一个同样的Date用来记录此时的分钟数量.

初始化一个NSFetchedResultsController
这里假设你看过我的Core Data笔记1,2.默认你已经做好了Core Data stack的全部工作.然后再开始NSFetchedResultsController的初始化.
|
1
2
3
4
5
6
7
8
9
10
11
12
13
14
15
16
17
18
19
20
21
22
23
24
25
26
27
28
29
30
31
32
33
34
|
- (NSFetchedResultsController *)fetchedResultsController{ if (_fetchedResultsController != nil) { return _fetchedResultsController; } NSFetchRequest *fetchRequest = [[NSFetchRequest alloc] init]; // Edit the entity name as appropriate. NSEntityDescription *entity = [NSEntityDescription entityForName:@"Event" inManagedObjectContext:self.managedObjectContext]; [fetchRequest setEntity:entity]; // Set the batch size to a suitable number. [fetchRequest setFetchBatchSize:20]; // Edit the sort key as appropriate. NSSortDescriptor *sortDescriptor = [[NSSortDescriptor alloc] initWithKey:@"timeStamp" ascending:NO]; NSArray *sortDescriptors = @[sortDescriptor]; [fetchRequest setSortDescriptors:sortDescriptors]; // Edit the section name key path and cache name if appropriate. // nil for section name key path means "no sections". NSFetchedResultsController *aFetchedResultsController = [[NSFetchedResultsController alloc] initWithFetchRequest:fetchRequest managedObjectContext:self.managedObjectContext sectionNameKeyPath:@"sectionMinute" cacheName:@"Master"]; aFetchedResultsController.delegate = self; self.fetchedResultsController = aFetchedResultsController; NSError *error = nil; if (![self.fetchedResultsController performFetch:&error]) { // Replace this implementation with code to handle the error appropriately. // abort() causes the application to generate a crash log and terminate. You should not use this function in a shipping application, although it may be useful during development. NSLog(@"Unresolved error %@, %@", error, [error userInfo]); abort(); } return _fetchedResultsController;} |
这里是工程里面的NSFetchedResultsController的set方法.可以看出,第一我们创建一个NSFetchRequest查询.然后在用这个NSFetchRequest去创建一个NSFetchedResultsController.
|
1
|
NSFetchedResultsController *aFetchedResultsController = [[NSFetchedResultsController alloc] initWithFetchRequest:fetchRequest managedObjectContext:self.managedObjectContext sectionNameKeyPath:@"sectionMinute" cacheName:@"Master"]; |
第一个参数就是NSFetchRequest.
第二个参数是要指定在哪个context里面进行查询
第三个参数是根据什么key来分组.sectionNameKeyPath本来是nil是不分组,我改为我们需要分组的key值“sectionMinute”.
第四个参数 官方解释是这里点到The Cache的地方. 我的理解是cache只保留很少的一部分数据在磁盘上面,如果使用了Cache,在重建UITableView的时候, 就优先查询cache里面的数据.然后要在-performFetch:执行的时候才会去刷新新的数据.这样有助于UITableView的流畅性.
然后我加入Sections的方法
|
1
2
3
4
5
6
7
|
- (NSString *)tableView:(UITableView *)tableView titleForHeaderInSection:(NSInteger)section{ NSArray *sections = [[self fetchedResultsController] sections]; id <NSFetchedResultsSectionInfo> sectionInfo = nil; sectionInfo = [sections objectAtIndex:section]; return [sectionInfo name];} |
接着我添加
|
1
|
https://github.com/erica/NSDate-Extensions.git |
这个NSDate库进来.自己按照他的写法,写一个能获得当前时间秒数为0的方法.用来分组.
|
1
2
3
4
5
|
- (NSDate *) dateAtStartOfMinutes{ NSDateComponents *components = [CURRENT_CALENDAR components:DATE_COMPONENTS fromDate:self]; [components setSecond:0]; return [CURRENT_CALENDAR dateFromComponents:components];} |
然后改写insert方法
|
1
2
3
4
5
6
7
8
9
10
11
12
13
14
15
16
17
18
19
|
- (void)insertNewObject:(id)sender{ NSManagedObjectContext *context = [self.fetchedResultsController managedObjectContext]; NSEntityDescription *entity = [[self.fetchedResultsController fetchRequest] entity]; NSManagedObject *newManagedObject = [NSEntityDescription insertNewObjectForEntityForName:[entity name] inManagedObjectContext:context]; // If appropriate, configure the new managed object. // Normally you should use accessor methods, but using KVC here avoids the need to add a custom class to the template. [newManagedObject setValue:[NSDate date] forKey:@"timeStamp"]; [newManagedObject setValue:[[NSDate date] dateAtStartOfMinutes] forKey:@"sectionMinute"]; // Save the context. NSError *error = nil; if (![context save:&error]) { // Replace this implementation with code to handle the error appropriately. // abort() causes the application to generate a crash log and terminate. You should not use this function in a shipping application, although it may be useful during development. NSLog(@"Unresolved error %@, %@", error, [error userInfo]); abort(); }} |
其实就是加入了
|
1
|
[newManagedObject setValue:[[NSDate date] dateAtStartOfMinutes] forKey:@"sectionMinute"]; |
这句.
这样,简单的使用NSFetchedResultsController来显示分组的UITableView就搞定了.
当然因为建立的工程模板原因.很大一部分都是xCode搞定的.
被遗忘的地方
Sections数量,决定了有多少组
|
1
2
3
|
- (NSInteger)numberOfSectionsInTableView:(UITableView *)tableView{ return [[self.fetchedResultsController sections] count];} |
如果在初始化NSFetchedResultsController的时候sectionNameKeyPath为nil.这里应该会返回1.(就算没有数据也会返回1)
Row数量,决定每一组分别有多少行数据.
|
1
2
3
4
|
- (NSInteger)tableView:(UITableView *)tableView numberOfRowsInSection:(NSInteger)section{ id <NSFetchedResultsSectionInfo> sectionInfo = [self.fetchedResultsController sections][section]; return [sectionInfo numberOfObjects];} |
我前面说过NSFetchedResultsController就是为了配合UITableView而设计的.所以自然有根据indexPath来取对应的NSManagedObject的方法.
|
1
2
3
4
5
6
7
8
9
10
11
12
|
- (UITableViewCell *)tableView:(UITableView *)tableView cellForRowAtIndexPath:(NSIndexPath *)indexPath{ UITableViewCell *cell = [tableView dequeueReusableCellWithIdentifier:@"Cell" forIndexPath:indexPath]; [self configureCell:cell atIndexPath:indexPath]; return cell;}- (void)configureCell:(UITableViewCell *)cell atIndexPath:(NSIndexPath *)indexPath{ NSManagedObject *object = [self.fetchedResultsController objectAtIndexPath:indexPath]; cell.textLabel.text = [[object valueForKey:@"timeStamp"] description];} |
show

总结
写Blog实在是太累了. NSFetchedResultsController努力一天也才一点点.回去继续写. 下次要写NSFetchedResultsController通知方法.
CoreData (三)备的更多相关文章
- redis cluster + sentinel详细过程和错误处理三主三备三哨兵
redis cluster + sentinel详细过程和错误处理三主三备三哨兵1.基本架构192.168.70.215 7001 Master + sentinel 27001192.168.70. ...
- CoreData (四)备
监听NSFetchedResultsController 之前说过, NSFetchedResultsController是有两个重要的功能. 第一:NSFetchedResultsControlle ...
- iOS CoreData技术学习资源汇总
一.CoreData学习指引 1. 苹果官方:Core Data Programming Guide 什么是CoreData? 创建托管对象模型 初始化Core Data堆栈 提取对象 创建和修改自定 ...
- 阿里云ECS部署Redis主备哨兵集群遇到的问题
一.部署 详细部署步骤:https://blog.csdn.net/lihongtai/article/details/82826809 Redis5.0版本需要注意的参数配置:https://www ...
- redis介绍 (8) window 下redis的集群(cluster命令)
前言: 前段时间我在centos上搭建过一次redis集群,那是借助ruby搭建,这次我介绍一种纯redis集群命令的方式去搭建[最后我会简单介绍ruby搭建]. redis集群搭建(三主三备): 准 ...
- mongodb系列~mongodb数据迁移
一 简介:今天来聊聊mongo的数据迁移二 迁移 1 具体迁移命令 nohup mongodump --port --db dbname --collection tablename --qu ...
- iOS - Share Extension
1. 学 Share Extension 之前 先了解一下iOS的App Extension 2.1 创建Share Extension扩展Target ** 注:扩展不能单独创建,必须依赖于应用工程 ...
- 【Redis】集群方式
一.概述 1.1 Redis3.0版本之前 1.2 常见集群方案 二.Redis-Cluster原理 三.搭建集群方案 3.1 准备工作 3.2 创建模拟集群的文件夹 3.3 复制脚本 3.4 复制一 ...
- ORACLE Physical Standby DG 之switch over
DG架构图如下: 计划,切换之后的架构图: DG切换: 主备切换:这里所有的数据库数据文件.日志文件的路径是一致的 [旧主库]主库primarydb切换为备库standby3主库检查switchove ...
随机推荐
- 将主机IDS OSSEC日志文件存入MYSQL的方法
将主机IDS OSSEC日志文件存入MYSQL的方法 http://www.freebuf.com/articles/system/6139.html http://ossec-docs.readth ...
- haskell学习笔记_函数
一开始学习函数式编程语言就被告知函数式编程语言是一种“定义式”的语言,而不是一种命令式的语言,在学习haskell的函数语法时,此感觉更加强烈,haskell的函数定义倾向于一种类似C++里面的swi ...
- IIC总线协议---以存储芯片at24c64为例
IIC总线协议 前言:年前给老师做个红外抄表系统,,现在对当中用到的一些模块总结一下. 1.只有在总线空闲时才允许启动数据传送. 2.在数据传送过程中,当时钟线为高电平时,数据线必须保持稳定状态,不允 ...
- Awesome Go
A curated list of awesome Go frameworks, libraries and software. Inspired by awesome-python. Contrib ...
- jquery获得select选中索引
select选中索引有好多方式, 这两种方式取不到索引值这两种方式取不到索引值这两种方式取不到索引值这两种方式取不到索引值 $('#someId').find('option:select ...
- <php>文件操作*(重要)
//touch("./3.txt");//创建文件:在当前目录下创建3.txt文件 //copy("./3.txt","./touxiang/5.ph ...
- android layout属性介绍
android:id 为控件指定对应的ID android:text 指定控件其中显示的文字,须要注意的是,这里尽量使用strings.xml文件其中的字符串 android:gravity 指定Vi ...
- swing入门例子
// a simple exmple that can show the basis of swing------------------------------------------------- ...
- 使用Qt Style Sheets制作UI特效
引言 作为一套GUI框架,Qt是非常强大的.(注:Qt 不仅是一套优秀的GUI框架,同时也是一套出色的应用程序框架).在UI的制作方面Qt为广大开发者提供了一套强大而易用的工具,她就是——Qt Sty ...
- Linux查看网络即时网速
sar -n DEV 1 100 1代表一秒统计并显示一次 100代表统计一百次 使用ntop等工具,就更方便简单了,不过这个更灵活 P.S. sar在sysstat包 来源:http://www.c ...