WPF 样式Style
一:样式基础
如果我们的程序有三个这样的按键,一般我们会这样写
    <StackPanel>

        <!--按键的背景色为Azure蔚蓝色背景色为Coral珊瑚色字体为Arial加粗字体大小为16-->

        <Button Content="Button1" Background="Azure" Foreground="Coral" FontFamily="Arial" FontWeight="Bold" FontSize="16" />

        <Button Content="Button2" Background="Azure" Foreground="Coral" FontFamily="Arial" FontWeight="Bold" FontSize="16" />

        <Button Content="Button3" Background="Azure" Foreground="Coral" FontFamily="Arial" FontWeight="Bold" FontSize="16" />

    </StackPanel>
但是如果我们的程序有很多这样的按键,每一个都设置一遍外观属性代码就会显得很冗余,有好奇心的小伙伴就会想有没有一种办法让代码变得简洁一些?答案是:Style
    <Window.Resources>

        <Style x:Key="ButtonStyle">

            <!--按键的背景色为Azure蔚蓝色背景色为Coral珊瑚色字体为Arial加粗字体大小为16-->

            <Setter Property="Control.FontFamily" Value="Arial"></Setter>

            <Setter Property="Control.Background" Value="Azure"></Setter>

            <Setter Property="Control.Foreground" Value="Coral"></Setter>

            <Setter Property="Control.FontWeight" Value="Bold"></Setter>

            <Setter Property="Control.FontSize" Value="16"></Setter>

        </Style>

    </Window.Resources>

    <StackPanel>

        <Button Content="Button1" Style="{StaticResource ButtonStyle}" />

        <Button Content="Button2" Style="{StaticResource ButtonStyle}" />

        <Button Content="Button3" Style="{StaticResource ButtonStyle}" />

    </StackPanel>
这样代码就会显得简洁一些,细心的小伙伴儿发现所有的按键都用Style="{StaticResource ButtonStyle}"来指定样式,感觉还是略有一点冗余,那我们还可以继续让代码简洁一些,把
<Style x:Key="ButtonStyle">样式里的键值换成目标类型TargetTpye="Button",
    <Window.Resources>

        <Style TargetType="Button">

            <!--按键的背景色为Azure蔚蓝色背景色为Coral珊瑚色字体为Arial加粗字体大小为16-->

            <Setter Property="Control.FontFamily" Value="Arial"></Setter>

            <Setter Property="Control.Background" Value="Azure"></Setter>

            <Setter Property="Control.Foreground" Value="Coral"></Setter>

            <Setter Property="Control.FontWeight" Value="Bold"></Setter>

            <Setter Property="Control.FontSize" Value="16"></Setter>

        </Style>

    </Window.Resources>

    <StackPanel>

        <Button Content="Button1"  />

        <Button Content="Button2"  />

        <Button Content="Button3"  />

    </StackPanel>
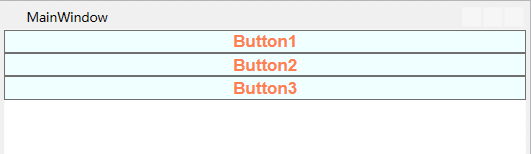
这样三个按键的代码就非常简洁了,但是有的小伙伴儿就想让第一个和第三个按键用上面的样式,第二个不用这样的样式,我们可以这样改
    <Window.Resources>

        <Style TargetType="Button">

            <!--按键的背景色为Azure蔚蓝色背景色为Coral珊瑚色字体为Arial加粗字体大小为16-->

            <Setter Property="Control.FontFamily" Value="Arial"></Setter>

            <Setter Property="Control.Background" Value="Azure"></Setter>

            <Setter Property="Control.Foreground" Value="Coral"></Setter>

            <Setter Property="Control.FontWeight" Value="Bold"></Setter>

            <Setter Property="Control.FontSize" Value="16"></Setter>

        </Style>

    </Window.Resources>

    <StackPanel>

        <Button Content="Button1"  />

        <Button Content="Button2" Style="{x:Null}" />

        <Button Content="Button3"  />

    </StackPanel>
效果如下

二:样式的事件
当我们想让鼠标经过按键时,前景色变为蓝色,鼠标离开时,前景色变为珊瑚色
一般我们会这样写前端代码
    <Window.Resources>

        <Style TargetType="Button">

            <!--按键的背景色为Azure蔚蓝色背景色为Coral珊瑚色字体为Arial加粗字体大小为16-->

            <Setter Property="Control.FontFamily" Value="Arial"></Setter>

            <Setter Property="Control.Background" Value="Azure"></Setter>

            <Setter Property="Control.Foreground" Value="Coral"></Setter>

            <Setter Property="Control.FontWeight" Value="Bold"></Setter>

            <Setter Property="Control.FontSize" Value="16"></Setter>

        </Style>

    </Window.Resources>

    <StackPanel>

        <Button Content="Button1" MouseEnter="btnMouseEnter" MouseLeave="btnMouseLeave" />

        <Button Content="Button2" MouseEnter="btnMouseEnter" MouseLeave="btnMouseLeave" />

        <Button Content="Button3" MouseEnter="btnMouseEnter" MouseLeave="btnMouseLeave"/>

    </StackPanel>
然后为后台代码添加事件处理事件
        private void btnMouseEnter(object sender, MouseEventArgs e)

        {

            ((Button)sender).Foreground = new SolidColorBrush(Colors.Blue);//字体颜色改为蓝色

        }

        private void btnMouseLeave(object sender, MouseEventArgs e)

        {

            ((Button)sender).Foreground = new SolidColorBrush(Colors.Coral);//字体颜色改为珊瑚色

        }
这样每个按键都有一个鼠标进入事件和一个离开事件MouseEnter="btnMouseEnter" MouseLeave="btnMouseLeave"。聪明的小伙伴儿就会想样式可以简化控件的外观,那可以不可以简化控件的事件呢?答案是:EventSetter
    <Window.Resources>

        <Style TargetType="Button">

            <!--按键的背景色为Azure蔚蓝色背景色为Coral珊瑚色字体为Arial加粗字体大小为16-->

            <Setter Property="Control.FontFamily" Value="Arial"></Setter>

            <Setter Property="Control.Background" Value="Azure"></Setter>

            <Setter Property="Control.Foreground" Value="Coral"></Setter>

            <Setter Property="Control.FontWeight" Value="Bold"></Setter>

            <Setter Property="Control.FontSize" Value="16"></Setter>

            <EventSetter Event="FrameworkElement.MouseEnter" Handler="btnMouseEnter"></EventSetter>

            <EventSetter Event="FrameworkElement.MouseLeave" Handler="btnMouseLeave"></EventSetter>

        </Style>

    </Window.Resources>

    <StackPanel>

        <Button Content="Button1" />

        <Button Content="Button2" />

        <Button Content="Button3" />

    </StackPanel>
<EventSetter Event="FrameworkElement.MouseEnter" Handler="btnMouseEnter"></EventSetter>

EventSetter :设置样式的事件设置,Event:事件类型,Handler:事件处理程序btnMouseEnter就是我们刚才写的后台代码事件处理程序没有任何变化
        private void btnMouseEnter(object sender, MouseEventArgs e)

        {

            ((Button)sender).Foreground = new SolidColorBrush(Colors.Blue);//字体颜色改为蓝色

        }
这样写代码就会很简洁,也便于维护。
WPF 样式Style的更多相关文章
- Bootstrap WPF Style,Bootstrap风格的WPF样式
简介 GitHub地址:https://github.com/ptddqr/bootstrap-wpf-style 此样式基于bootstrap-3.3.0,样式文件里的源码行数都是指的这个版本.CS ...
- C#工具:Bootstrap WPF Style,Bootstrap风格的WPF样式
简介 GitHub地址:https://github.com/ptddqr/bootstrap-wpf-style 此样式基于bootstrap-3.3.0,样式文件里的源码行数都是指的这个版本.CS ...
- WPF样式(Style)入门
原文:WPF样式(Style)入门 版权声明:本文为博主原创文章,未经博主允许不得转载. https://blog.csdn.net/qq_34802416/article/details/78231 ...
- wpf 中关于Image中样式Style的一点总结
第一种写法: (1):定义样式 <Style x:Key="imgStyle" TargetType="Image"> : <!-- Tar ...
- 第十四章:样式(Style)和主题(Theme)
简介 Android的样式(Style)和主题(Theme)文件就好比WEB开发中的CSS一样,可以实现UI界面的风格统一管理,这和Windows平台的XAML格式(Silverlight.WPF)类 ...
- WPF 样式和行为
样式(style):组织和重用格式化选项的重要工具,将细节如边距.字体.字号等信息封装起来,然后再需要的地方通过属性来应用样式. 行为(behavior):封装一些通用的UI行为,如拖动,缩放元素的代 ...
- WPF 之 style文件的引用
总结一下WPF中Style样式的引用方法. 一.内联样式: 直接设置控件的Height.Width.Foreground.HorizontalAlignment.VerticalAlignment等属 ...
- 写自己的WPF样式 - 窗体
初试WPF样式,感觉还不错.上篇写完了按钮的样式下面写窗体,废话不多说直接上代码: (1)定义一个窗体样式"MyWpfWindow" <Style x:Key="M ...
- WPF的Style的TargetType不同写法的异同
原文:WPF的Style的TargetType不同写法的异同 <Style TargetType="TextBlock"> <Setter Property=&q ...
随机推荐
- 详解git pull和git fetch的区别
前言 在我们使用git的时候用的更新代码是git fetch,git pull这两条指令.但是有没有小伙伴去思考过这两者的区别呢?有经验的人总是说最好用git fetch+git merge,不建议用 ...
- 十八:jinja2之include标签
用于将页面的某一块地方抽取出来,要嵌入内容的时候使用,继承的概念 把具体内容分别放到其他地方同一管理,要用的时候使用include继承 使用include的时候可以直接使用接收的数据
- Java 生成 32位 UUID
UUID:Universally Unique Identifier 通用唯一识别码 现在很多数据库的主键id,由原来的int自增,改为 UUID 表示.因为 UUID 本身不可能重复,线程安全,完美 ...
- 用roles部署nginx
1.初始化一个role [root@bogon ~]# ansible-galaxy init /etc/ansible/roles/websrvs 查看已经创建的role [root@bogon ~ ...
- shadow配置文件及结果
- FPGA VGA时序的理解
最近在做FPGA毕业设计,毕业设计规划的是摄像头采集图像,经过均值滤波,中值滤波,高斯滤波,然后通过VGA接口控制显示器显示出来,所以最近学习了一下FPGA的VGA驱动的相关内容. VGA接口 如上图 ...
- ansible自动化运维管理工具
1.Ansible介绍 1)Ansible:Ansible的核心程序 2)Host Inventory:(默认路径:/etc/ansible/hosts)记录了每一个由Ansible管理的主机信息,信 ...
- 【OpenCV开发】imread和imwrite的类型以及第三个参数关于图片压缩质量等
本片参考博客:http://blog.csdn.net/poem_qianmo/article/details/20537737 基于OpenCV3.0,与原博客有出入. 在OpenCV1.0时代,基 ...
- 【嵌入式开发】Raspberry Pi 树莓派性能测试
Raspberry Pi 树莓派性能测试 目录: CPU Linpack基准测试 源码 编译/运行 结果 Whetstone/Dhrystone综合基准测试 源码 编译/运行 结果 OpenSSL安全 ...
- CountDownLatch与CyclicBarrier的对比
CountDownLatch: CountDownLatch通过计数器来实现,计数器表示线程的数量.每当一个线程执行结束后,计数器的值就会减1,并在await方法处阻塞.一旦计数器为0,所有阻塞的线程 ...