WPF 样式Style
一:样式基础
如果我们的程序有三个这样的按键,一般我们会这样写
    <StackPanel>

        <!--按键的背景色为Azure蔚蓝色背景色为Coral珊瑚色字体为Arial加粗字体大小为16-->

        <Button Content="Button1" Background="Azure" Foreground="Coral" FontFamily="Arial" FontWeight="Bold" FontSize="16" />

        <Button Content="Button2" Background="Azure" Foreground="Coral" FontFamily="Arial" FontWeight="Bold" FontSize="16" />

        <Button Content="Button3" Background="Azure" Foreground="Coral" FontFamily="Arial" FontWeight="Bold" FontSize="16" />

    </StackPanel>
但是如果我们的程序有很多这样的按键,每一个都设置一遍外观属性代码就会显得很冗余,有好奇心的小伙伴就会想有没有一种办法让代码变得简洁一些?答案是:Style
    <Window.Resources>

        <Style x:Key="ButtonStyle">

            <!--按键的背景色为Azure蔚蓝色背景色为Coral珊瑚色字体为Arial加粗字体大小为16-->

            <Setter Property="Control.FontFamily" Value="Arial"></Setter>

            <Setter Property="Control.Background" Value="Azure"></Setter>

            <Setter Property="Control.Foreground" Value="Coral"></Setter>

            <Setter Property="Control.FontWeight" Value="Bold"></Setter>

            <Setter Property="Control.FontSize" Value="16"></Setter>

        </Style>

    </Window.Resources>

    <StackPanel>

        <Button Content="Button1" Style="{StaticResource ButtonStyle}" />

        <Button Content="Button2" Style="{StaticResource ButtonStyle}" />

        <Button Content="Button3" Style="{StaticResource ButtonStyle}" />

    </StackPanel>
这样代码就会显得简洁一些,细心的小伙伴儿发现所有的按键都用Style="{StaticResource ButtonStyle}"来指定样式,感觉还是略有一点冗余,那我们还可以继续让代码简洁一些,把
<Style x:Key="ButtonStyle">样式里的键值换成目标类型TargetTpye="Button",
    <Window.Resources>

        <Style TargetType="Button">

            <!--按键的背景色为Azure蔚蓝色背景色为Coral珊瑚色字体为Arial加粗字体大小为16-->

            <Setter Property="Control.FontFamily" Value="Arial"></Setter>

            <Setter Property="Control.Background" Value="Azure"></Setter>

            <Setter Property="Control.Foreground" Value="Coral"></Setter>

            <Setter Property="Control.FontWeight" Value="Bold"></Setter>

            <Setter Property="Control.FontSize" Value="16"></Setter>

        </Style>

    </Window.Resources>

    <StackPanel>

        <Button Content="Button1"  />

        <Button Content="Button2"  />

        <Button Content="Button3"  />

    </StackPanel>
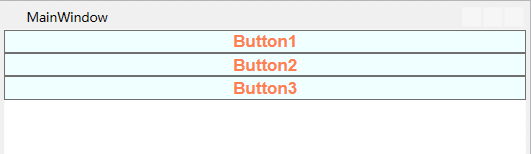
这样三个按键的代码就非常简洁了,但是有的小伙伴儿就想让第一个和第三个按键用上面的样式,第二个不用这样的样式,我们可以这样改
    <Window.Resources>

        <Style TargetType="Button">

            <!--按键的背景色为Azure蔚蓝色背景色为Coral珊瑚色字体为Arial加粗字体大小为16-->

            <Setter Property="Control.FontFamily" Value="Arial"></Setter>

            <Setter Property="Control.Background" Value="Azure"></Setter>

            <Setter Property="Control.Foreground" Value="Coral"></Setter>

            <Setter Property="Control.FontWeight" Value="Bold"></Setter>

            <Setter Property="Control.FontSize" Value="16"></Setter>

        </Style>

    </Window.Resources>

    <StackPanel>

        <Button Content="Button1"  />

        <Button Content="Button2" Style="{x:Null}" />

        <Button Content="Button3"  />

    </StackPanel>
效果如下

二:样式的事件
当我们想让鼠标经过按键时,前景色变为蓝色,鼠标离开时,前景色变为珊瑚色
一般我们会这样写前端代码
    <Window.Resources>

        <Style TargetType="Button">

            <!--按键的背景色为Azure蔚蓝色背景色为Coral珊瑚色字体为Arial加粗字体大小为16-->

            <Setter Property="Control.FontFamily" Value="Arial"></Setter>

            <Setter Property="Control.Background" Value="Azure"></Setter>

            <Setter Property="Control.Foreground" Value="Coral"></Setter>

            <Setter Property="Control.FontWeight" Value="Bold"></Setter>

            <Setter Property="Control.FontSize" Value="16"></Setter>

        </Style>

    </Window.Resources>

    <StackPanel>

        <Button Content="Button1" MouseEnter="btnMouseEnter" MouseLeave="btnMouseLeave" />

        <Button Content="Button2" MouseEnter="btnMouseEnter" MouseLeave="btnMouseLeave" />

        <Button Content="Button3" MouseEnter="btnMouseEnter" MouseLeave="btnMouseLeave"/>

    </StackPanel>
然后为后台代码添加事件处理事件
        private void btnMouseEnter(object sender, MouseEventArgs e)

        {

            ((Button)sender).Foreground = new SolidColorBrush(Colors.Blue);//字体颜色改为蓝色

        }

        private void btnMouseLeave(object sender, MouseEventArgs e)

        {

            ((Button)sender).Foreground = new SolidColorBrush(Colors.Coral);//字体颜色改为珊瑚色

        }
这样每个按键都有一个鼠标进入事件和一个离开事件MouseEnter="btnMouseEnter" MouseLeave="btnMouseLeave"。聪明的小伙伴儿就会想样式可以简化控件的外观,那可以不可以简化控件的事件呢?答案是:EventSetter
    <Window.Resources>

        <Style TargetType="Button">

            <!--按键的背景色为Azure蔚蓝色背景色为Coral珊瑚色字体为Arial加粗字体大小为16-->

            <Setter Property="Control.FontFamily" Value="Arial"></Setter>

            <Setter Property="Control.Background" Value="Azure"></Setter>

            <Setter Property="Control.Foreground" Value="Coral"></Setter>

            <Setter Property="Control.FontWeight" Value="Bold"></Setter>

            <Setter Property="Control.FontSize" Value="16"></Setter>

            <EventSetter Event="FrameworkElement.MouseEnter" Handler="btnMouseEnter"></EventSetter>

            <EventSetter Event="FrameworkElement.MouseLeave" Handler="btnMouseLeave"></EventSetter>

        </Style>

    </Window.Resources>

    <StackPanel>

        <Button Content="Button1" />

        <Button Content="Button2" />

        <Button Content="Button3" />

    </StackPanel>
<EventSetter Event="FrameworkElement.MouseEnter" Handler="btnMouseEnter"></EventSetter>

EventSetter :设置样式的事件设置,Event:事件类型,Handler:事件处理程序btnMouseEnter就是我们刚才写的后台代码事件处理程序没有任何变化
        private void btnMouseEnter(object sender, MouseEventArgs e)

        {

            ((Button)sender).Foreground = new SolidColorBrush(Colors.Blue);//字体颜色改为蓝色

        }
这样写代码就会很简洁,也便于维护。
WPF 样式Style的更多相关文章
- Bootstrap WPF Style,Bootstrap风格的WPF样式
简介 GitHub地址:https://github.com/ptddqr/bootstrap-wpf-style 此样式基于bootstrap-3.3.0,样式文件里的源码行数都是指的这个版本.CS ...
- C#工具:Bootstrap WPF Style,Bootstrap风格的WPF样式
简介 GitHub地址:https://github.com/ptddqr/bootstrap-wpf-style 此样式基于bootstrap-3.3.0,样式文件里的源码行数都是指的这个版本.CS ...
- WPF样式(Style)入门
原文:WPF样式(Style)入门 版权声明:本文为博主原创文章,未经博主允许不得转载. https://blog.csdn.net/qq_34802416/article/details/78231 ...
- wpf 中关于Image中样式Style的一点总结
第一种写法: (1):定义样式 <Style x:Key="imgStyle" TargetType="Image"> : <!-- Tar ...
- 第十四章:样式(Style)和主题(Theme)
简介 Android的样式(Style)和主题(Theme)文件就好比WEB开发中的CSS一样,可以实现UI界面的风格统一管理,这和Windows平台的XAML格式(Silverlight.WPF)类 ...
- WPF 样式和行为
样式(style):组织和重用格式化选项的重要工具,将细节如边距.字体.字号等信息封装起来,然后再需要的地方通过属性来应用样式. 行为(behavior):封装一些通用的UI行为,如拖动,缩放元素的代 ...
- WPF 之 style文件的引用
总结一下WPF中Style样式的引用方法. 一.内联样式: 直接设置控件的Height.Width.Foreground.HorizontalAlignment.VerticalAlignment等属 ...
- 写自己的WPF样式 - 窗体
初试WPF样式,感觉还不错.上篇写完了按钮的样式下面写窗体,废话不多说直接上代码: (1)定义一个窗体样式"MyWpfWindow" <Style x:Key="M ...
- WPF的Style的TargetType不同写法的异同
原文:WPF的Style的TargetType不同写法的异同 <Style TargetType="TextBlock"> <Setter Property=&q ...
随机推荐
- flutter dialog
flutter Dialog import 'dart:math'; import 'package:flutter/material.dart'; import 'test.dart'; impor ...
- Selenium 2自动化测试实战19(下载文件)
一.下载文件 webDriver允许设置默认的文件下载路径,也就是说,文件会自动下载并且存放到设置的目录中.下面以火狐浏览器为例,执行文件的下载. #downfile.py # -*- coding: ...
- caffe-----silence layer 作用
最近看到prototxt里面有silence这个层,好奇是干什么用的,而且看源码也出奇的简单: #include <vector> #include "caffe/layers/ ...
- java:Spring框架4(Project,ER图)
1.Project: ER图: applicationContext.xml: <?xml version="1.0" encoding="UTF-8"? ...
- 在Windows服务器安装ss服务端用于逃脱公司行为管理
1.安装:python-2.7.14.amd64.msi 2.配置环境变量 3.Win64OpenSSL-1_0_2n.exe 4.安装ss服务端:pip install **adowsocks 5. ...
- LeetCode.997-找到镇法官(Find the Town Judge)
这是悦乐书的第373次更新,第400篇原创 01 看题和准备 今天介绍的是LeetCode算法题中Easy级别的第234题(顺位题号是997).在一个城镇,有N个人从1到N标记.有传言说其中一个人是秘 ...
- GitHub高级搜索
GitHub是开发目前最为活跃的开源网站和代码托管地,虽然我们经常使用GitHub,关注各种开源项目,但可能有很多人并不太了解GitHub的搜索功能的使用.GitHub提供了简单搜索和高级搜索,高级 ...
- ios系统App Store安装包下载链接获取
今天将自己开发的Android版本和ios版本的安装包通过生成二维码的方式展示在H5页面上,Android版的比较简单,但是ios的安装包用户必须从App Store(苹果应用市场)中下载安装,所以获 ...
- 20191224 Spring官方文档(启动)
再学Spring 之前看过Spring教学视频,看过<Spring5高级编程>,但是对于Spring始终还是感觉差了一点,应该是底层没有学好,这次再学Spring,就是要将Spring底层 ...
- Python_Onlineh_Hmework(基础篇,持续更新中...)
1 递归 1.1 定义一个函数,求一个数的阶乘 def func(x): if x == 2: return 2 else: return x*func(x-1) a = func(4) print( ...