SpringBoot20 集成SpringSecurity02 -> 利用SpringSecurity进行前后端分离的登录验证
1 SpirngBoot环境搭建
创建一个SpringBoot项目即可,详情参见三少的相关博文
2 引入SpirngSecurity依赖
技巧01:引入了springSecurity相关依赖后,项目就会被SpringSecurity进行管理了;默认的登录名为user,登录密码会被打印到控制台上
技巧02:SpringSecurity默认的配置使用的是
        <!--spring-security相关-->

        <dependency>

            <groupId>org.springframework.boot</groupId>

            <artifactId>spring-boot-starter-security</artifactId>

        </dependency>
2.1 启动项目
技巧01:每次启动项目所打印出来的密码都是不一样的
控制台打印的登录密码信息如下:

2.2 请求一个后台实现的RestfulAPI
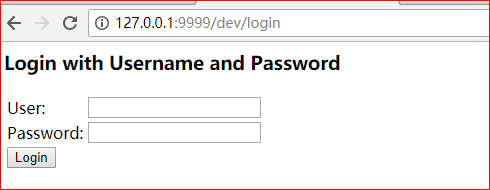
技巧01:项目启动后,前台首次访问时都会被重定向到一个默认的登录页面
技巧02:springSecurity默认的配置时使用表单进行登录
技巧03:前后端分离时也是使用表单登录,而且表单的用户名必须是username,密码必须是password(PS: 前后端分离时只需要模拟出表单提交请求即可,即:请求路径对应,请求参数和后台对应即可)
2.3 录入信息
技巧01:如果用户名不是user或者密码不是控制台打印的信息,都不会通过验证
技巧02:如果登录信息成功后,SpringSecurity会默认重定向到之前访问的路径
技巧03:前后端分离时要求登录验证无论成功与否都是返回JSON格式的数据,具体怎么跳转有前端进行控制
3 SpirngSecurity基础配置
技巧01:自定义SpringSecurity时需要重写一个UserDetaiService类,而该类需要使用一个对密码进行加密和解密的工具类,所以我们需要在自定义的SpringSecurity配置文件中指定这个密码加密解密工具的类的Bean,使得这个类会被Spring容器管理
package cn.test.demo.base_demo.config.springSecurity;

import org.springframework.beans.factory.annotation.Autowired;

import org.springframework.context.annotation.Bean;

import org.springframework.context.annotation.Configuration;

import org.springframework.security.config.annotation.web.builders.HttpSecurity;

import org.springframework.security.config.annotation.web.configuration.WebSecurityConfigurerAdapter;

import org.springframework.security.crypto.bcrypt.BCryptPasswordEncoder;

import org.springframework.security.crypto.password.PasswordEncoder;

/**

 * @author 王杨帅

 * @create 2018-05-27 21:27

 * @desc

 **/

@Configuration

public class FurySpringSecurityConfig extends WebSecurityConfigurerAdapter {

    /** 依赖注入自定义的登录成功处理器 */

    @Autowired

    private FuryAuthenticationSuccessHandler furyAuthenticationSuccessHandler;

    /** 依赖注入自定义的登录失败处理器 */

    @Autowired

    private FuryAuthenticationFailureHandler furyAuthenticationFailureHandler;

//    向spring容器中创建一个Bean

    @Bean

    public PasswordEncoder passwordEncoder() {

        return new BCryptPasswordEncoder();

    }

//    @Override

//    protected void configure(HttpSecurity http) throws Exception {

//        http.formLogin()

//                .loginProcessingUrl("/login")

//                .successHandler(furyAuthenticationSuccessHandler)

//                .failureHandler(furyAuthenticationFailureHandler)

//                .and().authorizeRequests()

//                        .antMatchers("/login").permitAll()

//                        .anyRequest()

//                        .authenticated()

//                .and().csrf().disable();

//    }

}
4 继承UserDetaiService
继承UserDetaiService的子类可以实现登录用户验证以及登录用户的权限查询
package cn.test.demo.base_demo.config.springSecurity;

import lombok.extern.slf4j.Slf4j;

import org.springframework.beans.factory.annotation.Autowired;

import org.springframework.context.annotation.Bean;

import org.springframework.security.core.authority.AuthorityUtils;

import org.springframework.security.core.userdetails.User;

import org.springframework.security.core.userdetails.UserDetails;

import org.springframework.security.core.userdetails.UserDetailsService;

import org.springframework.security.core.userdetails.UsernameNotFoundException;

import org.springframework.security.crypto.password.PasswordEncoder;

import org.springframework.stereotype.Component;

/**

 * @author 王杨帅

 * @create 2018-05-27 21:23

 * @desc

 **/

@Component

@Slf4j

public class FuryUserDetailService implements UserDetailsService {

    /**

     * 依赖注入密码加密解密工具(PS: 需要在springsecurity的配置文件中配置这个Bean)

     */

    @Autowired

    private PasswordEncoder passwordEncoder;

    @Override

    public UserDetails loadUserByUsername(String username) throws UsernameNotFoundException {

        // 打印前端传过来的用户数据

        log.info("前端闯过来的用户名为:{}", username);

        // 模拟数据库中的数据

        String pwd = passwordEncoder.encode("111");

        // 返回一个User对象(技巧01:这个User对象的密码是从数据库中取出来的密码)

//      // 技巧02:数据库中的密码是在创建用户时将用户的密码利用SpreingSecurity配置中相同的密码加密解密工具加密过的

        return new User(username, pwd, AuthorityUtils.commaSeparatedStringToAuthorityList("admin"));

    }

}
4.1 测试
重启项目后,访问一个RestfulAPI时;控制台就不会再打印出密码信息了,继承UserDetaiService的子类会接收到前端传过来的用户名和密码,我们可以在继承UserDetaiService的子类中依赖注入先关的持久层来通过用户名到数据库中去查询用户密码,在将查到的密码和用户登录时的密码进行比对,从而判断用户登录验证是否成功;还可以根据用户名到数据库中去查询该用户的权限信息
技巧01:此时用户名可以随便输入
技巧02:由于密码是三少在后台进行硬编码的的,所以登录时密码必须是 “111”(即:用户名任意,密码只要是 111 就可以登录成功,否则就会登录失败)
6 前后端分离配置
需求01:修改表单的登录路径
》配置登录请求路径即可
需求01:无论登录验证成功与否都返回JSON格式字符串
技巧01:以上的需求都可以在自定义的SpringSecurity配置中实现
技巧02:前后端分离时,请求的方式必须是POST方式,而且必须传递username和password两个变量到后台
6.1 验证后的JSON格式返回
只需要分别实现两个处理接口即可:AuthenticationSuccessHandler、AuthenticationFailureHandler;这两个接口分别处理登录验证成功和失败
package cn.test.demo.base_demo.config.springSecurity;

import com.fasterxml.jackson.databind.ObjectMapper;

import lombok.extern.slf4j.Slf4j;

import org.springframework.beans.factory.annotation.Autowired;

import org.springframework.security.core.Authentication;

import org.springframework.security.web.authentication.AuthenticationSuccessHandler;

import org.springframework.stereotype.Component;

import javax.servlet.ServletException;

import javax.servlet.http.HttpServletRequest;

import javax.servlet.http.HttpServletResponse;

import java.io.IOException;

/**

 * @author 王杨帅

 * @create 2018-05-27 21:48

 * @desc

 **/

@Slf4j

@Component

public class FuryAuthenticationSuccessHandler implements AuthenticationSuccessHandler {

    @Autowired

    private ObjectMapper objectMapper; // Json转化工具

    @Override

    public void onAuthenticationSuccess(HttpServletRequest request, HttpServletResponse response, Authentication authentication) throws IOException, ServletException {

        log.info("登录验证成功");

        response.setContentType("application/json;charset=UTF-8"); // 响应类型

        response.getWriter().write(objectMapper.writeValueAsString("登录验证成功"));

    }

}
FuryAuthenticationSuccessHandler.java
package cn.test.demo.base_demo.config.springSecurity;

import com.fasterxml.jackson.databind.ObjectMapper;

import lombok.extern.slf4j.Slf4j;

import org.springframework.beans.factory.annotation.Autowired;

import org.springframework.security.core.AuthenticationException;

import org.springframework.security.web.authentication.AuthenticationFailureHandler;

import org.springframework.stereotype.Component;

import javax.servlet.ServletException;

import javax.servlet.http.HttpServletRequest;

import javax.servlet.http.HttpServletResponse;

import java.io.IOException;

/**

 * @author 王杨帅

 * @create 2018-05-27 21:55

 * @desc

 **/

@Component

@Slf4j

public class FuryAuthenticationFailureHandler implements AuthenticationFailureHandler {

    @Autowired

    private ObjectMapper objectMapper;

    @Override

    public void onAuthenticationFailure(HttpServletRequest request, HttpServletResponse response, AuthenticationException exception) throws IOException, ServletException {

        log.info("登录验证失败");

        response.setContentType("application/json;charset=UTF-8");

        response.getWriter().write(objectMapper.writeValueAsString(exception));;

    }

}
FuryAuthenticationFailureHandler.java
6.2 配置自定SpringSecurity配置
package cn.test.demo.base_demo.config.springSecurity;

import org.springframework.beans.factory.annotation.Autowired;

import org.springframework.context.annotation.Bean;

import org.springframework.context.annotation.Configuration;

import org.springframework.security.config.annotation.web.builders.HttpSecurity;

import org.springframework.security.config.annotation.web.configuration.WebSecurityConfigurerAdapter;

import org.springframework.security.crypto.bcrypt.BCryptPasswordEncoder;

import org.springframework.security.crypto.password.PasswordEncoder;

/**

 * @author 王杨帅

 * @create 2018-05-27 21:27

 * @desc

 **/

@Configuration

public class FurySpringSecurityConfig extends WebSecurityConfigurerAdapter {

    /** 依赖注入自定义的登录成功处理器 */

    @Autowired

    private FuryAuthenticationSuccessHandler furyAuthenticationSuccessHandler;

    /** 依赖注入自定义的登录失败处理器 */

    @Autowired

    private FuryAuthenticationFailureHandler furyAuthenticationFailureHandler;

//    向spring容器中创建一个Bean

    @Bean

    public PasswordEncoder passwordEncoder() {

        return new BCryptPasswordEncoder();

    }

    @Override

    protected void configure(HttpSecurity http) throws Exception {

        http.formLogin()

                .loginProcessingUrl("/furyLogin") // 登录请求路径

                .successHandler(furyAuthenticationSuccessHandler) // 验证成功处理器

                .failureHandler(furyAuthenticationFailureHandler) // 验证失败处理器

                .and().authorizeRequests()

                        .antMatchers("/furyLogin").permitAll() // 登录请求路径不进行过滤

                        .anyRequest()

                        .authenticated()

                .and().csrf().disable(); // 取消跨站请求伪造防护

    }

}
6.3 测试
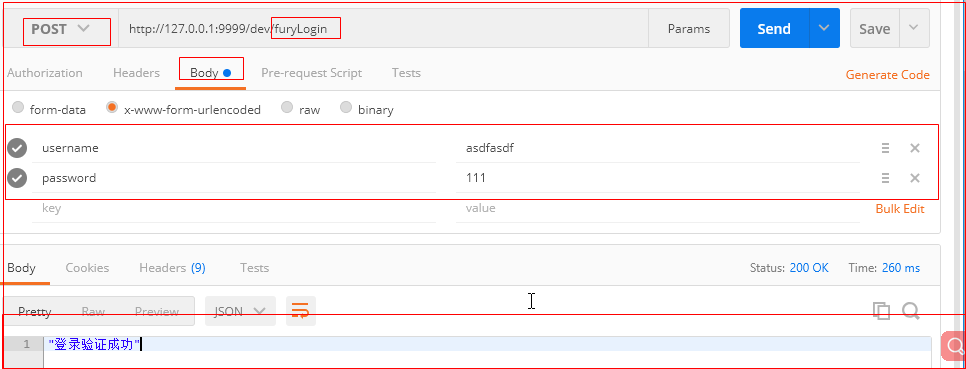
利用postman进行测试
技巧01:只需要模拟出 登录请求即可;POST请求,参数分别是username和password
坑01:虽然在springSecurity的自定义配置文件中配置的登录请求路径是 /furyLogin ,但是我们在模拟的时候必须模拟 http://127.0.0.1:9999/dev/furyLogin,因为必须加上IP、端口和应用上下文路径
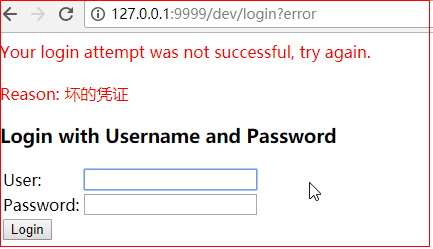
6.3.1 登录验证失败的效果展示

6.3.2 登录成功的效果
7 利用Angular实现前端登录
8 登录成功后返回对应的菜单信息
9 权限问题
·下面是我的公众号二维码,欢迎关注·
尋渝記

微信号:xyj_fury
SpringBoot20 集成SpringSecurity02 -> 利用SpringSecurity进行前后端分离的登录验证的更多相关文章
- Django 利用JWT实现前后端分离的Token验证
一.什么是Token? Token是服务端生成的一串字符串,以作客户端进行请求的一个令牌,当第一次登录后,服务器会生成一个Token并将此Token返回给客户端,以后客户端只需带上这个Token前来请 ...
- 【SpringSecurity系列2】基于SpringSecurity实现前后端分离无状态Rest API的权限控制原理分析
源码传送门: https://github.com/ningzuoxin/zxning-springsecurity-demos/tree/master/01-springsecurity-state ...
- SpringSecurity04 利用JPA和SpringSecurity实现前后端分离的认证和授权
1 环境搭建 1.1 环境说明 JDK:1.8 MAVEN:3.5 SpringBoot:2.0.4 SpringSecurity:5.0.7 IDEA:2017.02旗舰版 1.2 环境搭建 创建一 ...
- 【SpringSecurity系列3】基于Spring Webflux集成SpringSecurity实现前后端分离无状态Rest API的权限控制
源码传送门: https://github.com/ningzuoxin/zxning-springsecurity-demos/tree/master/02-springsecurity-state ...
- 利用gulp解决前后端分离的header/footer引入问题
在我们进行前后端完全分离的时候,有一个问题一直是挺头疼的,那就是公共header和footer的引入.在传统利用后端渲染的情况下,我们可以把header.footer写成两个单独的模板,然后用后端语言 ...
- Spring-Gateway与Spring-Security在前后端分离项目中的实践
前言 网上貌似webflux这一套的SpringSecurity操作资料貌似很少. 自己研究了一波,记录下来做一点备忘,如果能帮到也在迷惑的人一点点,就更好了. 新项目是前后端分离的项目,前台vue, ...
- 【SpringSecurity系列1】基于SpringSecurity实现前后端分离无状态Rest API的权限控制
源码传送门: https://github.com/ningzuoxin/zxning-springsecurity-demos/tree/master/01-springsecurity-state ...
- 利用CORS解决前后端分离的跨域资源问题
CORS 即CrossOrigin Resources Sharing-跨域资源共享,它定义了一种浏览器和服务器交互的方式来确定是否允许跨域请求.它是一个妥协,有更大的灵活性,但比起简单地允许所有这些 ...
- springsecurity实现前后端分离之jwt-资料收集
https://www.jianshu.com/p/5b9f1f4de88d https://www.jianshu.com/p/725d32ab92f8 https://blog.csdn.net/ ...
随机推荐
- shfileoperation 删除文件 FileDelete(CString strName)
From:http://blog.csdn.net/lvwx369/article/details/41440883 注意:其中namePath 为全局变量 Cstring namePath; BOO ...
- HihoCoder 1097 Prim算法
1097 : 最小生成树一·Prim算法 时间限制:10000ms 单点时限:1000ms 内存限制:256MB 描述 最近,小Hi很喜欢玩的一款游戏模拟城市开放出了新Mod,在这个Mod中,玩家可以 ...
- Block Towers (思维实现)
个人心得:这题没怎么看,题意难懂.后面比完再看的时候发现很好做但是怎么卡时间是个问题. 题意:就是有m个可以用2层积木的,n个可以用三层积木的,但是他们不允许重复所以可以无限添加. 比如 3 2 一开 ...
- 关于使用modelsim的一点感想
使用modelsim的过程中工程结构是这样的 testbench中例化了一个模块a,模块a中调用了模块b,中间模块a在其他工程中用了一下,改了模块名字,同时内容也稍微修改了一下,用完之后复制回来覆盖了 ...
- idea的有些路径问题
resource文件在xml的路径 http://www.cnblogs.com/zqr99/p/7642712.html resource文件在io流的读取 this.getClass().getR ...
- STM32从boot跳转到app失败
现象:在每次boot执行完跳转到APP时,都会跑飞 原因:在boot中使用到了USART和TIM,boot执行完没有关闭总中断 方法:在boot执行完跳转之前关闭中断,__disable_irq() ...
- TCP报文送达确认ACK
TCP数据包中的序列号(Sequence Number)不是以报文段来进行编号的,而是将连接生存周期内传输的所有数据当作一个字节流,序列号就是整个字节流中每个字节的编号.一个TCP数据包中包含多个字节 ...
- Intent使用方法
显示Intent 通过构造函数的重载,创建Intent对象,并用startActivity()启动目标活动. 目标活动需要在AndroidManifest.xml中注册 ...... Intent i ...
- VirtualBox 虚拟机 centos7 下 设置静态ip 并支持 xshell 远程登陆的设置方法
1.设置虚拟机使用“桥接模式” 2.使用 vi /etc/sysconfig/network-scripts/ifcfg-enp0s3 打开配置文件(其中 enp0s3 是你的linux的网卡名,在 ...
- 固态硬盘安装win7系统问题。
可能出现:安装程序无法创建新的系统分区 出现这个错误后, 1.可以先尝试把固态硬盘插在硬盘的第一个硬盘口上,然后安装系统时拔掉U盘刷新再点击安装. 2.可以尝试在PE下直接安装系统. 如果上两个方法都 ...