SpringBoot整合WEB开发--(一)处理JSON返回数据
1.使用默认的json转换HttpessageConverter
Json是目前主流的前后端数据传输方式,SpringMVC中使用消息转化器HttpMessageConverter对JSON的转换提供了很好的支持,在SpringBoot中对相关配置做了进一步简化。
pom.xml

<dependency>

<groupId>org.springframework.boot</groupId>

<artifactId>spring-boot-starter-web</artifactId>

</dependency>
这个依赖中默认加入了jacjson-databind作为JSON处理器,此时不需要添加额外的Json处理器就可以返回json了。
public class Book {

private String name;

private String author;

@JsonIgnore //过滤掉这个属性

protected Float price;

@JsonFormat(pattern = "yyyy-MM-dd") //格式化输出这个属性

private Date publicationDate;

//省略getter/setter

}


@RestController

public class BookController {

@GetMapping("/book")

public Book book() {

Book book = new Book();

book.setAuthor("罗贯中");

book.setName("三国演义");

book.setPrice(30f);

book.setPublicationDate(new Date());

return book;

}

}
结果: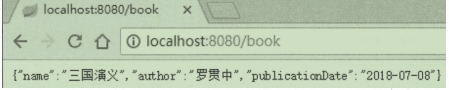
这是Springboot自带的处理方式,如果采用这种方式,对于字段忽略,日期格式化等都可以使用注解实现。
Spring中默认提供的MappingJackson2HttpMessageConverter去实现json转换的。
2.自定义转换器
常见的JSON处理器除了Jackson-databind,还有Gson和fastjson
2.1使用Gson
Gson是Google的一个开源的JSON解析框架,使用他之前首先去除默认的jackson-databind,然后加入Gson依赖。
<dependency>

<groupId>org.springframework.boot</groupId>

<artifactId>spring-boot-starter-web</artifactId>

<exclusions>

<exclusion>

<groupId>com.fasterxml.jackson.core</groupId>

<artifactId>jackson-databind</artifactId>

</exclusion>

</exclusions>

</dependency>

<dependency>

<groupId>com.google.code.gson</groupId>

<artifactId>gson</artifactId>

</dependency>
SpringBoot中默认提供了Gson的自动转换类GsonHttpMessageConverterConfiguration,因此可以像使用jackson-databind那样直接使用Gson,但是在Gson进行转换时,如果想对日期数据进行格式化,还需要自定义HttpMessageConverter。
protected static class GsonHttpMessageConverterConfiguration {

@Bean

@ConditionalOnMissingBean

public GsonHttpMessageConverter gsonHttpMessageConverter(Gson gson) {

GsonHttpMessageConverter converter = new GsonHttpMessageConverter();

converter.setGson(gson);

return converter;

}

}
@ConditionalOnMissingBean注解表示当项目中没有提供GsonHttpMessageConverter 时才会使用默认的GsonHttpMessageConverter,所以我们自己写一个 GsonHttpMessageConverter就可以避免没有GsonHttpMessageConverter从而使用默认的了。
@Configuration

public class GsonConfig {

@Bean

GsonHttpMessageConverter gsonHttpMessageConverter() {

GsonHttpMessageConverter converter = new GsonHttpMessageConverter();

GsonBuilder builder = new GsonBuilder();

//设置Gson解析时日期的格式

builder.setDateFormat("yyyy-MM-dd");

//设置Gson解析时修饰符为protected的字段时过滤掉它

builder.excludeFieldsWithModifiers(Modifier.PROTECTED);

//创建Gson对象放入GsonHttpMessageConverter的实例并且返回converter

Gson gson = builder.create();

converter.setGson(gson);

return converter;

}

}

public class Book {
private String name;
private String author;
protected Float price; //字段被过滤掉
private Date publicationDate;
}
2.2使用fastjson
阿里巴巴的json解析框架,可以集成到SpringBoot中,不同于Gson,fastjson继承后并不能立即使用,还需要开发者提供HttpMessageConverter后才可以使用。
同样,去除jsckson-databind依赖,加入fastjson依赖
<dependency>

<groupId>org.springframework.boot</groupId>

<artifactId>spring-boot-starter-web</artifactId>

<exclusions>

<exclusion>

<groupId>com.fasterxml.jackson.core</groupId>

<artifactId>jackson-databind</artifactId>

</exclusion>

</exclusions>

</dependency>

<dependency>

<groupId>com.alibaba</groupId>

<artifactId>fastjson</artifactId>

<version>1.2.47</version>

</dependency>
配置fasjson的HttpMessageConverter
@Configuration

public class MyFastJsonConfig {

@Bean

FastJsonHttpMessageConverter fastJsonHttpMessageConverter() {

FastJsonHttpMessageConverter converter = new FastJsonHttpMessageConverter();

FastJsonConfig config = new FastJsonConfig();

//设置json解析中一些细节,日期格式,数据编码

config.setDateFormat("yyyy-MM-dd");

config.setCharset(Charset.forName("UTF-8"));

//是否在生成的Json中输出类名

//是否输出value为null的数据

//生成的json格式化

//空集合输出[]而非null

//空字符串输出“”而非null等配置

config.setSerializerFeatures(

SerializerFeature.WriteClassName,

SerializerFeature.WriteMapNullValue,

SerializerFeature.PrettyFormat,

SerializerFeature.WriteNullListAsEmpty,

SerializerFeature.WriteNullStringAsEmpty

);

converter.setFastJsonConfig(config);

return converter;

}

}
若输出中文有乱码:spring.http.encoding.force-response=true
对于FastJsonHttpMessageConverter 的配置,还有一种方式
引入spring-boot-starter-web后,他依赖spring-boot-autoconfigure,在这个自动化配置中,有一个WebMvcAutoConfiguration类提供了对SpringMVC最基本的配置如果希望自己配置只需要实现WebMvcConfigurer接口即可。
@Configuration

public class MyWebMvcConfig implements WebMvcConfigurer {
@Override

public void configureMessageConverters(List<HttpMessageConverter<?>> converters) {

FastJsonHttpMessageConverter converter = new FastJsonHttpMessageConverter();

FastJsonConfig config = new FastJsonConfig();

config.setDateFormat("yyyy-MM-dd");

config.setCharset(Charset.forName("UTF-8"));

config.setSerializerFeatures(

SerializerFeature.WriteClassName,

SerializerFeature.WriteMapNullValue,

SerializerFeature.PrettyFormat,

SerializerFeature.WriteNullListAsEmpty,

SerializerFeature.WriteNullStringAsEmpty

);

converter.setFastJsonConfig(config);

converters.add(converter);

}
}
Jackson相关注解:
使用Jackson相关的注解时一定要注意自己定义的属性命名是否规范。
命名不规范时会失去效果。(例如Ename ,Eage 为不规范命名。“nameE”,“ageE”为规范命名,如果使用@JsonIgnore注解不起效时请注意一下你的属性名字是否规范
1、@JsonIgnoreProperties
此注解是类注解,作用是json序列化时将java bean中的一些属性忽略掉,序列化和反序列化都受影响。
写法将此标签加在model 类的类名上 ,可以多个属性也可以单个属性
//生成json时将name和age属性过滤

@JsonIgnoreProperties({"name"},{"age"})

public class  user {

private  String name;

private int age;

}
2、@JsonIgnore
此注解用于属性或者方法上(最好是属性上),作用和上面的@JsonIgnoreProperties一样。
生成json 时不生成age 属性
public class user {

  private String name;

  @JsonIgnore

  private int age;

}
3、@JsonFormat
此注解用于属性或者方法上(最好是属性上),可以方便的把Date类型直接转化为我们想要的模式,比如@JsonFormat(pattern = “yyyy-MM-dd HH-mm-ss”)
4、@JsonSerialize
此注解用于属性或者getter方法上,用于在序列化时嵌入我们自定义的代码,比如序列化一个double时在其后面限制两位小数点。
5、@JsonDeserialize
此注解用于属性或者setter方法上,用于在反序列化时可以嵌入我们自定义的代码,类似于上面的@JsonSerialize
6、@Transient
如果一个属性并非数据库表的字段映射,就务必将其标示为@Transient,否则ORM框架默认其注解为@Basic;
//表示该字段在数据库表中没有
@Transient

public int getAge() {

 return 1+1;

}
SpringBoot整合WEB开发--(一)处理JSON返回数据的更多相关文章
- springboot整合web开发(整合servlet、filter、listener、访问静态、文件上传)
整合servlet 1.继承HttpServlet 2.添加@WebServlet注解 @WebServlet(name="FirstServlet",urlPatterns=&q ...
- SpringBoot整合WEB开发--(五)自定义错误页
目的与原理: 处理异常时,若我们想根据实际情况返回不同的页面,@ControllerAdvice与@ExceptionHandler,一般用于处理应用级别的异常,一些容器级别的错误就处理不了,例如Fi ...
- SpringBoot整合WEB开发--(十)配置AOP
简介: SpringBoot框架中对AOP有很好的支持,简单AOP概念: JoinPoint(连接点):类里面可以被增强的方法即为连接点,例如,想修改哪个方法的功能,那么该方法就是一个连接点. Poi ...
- SpringBoot整合WEB开发--(九)整合Servlet,Filter,Listener
简介: 如果需要整合第三方框架时,可能还是不得不使用Servlet,Filter,Listener,Springboot中也有提供支持. @WebServlet("/my") pu ...
- SpringBoot整合WEB开发--(八)启动任务系统
简介: 有一些特殊的任务需要在系统启动时执行,例如配置文件的加载,数据库初始化等操作,如果没有使用SpringBoot,这些问题可以在Listener中解决.SpringBoot提供了两种解决方案:C ...
- SpringBoot整合WEB开发--(七)注册拦截器
1.创建一个拦截器类实现HandlerInterceptor接口,重写其中的3个方法,这拦截器中方法的执行顺序为:preHandle--Controller--postHandle--afterCom ...
- SpringBoot整合WEB开发--(六)CROS支持
简介: CROS(Cross-Origin Resource Sharing)是由W3C制定的一种跨域资源共享技术标准,其目的为了解决前端的跨域请求,在JavaEE开发中,最常见的前端跨域请求解决方案 ...
- SpringBoot整合WEB开发--(三)文件上传
文件上传: Java中文件上传一共涉及到两个组件,CommonsMultipartResolver和StandardServletMultipartResolver,其中CommonsMultipar ...
- SpringBoot整合WEB开发--(二)静态资源访问
1.默认策略: 静态资源的位置一共5个,开发者可以将静态资源放到其中任意一个,分别是: "classpath:/META-INF/resources/", "classp ...
随机推荐
- Tutorial: Publishing additional services for printing
Complexity:IntermediateData Requirement:Use your own data There may be occasions when you need to pu ...
- ES6扩展
模板字符串和标签模板 const getCourseList = function() { // ajax return { status: true, msg: '获取成功', data: [{ i ...
- salt-minion启动报错No module named salt.scripts
这是当初部署saltstack时候的问题了,saltstack用的是0.17.4的版本.正当minion部署到最后时候,启动 minion端时报错ImportError: No module name ...
- 图像读取函数cv::imread()的几种使用方式
string imgpath = "C:\Users\Y\Pictures\miao.jpg"; OpenCV的imread()函数不支持单右斜线形式的路径,即不支持上述形式的路径 ...
- 在W10系统中配置Java环境变量后,cmd命令提示符找不到java
java环境变量配置在W10系统上和以前有所区别,可能是W10版本导致也可能是W10一开始就出问题. 问题的表现就是你在环境变量里已经配置完JAVA_HOME,CLASSPATH,path之后在控制台 ...
- 设置完代理IP,手机连接WiFi时连不上,一直在转
fiddler抓包,设置代理后,会出现手机连不上网的情况,针对这个情况处理方式为: 首先如果已经连接上WiFi了,但是提示“不可上网”,那就把WiFi断开重新连接下. 不行的话就试试下面的办法 一.配 ...
- 初入python
初入python 一定要学好python 求1-100的和: i=1 s=0 while i<101: s=s+i i=i+1 print(s)
- java - 并发集合 Vector、synchronizedCollection、CopyOnWriteArrayList之间的区别。
概要 JDK中提供ArrayList集合方便我们对集合内元素进行增删改查,但是ArrayList为了能够在单线程中快速进行操作其设计并不支持多线程进行操作.ArrayList在多线程环境下可能会产生j ...
- SpringBoot之spring.factories
组件提供者如何编写出仅需系统开发者进行包引入就可以对spring进行bean注入等操作? 其实在spring库中有提供自动化配置的库spring-boot-autoconfigure,我们只需要引 ...
- java 日期累加,如何求一年后日期,一月后日期,一周后日期和一天后日期
import java.text.DateFormat; import java.text.SimpleDateFormat; import java.util.Calendar; import ja ...