AngularJS 模态对话框
本文内容
- 项目结构
- 运行结果
- index.html
- mymodal.js
- 参考资料
本文讲解 Angular JS 实现模式对话框。基于 AngularJS v1.5.3、Bootstrap v3.3.6 和 ui-bootstrap-tpls 0.11。ui-bootstrap-tpls 是 AngularJS 利用 bootstrap 封装的控件——AngularJS-ui-bootstrap,网上控件大都利用它,github 上有源代码。
最近研究 ELK,需要用 AngularJS 写个 UI 出来,因为 Kibana 3 是用 AngularJS 写的,我也选择了 AngularJS。
当时想,点击页面按钮弹出个 DIV 出来,DIV 上有一些检索条件,可是实现这个弹出 DIV 功能后,发现不会在 DIV 里初始化时间控件,靠~
为了讲解方便,源代码都加了行号,所以,如果你想自己运行,可以直接去 github 上下载 demo。
下载 Demo
项目结构
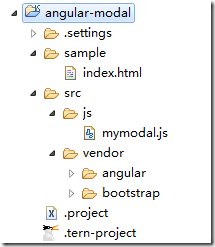
图 1 项目结构
运行结果

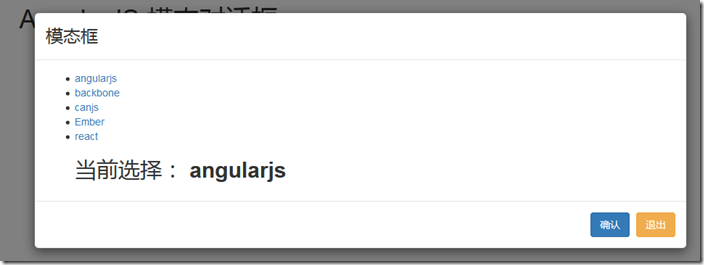
图 2 运行结果:大模态
index.html
1: <!DOCTYPE html>
2: <!--[if lt IE 7]> <html class="no-js lt-ie9 lt-ie8 lt-ie7"> <![endif]-->
3: <!--[if IE 7]> <html class="no-js lt-ie9 lt-ie8"> <![endif]-->
4: <!--[if IE 8]> <html class="no-js lt-ie9"> <![endif]-->
5: <!--[if gt IE 8]><!-->
6: <html class="no-js">
7: <!--<![endif]-->
8: <head>
9: <meta charset="UTF-8">
10: <meta http-equiv="X-UA-Compatible" content="IE=edge,chrome=1">
11: <meta name="viewport" content="width=device-width">
12: <title>AngularJS 模态对话框</title>
13: <link rel="stylesheet"
14: href="../src/vendor/bootstrap/dist/css/bootstrap.css">
15: </head>
16: <body ng-app="myApp" class="body">
17: <!-- modal template -->
18: <script type="text/ng-template" id="myModelContent.html">
19: <div class="modal-header">
20: <h3 class="modal-title">模态框</h3>
21: </div>
22: <div class="modal-body">
23: <ul>
24: <li ng-repeat="item in items">
25: <a ng-click="selected.item = item">{{item}}</a>
26: </li>
27: <div class="h2">当前选择: <b>{{selected.item}}</b></div>
28: </ul>
29: </div>
30: <div class="modal-footer">
31: <button class="btn btn-primary" ng-click="ok()">
32: 确认
33: </button>
34: <button class="btn btn-warning" ng-click="cancel()">退出</button>
35: </div>
36: </script>
37:
38: <div class="container h1">AngularJS 模态对话框</div>
39: <section class="row">
40: <section ng-controller="modalDemo" class="col-md-6"
41: style="margin: 40px auto; float: none; background: #fff; padding: 30px;">
42: <button class="btn btn-default" ng-click="open('lg')">大模态</button>
43: <button class="btn btn-default" ng-click="open()">中模态</button>
44: <button class="btn btn-default" ng-click="open('sm')">小模态</button>
45: <hr>
46: <div class="h1" ng-show="selected">当前选择:{{selected}}</div>
47: </section>
48: </section>
49: <!-- load js -->
50: <script src="../src/vendor/angular/angular.js"></script>
51: <script
52: src="http://cdn.bootcss.com/angular-ui-bootstrap/0.11.2/ui-bootstrap-tpls.js"></script>
53: <script src="../src/js/mymodal.js"></script>
54: </body>
55: </html>
.csharpcode, .csharpcode pre
{
font-size: small;
color: black;
font-family: consolas, "Courier New", courier, monospace;
background-color: #ffffff;
/*white-space: pre;*/
}
.csharpcode pre { margin: 0em; }
.csharpcode .rem { color: #008000; }
.csharpcode .kwrd { color: #0000ff; }
.csharpcode .str { color: #006080; }
.csharpcode .op { color: #0000c0; }
.csharpcode .preproc { color: #cc6633; }
.csharpcode .asp { background-color: #ffff00; }
.csharpcode .html { color: #800000; }
.csharpcode .attr { color: #ff0000; }
.csharpcode .alt
{
background-color: #f4f4f4;
width: 100%;
margin: 0em;
}
.csharpcode .lnum { color: #606060; }
说明:
- 第2~7行,是关于 HTML 5(以下简称 H5) 浏览器兼容的;
- 第9行,是设置页面编码,如果没有,用 firefox 调试时,你看到编码问题的提醒;
- 第10、11行,分别是关于 H5 在 Chrome、移动设备的设置;
- 第13行,是引入 bootstrap.css;
- 第16行,指定了 AngularJS 的 ng-app 属性“myApp”;
- 第18~36行,是定义模态对话框的 H5 模板。注意,它在 scrpit 编辑里,并且还起了名字“myModelContent.html”;
- 第38~48行,是页面的三个按钮,分别显示大、中、小三个尺寸的模态对话框;
- 第40行,指定了 AngularJS 控制器 ng-controller 属性为“modalDemo”,表明这里面有“动作”;
- 第42~44行,指定了 ng-click 属性,表明了元素上有点击事件。open 方法定义在后面的 mymodal.js 文件中;
- 第50~52行,加载 AngularJS 和 ui-bootstrap-tpls 脚本文件;
- 第53行,加载你自己的 mymodal.js 模态对话框的脚本文件。
mymodal.js
1: /**
2: *
3: */
4: angular.module('myApp', [ 'ui.bootstrap' ])
5: // demo controller
6: .controller('modalDemo', function($scope, $modal, $log) {
7: // list
8: $scope.items = [ 'angularjs', 'backbone', 'canjs', 'Ember', 'react' ];
9: // open click
10: $scope.open = function(size) {
11: var modalInstance = $modal.open({
12: templateUrl : 'myModelContent.html',
13: controller : 'ModalInstanceCtrl', // specify controller for modal
14: size : size,
15: resolve : {
16: items : function() {
17: return $scope.items;
18: }
19: }
20: });
21: // modal return result
22: modalInstance.result.then(function(selectedItem) {
23: $scope.selected = selectedItem;
24: }, function() {
25: $log.info('Modal dismissed at: ' + new Date())
26: });
27: }
28: })
29: // modal controller
30: .controller('ModalInstanceCtrl', function($scope, $modalInstance, items) {
31:
32: $scope.items = items;
33:
34: $scope.selected = {
35: item : $scope.items[0]
36: };
37: // ok click
38: $scope.ok = function() {
39: $modalInstance.close($scope.selected.item);
40: };
41: // cancel click
42: $scope.cancel = function() {
43: $modalInstance.dismiss('cancel');
44: }
45: });
.csharpcode, .csharpcode pre
{
font-size: small;
color: black;
font-family: consolas, "Courier New", courier, monospace;
background-color: #ffffff;
/*white-space: pre;*/
}
.csharpcode pre { margin: 0em; }
.csharpcode .rem { color: #008000; }
.csharpcode .kwrd { color: #0000ff; }
.csharpcode .str { color: #006080; }
.csharpcode .op { color: #0000c0; }
.csharpcode .preproc { color: #cc6633; }
.csharpcode .asp { background-color: #ffff00; }
.csharpcode .html { color: #800000; }
.csharpcode .attr { color: #ff0000; }
.csharpcode .alt
{
background-color: #f4f4f4;
width: 100%;
margin: 0em;
}
.csharpcode .lnum { color: #606060; }
说明:
- 第4行,在 AngularJS 里定义你的 myApp 模块,并且该模块依赖 ui.bootstrap。ui.bootstrap 在 ui-bootstrap-tpls.js 脚本里;
- 第6行,定义模态对话框的控制器,参数 $scope、$modal、$log 都是 AngularJS 提供,分别是作用域、模态、日志,希望在 function 里使用;
- 第10~25行,定义打开模态对话框的 open 方法,这就是页面里 ng-click 调用的方法。并且,第13行,指定了模态对话框对应的控制器,接下来会定义;
- 第30行,是定义模态对话框的控制器,定了模态对话框中“确定”和“取消”两个事件的方法;
- 另外,AngularJS 中不用考虑对象创建问题,AngularJS 会自动进行注入依赖。
参考资料
- AngularJS $modal
下载 Demo
AngularJS 模态对话框的更多相关文章
- AngularJS进阶(三十一)AngularJS项目开发技巧之获取模态对话框中的组件ID
AngularJS项目开发技巧之获取模态对话框中的组件ID 需求 出于项目开发需求,需要实现的业务逻辑是:药店端点击查看"已发货""已收货"订单详情时,模块弹出 ...
- MFC编程 | 非模态对话框的定义
因为课程需要,会用到MFC编程,所以讲一些经验总结下,以便日后使用查询. // 非模态对话框的定义 // 通过单文档菜单调用一个非模态窗口 1.首先在工程里插入一个对话框(如:IDD_DLG_TEST ...
- bootstrap dialog 使用模态对话框
bootstrap3-dialog 使用模态对话框 <div class="modal fade"> <div class="modal-dialog& ...
- 【原创】WinForm 模态对话框
今天解决的一个问题,记录下,以备后用. 问题描述:WinForm程序有超时自动退出功能,但是有些模态对话框不关掉的话会退出失败,原因(猜测): 程序倒计时用的System.Windows.Forms. ...
- 关于easyUI的模态对话框
本文版权归博客园和作者吴双本人共同所有,转载和爬虫请注明原文地址.博客园蜗牛cnblogs.com/tdws 会用easyUI的模态对话框会是我们的开发更加简洁,只需下载这个插件,把需要的文件拖到项目 ...
- 自定义AlertView实现模态对话框
在Windows应用程序中,经常使用模态(Model)对话框来和用户进行简单的交互,比如登录框.在IOS应用程序中,有时我们也希望做同样的事情.但IOS的UI库中,没有模态对话框,最接近那个样子的应该 ...
- MFC编程入门之十二(对话框:非模态对话框的创建及显示)
上一节讲了模态对话框及其弹出过程,本节接着讲另一种对话框--非模态对话框的创建及显示. 非模态对话框显示后,程序其他窗口仍然能正常运行,可以响应用户输入,还可以相互切换.上一讲中创建的Tip模态对话框 ...
- MFC编程入门之十一(对话框:模态对话框及其弹出过程)
加法计算器对话框程序大家照着做一遍后,相信对基于对话框的程序有了些解了,有个好的开始对于以后的学习大有裨益.趁热打铁,这一节讲讲什么是对话框和非模态对话框,以及模态对话框怎样弹出. 一.模态对话框和非 ...
- MFC学习笔记(一)向模态对话框传递数据
声明构造函数为2个参数,具有默认参数的参数须放在后面. CDialogDimmer::CDialogDimmer(CString name,CWnd* pParent /*=NULL*/) : CDi ...
随机推荐
- php总体架构图
- 【堆】【kd-tree】bzoj2626 JZPFAR
用堆记录答案.看看当前点是否比堆顶更优. #include<cstdio> #include<queue> #include<cstring> #include&l ...
- Mysql --分区表(6)Hash分区
HASH分区 HASH分区主要用来分散热点读,确保数据在预先确定个数的分区中尽可能平均分布.对一个表执行HASH分区时,MySQL会对分区键应用一个散列函数,以此确定数据应当放在N个分区中的哪个分区 ...
- 斯坦福第十二课:支持向量机(Support Vector Machines)
12.1 优化目标 12.2 大边界的直观理解 12.3 数学背后的大边界分类(可选) 12.4 核函数 1 12.5 核函数 2 12.6 使用支持向量机 12.1 优化目标 到目前为 ...
- objective-c 创建工程/编译/运行程序
// First program example #import <Foundation/Foundation.h> int main (int argc, const char * ar ...
- [SmartFoxServer概述]Zones和Rooms结构
Zones和Rooms结构: 相对于SFS 1.X而言,在Zones和Rooms的配置上,SFS2X有了显著的改善.尤其是我们建立了房组这样一个简单的概念,它允许在一个逻辑组中管理Rooms,从而独立 ...
- 反射生成SQL语句
public static int Reg(Model ml) { bool b = true; Visit vt = new Visit(); StringBuilder builder = new ...
- codeforces 424D
题意:给定n,m<=300的矩阵,然后求一个长宽大于2的矩形,使得是从左上角位置开始逆时针绕边框一圈的时间最少.时间的计算是:给定3个数tu,tp, td,路径上数字增加为tu,相等为tp否则为 ...
- 【概念笔记】 EL表达式
一.EL简介 1.语法结构 ${expression} 2.[]与.运算符 EL 提供.和[]两种运算符来存取数据. 当要存取的属性名称中包含一些特殊字符,如.或?等并非字母或数字的符号,就一定要 ...
- 分享一段视频关于SQL2014 Hekaton数据库的
分享一段视频关于SQL2014 Hekaton数据库的 Microsoft SQL Server In-Memory OLTP Project "Hekaton": App Dev ...