iOS开发之窥探UICollectionViewController(二) --详解CollectionView各种回调
UICollectionView的布局是可以自己定义的,在这篇博客中先在上篇博客的基础上进行扩充,我们先使用UICollectionViewFlowLayout,然后好好的介绍一下UICollectionView的一些回调方法,主要包括UICollectionViewDataSource,UICollectionViewDelegateFlowLayout,UICollectionViewDelegate相关回调方法,并通过实例来介绍每个回调的用法。并且给每个Section添加定制的Header和Footer,好废话少说进入今天的正题。
一、Demo总览
下图是本篇博客中Demo的最终运行效果,下面是我们要做的事情:
1. 给每个Section添加自定义的重用Header和Footer
2.调整第一个Section的上左下右的边距(UIEdgeInsets)
3.给UICollectioinView设置多选
4.处理Cell的高亮事件
5.处理Cell的选中事件
6.调整Cell的上下左右边距
7.对Cell进行编辑
二、UICollectionViewDataSource介绍
1、在UICollectionViewDataSource回调方法中有一个返回Section数量的方法,如下所示,该方法和UITableView中的用法一致。在这儿我们返回5个Section,如下所示:
 #pragma mark <UICollectionViewDataSource>

 /**

  * 返回Section的个数

  */

 - (NSInteger)numberOfSectionsInCollectionView: (UICollectionView *)collectionView {

     return ;

 }
2、在UICollectionViewDataSource的回调方法中,还有一个是返回每个Section中Cell的数量的方法,在这我们返回30个Cell, 如下代码所示:
 /**

  * 返回每个Section中Cell的个数

  */

 - (NSInteger)collectionView: (UICollectionView *)collectionView

      numberOfItemsInSection: (NSInteger)section {

     return ;

 }
3、在UICollectionViewDataSource还有一个必须实现的方法, 就是选择我们CollectionView中所使用的Cell, 在这里我们所使用的Cell是在Storyboard上实现的,所以不需要在我们的代码中注册Cell, 之间使用重用标示符就可以获取Cell的对象,如下所示:
 /**

  * 返回Cell种类

  */

 - (UICollectionViewCell *)collectionView: (UICollectionView *)collectionView

                   cellForItemAtIndexPath: (NSIndexPath *)indexPath {

     //通过Cell重用标示符来获取Cell

     CollectionViewCell *cell = [collectionView dequeueReusableCellWithReuseIdentifier: reuseIdentifier

                                                                          forIndexPath: indexPath];

     return cell;

 }
4、在UICollectionViewDataSource方法中有一个可选的方法就是为我们的Section添加Supplementary View(追加视图),下面是添Supplementary View(追加视图)的步骤。在UICollectionView中的Section中我们可以为其增加Header View和Footer View, 也就是官方文档上提到的Supplementary View(追加视图)。追加视图是可以重用的,也就是UICollectionReusableView。我们可以创建两个UICollectionReusableView的子类,一个是Header View, 另一个是Footer View。
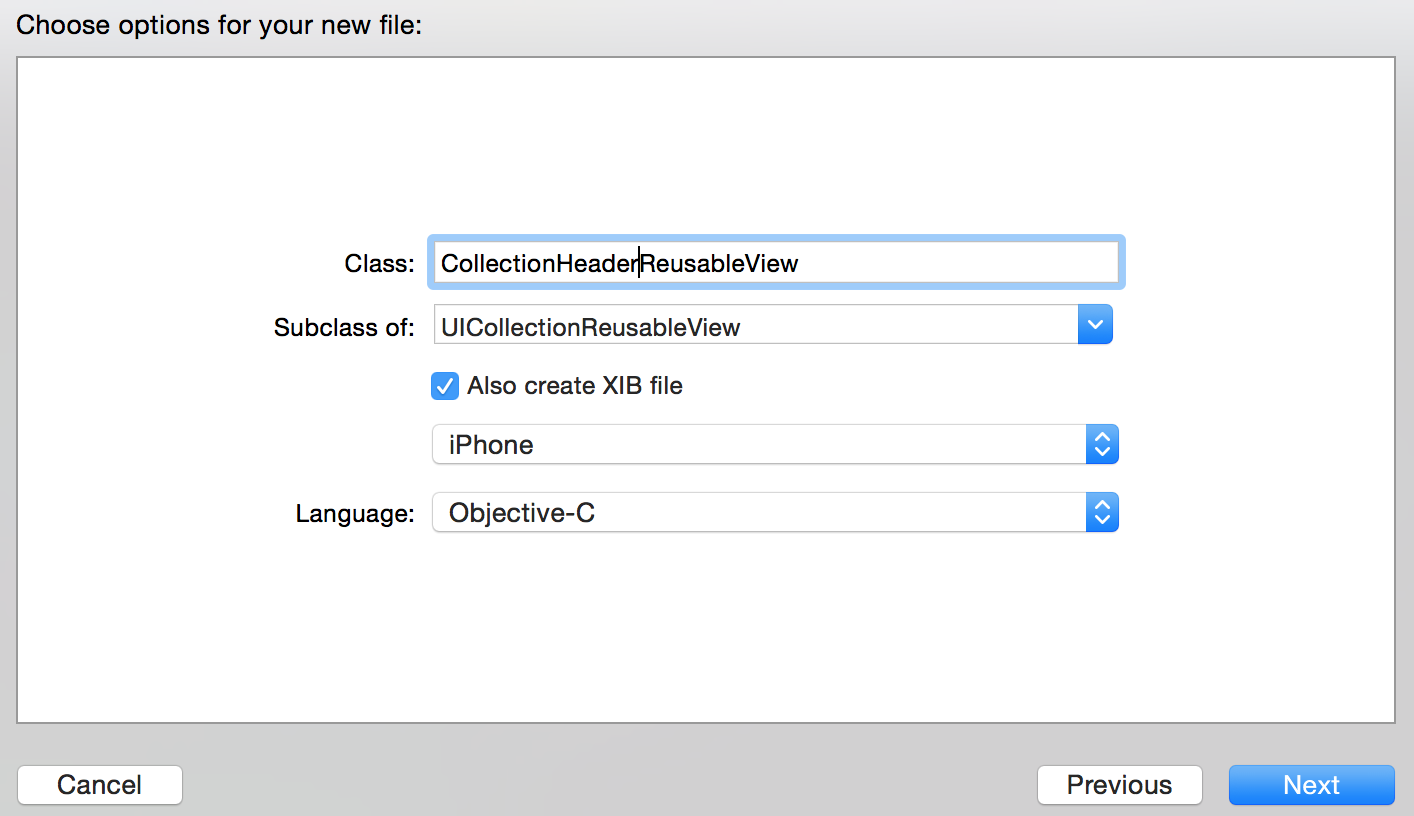
(1)创建UICollectionReusableView
追加视图可以在Storyboard上添加,然后设置重用标示符,在代码中使用即可。这里我们是从xib文件来加载的Supplementary View, 先创建两个UICollectionReusableView子类,在创建该子类的同时创建相应的xib文件,如下所示:
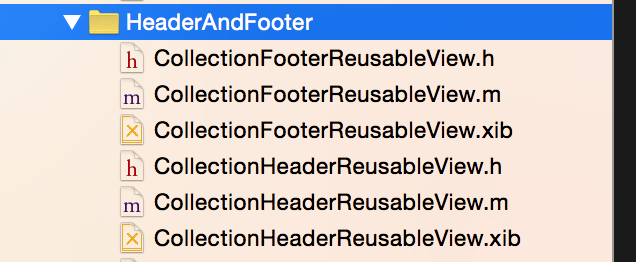
创建Header View和Footer View的UICollectionReusableView,创建后的文件目录如下:
(2) 因为我们是从xib文件中加载的UICollectionReusableView,所以需要在相应的UICollectionView上进行注册。如果你是使用的Storyboard, 只需要在Storyboard中指定重用标示符即可。下面的代码就是在ViewDidLoad中调用注册UICollectionReusableView的方法。
 /**

  * 注册Header和FooterView

  * 便于在UICollectionViewDataSource中使用

  */

 - (void) registerHeaderAndFooterView {

     //注册headerView

     //获取含有UICollectionReusableView的Nib文件。

     UINib *headerNib = [UINib nibWithNibName: @"CollectionHeaderReusableView"

                                       bundle: [NSBundle mainBundle]];

     //注册重用View

     [self.collectionView registerNib: headerNib

           forSupplementaryViewOfKind: UICollectionElementKindSectionHeader

                  withReuseIdentifier: @"CollectionHeaderReusableView"];

     //注册FooterView

     UINib *footerNib = [UINib nibWithNibName: @"CollectionFooterReusableView"

                                       bundle:[ NSBundle mainBundle]];

     [self.collectionView registerNib: footerNib

           forSupplementaryViewOfKind: UICollectionElementKindSectionFooter

                  withReuseIdentifier: @"CollectionFooterReusableView"];

 }
(3)在UICollectionViewDataSource中的设置Supplementary View的方法中通过Header View和Footer View的重用标示符来为我们的Section设置Supplementary View,具体代码如下所示:
 /**

  * 设置Setion的Header和Footer(Supplementary View)

  */

 - (UICollectionReusableView *)collectionView: (UICollectionView *)collectionView

            viewForSupplementaryElementOfKind: (NSString *)kind

                                  atIndexPath: (NSIndexPath *)indexPath{

     //设置SectionHeader

     if ([kind isEqualToString: UICollectionElementKindSectionHeader]) {

         UICollectionReusableView *view = [collectionView dequeueReusableSupplementaryViewOfKind:UICollectionElementKindSectionHeader withReuseIdentifier:@"CollectionHeaderReusableView" forIndexPath:indexPath];

         return view;

     }

     //设置SectionFooter

     UICollectionReusableView *view = [collectionView dequeueReusableSupplementaryViewOfKind:UICollectionElementKindSectionFooter withReuseIdentifier:@"CollectionFooterReusableView" forIndexPath:indexPath];

     return view;

 }
UICollectionViewDataSource中的四个方法在上面都进行了实现,UICollectionViewDataSource主要是负责加载数据源的,包括Section的个数,每个Section中Cell的个数,每个Section中Supplementary View的种类。
三.UICollectionViewDelegateFlowLayout回调实现
UICollectionViewDelegateFlowLayout主要是负责显示的,比如Secion的大小、边距,Cell的大小边距,headerView的大小已经FooterView的大小,都是在UICollectionViewDelegateFlowLayout的相应协议的方法来实现的。接下来详细的介绍一下UICollectionViewDelegateFlowLayout协议中的方法。
1.同一个Section中同一种Cell(通过同一个Cell重用标示符获取的对象)可以有不同的尺寸,下面的代码是给Cell定制尺寸。代码的具体意思是第一个Section中的所有Cell的尺寸是(50,50)。 其余的时(60,60)。
 #pragma mark <UICollectionViewDelegateFlowLayout>

 /**

  * 改变Cell的尺寸

  */

 - (CGSize)collectionView: (UICollectionView *)collectionView

                   layout: (UICollectionViewLayout*)collectionViewLayout

   sizeForItemAtIndexPath: (NSIndexPath *)indexPath{

     if (indexPath.section == ) {

         return CGSizeMake(, );

     }

     return CGSizeMake(, );

 }
2.改变Section的上下左右边距--UIEdgeInsetsMake(上, 左, 下, 右),逆时针旋转。第一个Section的上左下右的边距都是50, 其余的Section上左下右的边距是0。具体实现看如下代码:
 /**

  * Section的上下左右边距--UIEdgeInsetsMake(上, 左, 下, 右);逆时针

  */

 - (UIEdgeInsets)collectionView: (UICollectionView *)collectionView

                         layout: (UICollectionViewLayout*)collectionViewLayout

         insetForSectionAtIndex: (NSInteger)section{

     if (section == ) {

         return UIEdgeInsetsMake(, , , );

     }

     return UIEdgeInsetsMake(, , , );

 }
3.设置每个Cell的上下边距的回调如下所示,第一个Section的Cell上下边距是5.0f, 其余的为20.0f。
 /**

  * Section中每个Cell的上下边距

  */

 - (CGFloat)collectionView: (UICollectionView *)collectionView

                    layout: (UICollectionViewLayout*)collectionViewLayout

 minimumLineSpacingForSectionAtIndex: (NSInteger)section{

     if (section == ) {

         return 5.0f;

     }

     return 20.0f;

 }
4.设置Cell的左右边距,第一个Section的Cell左右边距是5.0f, 其余的为20.0f。
 /**

  * Section中每个Cell的左右边距

  */

 - (CGFloat)collectionView: (UICollectionView *)collectionView

                    layout: (UICollectionViewLayout*)collectionViewLayout

 minimumInteritemSpacingForSectionAtIndex: (NSInteger)section{

     if (section == ) {

         return 5.0f;

     }

     return 20.0f;

 }
5.设置Header View和Footer View的大小的回调如下。
 /**

  * headerView的大小

  */

 - (CGSize)collectionView: (UICollectionView *)collectionView

                   layout: (UICollectionViewLayout*)collectionViewLayout

 referenceSizeForHeaderInSection: (NSInteger)section{

     return CGSizeMake(, );

 }

 /**

  * footerView的大小

  */

 - (CGSize)collectionView: (UICollectionView *)collectionView

                   layout: (UICollectionViewLayout*)collectionViewLayout

 referenceSizeForFooterInSection: (NSInteger)section{

     return CGSizeMake(, );

 }
上面的方法就是UICollectionViewDelegateFlowLayout中所有的方法了,负责布局显示的。
四、UICollectionViewDelegate回调实现
UICollectionViewDelegate中的代理方法主要是负责Cell的交互的,比如是否高亮,是否选,是否可编辑等,接下来要为大家详细的介绍UICollectionViewDelegate中的代理方法。
1.为了这部分的效果展示,我们需要对Cell添加一些控件,并且设置其Highlight和Selected的一些状态。为Cell添加上ImageView, Cell的高亮状态和非高亮状态对应的ImageView上的图片是不同的。再添加一个Button, 并为Button设置Selected和Default状态下的图片,Button的选中和默认状态由Cell的选中状态来定。Cell中改变ImageView的图片的代码如下所示,函数传入的参数是当前Cell的高亮状态,根据高亮状态来设置ImageView上的Image。(有的小伙伴会问为什么给ImageView在Default状态和Highlight下设置不同的图片,然后直接改变ImageView的高亮状态即可。你可以试一下,达不到预期的效果)
 - (void) changeHighLightWithBool: (BOOL) highlight{

     NSString *imageName = @"003.jpg";

     if (highlight) {

         imageName = @"002.jpg";

     }

     [_highlightImage setImage: [UIImage imageNamed:imageName]];

 }
2.设置Cell可以高亮, 返回YES代表Cell可以高亮,返回NO代表Cell不可高亮。高亮就是触摸Cell时该Cell变为高亮状态,在代码中的反应就是Cell的Highligth属性变为YES。而触摸结束时,Cell的Highligth属性就变为NO。
 #pragma mark <UICollectionViewDelegate>

 /**

  * Cell是否可以高亮

  */

 - (BOOL)collectionView: (UICollectionView *)collectionView

 shouldHighlightItemAtIndexPath: (NSIndexPath *)indexPath{

     return YES;

 }
3.下面这个方法是自己写的,用来在界面上反应Cell的高亮状态。 ImageView在当前Cell高亮状态下和非高亮状态下所加载的图片不同,所以可以看出Cell高亮和非高亮。
 /**

  * 根据高亮状态修改背景图片

  */

 - (void) changeHighlightCellWithIndexPaht: (NSIndexPath *) indexPath{

     //获取当前变化的Cell

     CollectionViewCell *currentHighlightCell = (CollectionViewCell *)[self.collectionView cellForItemAtIndexPath:indexPath];

     [currentHighlightCell changeHighLightWithBool:currentHighlightCell.highlighted];

     if (currentHighlightCell.highlighted == YES){

         NSLog(@"第%ld个Section上第%ld个Cell变为高亮",indexPath.section ,indexPath.row);

         return;

     }

     if (currentHighlightCell.highlighted == NO){

         NSLog(@"第%ld个Section上第%ld个Cell变为非高亮",indexPath.section ,indexPath.row);

     }

 }
4.Cell从非高亮变为高亮状态时回调用下面的方法,为了反映Cell的高亮状态,我们去改变一下Cell上ImageView的图片。
 /**

  * 如果Cell可以高亮,Cell变为高亮后调用该方法

  */

 - (void)collectionView: (UICollectionView *)collectionView

 didHighlightItemAtIndexPath: (NSIndexPath *)indexPath{

     [self changeHighlightCellWithIndexPath:indexPath];

 }

 /**

  * 如果Cell可以高亮,Cell从高亮变为非高亮调用该方法

  */

 - (void)collectionView: (UICollectionView *)collectionView

 didUnhighlightItemAtIndexPath: (NSIndexPath *)indexPath{

     [self changeHighlightCellWithIndexPath:indexPath];

 }
5.设定Cell是否可选的回调如下所示,Cell被选中时该Cell的Selected为YES, 取消选中Selected为NO;
 /**

  * Cell是否可以选中

  */

 - (BOOL)collectionView:(UICollectionView *)collectionView shouldSelectItemAtIndexPath:(NSIndexPath *)indexPath{

     return YES;

 }
6. 如果想让你的Cell支持多选,就需要设定一下CollectionView的allowsMultipleSelection属性,下面的代码是在ViewDidLoad中添加的,如下所示:
     //设置Cell多选

     self.collectionView.allowsMultipleSelection = YES;
7.如果在多选状态下需要支持取消Cell的多选,那么就去执行下面的方法,并返回YES。就是支持在多选状态下取消选中状态。
 /**

  * Cell多选时是否支持取消功能

  */

 - (BOOL)collectionView:(UICollectionView *)collectionView shouldDeselectItemAtIndexPath:(NSIndexPath *)indexPath{

     return YES;

 }
8.下面这个方法是自己封装的,用来根据Cell的选中状态来改变Cell上Button的选中状态,具体代码实现如下:
 /**

  * Cell根据Cell选中状态来改变Cell上Button按钮的状态

  */

 - (void) changeSelectStateWithIndexPath: (NSIndexPath *) indexPath{

     //获取当前变化的Cell

     CollectionViewCell *currentSelecteCell = (CollectionViewCell *)[self.collectionView cellForItemAtIndexPath:indexPath];

     currentSelecteCell.selectButton.selected = currentSelecteCell.selected;

     if (currentSelecteCell.selected == YES){

         NSLog(@"第%ld个Section上第%ld个Cell被选中了",indexPath.section ,indexPath.row);

         return;

     }

     if (currentSelecteCell.selected == NO){

         //NSLog(@"第%ld个Section上第%ld个Cell取消选中",indexPath.section ,indexPath.row);

     }

 }
9.在Cell选中和取消选中时都会调用上面的方法来改变Button的选中状态,下面是Cell在选中时以及取消选中时所调用的方法:
 /**

  * Cell选中调用该方法

  */

 - (void)collectionView: (UICollectionView *)collectionView

 didSelectItemAtIndexPath: (NSIndexPath *)indexPath{

     [self changeSelectStateWithIndexPath:indexPath];

 }

 /**

  * Cell取消选中调用该方法

  */

 - (void)collectionView: (UICollectionView *)collectionView didDeselectItemAtIndexPath: (NSIndexPath *)indexPath{

     [self changeSelectStateWithIndexPath:indexPath];

 }
10.下方四个方法是Cell将要出现,Cell出现后,Supplementary View将要出现以及Supplementary View已经出现所调用的方法,具体信息请看下方代码实现:
 /**

  * Cell将要出现的时候调用该方法

  */

 - (void)collectionView:(UICollectionView *)collectionView willDisplayCell:(UICollectionViewCell *)cell forItemAtIndexPath:(NSIndexPath *)indexPath NS_AVAILABLE_IOS(8_0){

     NSLog(@"第%ld个Section上第%ld个Cell将要出现",indexPath.section ,indexPath.row);

 }

 /**

  * Cell出现后调用该方法

  */

 - (void)collectionView:(UICollectionView *)collectionView didEndDisplayingCell:(UICollectionViewCell *)cell forItemAtIndexPath:(NSIndexPath *)indexPath{

     NSLog(@"第%ld个Section上第%ld个Cell已经出现",indexPath.section ,indexPath.row);

 }

 /**

  * headerView或者footerView将要出现的时候调用该方法

  */

 - (void)collectionView:(UICollectionView *)collectionView willDisplaySupplementaryView:(UICollectionReusableView *)view forElementKind:(NSString *)elementKind atIndexPath:(NSIndexPath *)indexPath NS_AVAILABLE_IOS(8_0){

     NSLog(@"第%ld个Section上第%ld个扩展View将要出现",indexPath.section ,indexPath.row);

 }

 /**

  * headerView或者footerView出现后调用该方法

  */

 - (void)collectionView:(UICollectionView *)collectionView didEndDisplayingSupplementaryView:(UICollectionReusableView *)view forElementOfKind:(NSString *)elementKind atIndexPath:(NSIndexPath *)indexPath{

     NSLog(@"第%ld个Section上第%ld个扩展View已经出现",indexPath.section ,indexPath.row);

 }
在UICollectionViewDelegate回调方法中还有三个回调方法是关于Cell编辑的,比如copy, past, cut等操作,具体代码就不在此赘述了。在Demo中给出了实现方式,主要涉及到UIPasteboard的操作,本篇博客的整体的Demo回分享到Github上,下方是Github上的分享链接,感兴趣的小伙伴可以进行Clone。
Github分享链接:https://github.com/lizelu/CollectionViewControllerDemo
iOS开发之窥探UICollectionViewController(二) --详解CollectionView各种回调的更多相关文章
- iOS开发之窥探UICollectionViewController(四) --一款功能强大的自定义瀑布流
在上一篇博客中<iOS开发之窥探UICollectionViewController(三) --使用UICollectionView自定义瀑布流>,自定义瀑布流的列数,Cell的外边距,C ...
- iOS开发之窥探UICollectionViewController(三) --使用UICollectionView自定义瀑布流
上篇博客的实例是自带的UICollectionViewDelegateFlowLayout布局基础上来做的Demo, 详情请看<iOS开发之窥探UICollectionViewControlle ...
- iOS开发之窥探UICollectionViewController(五) --一款炫酷的图片浏览组件
本篇博客应该算的上CollectionView的高级应用了,从iOS开发之窥探UICollectionViewController(一)到今天的(五),可谓是由浅入深的窥探了一下UICollectio ...
- iOS开发--常用技巧 (MJRefresh详解)
iOS开发--常用技巧 (MJRefresh详解) https://github.com/CoderMJLee/MJRefresh 下拉刷新01-默认 self.tableView.head ...
- iOS开发——多线程OC篇&多线程详解
多线程详解 前面介绍了多线程的各种方式及其使用,这里补一点关于多线程的概念及相关技巧与使用,相信前面不懂的地方看了这里之后你就对多线程基本上没有什么问题了! 1——首先ios开发多线程中必须了解的概念 ...
- iOS开发——UI篇OC&transform详解
transframe属性详解 1. transform属性 在OC中,通过transform属性可以修改对象的平移.缩放比例和旋转角度 常用的创建transform结构体方法分两大类 (1) 创建“基 ...
- iOS开发——屏幕适配篇&Masonry详解
Masonry详解 前言 MagicNumber -> autoresizingMask -> autolayout 以上是纯手写代码所经历的关于页面布局的三个时期 在iphone1-ip ...
- iOS开发——实用技术OC篇&事件处理详解
事件处理详解 一:事件处理 事件处理常见属性: 事件类型 @property(nonatomic,readonly) UIEventType type; @property(nonatomic ...
- ios开发——实战OC篇&FMDB详解
FMDB详解 前一篇文章中我们介绍的SQLite的使用,在iOS中原生的SQLite API在使用上相当不友好. 于是,就出现了一系列将SQLite API进行封装的库,例如FMDB.Plausibl ...
随机推荐
- SPRING SECURITY JAVA配置:Web Security
在前一篇,我已经介绍了Spring Security Java配置,也概括的介绍了一下这个项目方方面面.在这篇文章中,我们来看一看一个简单的基于web security配置的例子.之后我们再来作更多的 ...
- JVM中对象的销毁
1.可达性分析算法: 可达性分析算法用来寻找将要销毁的对象,它的基本思路是:通过一系列的称为“GC ROOTs”的对象作为起始点,从这些节点开始向下搜索,搜索所走过的路径成为引用链,当一个对象到GC ...
- Xamarin的不归路-ios模拟器没有键盘
ios模拟器没有键盘解决方案: 勾选上就有了. 2016年9月1日
- mysql如何在一个字段后面加个字符?
update city set 字段=concat(字段,'内容');
- 我的emacs配置
我的emacs配置文件 ;; .emacs ;; ============================== Basic Configure START ====================== ...
- ffmpeg编译与移植问题
1.下载ffmpeg. 下载网址:http://www.ffmpeg.org/download.html 2.解压缩 tar -zxvf ffmpeg-2.0.1.tar.gz 3.配置,生成Make ...
- VS轻松开发Node.js应用
PTVS开发团队又开发出一款可以在VS里编写Node.js应用程序的插件--NTVS(Node.js Tools for Visual Studio),开发者可以在VS里轻松开发Node.js应用. ...
- .NET Framework 4.5.2 静默安装参数
Microsoft .NET Framework 4.5.2 是针对 Microsoft .NET Framework 4.Microsoft .NET Framework 4.5 和 Microso ...
- ABP理论学习之Web API控制器(新增)
返回总目录 本篇目录 介绍 AbpApiController基类 本地化 审计日志 授权 工作单元 其他 介绍 ABP通过Abp.Web.ApiNuget包集成了 ASP.NET Web API控制器 ...
- 新浪微博UWP版-实现‘分享功能’的艰难路
索引 介绍 遇到的问题 寻求帮助 最终的解决方案 最终效果 介绍 在整个Team的共同努力下,在众多WPer的期待下,Weibo UWP版终于正式发布了.有关Weibo UWP版更多的信息请大家参考这 ...