
springboot 中事件监听模型的一种实现
前言: 事件监听模型是一种常用的设计模式,在springboot 中我们如何实现呢?
首先我们要理解事件监听中需要的几个角色
- 事件发布者 (即事件源)
- 事件监听者
- 事件本身
废话不多说直接上代码
定义事件本身
事件本身需要继承ApplicationEvent
package com.yxd;

import java.util.List;

import java.util.Map;

import org.springframework.context.ApplicationEvent;

public class DemoEvent extends ApplicationEvent{

	private String type;

	private List<Map> msg;

	public DemoEvent(Object object, String type ,List<Map> msg) {

		super(object);

		this.msg = msg;

		this.type = type;

	}

	public String getType() {

		return type;

	}

	public void setType(String type) {

		this.type = type;

	}

	public List<Map> getMsg() {

		return msg;

	}

	public void setMsg(List<Map> msg) {

		this.msg = msg;

	}

}
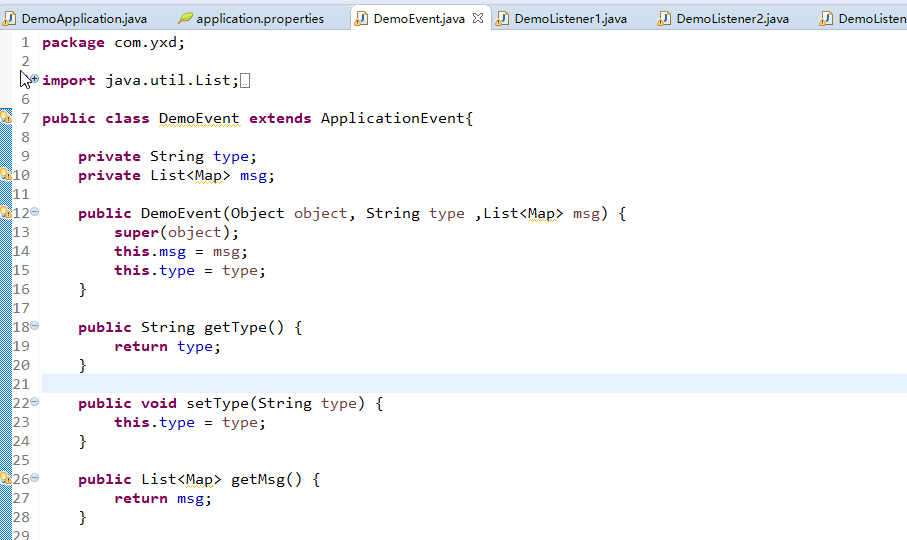
如图:
定义事件源
事件源需要注入 **ApplicationContext **
package com.yxd;

import org.springframework.beans.factory.annotation.Autowired;

import org.springframework.context.ApplicationContext;

import org.springframework.stereotype.Component;

@Component

public class DemoPublisher {

	@Autowired

	ApplicationContext applicationContext;

	public void publish(DemoEvent event) {

		applicationContext.publishEvent(event);

	}

}
定义监听者
监听者有两种实现
一、需要实现 ApplicationListener
package com.yxd;

import java.util.List;

import java.util.Map;

import org.springframework.context.ApplicationListener;

import org.springframework.stereotype.Component;

@Component

public class DemoListener1 implements ApplicationListener<DemoEvent> {

	@Override

	public void onApplicationEvent(DemoEvent event) {

		List<Map> msg = event.getMsg();

		String type = event.getType();

		System.out.println(" listener1接收到了 publisher 发送的消息 , 时间 "+ Time.getTime());

		System.out.println("listener1 : 类型 :" + type +", 消息内容: " + msg + ", 消息处理完毕! "+ Time.getTime());

	}

}
二、使用 @EventListener 注解
package com.yxd;

import java.util.List;

import java.util.Map;

import org.springframework.context.ApplicationListener;

import org.springframework.context.event.EventListener;

import org.springframework.stereotype.Component;

@Component

public class DemoListener2 {

	@EventListener

	public void onDemoEvent(DemoEvent demoEvent) {

		System.out.println(" listener2 通过注解接收到了 publisher 发送的消息 , 时间 "+ Time.getTime());

		List<Map> msg = demoEvent.getMsg();

		String type = demoEvent.getType();

		try {

			Thread.sleep(2000);

		} catch (InterruptedException e) {

			// TODO Auto-generated catch block

			e.printStackTrace();

		}

		System.out.println("listener2 : 类型 :" + type +", 消息内容: " + msg + ", 消息处理完毕! "+ Time.getTime());

	}

}
此处我们还需要注意一点,此处多个监听是同步执行的(阻塞),一般情况下我们发布一个事件,是不关心谁来处理,以及处理结果的,所以我们还需要加上异步的注解
package com.yxd;

import java.util.List;

import java.util.Map;

import org.springframework.context.ApplicationListener;

import org.springframework.scheduling.annotation.Async;

import org.springframework.stereotype.Component;

@Component

public class DemoListener3 implements ApplicationListener<DemoEvent> {

	@Override

	@Async

	public void onApplicationEvent(DemoEvent event) {

		System.out.println(" listener3 接收到了 publisher 发送的消息 , 时间 "+ Time.getTime());

		List<Map> msg = event.getMsg();

		String type = event.getType();

		try {

			Thread.sleep(3000);

		} catch (InterruptedException e) {

			// TODO Auto-generated catch block

			e.printStackTrace();

		}

		System.out.println("listener3 异步执行:类型 :" + type +", 消息内容: " + msg+ ", 消息处理完毕! "+ Time.getTime());

	}

}
测试
package com.yxd;

import java.util.ArrayList;

import java.util.HashMap;

import java.util.Map;

import org.springframework.beans.factory.annotation.Autowired;

import org.springframework.boot.SpringApplication;

import org.springframework.boot.autoconfigure.SpringBootApplication;

import org.springframework.scheduling.annotation.EnableAsync;

import org.springframework.web.bind.annotation.RequestMapping;

import org.springframework.web.bind.annotation.RestController;

@EnableAsync

@SpringBootApplication

@RestController

public class DemoApplication {

	public static void main(String[] args) {

		SpringApplication.run(DemoApplication.class, args);

	}

	@Autowired

	DemoPublisher demoPublisher;

	@RequestMapping("testListener")

	public String testListener() {

		ArrayList<Map> list = new ArrayList<>();

		HashMap<String, String> m1 =  new HashMap<>();

		m1.put("1", "2");

		HashMap<String, String> m2 =  new HashMap<>();

		m2.put("3", "4");

		HashMap<String, String> m3 =  new HashMap<>();

		m3.put("5", "6");

		list.add(m1);

		list.add(m2);

		list.add(m3);

		System.out.println("开始发布消息: " + Time.getTime());

		demoPublisher.publish(new DemoEvent(this,"测试消息",list));

		System.out.println("消息发布结束: " + Time.getTime());

		return "消息发布成功";

	}

}
我们访问接口
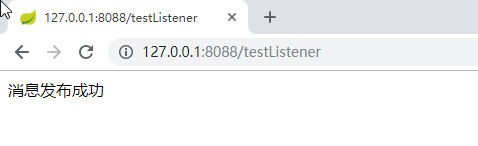
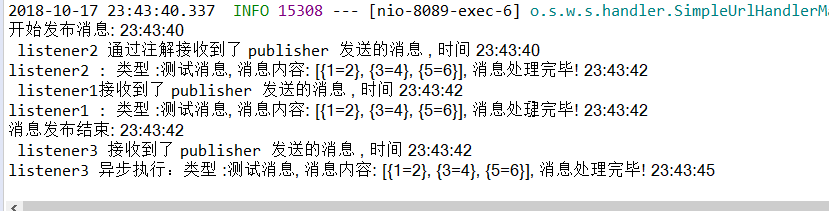
三个监听者都得到了消息。。
但是 listener2 通过注解 先得到了消息,延时2秒后,listener1 才得到消息,listener1 处理完后,主线程继续执行,同时listener3 开始接收到消息,开启了一个异步任务,3秒后执行结束
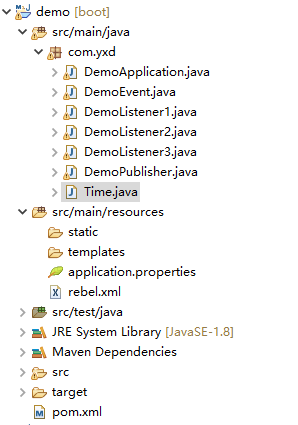
项目结构
最后附上Time类
package com.yxd;

import java.text.SimpleDateFormat;

import java.util.Date;

public class Time {

	public static String getTime() {

		return new SimpleDateFormat("HH:mm:ss").format(new Date());

	}

}
springboot 中事件监听模型的一种实现的更多相关文章
- SpringBoot Application事件监听
SpringBoot Application共支持6种事件监听,按顺序分别是: ApplicationStartingEvent:在Spring最开始启动的时候触发 ApplicationEnviro ...
- SpringBoot的事件监听
事件监听的流程分为三步:1.自定义事件,一般是继承ApplicationEvent抽象类.2.定义事件监听器,一般是实现ApplicationListener接口.3.a.启动的时候,需要将监听器加入 ...
- SpringBoot中如何监听两个不同源的RabbitMQ消息队列
spring-boot如何配置监听两个不同的RabbitMQ 由于前段时间在公司开发过程中碰到了一个问题,需要同时监听两个不同的rabbitMq,但是之前没有同时监听两个RabbitMq的情况,因此在 ...
- ASP.NET Core中配置监听URLs的五种方式
原文: 5 ways to set the URLs for an ASP.NET Core app 作者: Andrew Lock 译者: Lamond Lu 默认情况下,ASP. NET Core ...
- springboot~ EventListener事件监听的使用
EventListener事件触发和监听器可以对代码解耦,在一些与业务无关的,通用的操作方法,我们可以把它设计成事件监听器,像通知,消息这些模块都可以这样设计. 事件源 @Getter @Builde ...
- SpringBoot事件监听机制及观察者模式/发布订阅模式
目录 本篇要点 什么是观察者模式? 发布订阅模式是什么? Spring事件监听机制概述 SpringBoot事件监听 定义注册事件 注解方式 @EventListener定义监听器 实现Applica ...
- Spring之事件监听(观察者模型)
目录 Spring事件监听 一.事件监听案例 1.事件类 2.事件监听类 3.事件发布者 4.配置文件中注册 5.测试 二.Spring中事件监听分析 1. Spring中事件监听的结构 2. 核心角 ...
- SpringBoot事件监听机制源码分析(上) SpringBoot源码(九)
SpringBoot中文注释项目Github地址: https://github.com/yuanmabiji/spring-boot-2.1.0.RELEASE 本篇接 SpringApplicat ...
- jQuery中的事件监听小记
一,一个事件监听的简便写法 最近发现一个jQuery中事件监听的简洁写法,感觉方便好多.同时也深感自己基础薄弱,好多东西竟然都模棱两可.因此,记录的同时,也对jQuery事件监听做个小的总结 原文链接 ...
随机推荐
- 【Tomcat】Unrecognized Windows Sockets error: 10106: Socket creation failed
tomcat8启动过程中报如下错误 -Nov- ::]: java.net.SocketException: Unrecognized Windows Sockets error: : create ...
- Spring Boot(二):Web 综合开发
详见:http://www.ityouknow.com/springboot/2016/02/03/spring-boot-web.html Web 开发 Spring Boot Web 开发非常的简 ...
- EaseType 缓动函数
EaseType(动画曲线) EaseType 缓动函数或者我习惯叫它动画曲线,在很多的软件或动画中都有涉及到,下面是摘取的一些资料: 缓函数图例 Tween效果 每一幅图像当鼠标移上去,会有路径效果 ...
- sublime text 中 .vue文件中的scss语法无法高亮bug怎么解决
如题,在vuejs的单文件组件中,.vue 结尾的文件里面使用scss的时候,无法高亮.因为 sublime默认是不带sass语法高亮的,安装 sublime SCSS语法高亮包即可. 方法如下: ...
- Django【进阶篇】
目录 一.Model 二.admin 三.Form组件 四.Cookie 五.Session 六.分页 七.序列化 一.Model 数据库的配置 1.django默认支持sqlite,mysql, o ...
- 数据可视化:CSV格式,JSON格式
下载CSV格式数据,进行可视化 csv.reader()创建一个与文件有关联的阅读器(reader)对象,reader处理文件中的第一行数据,并将每一项数据都存储在列表中 head_row = nex ...
- 【PAT】B1043 输出PATest(20 分)
/* */ #include<stdio.h> #include<algorithm> #include<string.h> #include<ctype.h ...
- 西安80投影坐标系转WGS84地理坐标系如何求七参数
需求:西安80投影坐标系(平面坐标)转为WGS84地理坐标系(球面坐标) 这其中涉及的问题主要有以下两点: 1.一个是投影坐标系,一个是地理坐标系,而七参数指的是两个地理坐标系之间的转换,因此需要把投 ...
- Java日志框架Slf4j+Log4j入门
一.日志系统介绍 slf4j,即简单日志门面(Simple Logging Facade for Java),不是具体的日志解决方案,它只服务于各种各样的日志系统.简答的讲就是slf4j是一系列的日志 ...
- Arduino IDE for ESP8266 项目云盒子 (1)AP直接模式
手机直接连接esp8266辐射的WIFI,通信. https://item.taobao.com/item.htm?spm=a230r.1.14.20.eYblO3&id=5219451024 ...