
crm--纯后端部署
技术栈:supervisor + nginx + uwsgi + django + virtualenv + mariadb
基本流程
crm 纯后端部署是通过模板语言进行和前端通信的,前端代码写在后端中
<!--模板语言-->

{{static.el}}
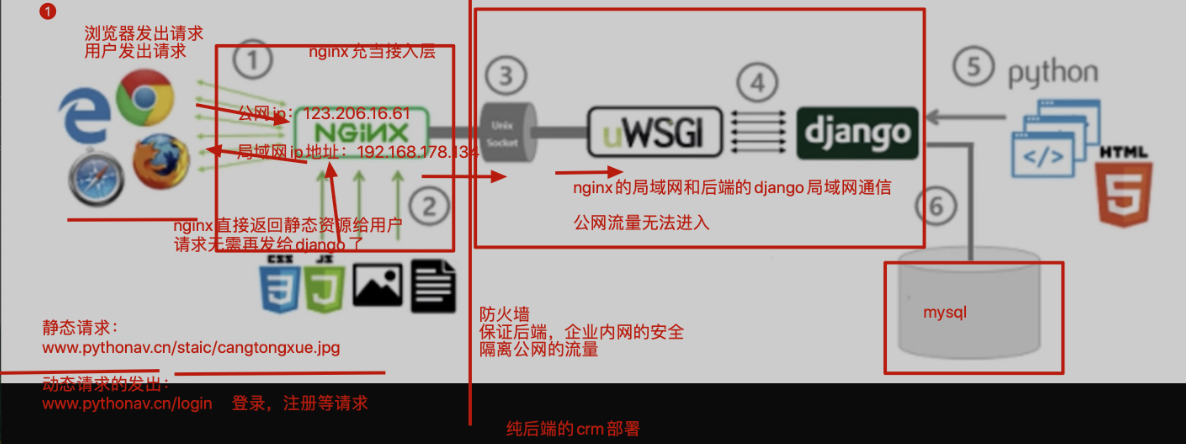
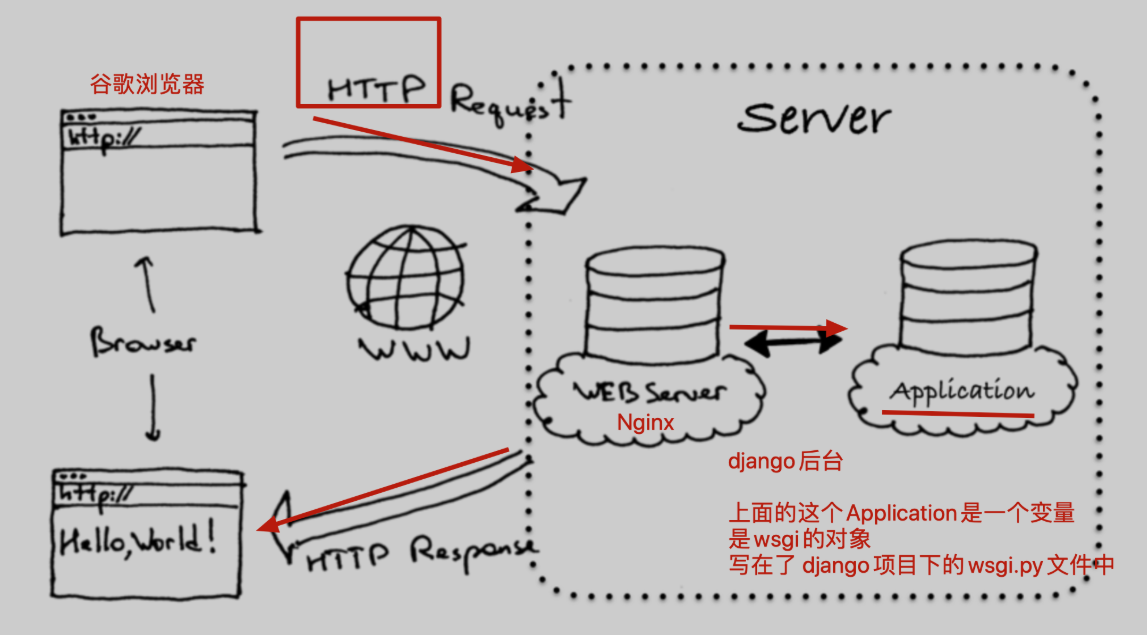
先配置后端,uwsgi+crm进行项目运行
环境变量
[root@localhost ~]# vim /etc/profile

PATH="/opt/tngx232/sbin:/opt/python369/bin:/usr/local/sbin:/usr/local/bin:/usr/sbin:/usr/bin:"

[root@localhost ~]# source /etc/profile

[root@localhost ~]# echo $PATH

/opt/tngx232/sbin:/opt/python369/bin:/usr/local/sbin:/usr/local/bin:/usr/sbin:/usr/bin:
1.先创建虚拟环境,用于运行crm
[root@localhost ~]# mkdir /s25crm

[root@localhost ~]# cd /s25crm/

[root@localhost s25crm]# ls

[root@localhost s25crm]# pwd

/s25crm

[root@localhost s25crm]# virtualenv --python=python3 s25_crm

created virtual environment CPython3.6.9.final.0-64 in 138ms

  creator CPython3Posix(dest=/s25crm/s25_crm, clear=False, no_vcs_ignore=False, global=False)

  seeder FromAppData(download=False, pip=bundle, setuptools=bundle, wheel=bundle, via=copy, app_data_dir=/root/.local/share/virtualenv)

    added seed packages: pip==21.3.1, setuptools==59.6.0, wheel==0.37.1

  activators BashActivator,CShellActivator,FishActivator,NushellActivator,PowerShellActivator,PythonActivator

[root@localhost s25crm]# ls

s25_crm

[root@localhost s25crm]# source s25_crm/bin/activate

(s25_crm) [root@localhost s25crm]#
2.上传代码到linux中,调试项目是否能够运行
(s25_crm) [root@localhost s25crm]# git clone https://github.com/zylyehuo/tf_crm.git

Cloning into 'tf_crm'...

remote: Enumerating objects: 153, done.

remote: Counting objects: 100% (153/153), done.

remote: Compressing objects: 100% (133/133), done.

remote: Total 153 (delta 20), reused 150 (delta 17), pack-reused 0

Receiving objects: 100% (153/153), 1.17 MiB | 0 bytes/s, done.

Resolving deltas: 100% (20/20), done.

(s25_crm) [root@localhost s25crm]# ls

s25_crm  tf_crm

(s25_crm) [root@localhost s25crm]# ls tf_crm/

app01  manage.py  static  templates  tf_crm

(s25_crm) [root@localhost s25crm]# cd tf_crm/

(s25_crm) [root@localhost tf_crm]#

(s25_crm) [root@localhost tf_crm]# pip3 install -i https://pypi.tuna.tsinghua.edu.cn/simple django==1.11.25

(s25_crm) [root@localhost tf_crm]# pip3 install -i https://pypi.tuna.tsinghua.edu.cn/simple pymysql

(s25_crm) [root@localhost tf_crm]# pip3 install -i https://pypi.tuna.tsinghua.edu.cn/simple django-multiselectfield

(s25_crm) [root@localhost tf_crm]# yum install mariadb-server  mariadb -y

(s25_crm) [root@localhost tf_crm]# systemctl start mariadb

(s25_crm) [root@localhost tf_crm]# netstat -tunlp | grep 3306

tcp        0      0 0.0.0.0:3306            0.0.0.0:*               LISTEN      106346/mysqld

(s25_crm) [root@localhost tf_crm]# python3 manage.py runserver

# 出现 ValueError: Incorrect timezone setting: Asia/shanghai

(s25_crm) [root@localhost tf_crm]# vim tf_crm/settings.py

#TIME_ZONE = 'Asia/shanghai'  # 注释掉,临时解决

(s25_crm) [root@localhost tf_crm]# python3 manage.py runserver

# 出现 django.db.utils.OperationalError: (1045, "Access denied for user 'root'@'localhost' (using password: YES)")

(s25_crm) [root@localhost tf_crm]# vim /s25crm/tf_crm/tf_crm/local_settings.py

# 修改以下内容

DATABASES = {

    'default':{

        'ENGINE': 'django.db.backends.mysql',

        'NAME': 'tf_crm',

        'HOST': '127.0.0.1',

        'POST': 3306,

        'USER': 'root',

        'PASSWORD': '',

    }

}

(s25_crm) [root@localhost tf_crm]# vim /opt/s25crm/tf_crm/tf_crm/settings.py

# 修改以下内容

ALLOWED_HOSTS = ["*"]

(s25_crm) [root@localhost tf_crm]# pwd

/s25crm/tf_crm

(s25_crm) [root@localhost tf_crm]# python3 manage.py runserver
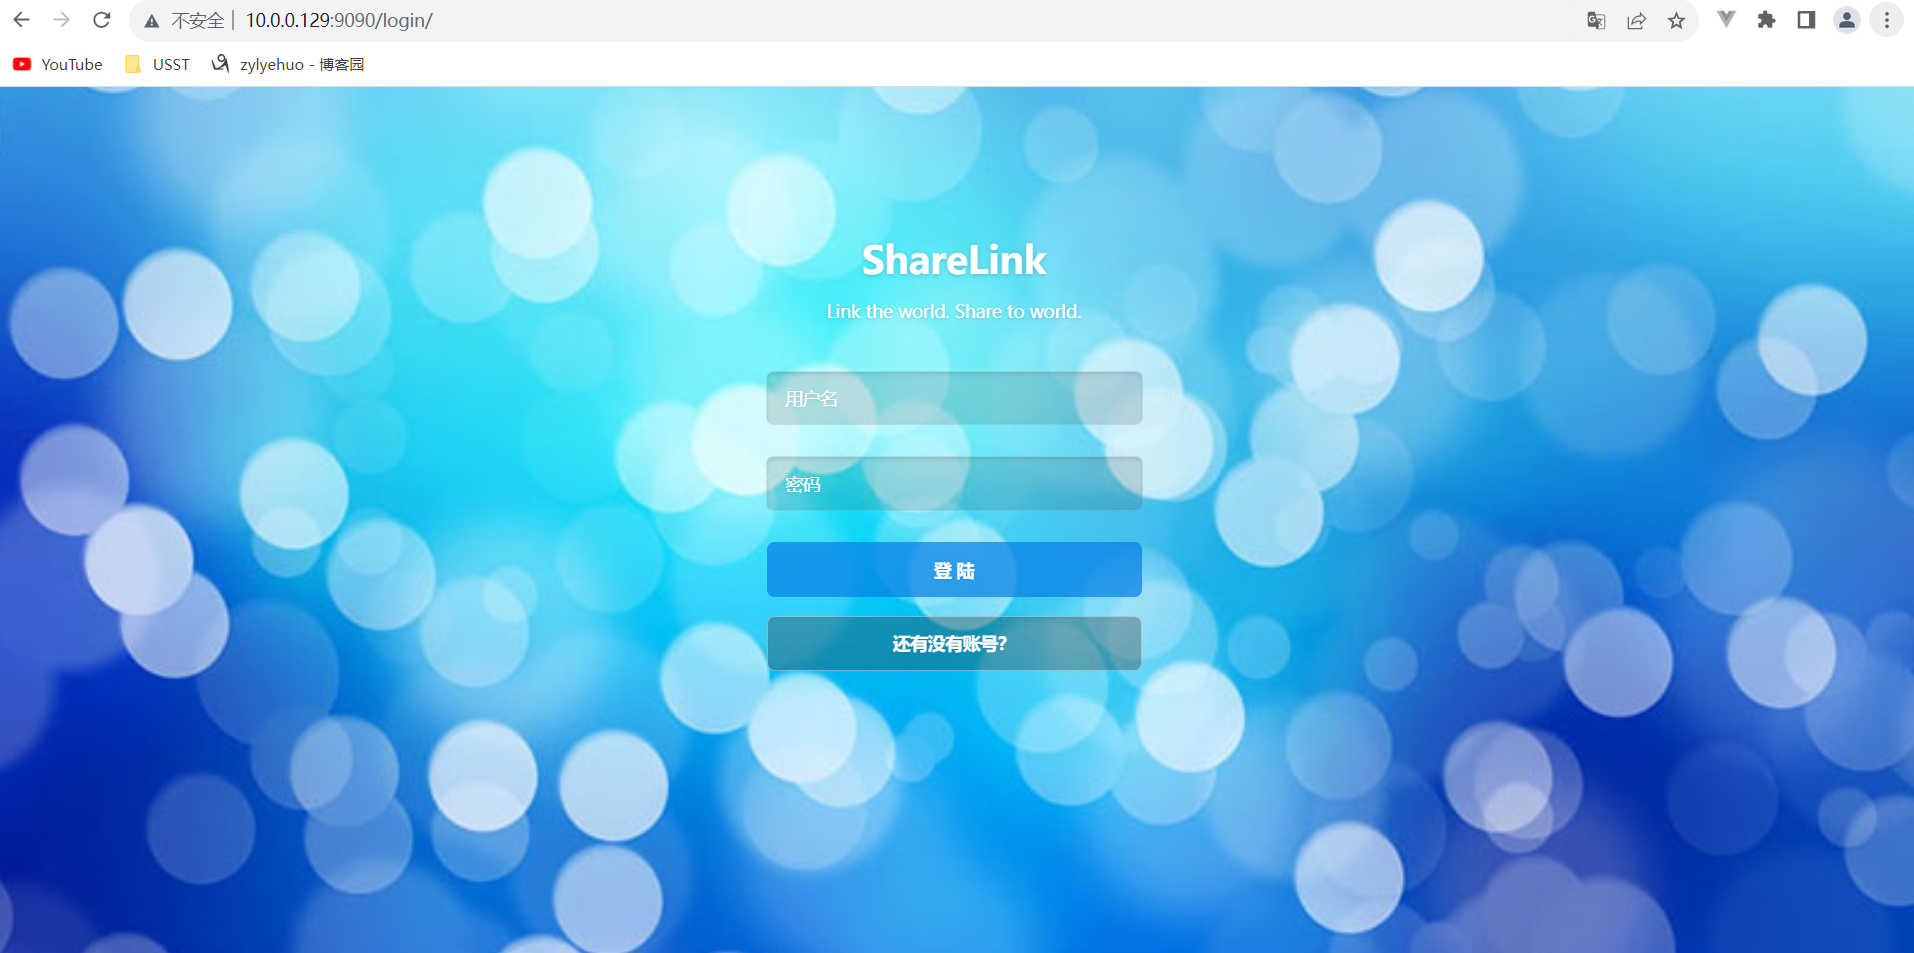
3.调试好crm的模块依赖,以及mariadb数据库的安装,以及数据导入之后,crm调试可以正确运行了
浏览器访问 10.0.0.129:9090/login/
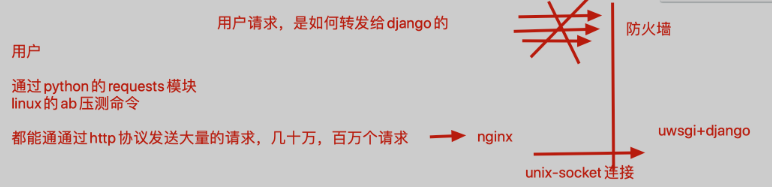
4.在线上,是使用uwsgi结合uwsgi.ini配置文件,启动crm的,启动方式如下
安装uwsgi
pip3 install -i https://pypi.tuna.tsinghua.edu.cn/simple uwsgi
线上部署时,uwsgi.ini需要修改添加如下参数,关闭http参数
(s25_crm) [root@localhost tf_crm]# vim uwsgi.ini
注释版
[uwsgi]

# Django-related settings

# the base directory (full path)

# 填写crm项目的第一层绝对路径

chdir           = /s25crm/tf_crm/

# Django's wsgi file

# 填写crm项目第二层的相对路径,找到第二层目录下的wsgi.py

# 这里填写的不是路径,是以上一个参数为相对,找到第二层项目目录下的wsgi.py文件

module          = tf_crm.wsgi

# the virtualenv (full path)

# 填写虚拟环境解释器的第一层工作目录

home            = /s25crm/s25_crm

# process-related settings

# master

master          = true

# maximum number of worker processes

# 代表定义uwsgi运行的多进程数量,官网给出的优化建议是 2*cpu核数+1

# 如果是单进程,十万个请求,都丢给一个进程去处理

# 3个工作进程,十万个请求,就分给了3个进程去分摊处理

# 查看几核

# [root@localhost ~]# cat /proc/cpuinfo| grep "cpu cores"| uniq

# cpu cores	: 4

processes       = 9

# the socket (use the full path to be safe

# 使用此协议运行后台,就无法通过浏览器访问了,协议不一样

socket          = 0.0.0.0:8000

#  线上不会用http参数,因为对后端是不安全的,使用socket参数是安全的连接,用nginx反向代理去访问

# 后端程序是运行在防火墙内部,外网是无法直接访问的

# 临时使用http参数,便于我们用浏览器调试访问

#http =  0.0.0.0:8000

# ... with appropriate permissions - may be needed

# chmod-socket    = 664

# clear environment on exit

vacuum          = true
无注释版
[uwsgi]

chdir           = /s25crm/tf_crm/

module          = tf_crm.wsgi

home            = /s25crm/s25_crm

master          = true

processes       = 9

socket          = 0.0.0.0:8000

vacuum          = true
5.使用supervisor启动uwsgi进程,需要修改supervisord.conf配置文件,看好文件的名字
(s25_crm) [root@localhost tf_crm]# which uwsgi

/s25crm/s25_crm/bin/uwsgi

(s25_crm) [root@localhost tf_crm]# ls

app01  manage.py  static  templates  tf_crm  uwsgi.ini

(s25_crm) [root@localhost tf_crm]# pwd

/s25crm/tf_crm
vim /etc/supervisord.conf #修改如下参数
注释版
[program:s25crm]

command=/s25crm/s25_crm/bin/uwsgi --ini /s25crm/tf_crm/uwsgi.ini

autostart=true       ; 在supervisord启动的时候也自动启动

startsecs=10         ; 启动10秒后没有异常退出,就表示进程正常启动了,默认为1秒

autorestart=true     ; 程序退出后自动重启,可选值:[unexpected,true,false],默认为unexpected,表示进程意外杀死后才重启

stopasgroup=true     ;默认为false,进程被杀死时,是否向这个进程组发送stop信号,包括子进程

killasgroup=true     ;默认为false,向进程组发送kill信号,包括子进程
无注释版
[program:s25crm]

command=/s25crm/s25_crm/bin/uwsgi --ini /s25crm/tf_crm/uwsgi.ini

autostart=true

startsecs=10

autorestart=true

stopasgroup=true

killasgroup=true
6.检查后台的状态,并启动supervisor
# 【supervisor无法正常启动,立即去检查 supervisord.conf里面定义的任务参数是否正确】

(s25_crm) [root@localhost tf_crm]# supervisord -c /etc/supervisord.conf

Unlinking stale socket /tmp/supervisor.sock

(s25_crm) [root@localhost tf_crm]# supervisorctl -c /etc/supervisord.conf

s25crm                           RUNNING   pid 107727, uptime 0:00:52

supervisor> status

s25crm                           RUNNING   pid 107727, uptime 0:01:16
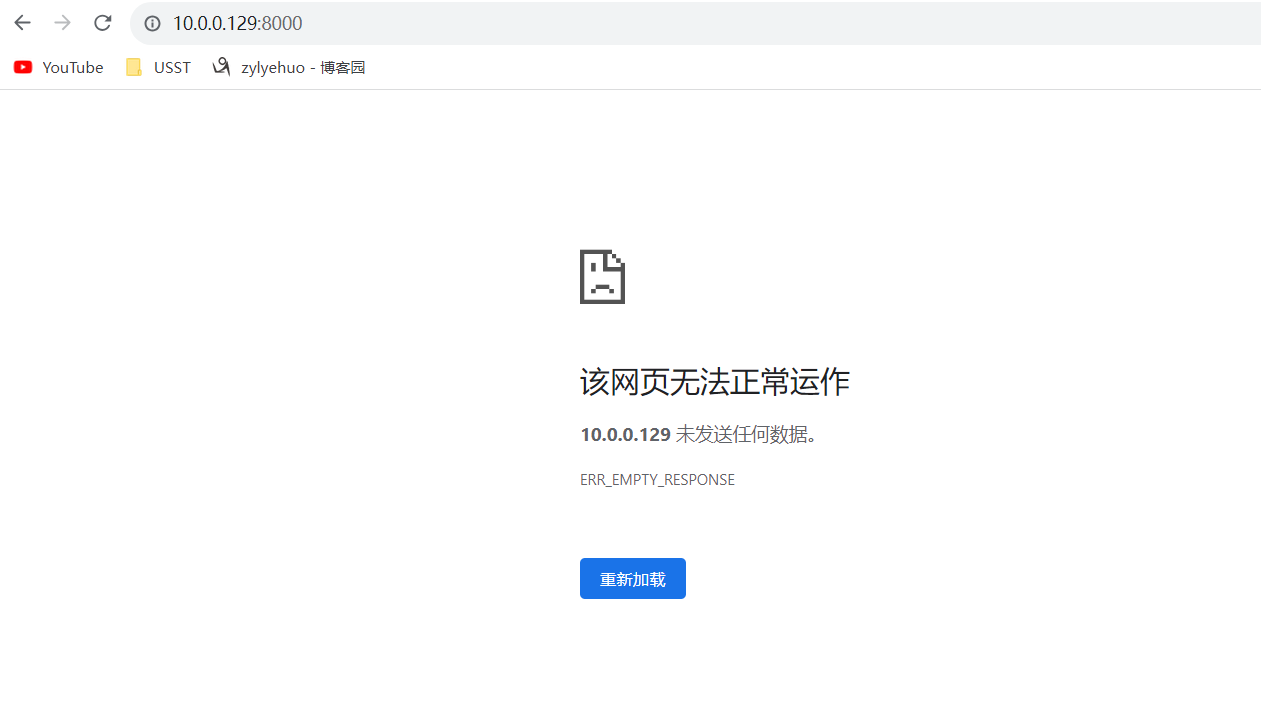
此时浏览器访问 10.0.0.129:8000
由于协议不通,故出现如下页面
7.此时配置好nginx.conf就完事了,修改如下,配置nginx,请求转发给后台即可
(s25_crm) [root@localhost tf_crm]# vim /opt/tngx232/conf/nginx.conf
注释版
    server {

        listen       80;

        server_name  localhost;

        # 这是一个局部的变量,只对当前这个server{}代码块生效,编码设置为utf-8

        charset utf-8;

        error_page  404  /40x.html;

        # 这里的locaiton路径匹配,如果你写的是root参数,就是一个web站点功能

        # 基于uwsgi协议的一个高性能的反向代理转发,新的参数

        location / {

            # 当请求发送给  10.0.0.129:80的时候

            # 通过uwsgi_pass把请求转发给后端的uwsgi服务器

            uwsgi_pass   0.0.0.0:8000;

            # 这个参数,是固定的,是添加一些转发请求头内容

            include uwsgi_params;

        }

    }
无注释版
    server {

        listen       80;

        server_name  localhost;

        charset utf-8;

        error_page  404  /40x.html;

        location / {

            uwsgi_pass   0.0.0.0:8000;

            include uwsgi_params;

        }

    }
8.重启nginx
(s25_crm) [root@localhost tf_crm]# nginx -t

nginx: the configuration file /opt/tngx232//conf/nginx.conf syntax is ok

nginx: configuration file /opt/tngx232//conf/nginx.conf test is successful

(s25_crm) [root@localhost tf_crm]# nginx -s reload
浏览器访问 10.0.0.129/login/
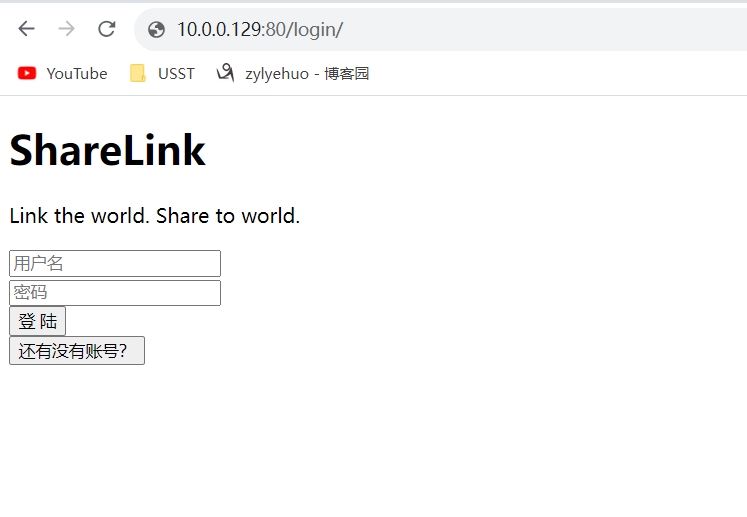
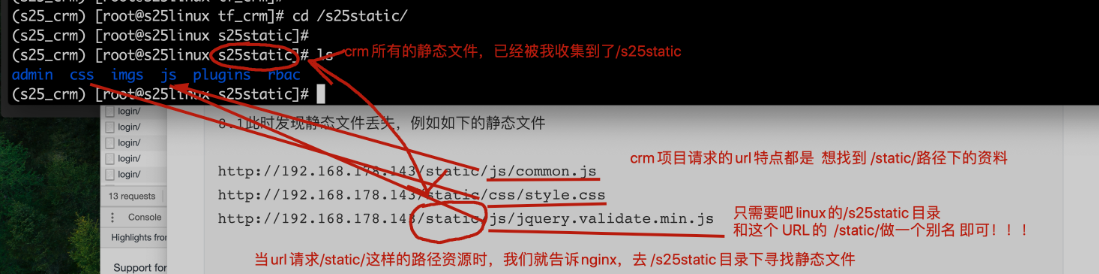
此时发现静态文件丢失,例如如下的静态文件
http://10.0.0.129/static/js/common.js

http://10.0.0.129/static/css/style.css

http://10.0.0.129/static/js/jquery.validate.min.js
9.还得配置nginx接收所有的django静态文件,修改命令如下
第一步:修改django的配置文件,收集所有的静态文件,放入一个统一管理的目录
(s25_crm) [root@localhost tf_crm]# vim /s25crm/tf_crm/tf_crm/settings.py  # 添加如下内容

STATIC_ROOT='/s25static/'   # 作用是定义一个统一管理的目录,收集所有crm的静态文件
第二步:用命令收集静态文件
cd /s25crm/tf_crm

(s25_crm) [root@localhost tf_crm]# python3 manage.py collectstatic

(s25_crm) [root@localhost tf_crm]# cd /s25static/

(s25_crm) [root@localhost s25static]# ls

admin  css  imgs  js  plugins
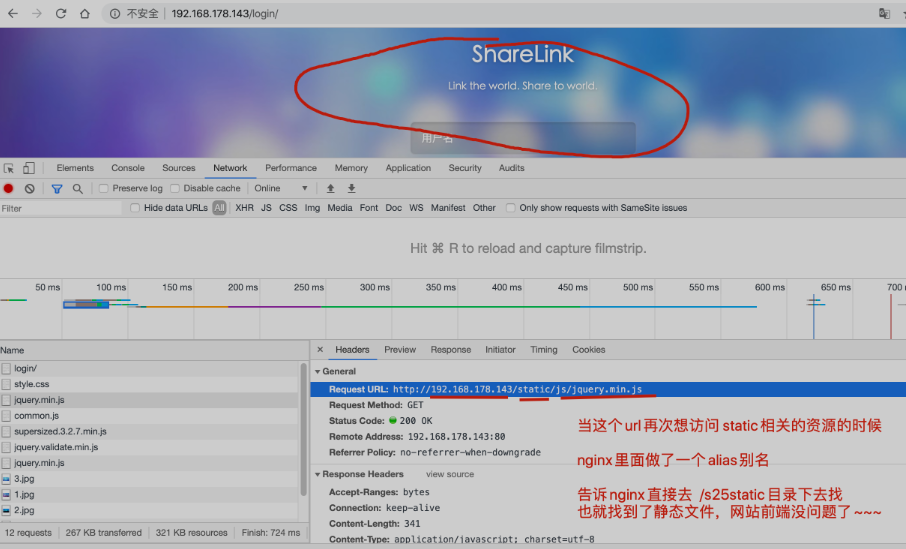
10.通过nginx去找到如下的静态文件即可
nginx找到crm的静态文件原理图
(s25_crm) [root@localhost s25static]# vim /opt/tngx232/conf/nginx.conf
注释版
    server {

        listen       80;

        server_name  localhost;

        # 这是一个局部的变量,只对当前这个server{}代码块生效,编码设置为utf-8

        charset utf-8;

        error_page  404  /40x.html;

        # 这里的locaiton路径匹配,如果你写的是root参数,就是一个web站点功能

        # 基于uwsgi协议的一个高性能的反向代理转发,新的参数

        location / {

            # 当请求发送给  10.0.0.129:80的时候

            # 通过uwsgi_pass把请求转发给后端的uwsgi服务器

            uwsgi_pass   0.0.0.0:8000;

            # 这个参数,是固定的,是添加一些转发请求头内容

            include uwsgi_params;

        }

        # nginx的location{}代码块用于匹配nginx的url,对于静态文件的匹配,可以按如下配置

        # 当请求url是 10.0.0.129:80/static/js

        #            10.0.0.129:80/static/css

        #            10.0.0.129:80/static/admin/admin.js

        #            ......

        #            如此之类以 /static 开头的url,都告诉nginx去Linux的 /s25static 目录下寻找资料,也就找到所有的 js、css了

        location /static {

            alias /s25static;

        }

    }
无注释版
    server {

        listen       80;

        server_name  localhost;

        charset utf-8;

        error_page  404  /40x.html;

        location / {

            uwsgi_pass   0.0.0.0:8000;

            include uwsgi_params;

        }

        location /static {

            alias /s25static;

        }

    }
11.重启nginx
(s25_crm) [root@localhost tf_crm]# nginx -t

nginx: the configuration file /opt/tngx232//conf/nginx.conf syntax is ok

nginx: configuration file /opt/tngx232//conf/nginx.conf test is successful

(s25_crm) [root@localhost tf_crm]# nginx -s reload
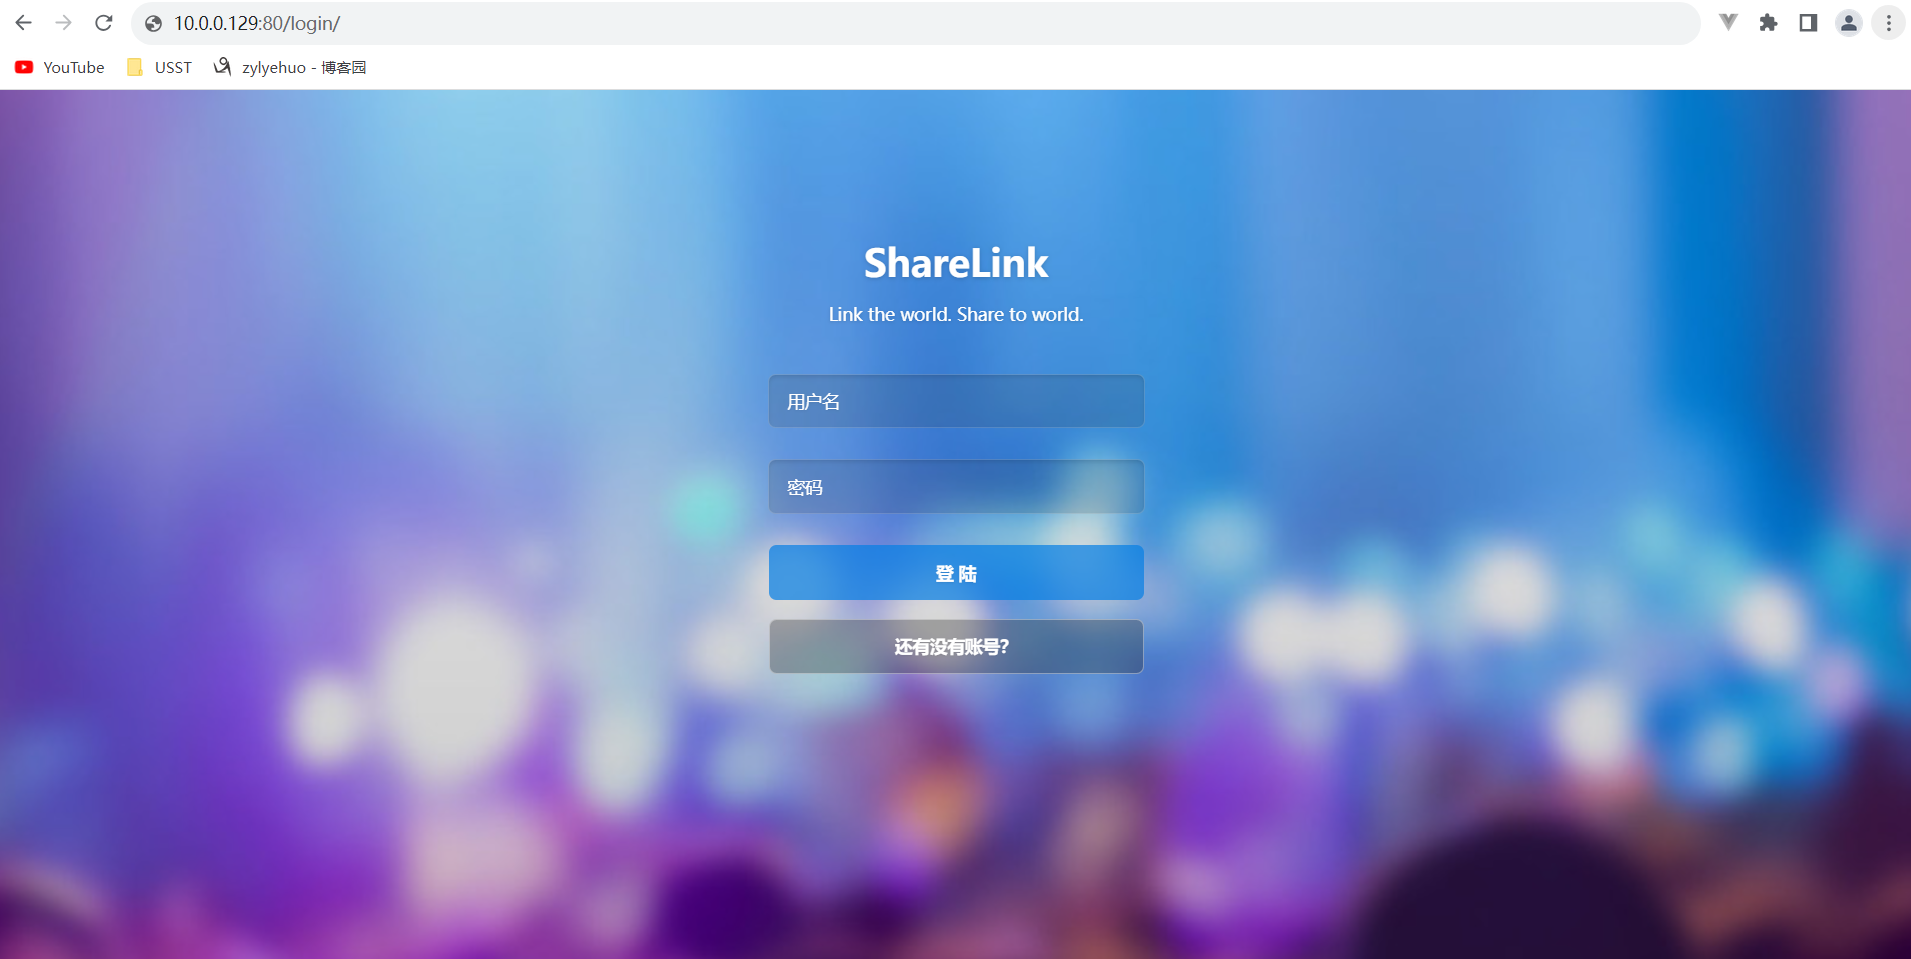
浏览器访问 10.0.0.129/login/
crm--纯后端部署的更多相关文章
- crm 项目的部署
发布CRM你将使用以下软件 nginx uWSGI CentOS7 CRM项目文件 virtualenv supervisor WSGI.uWSGI python web服务器开发使用WSGI协议(W ...
- Dynamics CRM Package Deployer 部署工具
CRM 部署工具非常有用 我们可以用部署工具来做迁移,部署 等等. Package Deployer可以同时部署多个solutions. 并且也可以勾选solution的plugin也同时部署. 三 ...
- Java后端部署以及与Android通信注意事项
1 概述 本文列举了一些Android+后端Java通信/部署时的问题以及注意事项,覆盖的问题包括但不限于安全组.数据库.路径等,如果各位读者的Android端不能正常访问Java后端,希望这里的解决 ...
- day91:luffy:基于vue+drf的路飞学城项目后端部署
目录 1.安装mysql镜像 2.把本地的数据导入到容器的mysql数据库中 3.安装redis容器 4.把后端项目部署前的处理 5.修改项目的配置文件:prod.py 6.从后端项目中收集静态文件 ...
- 纯后端尝试写一个前端slide插件
概述 由于项目组前端人员缺失,又赶上需要在手机端做一个slide效果的页面,所以只能自己硬着头皮上了,写的很简单,请大家不要笑话,只是拿出来分享下,大家先看下完成后的效果,如下: 过程 看了效果图是不 ...
- Django前后端分离项目部署
vue+drf的前后端分离部署笔记 前端部署过程 端口划分: vue+nginx的端口 是81 vue向后台发请求,首先发给的是代理服务器,这里模拟是nginx的 9000 drf后台运行在 9005 ...
- 部署服务能在Dynamics CRM Online上使用吗?
部署服务有些时候有用,改动一些参数不需要重启IIS,也不需要去数据库中更改.比如,系统默认设置一个仪表盘(Dashboard)最多6个组件,不能超过这个数量,通过部署服务是可以更改的.部署服务既可以通 ...
- .Net Core 在Linux服务器下部署程序--(3). 部署.net core 后端程序
确认第二步中的软件已安装完成 lrzsz文件上传下载软件 zip与unzip压缩包软件 net core 相关软件 确认上述软件安装完成之后,开始部署程序 创建部署文件夹 我的习惯是在usr文件夹下新 ...
- springboot+vue前后端分离,nginx代理配置 tomcat 部署war包详细配置
1.做一个小系统,使用了springboot+vue 基础框架参考这哥们的,直接拿过来用,链接https://github.com/smallsnail-wh/interest 前期的开发环境搭建就不 ...
- 使用 Nginx 部署前后端分离项目,解决跨域问题
前后端分离这个问题其实松哥和大家聊过很多了,上周松哥把自己的两个开源项目部署在服务器上以帮助大家可以快速在线预览(喜大普奔,两个开源的 Spring Boot + Vue 前后端分离项目可以在线体验了 ...
随机推荐
- CreateProcess error=2, 系统找不到指定的文件。
遇到一个android 配置.gradle时提示CreateProcess error=2, 系统找不到指定的文件 于是百度有很多这类答案,如:干掉NDK 我按照这么做了,最后顽固的bug 并没有理睬 ...
- C++面试八股文:struct、class和union有哪些区别?
某日小二参加XXX科技公司的C++工程师开发岗位5面: 面试官:struct和class有什么区别? 小二:在C++中,struct和class的唯一区别是默认的访问控制.struct默认的成员是pu ...
- 从 pheatmap 无缝迁移至 ComplexHeatmap
pheatmap 是一个非常受欢迎的绘制热图的 R 包.ComplexHeatmap 包即是受之启发而来.你可以发现Heatmap()函数中很多参数都与pheatmap()相同.在 pheatmap ...
- JUC同步锁原理
JUC同步锁原理 1.锁的本质 1.什么是锁? 通俗来讲,锁要保证的就是原子性,就是一个代码块不允许多线程同时执行,就是锁.从生活的角度上来说,就比如你要去上厕所,当你在上厕所期间,你会把门锁上, ...
- python测试系列教程——python+Selenium+chrome自动化测试框架
需要的环境 浏览器(Firefox/Chrome/IE-) Python Selenium Selenium IDE(如果用Firefox) FireBug.FirePath(如果用Firefox) ...
- MRS-MRS相同功能代码管理应用笔记
MRS相同功能代码管理应用笔记 使用 MounRiver(以下简称 MRS )进行 RISC-V 单片机开发时,工程目录下往往存在多个文件夹与文件,我们只需要着重关注截图中红框所示的部分,它们自上而下 ...
- 一篇随笔学会CSS
CSS3 1.CSS介绍 HTML+CSS+JS 结构+表现+交互 2.CSS发展史 Cascading Style Sheet 层叠级联样式表 表现层:美化网页(字体.颜色.边距.宽高.网页定位.网 ...
- 【Python】Locust持续优化:InfluxDB与Grafana实现数据持久化与可视化分析
前言 在进行性能测试时,我们需要对测试结果进行监控和分析,以便于及时发现问题并进行优化. Locust在内存中维护了一个时间序列数据结构,用于存储每个事件的统计信息. 这个数据结构允许我们在Chart ...
- 【环境搭建】docker+nginx部署PHP
目的 使用docker容器完成nginx的安装以及部署PHP网页 步骤 一. 安装nginx 1. 拉取Nginx镜像 docker pull nginx //拉取镜像 docker images / ...
- 【原创】Ftrace使用及实现机制
Ftrace使用及实现机制 版权声明:本文为本文为博主原创文章,转载请注明出处 https://www.cnblogs.com/wsg1100 如有错误,欢迎指正. 目录 Ftrace使用及实现机制 ...