nginx发布vue 项目
在本次使用nginx发布vue项目遇到 配置location 始终404 和 在项目子目录点击浏览器刷新出现404问题
使用nginx发布vue项目,为了方便测试就下载了一个nginx 放置自己目录下
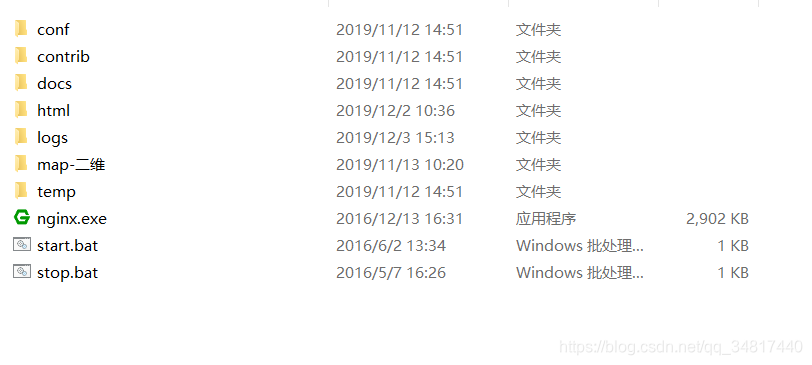
nginx目录是这样的
一、配置端口
然后打开conf / nginx.conf 配置 server,首选监听808 设置服务名
	listen       808;

	server_name  localhost;
二、配置项目根目录
	index index.html index.htm index.php;

    root  /YLKJPro/leshan_integrate_manage/dist;    #这个是直接指向我的D盘下的项目目录
三、location URL匹配配置
要进行location 的配置首选要了解 nginx 子目录匹配规则(减少不必要的时间成本)
看官方案例:
	location / {

	    root /data/www;

	}
配置分解~~
当访问http://127.0.0.1/时,会匹配/data/www
当访问http://127.0.0.1/images时,会匹配/data/www/images
当访问http://127.0.0.1/images/1.jpg时,会匹配/data/www/images/1.jpg
也就是说,地址栏里"/"后的路径是直接匹配目录data/www/下的路径
根据如上案例 我项目location 配置如下
	location /dist/{

	 	root /YLKJPro/leshan_integrate_manage;

	}
根据如上配置~
访问http://127.0.0.1/dist/时,会匹配/YLKJPro/leshan_integrate_manage/dist
也就是说,地址栏里/dist,直接匹配了/YLKJPro/leshan_integrate_manage的子目录dist
经常出问题的是, location里的url随意配了一个名字,如/xxx,
但是对应的/YLKJPro/leshan_integrate_manage目录
下并没有该/YLKJPro/leshan_integrate_manage/xxx子目录,一访问就404
还有个是重复路径配置
server {

    location / {

        root /data/www;

    }

    location /images/ {

        root /data;

    }

}
访问URL http://localhost/images/example.png,将会匹配第二个/images/规则,
虽然也可以匹配location /规则,但nginx默认会选择最长前缀去匹配当前URL,也就是
第二个配置会生效,访问/data/images/目录,而不是/data/www/images/目录
引用官方解释
	An important web server task is serving out files (such as images or static HTML pages). You will implement an example where, depending on the request, files will be served from different local directories: /data/www (which may contain HTML files) and /data/images (containing images). This will require editing of the configuration file and setting up of a server block inside the http block with two location blocks.

	First, create the /data/www directory and put an index.html file with any text content into it and create the /data/images directory and place some images in it.

	Next, open the configuration file. The default configuration file already includes several examples of the server block, mostly commented out. For now comment out all such blocks and start a new server block:

	http {

	    server {

	    }

	}

	Generally, the configuration file may include several server blocks distinguished by ports on which they listen to and by server names. Once nginx decides which server processes a request, it tests the URI specified in the request’s header against the parameters of the location directives defined inside the server block.

	Add the following location block to the server block:

	location / {

	    root /data/www;

	}

	This location block specifies the “/” prefix compared with the URI from the request. For matching requests, the URI will be added to the path specified in the root directive, that is, to /data/www, to form the path to the requested file on the local file system. If there are several matching location blocks nginx selects the one with the longest prefix. The location block above provides the shortest prefix, of length one, and so only if all other location blocks fail to provide a match, this block will be used.

	Next, add the second location block:

	location /images/ {

	    root /data;

	}

	It will be a match for requests starting with /images/ (location / also matches such requests, but has shorter prefix).

	The resulting configuration of the server block should look like this:

	server {

	    location / {

	        root /data/www;

	    }

	    location /images/ {

	        root /data;

	    }

	}

	This is already a working configuration of a server that listens on the standard port 80 and is accessible on the local machine at http://localhost/. In response to requests with URIs starting with /images/, the server will send files from the /data/images directory. For example, in response to the http://localhost/images/example.png request nginx will send the /data/images/example.png file. If such file does not exist, nginx will send a response indicating the 404 error. Requests with URIs not starting with /images/ will be mapped onto the /data/www directory. For example, in response to the http://localhost/some/example.html request nginx will send the /data/www/some/example.html file.

	To apply the new configuration, start nginx if it is not yet started or send the reload signal to the nginx’s master process, by executing:

	nginx -s reload

	In case something does not work as expected, you may try to find out the reason in access.log and error.log files in the directory /usr/local/nginx/logs or /var/log/nginx.

	Setting Up a Simple Proxy Server

	One of the frequent uses of nginx is setting it up as a proxy server, which means a server that receives requests, passes them to the proxied servers, retrieves responses from them, and sends them to the clients.

	We will configure a basic proxy server, which serves requests of images with files from the local directory and sends all other requests to a proxied server. In this example, both servers will be defined on a single nginx instance.

	First, define the proxied server by adding one more server block to the nginx’s configuration file with the following contents:

	server {

	    listen 8080;

	    root /data/up1;

	    location / {

	    }

	}

	This will be a simple server that listens on the port 8080 (previously, the listen directive has not been specified since the standard port 80 was used) and maps all requests to the /data/up1 directory on the local file system. Create this directory and put the index.html file into it. Note that the root directive is placed in the server context. Such root directive is used when the location block selected for serving a request does not include own root directive.

	Next, use the server configuration from the previous section and modify it to make it a proxy server configuration. In the first location block, put the proxy_pass directive with the protocol, name and port of the proxied server specified in the parameter (in our case, it is http://localhost:8080):

	server {

	    location / {

	        proxy_pass http://localhost:8080;

	    }

	    location /images/ {

	        root /data;

	    }

	}

	We will modify the second location block, which currently maps requests with the /images/ prefix to the files under the /data/images directory, to make it match the requests of images with typical file extensions. The modified location block looks like this:

	location ~ \.(gif|jpg|png)$ {

	    root /data/images;

	}

	The parameter is a regular expression matching all URIs ending with .gif, .jpg, or .png. A regular expression should be preceded with ~. The corresponding requests will be mapped to the /data/images directory.

	When nginx selects a location block to serve a request it first checks location directives that specify prefixes, remembering location with the longest prefix, and then checks regular expressions. If there is a match with a regular expression, nginx picks this location or, otherwise, it picks the one remembered earlier.

	The resulting configuration of a proxy server will look like this:

	server {

	    location / {

	        proxy_pass http://localhost:8080/;

	    }

	    location ~ \.(gif|jpg|png)$ {

	        root /data/images;

	    }

	}

	This server will filter requests ending with .gif, .jpg, or .png and map them to the /data/images directory (by adding URI to the root directive’s parameter) and pass all other requests to the proxied server configured above.

	To apply new configuration, send the reload signal to nginx as described in the previous sections.

	There are many more directives that may be used to further configure a proxy connection.
四、子目录页面刷新404
经过上面一系列的nginx配置现在可以访问了,但是在项目的子路由下刷新页面出现了404,这是因为刷新页面时访问的资源在服务端找不到,因为vue-router设置的路径不是真实存在的路径。
这个在最初也是困惑许久,最后经过一番折腾,最后使用try_files总算解决了,在nginx中新增如下配置
  	location / {

             try_files $uri $uri/ @router; #检测文件存在性重定向到首页目录    防止404

             index  index.html;

     }

     location @router {

             rewrite ^.*$ /index.html last;

     }
再来看看一个案例对try_files 的解释
	location / {

	    try_files $uri $uri/ /index.php?$query_string;

	}
当用户请求 http://localhost/example 时,这里的 $uri 就是 /example。
try_files 会到硬盘里尝试找这个文件。如果存在名为 /$root/example(其中 $root 是项目代码安装目录)的文件,就直接把这个文件的内容发送给用户。
显然,目录中没有叫 example 的文件。然后就看 $uri/,增加了一个 /,也就是看有没有名为 /$root/example/ 的目录。
又找不到,就会 fall back 到 try_files 的最后一个选项 /index.php,发起一个内部 “子请求”,也就是相当于 nginx 发起一个 HTTP 请求到 http://localhost/index.php。
五、完整nginx 配置
最后nginx server完整配置如下
   server {

        listen       808;

        server_name  localhost;

        #charset koi8-r;

        #access_log  logs/host.access.log  main;

		index index.html index.htm index.php;

        root  /YLKJPro/leshan_integrate_manage/dist;    #你打包项目存放的位置

        location / {

                try_files $uri $uri/ @router; #检测文件存在性重定向到首页目录    防止404

                index  index.html;

        }

        location @router {

                rewrite ^.*$ /index.html last;

        }

		location /dist/{

		  root /YLKJPro/leshan_integrate_manage;

		}

		# 本地瓦片配置

        location /arcgis_vector_leshan/{

            root   html;

        }

	}
nginx发布vue 项目的更多相关文章
- nginx部署vue项目
nginx是一个高性能的HTTP和反向代理服务器.因此常用来做静态资源服务器和后端的反向代理服务器.本文主要记录使用nginx去部署使用vue搭建的前端项目,项目基于vue官方的脚手架vue-cli构 ...
- 使用jenkins一键打包发布vue项目
jenkins的安装 Jenkins是一款开源 CI&CD 软件,用于自动化各种任务,包括构建.测试和部署软件. Jenkins 支持各种运行方式,可通过系统包.Docker 或者通过一个独立 ...
- 【linux】【jenkins】自动化运维三 整合gitlab、docker发布vue项目
由于工作需要,这里我先创建一个vue的工程. 1.首先安装好gitlab相关插件:GitLab.GitLab Hook.NodeJS 插件安装参考:https://www.cnblogs.com/jx ...
- Docker镜像+nginx 部署 vue 项目
一.打包vue项目 在开发完的vue项目输入如下命名,打包生成dist文件夹 yarn build / npm run build 此时根目录会多出一个文件夹:dist文件夹,里面就是我们要发布的东西 ...
- Centos7 使用nginx部署vue项目
一.安装nginx #设置源 sudo rpm -Uvh http://nginx.org/packages/centos/7/noarch/RPMS/nginx-release-centos-7-0 ...
- nginx代理vue项目
很多项目的前端都使用vue编写的,在项目上线部署的时候,有些项目要求把前端页面和后台服务部署在不同的服务器,这就要求使用nginx代理,本文就来讲讲vue项目怎么使用nginx代理. 项目github ...
- CentOS7 安装nginx部署vue项目
简单描述:代码开发完了,需要环境来运行测试.服务器上没有nginx,搞起搞起. 在Centos下,yum源不提供nginx的安装,可以通过切换yum源的方法获取安装.也可以通过直接下载安装包的方法 ...
- Nginx 代理Vue项目出现Invalid Host header
说明 使用 Nginx 的 upstream 对 Vue 项目做负载均衡时,代理的地址无法访问目标地址,且页面报错: Invalid Host header(无效主机头) 分析 检查 Nginx 的 ...
- 关于nginx部署vue项目的两个问题
首先我使用的是后端接口+前端vue的形式,这样就涉及到跨域的问题.我是这样配置的: server { listen 80; server_name www.liangyp.xyz;//访问网址 loc ...
- nginx部署vue项目 解决方案
给前端同事部署了web项目之后,访问发现除了index.html可以访问,其他的路径使用了“伪静态”.比如访问:http://localhost:8081/user/login,访问即报404错误,这 ...
随机推荐
- 《golong入门教程📚》,从零开始入门❤️(建议收藏⭐️)
Go语言学习笔记 本菜鸟的Go语言学习笔记,历时1个月,包含了Go语言大部分的基本语法(不敢说全部),学习期间参考了各种视频,阅读了各种文章,主要参考名单如下: 点击跳转到参考名单<( ̄︶ ̄)& ...
- T-Dubbo,最好的RPC接口测试工具,支持nacos、zookeeper两大主流注册中心,真香!
这可能是有史以来最好用的RPC接口测试工具 文末有视频简介 获取方式 一只小Coder 简介 T-Dubbo,是一个基于Dubbo的全自动RPC接口测试平台为当下最流行的微服务架构中的RPC接口提供了 ...
- DOM选择器之元素其他节点选择器
<!DOCTYPE html> <html lang="en"> <head> <meta charset="UTF-8&quo ...
- java idea配置流程
这篇文章主要介绍了IntelliJ IDEA2021.1 配置大全(超详细教程),需要的朋友可以参考下 一.IDEA下载 idea.jdk.tomcat.maven下载地址请参考上一篇博客:https ...
- sorted、返回函数、匿名函数、装饰器、偏函数
1.sorted()排序方法,它可已经一个列表按照升序排序,也可以按照反序排序 1)如果要进行反序排序时,需要在函数里面设置reverse = True 2)sorted是一个高阶函数,它接受函数作为 ...
- Java学习笔记04
1. 循环进阶 1.1 无限循环 概念 循环一直停不下来,又叫死循环. for格式 for (;;) { 循环语句; } while格式 while (true) { 循环语句; } do...w ...
- java-io FileInputStream文件拷贝
1.编写代码 main方法: public static void main(String[] args) throws IOException { String pathFileUrl =" ...
- java生成机器码
java根据系统参数生成每个计算机的唯一标识. 1. 获取CPU序列号 /** * 获取CPU序列号 * @return * @throws IOException */ public static ...
- WPF Window设置ResizeMode="NoResize"
WPF窗口设置属性ResizeMode="NoResize"时,回到桌面后,点击任意应用,都会将此窗口激活. 我们来看下详细操作: 1. WPF窗口设置属性ResizeMode 2 ...
- Python 项目:外星人入侵----第一部分
外星人入侵 1.规划项目 玩家控制着一艘最初出现在屏幕底部中央的飞船,玩家可以使用箭头键左右移动飞船,还可以使用空格键进行射击,游戏开始时,一群外星人出现在天空中,他们在屏幕中下移动.玩家任务是射杀这 ...