002 Hello Spring Security
在前面已经搭建过环境框架,现在在demo模块下写一个简单的案例,让整个环境跑起来。
一:启动Demo项目
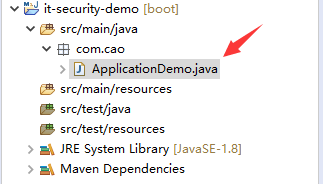
1.新建类
在这前,先建立包。
2.启动类程序
package com.cao; import org.springframework.boot.SpringApplication;
import org.springframework.boot.autoconfigure.SpringBootApplication;
import org.springframework.web.bind.annotation.GetMapping;
import org.springframework.web.bind.annotation.RestController; /**
* 模块启动类
* @author dell
*/
@SpringBootApplication //说明这是一个springboot项目
@RestController //可以提供rest服务
public class ApplicationDemo { public static void main(String[] args) {
//spring标准启动方式
SpringApplication.run(ApplicationDemo.class, args);
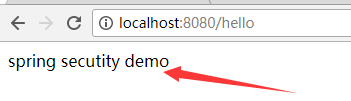
} @GetMapping("/hello")
public String hello() {
return "spring secutity demo";
} }
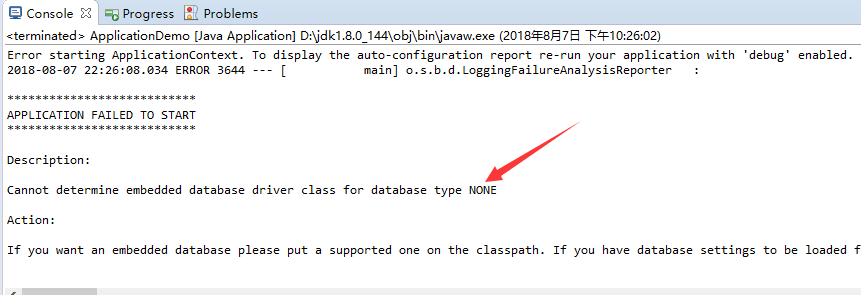
3.启动效果
说明没有指定数据库。
4.解决方式
在core虽然引入了jdbc,但是没有在项目中添加配置项。现在在demo模块中添加数据库配置项
新建File
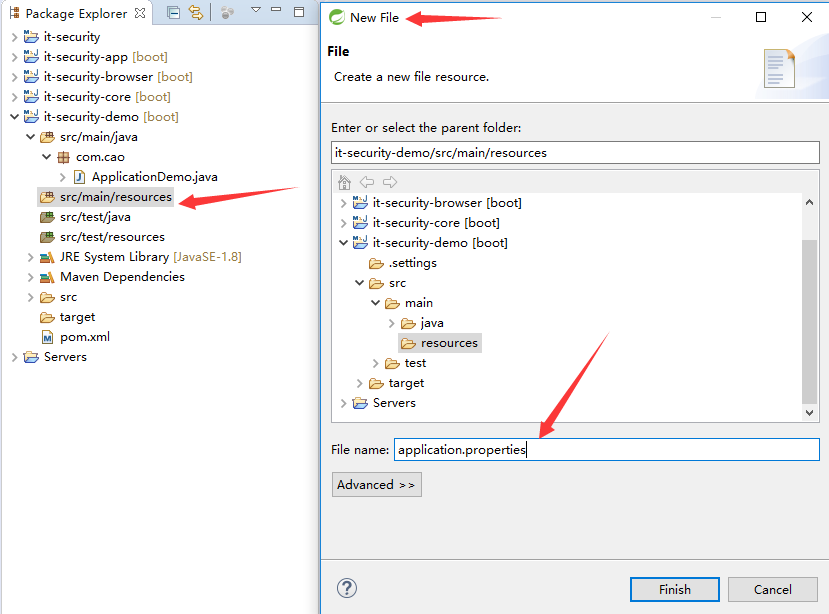
添加配置项
 spring.datasource.driver-class-name = com.mysql.jdbc.Driver

 spring.datasource.url= jdbc:mysql://127.0.0.1:3308/test?useUnicode=yes&characterEncoding=UTF-8&useSSL=false

 spring.datasource.username = root

 spring.datasource.password = 123456
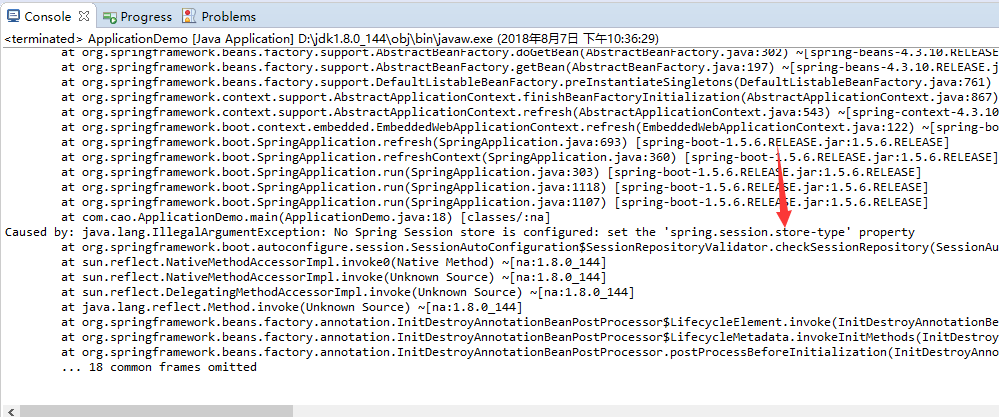
5.再次启动
session的存储没有指定。
6.解决方式
在browser模块中有session引用,在这里指定session的存储为none
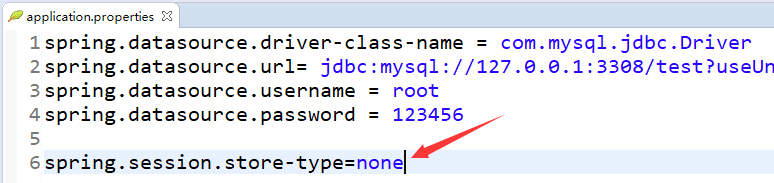
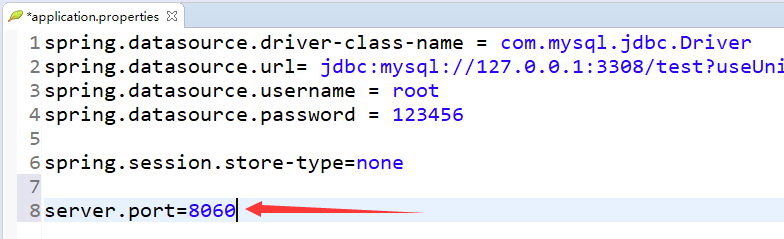
在学习过程中,如果8080端口被占用,可以在这里配置一个配置(这里使用8080,只是做一个示例)
7.再次启动,可以成功启动

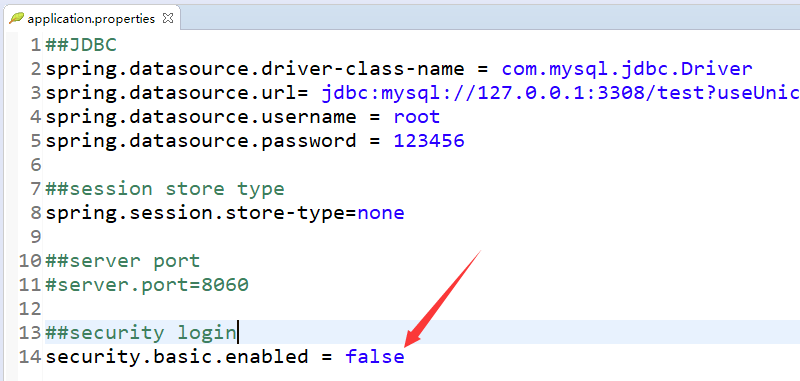
这里是默认,为了验证demo,暂时将这个通过配置项关掉。
8.最终效果
9.此时的application.properties
 ##JDBC

 spring.datasource.driver-class-name = com.mysql.jdbc.Driver

 spring.datasource.url= jdbc:mysql://127.0.0.1:3308/test?useUnicode=yes&characterEncoding=UTF-8&useSSL=false

 spring.datasource.username = root

 spring.datasource.password = 123456

 ##session store type

 spring.session.store-type=none

 ##server port

 #server.port=8060

 ##security login

 security.basic.enabled = false
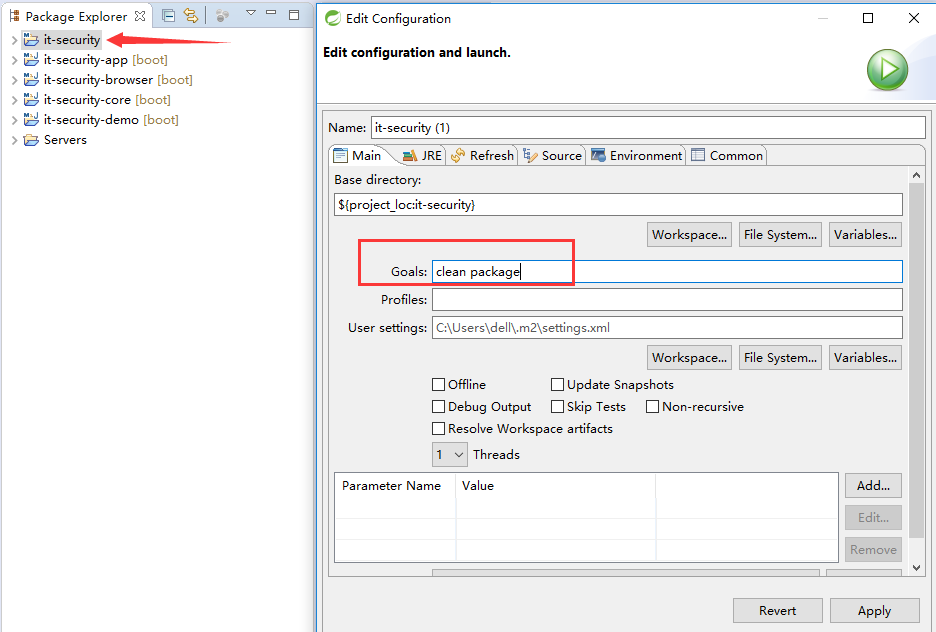
二:打包
1.在父项目上构建
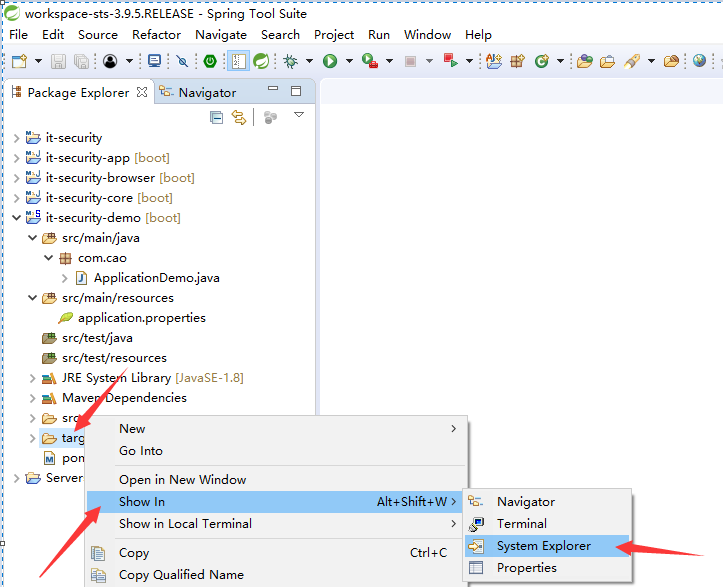
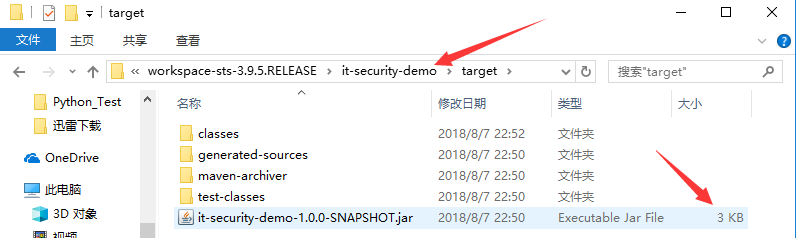
2.观看每个target
可以发现,这个打包不能提供web服务,因为包太小。
-----------------------------------------------------------------------
3.如何打一个可以执行的包呢
在demo模块中加一段build配置。
 <project xmlns="http://maven.apache.org/POM/4.0.0" xmlns:xsi="http://www.w3.org/2001/XMLSchema-instance" xsi:schemaLocation="http://maven.apache.org/POM/4.0.0 http://maven.apache.org/xsd/maven-4.0.0.xsd">

   <modelVersion>4.0.0</modelVersion>

   <artifactId>it-security-demo</artifactId>

   <parent>

       <groupId>com.jun.security</groupId>

       <artifactId>it-security</artifactId>

       <version>1.0.0-SNAPSHOT</version>

       <relativePath>../it-security</relativePath>

   </parent>

   <dependencies>

       <dependency>

             <groupId>com.jun.security</groupId>

             <artifactId>it-security-browser</artifactId>

             <version>${it.security.version}</version>

         </dependency>

   </dependencies>

   <build>

         <plugins>

             <plugin>

                 <groupId>org.springframework.boot</groupId>

                 <artifactId>spring-boot-maven-plugin</artifactId>

                 <version>1.3.3.RELEASE</version>

                 <executions>

                     <execution>

                         <goals>

                             <goal>repackage</goal>

                         </goals>

                     </execution>

                 </executions>

             </plugin>

         </plugins>

         <finalName>demo</finalName>

     </build>

 </project>
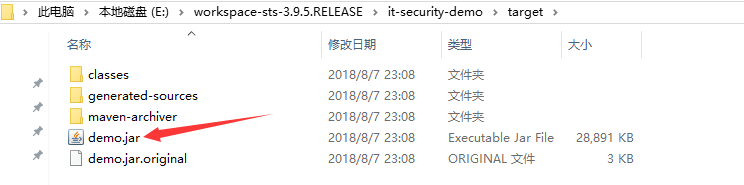
4.重新打包
效果如下:
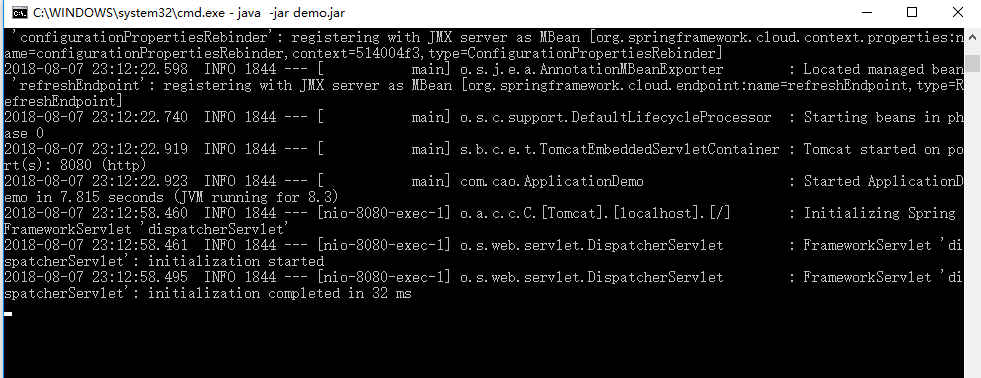
5.运行
在命令行运行

6.最终启动效果
002 Hello Spring Security的更多相关文章
- Spring Security OAuth2 开发指南
官方原文:http://projects.spring.io/spring-security-oauth/docs/oauth2.html 翻译及修改补充:Alex Liao. 转载请注明来源:htt ...
- spring mvc 和spring security配置 web.xml设置
<?xml version="1.0" encoding="UTF-8"?> <web-app xmlns="http://xmln ...
- SPRING SECURITY JAVA配置:Web Security
在前一篇,我已经介绍了Spring Security Java配置,也概括的介绍了一下这个项目方方面面.在这篇文章中,我们来看一看一个简单的基于web security配置的例子.之后我们再来作更多的 ...
- 【OAuth2.0】Spring Security OAuth2.0篇之初识
不吐不快 因为项目需求开始接触OAuth2.0授权协议.断断续续接触了有两周左右的时间.不得不吐槽的,依然是自己的学习习惯问题,总是着急想了解一切,习惯性地钻牛角尖去理解小的细节,而不是从宏观上去掌握 ...
- spring security oauth2.0 实现
oauth应该属于security的一部分.关于oauth的的相关知识可以查看阮一峰的文章:http://www.ruanyifeng.com/blog/2014/05/oauth_2_0.html ...
- Spring Security(08)——intercept-url配置
http://elim.iteye.com/blog/2161056 Spring Security(08)--intercept-url配置 博客分类: spring Security Spring ...
- Spring Security控制权限
Spring Security控制权限 1,配置过滤器 为了在项目中使用Spring Security控制权限,首先要在web.xml中配置过滤器,这样我们就可以控制对这个项目的每个请求了. < ...
- Spring Security笔记:Hello World
本文演示了Spring Security的最最基本用法,二个页面(或理解成二个url),一个需要登录认证后才能访问(比如:../admin/),一个可匿名访问(比如:../welcome) 注:以下内 ...
- Spring Security笔记:自定义Login/Logout Filter、AuthenticationProvider、AuthenticationToken
在前面的学习中,配置文件中的<http>...</http>都是采用的auto-config="true"这种自动配置模式,根据Spring Securit ...
随机推荐
- zxing源码编译与运行
编译的jar文件下载地址:http://files.cnblogs.com/rainboy2010/zxing.zip zxing是一个开源的解析条形码/二维码的类库,广泛应用于Android 各大A ...
- 【进阶1-4期】JavaScript深入之带你走进内存机制(转)
这是我在公众号(高级前端进阶)看到的文章,现在做笔记 https://mp.weixin.qq.com/s/yK4DPKhkmkiroasWJMrJcw 阅读笔记 JS内存空间分为栈(stack).堆 ...
- "字体arial不支持样式regular"的解决方法
软件报错,提示“字体arial不支持样式regular”的提示,这是由于字体arial缺失导致的, “字体arial不支持样式regular”的解决方法如下: 方法/步骤 1.用户需要先下载arial ...
- django 中的闪现
导包 from django.contrib import messages #输出格式 messages.success(request,'不能为空') #前端页面的写法 {%if messages ...
- 使用Spring配置数据源JdbcTemplate
c3p0作为演示 1.编写资源文件(db.properties) jdbc.user=root jdbc.password=root jdbc.jdbcUrl=jdbc:mysql://localho ...
- HTML&javaSkcript&CSS&jQuery&ajax(七)
’一.HTML5 实例 <video width="430" controls> <source src="mov_nnn.mp4" t ...
- QuerySet中添加Extra进行SQL查询
select参数接受一个映射到SQL的字符串标识字典,让你可以根据SQL select子句里的选择进行对模型实例添加属性,或者查询. from blog.models import BlogPost& ...
- 登录界面之Axure原型制作
*****登录界面制作步骤***** 1.背景色:需要设定的背景色不知道色值,可以使用截图工具截取一小块粘贴到axure页面, 点击页面样式中的背景色左上角的取色器点击一下该色块,即可将背景色全部填充 ...
- 创建WIFI热点
@echo off:beginecho 笔记本做无线WiFi程序(首次使用请先设置WiFi帐户.)echo 1.设置WiFi帐户,请按1echo 2.开启WiFi功能,请按2echo 3.闭关WiFi ...
- azkaban安装使用
本文记录azkaban的安装和 一些报错处理(文章末尾). AzKaban组成 MySQL数据库,azkaban-server (web端),azkaban-executor (执行job) 1.下载 ...