
SpringBoot第二十三篇:安全性之Spring Security
作者:追梦1819
原文:https://www.cnblogs.com/yanfei1819/p/11350255.html
版权声明:本文为博主原创文章,转载请附上博文链接!
引言
系统的安全的重要性人人皆知,其也成为评判系统的重要标准。
Spring Security 是基于 Spring 的安全框架。传统的 Spring Security 框架需要配置大量的 xml 文件。而 SpringBoot 的出现,使其简单、方便、上手快。
版本信息
- JDK:1.8
- SpringBoot :2.1.6.RELEASE
- maven:3.3.9
- Thymelaf:2.1.4.RELEASE
- IDEA:2019.1.1
数据库设计
系统的底层数据库,设计的表格是五张:用户表、角色表、用户角色对应表、权限表、角色权限对应表。用户与角色对应,角色与权限对应,从而使用户与权限间接对应。同时考虑到了扩展性和健壮性。这就是底层设计的核心思想。
上述的底层设计基本上是千篇一律的,没啥可以讲的。不是本文的重点。本文的重点是通过项目的需求来演示完整的功能实现。
搭建环境
为了便于项目的演示,本章的实例用 SpringBoot + thymelaf 构建一个简单的页面。同时,由于功能点比较多,并保证能够同时讲解晚上功能,以下将分阶段详解各个功能点。
第一阶段:
第一步,创建项目:
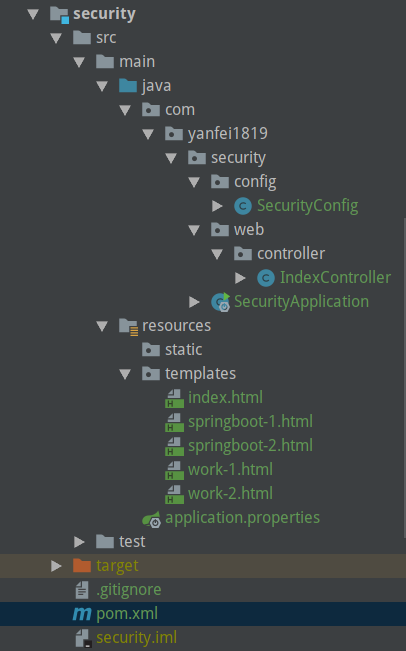
对以上的项目目录说明:
com.yanfei1819.security.config.SecurityConfig:security配置
com.yanfei1819.security.web.controller.IndexController:测试接口
com.yanfei1819.security.SecurityApplication:启动类
src\main\resources\templates\index.html:首页
src\main\resources\templates\springboot-1.html:同以下三个页面都是菜单的详细页,用来模拟菜单
src\main\resources\templates\springboot-2.html:
src\main\resources\templates\work-1.html:
src\main\resources\templates\work-2.html:
src\main\resources\application.properties:主配置文件
第二步,引入 maven 依赖:
<dependency>

    <groupId>org.springframework.boot</groupId>

    <artifactId>spring-boot-starter-web</artifactId>

</dependency>

<dependency>

    <groupId>org.springframework.boot</groupId>

    <artifactId>spring-boot-starter-security</artifactId>

</dependency>

<dependency>

    <groupId>org.springframework.boot</groupId>

    <artifactId>spring-boot-starter-thymeleaf</artifactId>

</dependency>
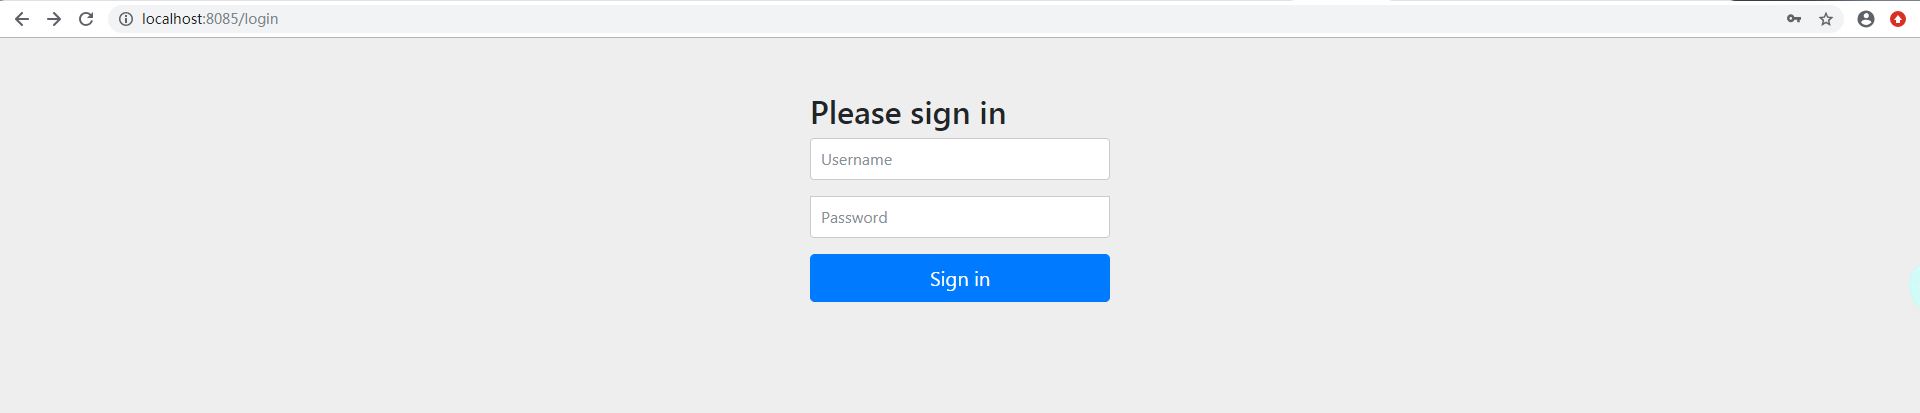
注意,在引入 security 依赖后,如果没有做配置,它会将所有的请求拦截,并跳转到自定义的登录界面(端口号被定义为8085)。如下图:
第三步,创建配置类 SecurityConfig ,并继承 WebSecurityConfigurerAdapter:
package com.yanfei1819.security.config;

import org.springframework.security.config.annotation.authentication.builders.AuthenticationManagerBuilder;

import org.springframework.security.config.annotation.web.builders.HttpSecurity;

import org.springframework.security.config.annotation.web.configuration.EnableWebSecurity;

import org.springframework.security.config.annotation.web.configuration.WebSecurityConfigurerAdapter;

import org.springframework.security.crypto.bcrypt.BCryptPasswordEncoder;

/**

 * Created by 追梦1819 on 2019-06-27.

 */

@EnableWebSecurity

public class SecurityConfig extends WebSecurityConfigurerAdapter {

    @Override

    protected void configure(HttpSecurity http) throws Exception {

        // 定制授权规则

        http.authorizeRequests().antMatchers("/").permitAll(). // 所有角色可访问

                antMatchers("/springboot/**").hasAnyRole("admin","test"). // 只有xx角色才能访问

                antMatchers("/work/**").hasRole("admin"); // 只有xx角色才能访问

    }

}
定义授权规则,需要重写 configure(HttpSecurity http) 方法。该配置类的写法,可以参照 Spring Security官网。该方法中是定制授权规则。
hasAuthority([auth]):等同于hasRole
hasAnyAuthority([auth1,auth2]):等同于hasAnyRole
hasRole([role]):当前用户是否拥有指定角色。
hasAnyRole([role1,role2]):多个角色是一个以逗号进行分隔的字符串。如果当前用户拥有指定角色中的任意一个则返回true
Principle:代表当前用户的principle对象
authentication:直接从SecurityContext获取的当前Authentication对象
permitAll():总是返回true,表示允许所有的
denyAll():总是返回false,表示拒绝所有的
isAnonymous():当前用户是否是一个匿名用户
isAuthenticated():表示当前用户是否已经登录认证成功了
isRememberMe():表示当前用户是否是通过Remember-Me自动登录的
isFullyAuthenticated():如果当前用户既不是一个匿名用户,同时又不是通过Remember-Me自动登录的,则返回true
hasPermission():当前用户是否拥有指定权限
第四步,定义接口:
package com.yanfei1819.security.web.controller;

import org.springframework.stereotype.Controller;

import org.springframework.web.bind.annotation.GetMapping;

import org.springframework.web.bind.annotation.PathVariable;

/**

 * Created by 追梦1819 on 2019-06-27.

 */

@Controller

public class IndexController {

    @GetMapping("/")

    public String index(){

        return "index";

    }

    @GetMapping("/springboot/{id}")

    public String springbootById(@PathVariable int id){

        return "springboot-"+id;

    }

    @GetMapping("/work/{id}")

    public String work(@PathVariable int id){

        return "work-"+id;

    }

}
第五步,编写页面 index.html:
<!DOCTYPE html>

<html lang="en" xmlns:th="http://www.thymeleaf.org">

<head>

    <meta charset="UTF-8">

    <title>Title</title>

</head>

<body>

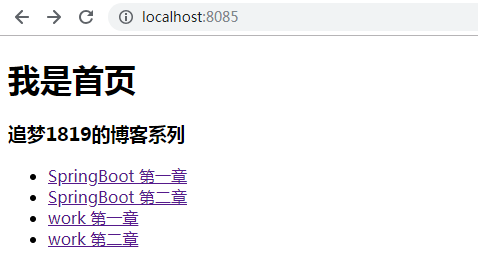
<h1>我是首页</h1>

<di>

    <h3>追梦1819的博客系列</h3>

    <ul>

        <li><a th:href="@{/springboot/1}">SpringBoot 第一章</a></li>

        <li><a th:href="@{/springboot/2}">SpringBoot 第二章</a></li>

        <li><a th:href="@{/work/1}">work 第一章</a></li>

        <li><a th:href="@{/work/2}">work 第二章</a></li>

    </ul>

</di>

</body>

</html>
SpringBoot-1.html:
<!DOCTYPE html>

<html lang="en" xmlns:th="http://www.thymeleaf.org">

<head>

    <meta charset="UTF-8">

    <title>Title</title>

</head>

<body>

<h1>SpringBoot-1</h1>

</body>

</html>
另外的 springboot-2.html、work-1.html、work-2.html 与以上类似,此不再赘述。
第六步,启动类是:
package com.yanfei1819.security;

import org.springframework.boot.SpringApplication;

import org.springframework.boot.autoconfigure.SpringBootApplication;

@SpringBootApplication

public class SecurityApplication {

    public static void main(String[] args) {

        SpringApplication.run(SecurityApplication.class, args);

    }

}
最后,启动项目。直接访问 http://localhost:8085/ ,进入首页:
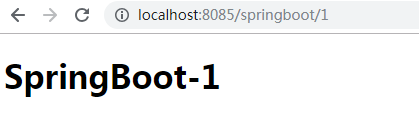
点击其中任意一个链接:

可以看到是没有权限访问的。因此,上述的 security 配置成功。
第二阶段:
开启自动配置的登录功能,也就是在 SecurityConfig 配置类中加入以下代码:
http.formLogin();
该功能的作用是,进入首页后,点击菜单,如果没有权限,则跳转到登录页。
第三阶段:
下面阐述设置登录账号和密码。
在 SecurityConfig 配置类重写 configure(AuthenticationManagerBuilder auth) 方法:
    // 定义认证规则

    @Override

    protected void configure(AuthenticationManagerBuilder auth) throws Exception {

        auth.inMemoryAuthentication()

                .withUser("admin").password("123456").roles("admin", "test")

                .and().withUser("test").password("123456").roles("test");

    }
注意,此处会有一个问题。如以上地址认证规则,在使用配置的账号登录时会报错:

这是由于在 Spring Security5.0 版本后,新增了加密方式,改变了密码的格式。
在官网中有描述:
The general format for a password is:
{id}encodedPassword.Such that
idis an identifier used to look up whichPasswordEncodershould be used andencodedPasswordis the original encoded password for the selectedPasswordEncoder. Theidmust be at the beginning of the password, start with{and end with}. If theidcannot be found, theidwill be null. For example, the following might be a list of passwords encoded using differentid. All of the original passwords are "password".{bcrypt}$2a$10$dXJ3SW6G7P50lGmMkkmwe.20cQQubK3.HZWzG3YB1tlRy.fqvM/BG 1
{noop}password 2
{pbkdf2}5d923b44a6d129f3ddf3e3c8d29412723dcbde72445e8ef6bf3b508fbf17fa4ed4d6b99ca763d8dc 3
{scrypt}$e0801$8bWJaSu2IKSn9Z9kM+TPXfOc/9bdYSrN1oD9qfVThWEwdRTnO7re7Ei+fUZRJ68k9lTyuTeUp4of4g24hHnazw==$OAOec05+bXxvuu/1qZ6NUR+xQYvYv7BeL1QxwRpY5Pc= 4
{sha256}97cde38028ad898ebc02e690819fa220e88c62e0699403e94fff291cfffaf8410849f27605abcbc0 5
1 The first password would have a PasswordEncoderid ofbcryptand encodedPassword of$2a$10$dXJ3SW6G7P50lGmMkkmwe.20cQQubK3.HZWzG3YB1tlRy.fqvM/BG. When matching it would delegate toBCryptPasswordEncoder2 The second password would have a PasswordEncoderid ofnoopand encodedPassword ofpassword. When matching it would delegate toNoOpPasswordEncoder3 The third password would have a PasswordEncoderid ofpbkdf2and encodedPassword of5d923b44a6d129f3ddf3e3c8d29412723dcbde72445e8ef6bf3b508fbf17fa4ed4d6b99ca763d8dc. When matching it would delegate toPbkdf2PasswordEncoder4 The fourth password would have a PasswordEncoderid ofscryptand encodedPassword of$e0801$8bWJaSu2IKSn9Z9kM+TPXfOc/9bdYSrN1oD9qfVThWEwdRTnO7re7Ei+fUZRJ68k9lTyuTeUp4of4g24hHnazw==$OAOec05+bXxvuu/1qZ6NUR+xQYvYv7BeL1QxwRpY5Pc=When matching it would delegate toSCryptPasswordEncoder5 The final password would have a PasswordEncoderid ofsha256and encodedPassword of97cde38028ad898ebc02e690819fa220e88c62e0699403e94fff291cfffaf8410849f27605abcbc0. When matching it would delegate toStandardPasswordEncoder
上面这段话的解释了为什么会报错:There is no PasswordEncoder mapped for the id "null",同时给出了解决方案。也就是 configure(AuthenticationManagerBuilder auth) 方法修改为:
    // 定义认证规则

    @Override

    protected void configure(AuthenticationManagerBuilder auth) throws Exception {

        auth.inMemoryAuthentication().passwordEncoder(new BCryptPasswordEncoder())

                .withUser("admin").password(new BCryptPasswordEncoder().encode("123456")).roles("admin","test")

                .and().passwordEncoder(new BCryptPasswordEncoder())

                .withUser("test").password(new BCryptPasswordEncoder().encode("123456")).roles("test");

    }
修改后重启项目,登录可正常访问:
访问结果是:账号 admin/123456 可以访问所有菜单:SpringBoot 第一章、SpringBoot 第二章、work 第一章、work 第二章,账号 test/123456 只能访问 SpringBoot 第一章、SpringBoot 第二章。
第四阶段:
开启自动配置的注销功能,并清除 session,在配置类 SecurityConfig 中的 configure(HttpSecurity http) 方法中添加:
http.logout();
然后在首页 index.html 中添加一个注销按钮:
<!DOCTYPE html>

<html lang="en" xmlns:th="http://www.thymeleaf.org">

<head>

    <meta charset="UTF-8">

    <title>Title</title>

</head>

<body>

<h1>我是首页</h1>

<di>

    <h3>追梦1819的博客系列</h3>

    <ul>

        <li><a th:href="@{/springboot/1}">SpringBoot 第一章</a></li>

        <li><a th:href="@{/springboot/2}">SpringBoot 第二章</a></li>

        <li><a th:href="@{/work/1}">work 第一章</a></li>

        <li><a th:href="@{/work/2}">work 第二章</a></li>

    </ul>

</di>

<div>

    <form method="post" th:action="@{/logout}">

        <input type="submit" value="logout">

    </form>

</div>

</body>

</html>
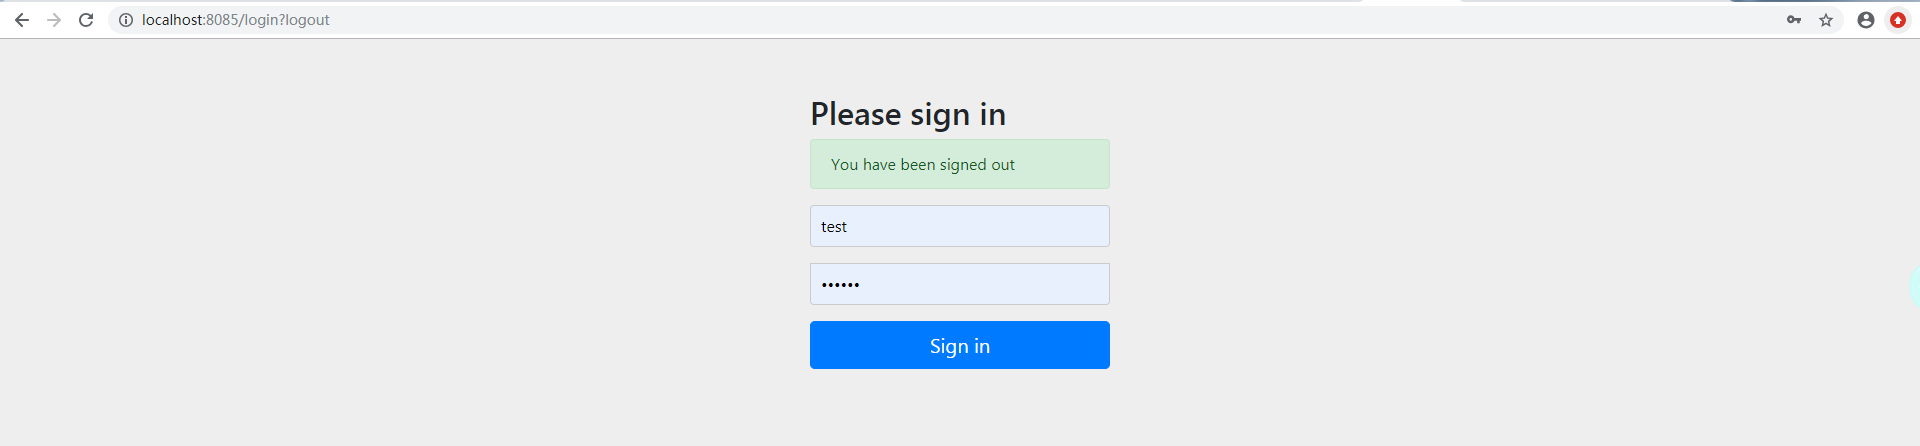
启动项目,进入首页,点击 【logout】,会跳转到登录界面,同时链接中带了参数 ?logout:
当然,也可以跳转到定制的页面,只要将属性修改为:
        http.logout()  // 退出并清除session

                .logoutSuccessUrl("/");
第五阶段:
以上的功能基本都满足了我们项目中的需求。不过只讲述了功能点。下面我们将阐述如何在页面展示以上功能。
首先,我们必须引入以下依赖,以便使用 sec:authentication和sec:authorize 属性。
<dependency>

    <groupId>org.thymeleaf.extras</groupId>

    <artifactId>thymeleaf-extras-springsecurity4</artifactId>

</dependency>
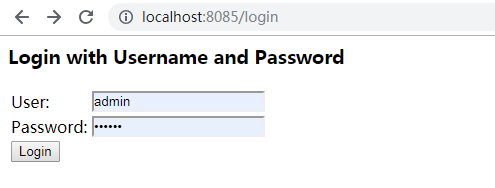
注意: 此处有版本冲突问题,以上的演示的 SpringBoot 用的版本都是 2.1.6.RELEASE。但是在此如果继续使用该版本,则无法使用以上依赖中的 sec:authentication和sec:authorize 属性。作者在做此演示时,对 SpringBoot 版本作了降级处理,版本为 2.1.4.RELEASE。而旧的版本有很多不同的地方,例如旧版本的登录界面是:
此处需要特别注意!
引入上述依赖后,我们将首页进行改造:
<!DOCTYPE html>

<html lang="en" xmlns:th="http://www.thymeleaf.org"

      xmlns:sec="https://www.thymeleaf.org/thymeleaf-extras-springsecurity4">

<head>

    <meta charset="UTF-8">

    <title>Title</title>

</head>

<body>

<h1>我是首页</h1>

<!--没有登录-->

<div sec:authorize="!isAuthenticated()">

    <a th:href="@{/login}">login</a>

</div>

<!--已登录-->

<div sec:authorize="isAuthenticated()">

    <div>

        <form method="post" th:action="@{/logout}">

            <input type="submit" value="logout">

        </form>

    </div>

    登陆者:<span sec:authentication="name"></span>

    登陆者角色:<span sec:authentication="principal.authorities"></span>

</div>

<div>

    <h3>追梦1819的博客系列</h3>

    <ul>

        <!-- 通过角色判断是否展示-->

        <div sec:authorize="hasRole('admin')">

            <li><a th:href="@{/springboot/1}">SpringBoot 第一章</a></li>

            <li><a th:href="@{/springboot/2}">SpringBoot 第二章</a></li>

        </div>

        <div sec:authorize="hasRole('test')">

            <li><a th:href="@{/work/1}">work 第一章</a></li>

            <li><a th:href="@{/work/2}">work 第二章</a></li>

        </div>

    </ul>

</div>

</body>

</html>
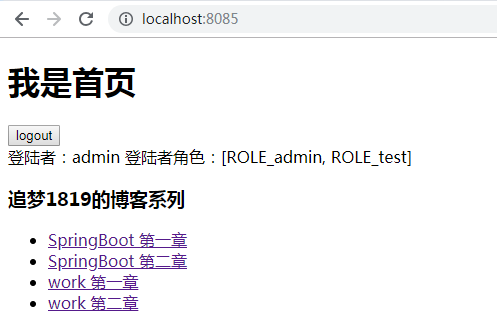
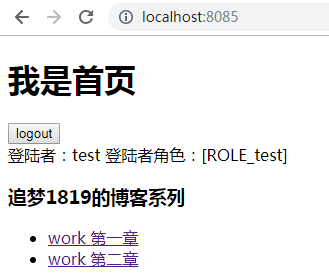
启动项目,分别用不登录、 admin/123456、test/123456 登录,查看效果:

第六阶段:
最后我们讲解一个常用的功能,就是登陆的记住功能,配置很简单,在配置类 SecurityConfig 中的 configure(HttpSecurity http) 方法中添加即可:
        http.rememberMe() // 记住功能

                .rememberMeParameter("remember") //自定义rememberMe的name值,默认remember-Me

                .tokenValiditySeconds(10); // 记住时间
进入登陆界面:
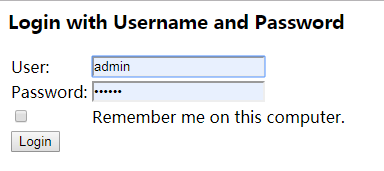
添加该方法后,登录页会出现记住功能的复选框。
总结
还有很多详细的功能。由于篇幅所限,本章中不做一一细解。如果想了解更多,作者给读者的建议是,可以多看看 WebSecurityConfigurerAdapter 、HttpSecurity、AuthenticationManagerBuilder 等类的源码,比较简单,很容易上手。另外就是其文档非常的详细、清晰(文档详细是Spring的一个特色)。可以让大家先感受一下 Spring 源码文档的强大:
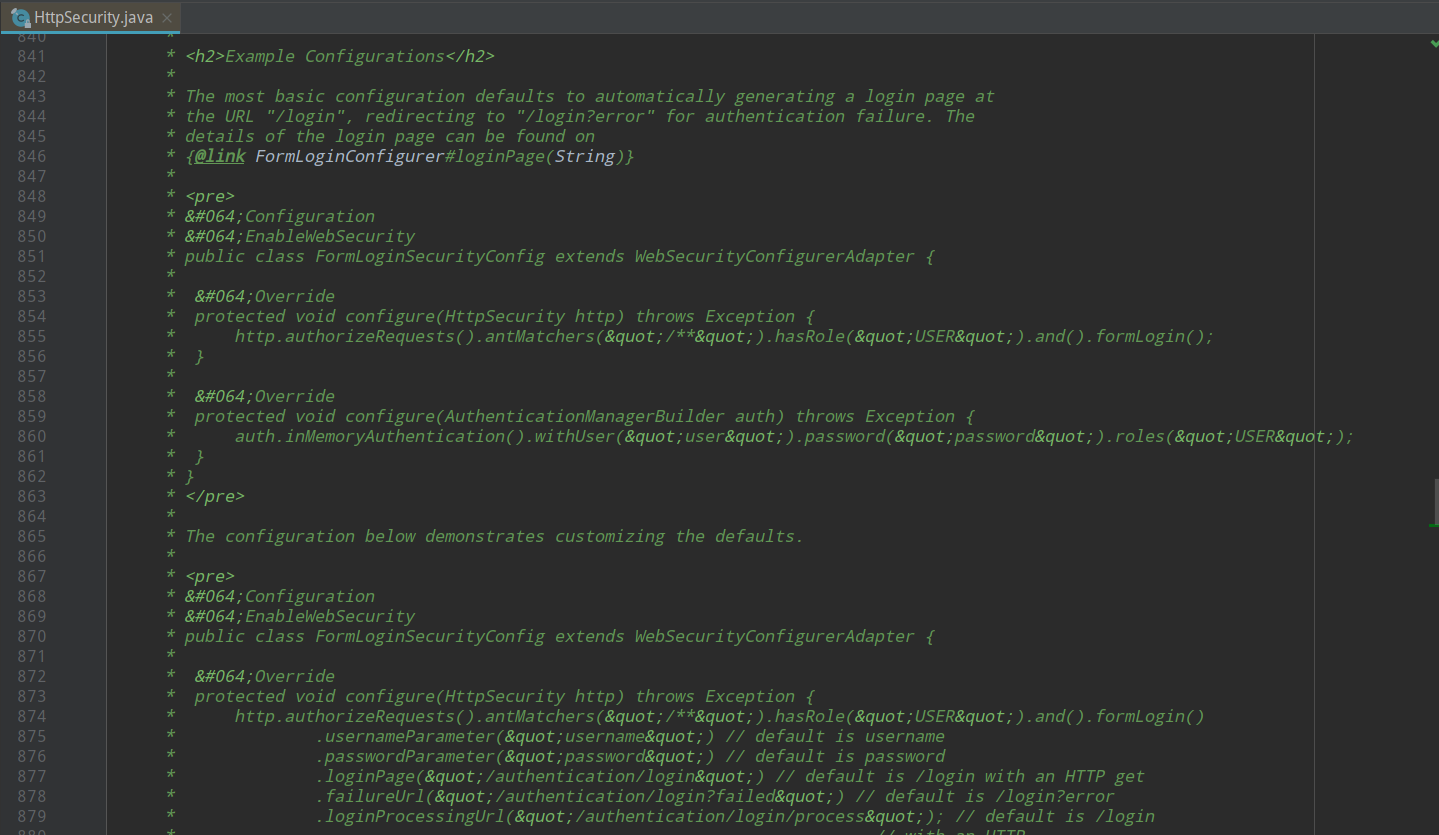
功能描述、示例一应俱全。
结语
其实对以上功能的了解,不算很难。但是这篇博客前后写了六七个小时。作者看了翻阅了不少的资料,通读对应的官方文档,听了一些比较好的课程,然后自己一一校验,思考,排版,解决版本冲突等。最终是希望让读者能够看到一篇准确、美观、较详细的资料,不至于陷入网上的乱七八糟的资料中无法自拔。
参考
- Spring Security Reference
- Hello Spring Security with Boot
WebSecurityConfigurerAdapter、HttpSecurity、AuthenticationManagerBuilder等类的源码
SpringBoot第二十三篇:安全性之Spring Security的更多相关文章
- Python开发【第二十三篇】:持续更新中...
Python开发[第二十三篇]:持续更新中...
- SpringBoot非官方教程 | 第二十三篇: 异步方法
转载请标明出处: 原文首发于https://www.fangzhipeng.com/springboot/2017/07/11/springboot-ansy/ 本文出自方志朋的博客 这篇文章主要介绍 ...
- SpringBoot | 第二十三章:日志管理之整合篇
前言 在本系列<第四章:日志管理>中,由于工作中日志这块都是走默认配置,也没有深入了解过,因为部署过程中直接使用了linux中的输出重定向功能,如java -jar xx.jar > ...
- SpringBoot第二十一篇:整合ActiveMQ
作者:追梦1819 原文:https://www.cnblogs.com/yanfei1819/p/11190048.html 版权声明:本文为博主原创文章,转载请附上博文链接! 引言 前一章节中 ...
- SpringBoot第二十篇:初识ActiveMQ
本文是作者之前写的关于 ActiveMQ 的一篇文章.此处为了保证该系列文章的完整性,故此处重新引入. 一.消息中间件的介绍 介绍 消息队列 是指利用 高效可靠 的 消息传递机制 进行与平台无关的 数 ...
- 第二十三篇:在SOUI中使用LUA脚本开发界面
像写网页一样做客户端界面可能是很多客户端开发的理想. 做好一个可以实现和用户交互的动态网页应该包含两个部分:使用html做网页的布局,使用脚本如vbscript,javascript做用户交互的逻辑. ...
- Python之路【第二十三篇】:Django 初探--Django的开发服务器及创建数据库(笔记)
Django 初探--Django的开发服务器及创建数据库(笔记) 1.Django的开发服务器 Django框架中包含一些轻量级的web应用服务器,开发web项目时不需再对其配置服务器,Django ...
- Python之路(第二十三篇) 面向对象初级:静态属性、静态方法、类方法
一.静态属性 静态属性相当于数据属性. 用@property语法糖装饰器将类的函数属性变成可以不用加括号直接的类似数据属性. 可以封装逻辑,让用户感觉是在调用一个普通的数据属性. 例子 class R ...
- 【Python之路】第二十三篇--Django【进阶篇】
文件配置 1.模版Templates文件配置: TEMPLATE_DIRS = ( os.path.join(BASE_DIR,'templates'), ) 2.静态文件static配置: STAT ...
随机推荐
- 《ASP.NET Core 高性能系列》致敬伟大的.NET斗士甲骨文!
写在开始 三年前,曾写过一篇文章:从.NET和Java之争谈IT这个行业,当时遭到某些自认为懂得java就了不起的Javaer抨击, 现在可以致敬伟大的.NET斗士甲骨文了 (JDK8以上都需要收费, ...
- c++ 二分答案
c++ 二分答案 问题 使得x^x达到或超过n位数字的最小正整数x是多少?n<=2000000000 分析 对与这种较难求解的问题,我们很难想出较好的解决策略.但是,我们至少知道答案一定在1与2 ...
- 堡垒机-jumpserver
目录 官方网站 Jumpserver 软件包环境要求: 环境 手动本地jumpserver-服务端搭建 初始化一些系统环境设置: 安装相关软件 安装 组件 自建服务器极速安装步骤 0. 防火墙.Sel ...
- RDBMS与数据库之间的关系
什么是数据库? 数据库就是用来存放数据的仓库,它是一种特殊的文件. 什么是关系型数据库? 关系型数据库就是指建立在关系模型基础上的数据库,通常由多张表组成,这些表之间存在一定的关系. 什么是RDBMS ...
- java三大集合遍历
1. 场景描述 今天需要用到map集合遍历,一下子忘记咋写了,以前一般用map.get()直接获取值,很少遍历map,刚好总结下java中常用的几个集合-map,set,list遍历. 2. 解决方案 ...
- 算法与数据结构基础 - 堆(Heap)和优先级队列(Priority queue)
堆基础 堆(Heap)是具有这样性质的数据结构:1/完全二叉树 2/所有节点的值大于等于(或小于等于)子节点的值: 图片来源:这里 堆可以用数组存储,插入.删除会触发节点shift_down.shif ...
- request 中url拼接排序参数与签名算法
一.参数要求: { appId:应用在后台创建应用时分配的应用编号,与应用密钥一一对应 sign:按照当前请求参数名的字母序进行升序排列(排序时区分大小写,除sign外,其它值不为空的参数都参与签名) ...
- 精美的在线icon
super-tiny-icons(0.2.1)列表 序号 名称 图标 地址 是否使用 1 acast.svg https://cdn.jsdelivr.net/npm/super-tiny-icons ...
- Excel催化剂图表系列之一键完成IBCS国际商业标准图表
在数据分析领域,最后一公里的图表输出,是一片十分广阔的领域.一直以来,笔者深知不是这一方面的能手,学习上也仅仅是浅尝而止.没有往其深入研究并有所产出.很幸运地在数据圈子能够结识到其他的志同道合的伙伴, ...
- C#8.0 中使用默认接口成员更新接口
连载目录 [已更新最新开发文章,点击查看详细] 从 .NET Core 3.0 上的 C# 8.0 开始,可以在声明接口成员时定义实现. 最常见的方案是安全地将成员添加到已经由无数客户端发布并使 ...