C#配置文件configSections详解
一、问题需求: 在项目中经常遇到需要写配置文件地方,目的就是不想在程序中关于一些信息写死,发布的时候只需要修改一下配置文件就可以,不需要每次都修改程序,如项目名称、数据库连接字符串、IP端口之类 的;对于小项目或者服务程序,配置信息可以通过系统自带的appSettings进行配置,但大项目或者配置信息太多,如果都用appSettings来配置就感觉比较杂乱,运维人员在修改配置的时候不好修改,而且如果想找某一模块相关或者某一节点配置容易出错,这时如果能分类管理,例如跟数据库相关的写到一个节点里,跟某个业务独立相关的可以也能单独写一个节点上 等等;
二、解决方案:其实 使用.net自带的configSections,将配置信息分块管理,并提供实体类且还能单配置文件管理,这样程序员可以根据业务类型等其他方式分类写入配置文件,运维人员可以针对某一项进行修改部署维护;
三、具体实现:接下来演示一下几种自定义的configSections节点,有单节点配置、多节点配置、自定义节点配置
1、 首先演示一下单节点配置:
1.1 新建一个类继承ConfigurationSection,新增属性及调用方法
 /// <summary>

    /// 单级自定义配置节点

    /// </summary>

   public class CustomerSingleConfig:ConfigurationSection

    {

        /// <summary>

        /// 获取配置信息

        /// </summary>

        /// <returns></returns>

        public static CustomerSingleConfig GetConfig()

        {

            return GetConfig("CustomerSingleConfig");

        }

        /// <summary>

        /// 获取配置信息

        /// </summary>

        /// <param name="sectionName"></param>

        /// <returns></returns>

        public static CustomerSingleConfig GetConfig(string sectionName)

        {

            CustomerSingleConfig section = (CustomerSingleConfig)ConfigurationManager.GetSection(sectionName);

            if (section == null)

                throw new ConfigurationErrorsException("Section " + sectionName + " is not found.");

            return section;

        }

        /// <summary>

        /// 平台中文名称

        /// </summary>

       [ConfigurationProperty("PlatChName",DefaultValue = "", IsRequired = true, IsKey = false)]

        public string PlatChName

        {

            get { return (string)this["PlatChName"]; }

            set { this["PlatChName"]=value; }

        }

        /// <summary>

        /// 平台英文名称

        /// </summary>

       [ConfigurationProperty("PlatEnName",DefaultValue = "", IsRequired = true, IsKey = false)]

        public string PlatEnName

        {

            get { return (string)this["PlatEnName"]; }

            set { this["PlatEnName"] = value; }

        }

    }
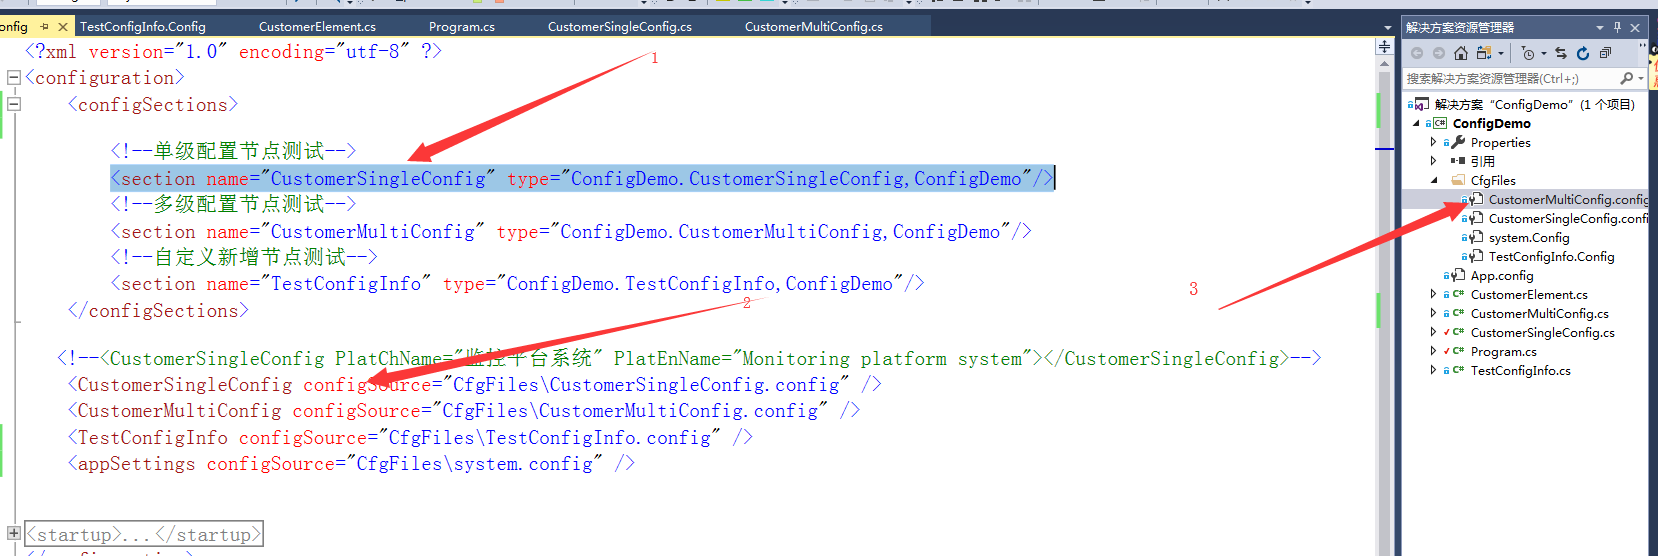
1.2 在app.config------>configuration--------->configSections里面加入CustomerSingleConfig节点,如下:
<!--单级配置节点测试-->

        <section name="CustomerSingleConfig" type="ConfigDemo.CustomerSingleConfig,ConfigDemo"/>
1.3 在app.config------>configuration------->新建CustomerSingleConfig里面加入配置信息
<CustomerSingleConfig PlatChName="监控平台系统" PlatEnName="Monitoring platform system"></CustomerSingleConfig>
1.4 调用获取配置信息
static void Main(string[] args)
{
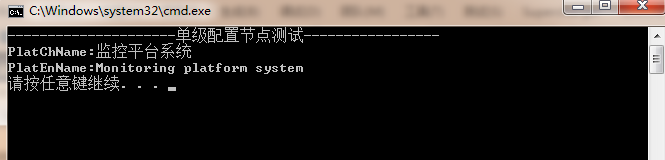
Console.WriteLine("---------------------单级配置节点测试-----------------");
Console.WriteLine("PlatChName:" + CustomerSingleConfig.GetConfig().PlatChName);
Console.WriteLine("PlatEnName:" + CustomerSingleConfig.GetConfig().PlatEnName);
}
1.5 运行效果如下
1.6 针对1.3还可以更进一步分离配置写法,可以单独配置成一个config文件
将1.3 <section name="CustomerSingleConfig" type="ConfigDemo.CustomerSingleConfig,ConfigDemo"/>这个节点内容换成如下配置:
<CustomerSingleConfig configSource="CfgFiles\CustomerSingleConfig.config" />
再新一个CfgFiles文件夹在文件里面新增CustomerSingleConfig.config:
<?xml version="1.0" encoding="utf-8" ?>

<CustomerMultiConfig >

<CustomerElement connectionString="Data Source='.';Initial Catalog='UniDataNH';User ID='sa';Password='123456'" enabled="true"></CustomerElement>

</CustomerMultiConfig>
整体截图配置如下:
2、接下来演示一下多级节点
2.1先定义一个子节点类CustomerElement继承ConfigurationElement
public class CustomerElement:ConfigurationElement

    {

        private const string EnablePropertyName = "enabled";

        private const string ConnectionStringPropery = "connectionString";

        [ConfigurationProperty(EnablePropertyName, IsRequired = true)]

        public bool Enabled

        {

            get { return (bool)base[EnablePropertyName]; }

            set { base[EnablePropertyName] = value; }

        }

        [ConfigurationProperty(ConnectionStringPropery, IsRequired = true)]

        public string ConnectionString

        {

            get { return (string)base[ConnectionStringPropery]; }

            set { base[ConnectionStringPropery] = value; }

        }

    }
2.2再定一个配置节点类CustomerMultiConfig继承ConfigurationSection,和单个节点配置一样
namespace ConfigDemo

{

    /// <summary>

    /// 多级配置文件自定义节点配置

    /// </summary>

   public class CustomerMultiConfig:ConfigurationSection

    {

        private const string CustomerConfigPropertyName = "CustomerElement";

        /// <summary>

        /// 获取配置信息

        /// </summary>

        /// <returns></returns>

        public static CustomerMultiConfig GetConfig()

        {

            return GetConfig("CustomerMultiConfig");

        }

        /// <summary>

        /// 获取配置信息

        /// </summary>

        /// <param name="sectionName">xml节点名称</param>

        /// <returns></returns>

        public static CustomerMultiConfig GetConfig(string sectionName)

        {

            CustomerMultiConfig section = (CustomerMultiConfig)ConfigurationManager.GetSection(sectionName);

            if (section == null)

                throw new ConfigurationErrorsException("Section " + sectionName + " is not found.");

            return section;

        }

        [ConfigurationProperty(CustomerConfigPropertyName)]

        public CustomerElement CustomerElementConfig

        {

            get { return (CustomerElement)base[CustomerConfigPropertyName]; }

            set { base[CustomerConfigPropertyName] = value; }

        }

    }

}
2.3 接下就是在app.config------>configuration--------->configSections里面加入CustomerMultiConfig节点,详细步骤和单节点一下 如图配置

2.4 调用获取配置信息代码如下:
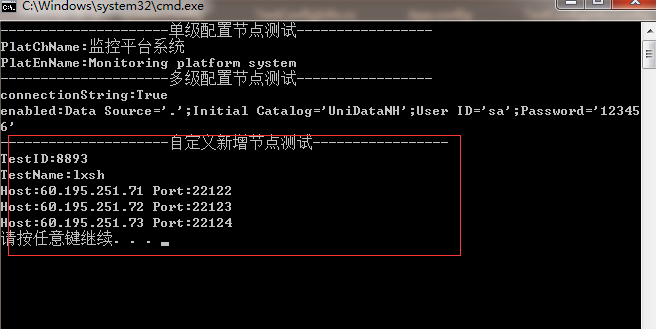
Console.WriteLine("---------------------多级配置节点测试-----------------");

            Console.WriteLine("connectionString:" + CustomerMultiConfig.GetConfig().CustomerElementConfig.Enabled);

            Console.WriteLine("enabled:" + CustomerMultiConfig.GetConfig().CustomerElementConfig.ConnectionString);
2.5 运行效果如下图:

3、再演示一下自定义节点配置,可以随意添加配置节点信息
3.1 具体操作步骤类似,代码如下:
namespace ConfigDemo

{

    public class TestConfigInfo : ConfigurationSection

    {

        [ConfigurationProperty("trackers", IsDefaultCollection = false)]

        public trackers Trackers { get { return (trackers)base["trackers"]; } }

        /// <summary>

        /// 获取配置信息

        /// </summary>

        /// <returns></returns>

        public static TestConfigInfo GetConfig()

        {

            return GetConfig("TestConfigInfo");

        }

        /// <summary>

        /// 获取配置信息

        /// </summary>

        /// <param name="sectionName">xml节点名称</param>

        /// <returns></returns>

        public static TestConfigInfo GetConfig(string sectionName)

        {

            TestConfigInfo section = (TestConfigInfo)ConfigurationManager.GetSection(sectionName);

            if (section == null)

                throw new ConfigurationErrorsException("Section " + sectionName + " is not found.");

            return section;

        }

        [ConfigurationProperty("TestName", IsRequired = false)]

        public string TestName

        {

            get { return (string)base["TestName"]; }

            set { base["TestName"] = value; }

        }

        [ConfigurationProperty("TestID", IsRequired = false)]

        public string TestID

        {

            get { return (string)base["TestID"]; }

            set { base["TestID"] = value; }

        }

    }

    public class trackers : ConfigurationElementCollection

    {

        [ConfigurationProperty("TrackerName", IsRequired = false)]

        public string TrackerName

        {

            get { return (string)base["TrackerName"]; }

            set { base["TrackerName"] = value; }

        }

        protected override ConfigurationElement CreateNewElement()

        {

            return new tracker();

        }

        protected override object GetElementKey(ConfigurationElement element)

        {

            return ((tracker)element).Host;

        }

    }

    public class tracker : ConfigurationElement

    {

        #region 配置節設置,設定檔中有不能識別的元素、屬性時,使其不報錯

        protected override bool OnDeserializeUnrecognizedAttribute(string name, string value)

        {

            return base.OnDeserializeUnrecognizedAttribute(name, value);

        }

        protected override bool OnDeserializeUnrecognizedElement(string elementName, System.Xml.XmlReader reader)

        {

            return base.OnDeserializeUnrecognizedElement(elementName, reader);

        }

        #endregion

        [ConfigurationProperty("Host", DefaultValue = "localhost", IsRequired = true)]

        public string Host { get { return this["Host"].ToString(); } }

        [ConfigurationProperty("Port", DefaultValue = "", IsRequired = true)]

        public int Port { get { return (int)this["Port"]; } }

    }

}
3.2 在CfgFiles新建TestConfigInfo.Config配置文件
<?xml version="1.0" encoding="utf-8" ?>

<TestConfigInfo TestName="lxsh" TestID="">

    <trackers TrackerName="testName">

        <add Host="60.195.251.71" Port="" />

        <add Host="60.195.251.72" Port="" />

        <add Host="60.195.251.73" Port="" />

    </trackers>

</TestConfigInfo>
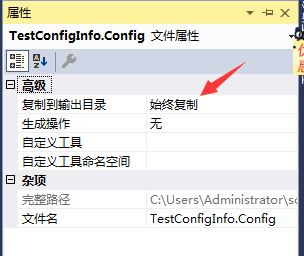
3.3 右键TestConfigInfo.Config属性,选择输出目录为始终复制,这样操作目地是在运行目录下面生成该文件(其他配置文件也需要这样操作)
3.4 调用获取配置信息代码如下:
            Console.WriteLine("---------------------自定义新增节点测试-----------------");

            Console.WriteLine("TestID:" + TestConfigInfo.GetConfig().TestID);

            Console.WriteLine("TestName:" + TestConfigInfo.GetConfig().TestName);

            foreach (tracker item in TestConfigInfo.GetConfig().Trackers)

            {

                Console.WriteLine("Host:" + item.Host + " Port:" + item.Port);

            }
3.5 运行效果如下图:
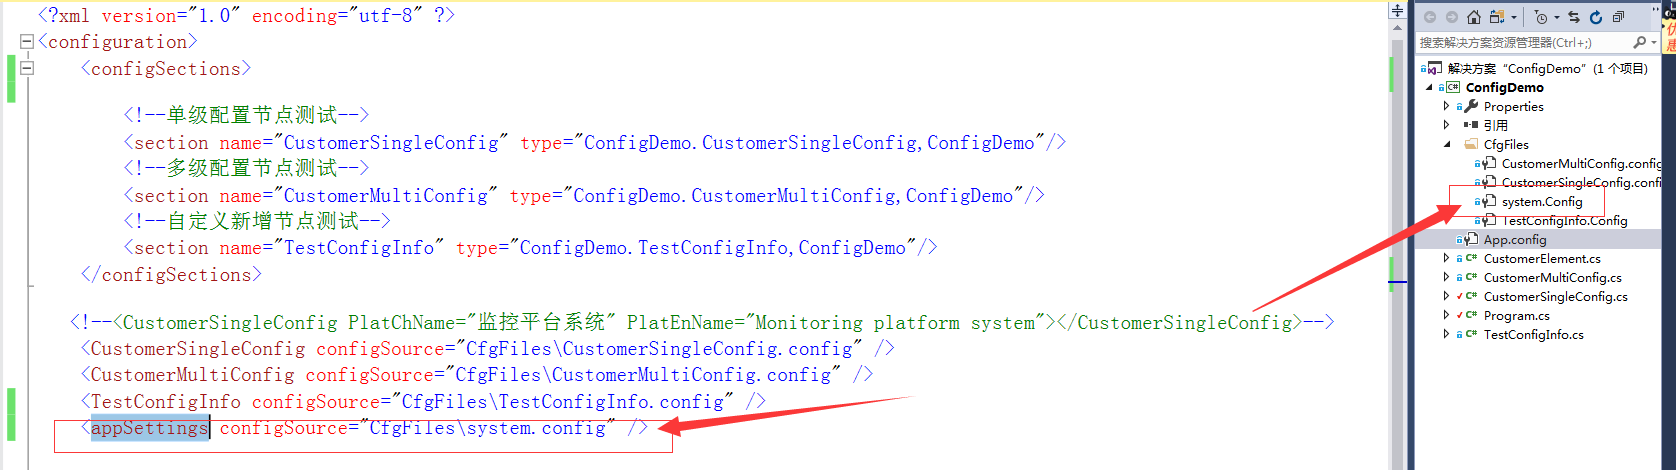
4 系统appSettings配置文件单独建立配置文件
4.1 appconfig配置文件修改截图如下
4.2 system.config配置文件内容如下

4.3 调用方式和没有分开是一样的,如下
  Console.WriteLine("---------------------系统自带appSettings配置文件-----------------");

            Console.WriteLine("logLevel:" + System.Configuration.ConfigurationManager.AppSettings["logLevel"]);

            Console.WriteLine("LogType:" + System.Configuration.ConfigurationManager.AppSettings["LogType"]);
四、四种方式演示源码Github地址:https://github.com/lxshwyan/ConfigDemo.git
C#配置文件configSections详解的更多相关文章
- Nginx 主配置文件参数详解
Nginx 主配置文件参数详解 Nginx 安装完毕后,会有响应的安装目录,安装目录里 nginx.conf 为 nginx 的主配置文件, ginx 主配置文件分为 4 部分,main(全局配置). ...
- CentOS网络接口配置文件ifcfg-eth详解
======CentOS网络接口配置文件ifcfg-eth详解====== 文件 /etc/sysconfig/network-scripts/ifcfg-eth0在/etc/sysconfig/ne ...
- Apache2 httpd.conf配置文件中文版详解
Apache2 httpd.conf配置文件中文版详解## 基于 NCSA 服务的配置文件.##这是Apache服务器主要配置文件.#它包含服务器的影响服务器运行的配置指令.#参见以取得关于这些指令的 ...
- ssh2的application.xml配置文件配置详解
ssh2的application.xml配置文件配置详解 1.导入其他的配置文件.在ssh项目中可以导入其他的配置文件,导入的格式为: <import resource="clas ...
- MySQL-5.5.32 配置文件优化详解
目录 MySQL-5.5.32 配置文件优化详解 一.配置文件说明 2.my-medium.cnf 3.my-large.cnf 4.my-huge.cnf 5.my-innodb-heavy-4G. ...
- [转帖]SSH远程登录配置文件sshd_config详解
SSH远程登录配置文件sshd_config详解 2016年06月02日 17:42:25 Field_Yang 阅读数 61386 版权声明:本文为博主原创文章,遵循CC 4.0 by-sa版权 ...
- mysql数据库my.ini配置文件中文详解
mysql数据库my.ini配置文件中文详解 mysqld程序–目录和文件 basedir = path 使用给定目录作为根目录(安装目录). character-sets-dir = path 给出 ...
- 史上最全web.xml配置文件元素详解
一.web.xml配置文件常用元素及其意义预览 <web-app> <!--定义了WEB应用的名字--> <display-name></display-na ...
- Nginx配置文件中文详解
######Nginx配置文件nginx.conf中文详解##### #定义Nginx运行的用户和用户组 user www www; #nginx进程数,建议设置为等于CPU总核心数. worker_ ...
随机推荐
- X264-视频帧的存取
X264的编码器结构体x264_t中的子结构体字段frames包含了4个临时视频帧序列空间:current.next.unused和reference,分别保存当前编码帧.将编码帧序列.未处理原始视频 ...
- 多线程学习笔记(二) BackgroundWorker 和 ProgressChanged
BackgroundWorker是在内部使用了线程池的技术:同时,在Winform 或WPF编码中,它还给工作线程和UI线程提供了交互的能力. Thread和ThreadPool默认都没有提供这种交互 ...
- WIP表解析
1,WIP的作用 负责纪录生产相关信息,生产什莫--工单的制定,下达,生产步鄹--工序及其移动,投入什莫--组件需求和投料,资源投入入和费用吸收,负责纪录生产成本的归集和差异分析,投入多少组件,资 ...
- Rust的Drop Trait,相当于析构代码
退出前自动执行的代码. struct CustomSmartPointer { data: String, } impl Drop for CustomSmartPointer { fn drop(& ...
- Hello,DTOS!(中)
org 0x7c00 //主引导程序的入口地址为0x7c00(物理地址),类似于用c或c++程序中的main函数. start: //定义标签,标签的含义就是mov ax,cs这条指令的地址. ...
- c# 第四节 Net Framework编写应用程序的过程
本节 1:创建.net应用程序所经历的步骤 2:cli是什么 3:程序集是什么 4:jit编辑器 5:托管代码 1:创建.net应用程序所经历的步骤 2:cli是什么 3:程序集是什么 4:jit编辑 ...
- shell之seq
seq 用于生成从一个数到另一个数之间的所有整数 seq [选项]... 尾数 seq [选项]... 首数 尾数 seq [选项]... 首数 增量 尾数 例如: 1. -s 指定分隔符,默认分隔 ...
- 在 Oracle 中使用正则表达式
Oracle使用正则表达式离不开这4个函数: 1.regexp_like 2.regexp_substr 3.regexp_instr 4.regexp_replace 看函数名称大概就能猜到有什么用 ...
- [LeetCode] 305. Number of Islands II 岛屿的数量之二
A 2d grid map of m rows and n columns is initially filled with water. We may perform an addLand oper ...
- BS项目启动任意EXE文件或者CS项目
1. 基于注册表启动exe程序 1. 桌面新建注册表执行文件:protocal.reg 2. 任意文本编辑器打开该文件 Windows Registry Editor Version 5.00 [HK ...