Android studio开发-第一个应用
Android studio开发-第一个应用
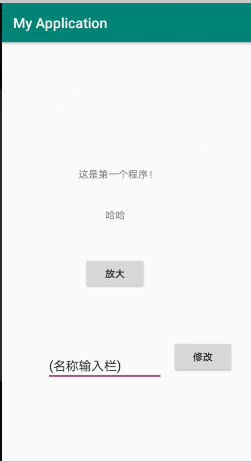
上效果图
1.先创建布局文件 firstbutton.xml

代码
 <?xml version="1.0" encoding="utf-8"?>

 <android.support.constraint.ConstraintLayout xmlns:android="http://schemas.android.com/apk/res/android"

     xmlns:app="http://schemas.android.com/apk/res-auto"

     xmlns:tools="http://schemas.android.com/tools"

     android:layout_width="match_parent"

     android:layout_height="match_parent"

     tools:context=".MainActivity">

     <TextView

         android:id="@+id/textView4"

         android:layout_width="113dp"

         android:layout_height="22dp"

         android:layout_marginBottom="336dp"

         android:text="这是第一个程序!"

         app:layout_constraintBottom_toBottomOf="parent"

         app:layout_constraintHorizontal_bias="0.472"

         app:layout_constraintLeft_toLeftOf="parent"

         app:layout_constraintRight_toRightOf="parent" />

     <Button

         android:id="@+id/button"

         android:layout_width="89dp"

         android:layout_height="47dp"

         android:layout_marginStart="128dp"

         android:layout_marginLeft="128dp"

         android:layout_marginTop="50dp"

         android:layout_marginEnd="167dp"

         android:layout_marginRight="167dp"

         android:text="放大"

         android:onClick="bigger"

         app:layout_constraintEnd_toEndOf="parent"

         app:layout_constraintStart_toStartOf="parent"

         app:layout_constraintTop_toBottomOf="@+id/txv"

         tools:ignore="OnClick" />

     <Button

         android:id="@+id/confirm"

         android:layout_width="wrap_content"

         android:layout_height="wrap_content"

         android:layout_marginStart="12dp"

         android:layout_marginLeft="12dp"

         android:layout_marginTop="377dp"

         android:layout_marginEnd="43dp"

         android:layout_marginRight="43dp"

         android:layout_marginBottom="86dp"

         android:text="修改"

         android:onClick="display"

         app:layout_constraintBottom_toBottomOf="parent"

         app:layout_constraintEnd_toEndOf="parent"

         app:layout_constraintStart_toEndOf="@+id/name"

         app:layout_constraintTop_toTopOf="parent" />

     <EditText

         android:id="@+id/name"

         android:layout_width="166dp"

         android:layout_height="wrap_content"

         android:layout_marginStart="75dp"

         android:layout_marginLeft="75dp"

         android:layout_marginTop="54dp"

         android:layout_marginEnd="12dp"

         android:layout_marginRight="12dp"

         android:layout_marginBottom="88dp"

         android:ems=""

         android:inputType="textPersonName"

         android:hint="请输入要显示的字符"

         android:text="(名称输入栏)"

         app:layout_constraintBottom_toBottomOf="parent"

         app:layout_constraintEnd_toStartOf="@+id/confirm"

         app:layout_constraintStart_toStartOf="parent"

         app:layout_constraintTop_toBottomOf="@+id/button" />

     <TextView

         android:id="@+id/txv"

         android:layout_width="wrap_content"

         android:layout_height="wrap_content"

         android:layout_marginStart="159dp"

         android:layout_marginLeft="159dp"

         android:layout_marginTop="36dp"

         android:layout_marginEnd="197dp"

         android:layout_marginRight="197dp"

         android:text="哈哈"

         app:layout_constraintEnd_toEndOf="parent"

         app:layout_constraintStart_toStartOf="parent"

         app:layout_constraintTop_toBottomOf="@+id/textView4" />

 </android.support.constraint.ConstraintLayout>
修改java代码

插入代码
package com.demo.my.myapplication;

import android.support.annotation.Nullable;

import android.support.v7.app.AppCompatActivity;

import android.os.Bundle;

import android.util.Log;

import android.view.View;

import android.widget.EditText;

import android.widget.TextView;

public class MainActivity extends AppCompatActivity {

    @Override

    protected void onCreate(@Nullable Bundle savedInstanceState) {

        super.onCreate(savedInstanceState);

        setContentView(R.layout.firstbutton);

        }

        //添加布局

        int size=30;   // 按钮对应的 onclick 响应

        public void bigger(View v){

            TextView txv;

            txv=(TextView) findViewById(R.id.txv);   //根据ID找到对应的text对象

            txv.setTextSize(++size);  //修改对象的字符大小-size

        }

        //另一个按钮对应的onclick响应

        public void display(View v){

            EditText name=(EditText) findViewById(R.id.name);  //根据ID找到对应的text对象,并进行接下来的操作

            TextView text2=(TextView) findViewById(R.id.txv);

            text2.setText(name.getText().toString()); //设置字符

        }

}
Android studio开发-第一个应用的更多相关文章
- Android Studio开发第一篇QuickStart
为什么把as的环境开发放在gradle里呢,因为eclipse里装gradle插件还是不够方便,as直接集成了,然后正好as也是大势所趋,学习一下正好. 看到右边Quick Start快速启动栏下面 ...
- 《Android Studio开发实战 从零基础到App上线》资源下载和内容勘误
转载于:https://blog.csdn.net/aqi00/article/details/73065392 资源下载 下面是<Android Studio开发实战 从零基础到App上线&g ...
- windows平台下Android studio开发环境搭建教程
最近,Google 已宣布,为了简化 Android 的开发力度,以重点建设 Android Studio 工具,到今年年底将停止支持Eclipse等其他集成开发环境 .而随着Android stud ...
- 使用 Android Studio 开发 widget 安卓桌面插件
•What AppWidget 即桌面小部件,也叫桌面控件,就是能直接显示在Android系统桌面上的小程序: 这么说可能有点抽象,看图: 像这种,桌面上的天气.时钟.搜索框等等,都属于 APP Wi ...
- 使用Android Studio开发J2SE项目方法
0.前言 最近因为要为项目开发一个底层的Java应用,所以非常偶然的遇到了这样一个问题,过去Eclipse有Java Project而现在手头使用Android Studio并不能直接建立Java应用 ...
- Android studio 开发环境搭建
Android studio 开发环境搭建 一.环境: 下载java jdk:http://www.oracle.com/technetwork/cn/java/javase/downloads/jd ...
- 【Android 应用开发】Ubuntu 下 Android Studio 开发工具使用详解 (旧版本 | 仅作参考)
. 基本上可以导入项目开始使用了 ... . 作者 : 万境绝尘 转载请注明出处 : http://blog.csdn.net/shulianghan/article/details/21035637 ...
- Android Studio开发环境配置以及相关说明
版权声明:本文为HaiyuKing原创文章,转载请注明出处! 前言 这里简单记录下在开发的时候使用的Android Studio开发环境版本以及相关注意事项. 一般来讲,每隔一段时间就要检查下Andr ...
- 【Android Studio安装部署系列】二、Android Studio开发环境搭建
版权声明:本文为HaiyuKing原创文章,转载请注明出处! 概述 Android Studio开发环境安装步骤 下载Android Studio 下载地址: http://www.wanandroi ...
随机推荐
- MongDB应用
题外话 工作3年,了解的技术颇多,但都是一知半解,了解不是很透澈.用过的技术,就像猴子搬过的包谷,搬一个丢一个.几年风雨,真有点一缕清风过,片叶不沾身的味道. 为强化知识点,提升文档及学习能力,我把以 ...
- msyql索引详解
一.mysql查询表索引命令两种形式 1.mysql>SHOW INDEX FROM 'biaoming' 2.mysql>SHOW keys FROM 'biaoming' 运行结果如下 ...
- struts <s:iterator>两个list嵌套循环,对象属性交叉使用
两个list:List<CreateTableColumn> createTableColumnList,List<Map<String, Object>> tab ...
- 2015/12/30 字符集 ASCII 到Unicode
——每个软件开发人员应该无条件掌握的知识! ——Unicode伟大的创想! 相信大家一定碰到过,打开某个网页,却显示一堆像乱码,如"бЇЯАзЪСЯ"."�??????? ...
- android studio 使用
java5-7适用android,java8对安卓支持不好. mac osx 需要安装jdk8, google Nexus模拟器, Intellij是JetBrains发布的. Intellij有2个 ...
- ios21--xib例子
故事板控制器: // // XMGViewController.m // 03-综合练习 // // Created by xiaomage on 15/12/28. // Copyright © 2 ...
- JButton的setRollover出现的奇怪问题
设置了setRollover,可以正常出现状态但是却不会回到默认状态. 研究了一下才发现,repaint的时候不会清除背板而是覆盖上去的, 所以如果原图是透明图就会出现状态不变的情况
- tracert 路由跟踪程序
C:\Users\Administrator>tracert 10.0.0.1 通过最多 30 个跃点跟踪到 10.0.0.1 的路由 1 <1 毫秒 1 ms 3 ms 192.168. ...
- WinForm里面连接Oracle数据库
WinForm里面连接Oracle数据库 string oradb = "Data Source=(DESCRIPTION=" + "(ADDRE ...
- MFC ListControl技巧汇总
转自:http://hi.baidu.com/qi_xian/blog/item/1971aa22da89ada24723e856.html 以下未经说明,listctrl默认view 风格为repo ...