Android开发之自定义对话框
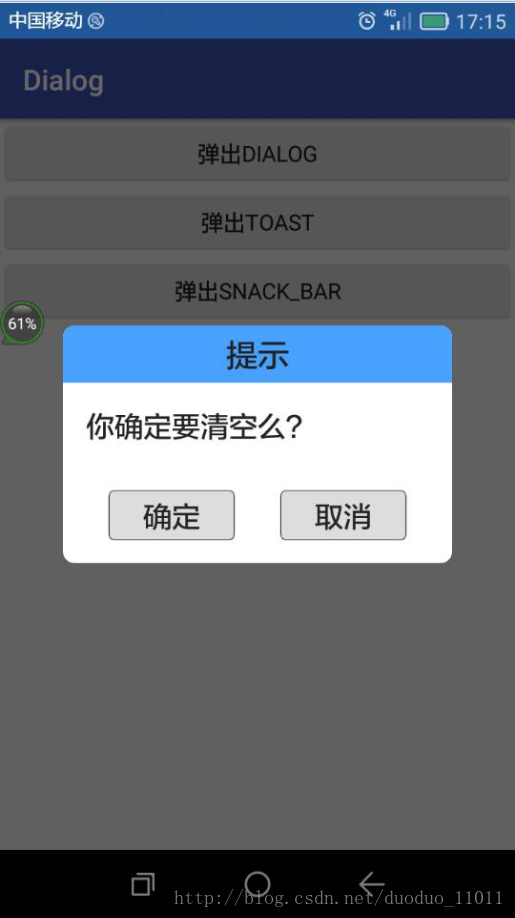
由于系统自带的对话框不好看,于是本人就自定义了一个对话框,以后有类似的就可以直接使用啦。先上效果图:
1,布局文件dialog_clear_normal.xml
<?xml version="1.0" encoding="utf-8"?>

<LinearLayout xmlns:android="http://schemas.android.com/apk/res/android"

    android:layout_width="200dp"

    android:layout_height="wrap_content"

    android:background="@drawable/dialog_bkg_2"

    android:orientation="vertical">

    <TextView

        android:id="@+id/dialog_title"

        android:layout_width="match_parent"

        android:layout_height="40dp"

        android:background="@drawable/dialog_title_bkg"

        android:gravity="center"

        android:paddingBottom="4dp"

        android:paddingTop="4dp"

        android:text="标题"

        android:textColor="@color/textColor_black"

        android:textSize="20sp" />

    <LinearLayout

        android:id="@+id/dialog_content"

        android:layout_width="fill_parent"

        android:layout_height="wrap_content"

        android:gravity="center">

        <TextView

            android:id="@+id/dialog_message"

            android:layout_width="match_parent"

            android:layout_height="wrap_content"

            android:layout_margin="16dp"

            android:text="您确定要删除么?"

            android:textColor="@drawable/radio_btn_text"

            android:textSize="18sp" />

    </LinearLayout>

    <LinearLayout

        android:layout_width="match_parent"

        android:layout_height="35dp"

        android:layout_margin="16dp"

        android:orientation="horizontal">

        <Button

            android:id="@+id/btn_dialog_ok"

            style="@style/btn_style"

            android:layout_width="wrap_content"

            android:layout_height="match_parent"

            android:layout_marginLeft="16dp"

            android:layout_marginRight="16dp"

            android:layout_weight="1"

            android:text="确定"

            android:textAllCaps="false"

            android:textSize="18sp" />

        <Button

            android:id="@+id/btn_dialog_cancel"

            style="@style/btn_style"

            android:layout_width="wrap_content"

            android:layout_height="match_parent"

            android:layout_marginLeft="16dp"

            android:layout_marginRight="16dp"

            android:layout_weight="1"

            android:text="取消"

            android:textAllCaps="false"

            android:textSize="18sp" />

    </LinearLayout>

</LinearLayout>
2,文件夹values/colors.xml
<?xml version="1.0" encoding="utf-8"?>

<resources>

    <color name="colorPrimary">#3F51B5</color>

    <color name="colorPrimaryDark">#303F9F</color>

    <color name="colorAccent">#FF4081</color>

    <color name="white">#ffffff</color>

    <color name="black">#000000</color>

    <color name="textColor_black">#222222</color>

    <color name="transparent">#00000000</color>

    <color name="title_bkg">#48a1ff</color>

    <color name="btn_unselect">#dddddd</color>

    <color name="btn_selected">#aaaaaa</color>

    <color name="right_key_unselect">#80dddddd</color>

    <color name="right_key_selected">#80aaaaaa</color>

    <color name="right_key_textColor">#80222222</color>

    <color name="bkg_num_color">#40ffffff</color>

    <color name="nn">#0000ff</color>

</resources>
3,文件夹values/styles.xml
<resources>

    <!-- Base application theme. -->

    <style name="AppTheme" parent="Theme.AppCompat.Light.DarkActionBar">

        <!-- Customize your theme here. -->

        <item name="colorPrimary">@color/colorPrimary</item>

        <item name="colorPrimaryDark">@color/colorPrimaryDark</item>

        <item name="colorAccent">@color/colorAccent</item>

    </style>

    <style name="btn_style">

        <item name="android:background">@drawable/button_selector</item>

        <item name="android:textSize">20sp</item>

        <item name="android:textColor">@color/textColor_black</item>

        <item name="android:textAllCaps">false</item>

    </style>

    <style name="Dialog" parent="android:style/Theme.Dialog">

        <item name="android:background">#00000000</item>

        <item name="android:windowBackground">@android:color/transparent</item>

        <item name="android:windowNoTitle">true</item>

        <item name="android:windowIsFloating">true</item>

    </style>

</resources>
4,文件夹drawable/的一些xml文件:
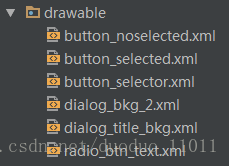
1)
<?xml version="1.0" encoding="utf-8"?>

<shape xmlns:android="http://schemas.android.com/apk/res/android" >

    <solid android:color="@color/btn_unselect" />

    <stroke

        android:width="1px"

        android:color="@color/textColor_black" />

    <corners

        android:radius="4dp" />

</shape>
2)
<?xml version="1.0" encoding="utf-8"?>

<shape xmlns:android="http://schemas.android.com/apk/res/android" >

    <!--<solid android:color="@color/rippelColor" />-->

    <solid android:color="@color/btn_selected" />

    <stroke

        android:width="1px"

        android:color="@color/textColor_black" />

    <corners

        android:radius="4dp" />

</shape>
3)
<?xml version="1.0" encoding="utf-8"?>

<selector xmlns:android="http://schemas.android.com/apk/res/android">

    <item android:drawable="@drawable/button_selected" android:state_selected="true" />

    <item android:drawable="@drawable/button_selected" android:state_focused="true" />

    <item android:drawable="@drawable/button_selected" android:state_pressed="true" />

    <item android:drawable="@drawable/button_selected" android:state_checked="true"/>

    <item android:drawable="@drawable/button_noselected" />

</selector>
4)
<?xml version="1.0" encoding="utf-8"?>

<shape xmlns:android="http://schemas.android.com/apk/res/android" >

    <solid android:color="#ffffff" />

    <corners

        android:radius="8dp" />

</shape>
5)
<?xml version="1.0" encoding="utf-8"?>

<shape xmlns:android="http://schemas.android.com/apk/res/android" >

    <solid android:color="@color/title_bkg" />

    <corners

        android:topLeftRadius="8dp"

        android:topRightRadius="8dp"/>

</shape>
6)
<?xml version="1.0" encoding="utf-8"?>

<selector xmlns:android="http://schemas.android.com/apk/res/android">

        <item android:color="@color/textColor_black" android:state_checked="false" />

        <item android:color="@color/title_bkg" android:state_checked="true" />

</selector>
5,自定义一个对话框的类:
package com.gyq.dialog;

import android.app.Dialog;

import android.content.Context;

import android.content.DialogInterface;

import android.view.LayoutInflater;

import android.view.View;

import android.view.ViewGroup;

import android.widget.Button;

import android.widget.LinearLayout;

import android.widget.TextView;

/**

 * ${DESC}

 * author: gyq

 * create at 2017/2/7 15:33

 */

public class CustomDialog extends Dialog {

    public CustomDialog(Context context) {

        super(context);

    }

    public CustomDialog(Context context, int theme) {

        super(context, theme);

    }

    public static class Builder {

        private Context context;

        private String title;

        private String message;

        private String positiveButtonText;

        private String negativeButtonText;

        private View contentView;

        private DialogInterface.OnClickListener positiveButtonClickListener;

        private DialogInterface.OnClickListener negativeButtonClickListener;

        public Builder(Context context) {

            this.context = context;

        }

        public Builder setMessage(String message) {

            this.message = message;

            return this;

        }

        /**

         * Set the Dialog message from resource

         *

         * @param

         * @return

         */

        public Builder setMessage(int message) {

            this.message = (String) context.getText(message);

            return this;

        }

        /**

         * Set the Dialog title from resource

         *

         * @param title

         * @return

         */

        public Builder setTitle(int title) {

            this.title = (String) context.getText(title);

            return this;

        }

        /**

         * Set the Dialog title from String

         *

         * @param title

         * @return

         */

        public Builder setTitle(String title) {

            this.title = title;

            return this;

        }

        public Builder setContentView(View v) {

            this.contentView = v;

            return this;

        }

        /**

         * Set the positive button resource and it's listener

         *

         * @param positiveButtonText

         * @return

         */

        public Builder setPositiveButton(int positiveButtonText,

                                         DialogInterface.OnClickListener listener) {

            this.positiveButtonText = (String) context

                    .getText(positiveButtonText);

            this.positiveButtonClickListener = listener;

            return this;

        }

        public Builder setPositiveButton(String positiveButtonText,

                                         DialogInterface.OnClickListener listener) {

            this.positiveButtonText = positiveButtonText;

            this.positiveButtonClickListener = listener;

            return this;

        }

        public Builder setNegativeButton(int negativeButtonText,

                                         DialogInterface.OnClickListener listener) {

            this.negativeButtonText = (String) context

                    .getText(negativeButtonText);

            this.negativeButtonClickListener = listener;

            return this;

        }

        public Builder setNegativeButton(String negativeButtonText,

                                         DialogInterface.OnClickListener listener) {

            this.negativeButtonText = negativeButtonText;

            this.negativeButtonClickListener = listener;

            return this;

        }

        public CustomDialog create() {

            LayoutInflater inflater = (LayoutInflater) context

                    .getSystemService(Context.LAYOUT_INFLATER_SERVICE);

            // instantiate the dialog with the custom Theme

            final CustomDialog dialog = new CustomDialog(context,R.style.Dialog);

            View layout = inflater.inflate(R.layout.dialog_clear_normal, null);

            dialog.addContentView(layout, new ViewGroup.LayoutParams(

                    ViewGroup.LayoutParams.MATCH_PARENT, ViewGroup.LayoutParams.WRAP_CONTENT));

            // set the dialog title

            ((TextView) layout.findViewById(R.id.dialog_title)).setText(title);

            // set the confirm button

            if (positiveButtonText != null) {

                ((Button) layout.findViewById(R.id.btn_dialog_ok))

                        .setText(positiveButtonText);

                if (positiveButtonClickListener != null) {

                    ((Button) layout.findViewById(R.id.btn_dialog_ok))

                            .setOnClickListener(new View.OnClickListener() {

                                public void onClick(View v) {

                                    positiveButtonClickListener.onClick(dialog,

                                            DialogInterface.BUTTON_POSITIVE);

                                }

                            });

                }

            } else {

                // if no confirm button just set the visibility to GONE

                layout.findViewById(R.id.btn_dialog_ok).setVisibility(

                        View.GONE);

            }

            // set the cancel button

            if (negativeButtonText != null) {

                ((Button) layout.findViewById(R.id.btn_dialog_cancel))

                        .setText(negativeButtonText);

                if (negativeButtonClickListener != null) {

                    ((Button) layout.findViewById(R.id.btn_dialog_cancel))

                            .setOnClickListener(new View.OnClickListener() {

                                public void onClick(View v) {

                                    negativeButtonClickListener.onClick(dialog,

                                            DialogInterface.BUTTON_NEGATIVE);

                                }

                            });

                }

            } else {

                // if no confirm button just set the visibility to GONE

                layout.findViewById(R.id.btn_dialog_cancel).setVisibility(

                        View.GONE);

            }

            // set the content message

            if (message != null) {

                ((TextView) layout.findViewById(R.id.dialog_message)).setText(message);

            } else if (contentView != null) {

                // if no message set

                // add the contentView to the dialog body

                ((LinearLayout) layout.findViewById(R.id.dialog_content))

                        .removeAllViews();

                ((LinearLayout) layout.findViewById(R.id.dialog_content)).addView(

                        contentView, new ViewGroup.LayoutParams(

                                ViewGroup.LayoutParams.MATCH_PARENT,

                                ViewGroup.LayoutParams.MATCH_PARENT));

            }

            dialog.setContentView(layout);

            return dialog;

        }

    }

}
7,使用这个dialog:
CustomDialog.Builder builder = new CustomDialog.Builder(this);

                builder.setTitle("提示");

                builder.setMessage("你确定要清空么?");

                builder.setPositiveButton("确定", new DialogInterface.OnClickListener() {

                    @Override

                    public void onClick(DialogInterface dialog, int which) {

                        dialog.dismiss();

                    }

                });

                builder.setNegativeButton("取消", new DialogInterface.OnClickListener() {

                    @Override

                    public void onClick(DialogInterface dialog, int which) {

                        dialog.dismiss();

                    }

                });

                builder.create().show();
小结:这个自定义的对话宽,点击外面也会消失。有阴影部分,效果还是蛮好看的。
Android开发之自定义对话框的更多相关文章
- android开发之自定义组件
android开发之自定义组件 一:自定义组件: 我认为,自定义组件就是android给我们提供的的一个空白的可以编辑的图片,它帮助我们实现的我们想要的界面,也就是通过自定义组件我们可以把我们要登入的 ...
- android 开发AlertDialog.builder对话框的实现
AndroidAPI提供了Dialog对话框控件,但google明确指出不建议开发者只是使用Dialog来创建对话框,而应该自定义对话框或者使用API中提供的Dialog的子类,如AlertDialo ...
- Android开发之自定义的ListView(UITableViewController)
Android开发中的ListView, 顾名方法思义,就是表视图.表示图在iOS开发中就是TableView.两者虽然名称不一样,但是其使用方法,使用场景以及该控件的功能都极为相似,都是用来展示大量 ...
- Android开发之自定义组件和接口回调
说到自定义控件不得不提的就是接口回调,在Android开发中接口回调用的还是蛮多的.在这篇博客开始的时候呢,我想聊一下iOS的自定义控件.在iOS中自定义控件的思路是继承自UIView, 在UIVie ...
- Android开发之自定义的ProgressDialog
package com.example.dialog; import android.app.ProgressDialog; import android.content.Context; /** * ...
- Android开发之自定义Dialog简单实现
本文着重研究了自定义对话框,通过一下步骤即可清晰的理解原理,通过更改界面设置和style类型,可以应用在各种各样适合自己的App中. 首先来看一下效果图: 首先是activity的界面 点击了上述图片 ...
- Android开发之自定义局部导航菜单
如今,要实现导航功能方案有很多.比如: 1.用3.0+自带的Toolbar + Fragment导航. 2.用Tabhost实现导航.小弟学浅,就只用过这两种方案实现导航. 但是这两种方案都有一个很明 ...
- Android开发进阶——自定义View的使用及其原理探索
在Android开发中,系统提供给我们的UI控件是有限的,当我们需要使用一些特殊的控件的时候,只靠系统提供的控件,可能无法达到我们想要的效果,这时,就需要我们自定义一些控件,来完成我们想要的效果了.下 ...
- Android开发之自定义圆角矩形图片ImageView的实现
android中的ImageView只能显示矩形的图片,这样一来不能满足我们其他的需求,比如要显示圆角矩形的图片,这个时候,我们就需要自定义ImageView了,其原理就是首先获取到图片的Bitmap ...
随机推荐
- 【Codeforces 827B】High Load
[链接] 我是链接,点我呀:) [题意] 题意 [题解] 树的最长链是一定会经过两个叶子节点的. 我们可以构造一棵树,让最后的最长链一定是由经过根节点的两条链组成. 然后让这两条链的长度尽可能短就好. ...
- 大数据学习——mapreduce学习topN问题
求每一个订单中成交金额最大的那一笔 top1 数据 Order_0000001,Pdt_01,222.8 Order_0000001,Pdt_05,25.8 Order_0000002,Pdt_05 ...
- Leetcode 264.丑数II
丑数II 编写一个程序,找出第 n 个丑数. 丑数就是只包含质因数 2, 3, 5 的正整数. 示例: 输入: n = 10 输出: 12 解释: 1, 2, 3, 4, 5, 6, 8, 9, 10 ...
- HA架构
HA架构是个什么东西? 阅读文章:浅谈web应用的负载均衡.集群.高可用(HA)解决方案
- IntelliJ IDEA平台下JNI编程—HelloWorld篇
转载请注明出处:[huachao1001的专栏:http://blog.csdn.net/huachao1001/article/details/53906237] JNI(Java Native I ...
- 聪明的猴子(BZOJ 2429)
题目描述 在一个热带雨林中生存着一群猴子,它们以树上的果子为生.昨天下了一场大雨,现在雨过天晴,但整个雨林的地表还是被大水淹没着,部分植物的树冠露在水面上.猴子不会游泳,但跳跃能力比较强,它们仍然可以 ...
- [NOIP2003] 提高组 洛谷P1039 侦探推理
题目描述 明明同学最近迷上了侦探漫画<柯南>并沉醉于推理游戏之中,于是他召集了一群同学玩推理游戏.游戏的内容是这样的,明明的同学们先商量好由其中的一个人充当罪犯(在明明不知情的情况下),明 ...
- 使用Spring Data Redis操作Redis(集群版)
说明:请注意Spring Data Redis的版本以及Spring的版本!最新版本的Spring Data Redis已经去除Jedis的依赖包,需要自行引入,这个是个坑点.并且会与一些低版本的Sp ...
- SQL根据某一父节点查询所有子节点,无限
;with cte as( select id,ParentCategoryId from Category where id = 17 union all select a.id,a.ParentC ...
- 使用Python将数据插入数据库(一)
假如我现在有一个Excel数据表格,需要将其数据插入MySQL数据库中.数据如下: 对应的Python实现代码如下: #导入需要使用到的数据模块 import pandas as pd import ...