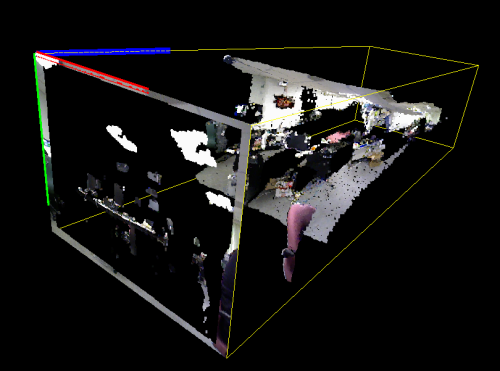
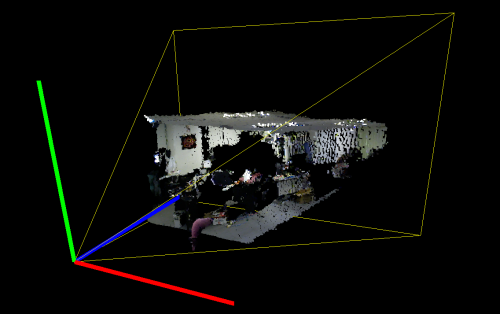
使用OpenNI 2获取RGBD摄像头深度信息
- NiViewer
安装好摄像头驱动和OpenNI后,在Tools文件夹中可以找到一个程序NiViewer。NiViewer的一些基本控制方法如下:
1. ESC关闭NiViewer程序
2. 右键可以显示出控制选项
3. 按0到9以及“-”与“=”键,这12个键可以控制显示的方法
4. 按M键控制显示图像是否镜像
5. F键全屏切换
在使用NiViewer的时候,如果使用的设备没有RGB摄像头,此时NiViewer只显示深度图像,而RGB图像部分则处于关闭状态。如果使用的设备存在RGB摄像头,则NiViewer窗口左半边是3D摄像头的深度影像,右半边是RGB摄像头的影像。
使用RGBD摄像头时,由于需要传输的影像和深度信息资料的量很大,所以要注意所使用的USB的频宽。当USB频宽不够的时候会出现卡顿或其他情况,尽量不要和其它大量数据传输的USB装置同时使用。
- 深度感应器原理
对于光学设备来说,不可避免的要涉及精度和使用范围问题。作为开发者,要熟悉这款设备的这些功能,对于基于这些设备所进行的开发有着决定性的作用。Xtion设备采用的是基于散斑的光源标定技术,所以散斑的形成与否对深度图像有着决定性的作用。下图是获取的深度图像,图中黑色的部分表示无法精确获得深度信息。首先在靠近镜头的地方会无法获取深度,这是因为在这么近的距离无法形成有效的散斑。其次图片中天花板上的照明灯管部分也无法获取深度,因为Xtion使用的是主动光学式探测,所以直接光照会对传感器的接收产生较强的干扰,最后一部分黑色是在图片中最远的地方,这是因为距离过远,当距离过远时也不能形成有效的散斑。

由于深度信息是通过红外激光发射器发射激光,激光在物体表面通过漫反射形成散斑,再由CMOS传感器接收返回的红外激光来获取,因此物体的材质会影响探测效果。比如透明材质和镜面材质,对于这两种材质,摄像头均不能有效获取深度信息。除了材质问题,在遮蔽的情况下,摄像头也不能获取到物体的深度。当一个物体被其他非透明物体所遮挡,这样红外激光不能照射到物体,也就不能被摄像头的接收器所接收到,这时物体就没有正确的深度。
- 获取深度数据
具体创建工程的步骤可以参考OpenNI文档中的Getting Started章节。下图描述了数据获取的流程:

1. 轮询方式:
#include <stdio.h>

#include <OpenNI.h>

#include "OniSampleUtilities.h"

#define SAMPLE_READ_WAIT_TIMEOUT 2000 //2000ms

using namespace openni;  // The entire C++ API is available under the openni namespace.

int main(int argc, char* argv[])

{

    // Be sure to call openni::OpenNI::initialize(), to make sure all drivers are loaded

    // If no drivers are found, this function will fail. If it does, you can get some basic

    // log by calling openni::OpenNI::getExtendedError() (which returns a string)

    Status rc = OpenNI::initialize();

    if (rc != STATUS_OK)

    {

        // getExtendedError() method returns additional, human-readable information about the error.

        printf("Initialize failed\n%s\n", OpenNI::getExtendedError());

        return ;

    }

    // Provides an interface to a single sensor device connected to the system. Requires OpenNI

    // to be initialized before it can be created. Devices provide access to Streams.

    Device device;

     // Device::open():  connects to a physical hardware device

     // This function returns a status code indicating either success or what error occurred.

    if (argc < )

        rc = device.open(ANY_DEVICE);

    else

        rc = device.open(argv[]);

    if (rc != STATUS_OK)

    {

        printf("Couldn't open device\n%s\n", OpenNI::getExtendedError());

        return ;

    }

    VideoStream depth;  // VideoStream: Abstracts a single video stream. Obtained from a specific Device.

    // Get the SensorInfo for a specific sensor type on this device

    // The SensorInfo is useful for determining which video modes are supported by the sensor

    // Parameters: sensorType of sensor to get information

    // Returns: SensorInfo object corresponding to the sensor type specified,or NULL if such a sensor is not available from this device.

    if (device.getSensorInfo(SENSOR_DEPTH) != NULL)

    {

        // Before VideoStream object can be used, this object must be initialized with the VideoStream::create() function.

        // The create() function requires a valid initialized device. Once created,

        // you should call the VideoStream::start() function to start the flow of data

        rc = depth.create(device, SENSOR_DEPTH);

        if (rc != STATUS_OK)

        {

            printf("Couldn't create depth stream\n%s\n", OpenNI::getExtendedError());

            return ;

        }

    }

    rc = depth.start();  // Start data generation from the video stream

    if (rc != STATUS_OK)

    {

        printf("Couldn't start the depth stream\n%s\n", OpenNI::getExtendedError());

        return ;

    }

    VideoFrameRef frame;  // VideoFrameRef: Abstracts a single video from and related meta-data. Obtained from a specific Stream.

    // Polling based data reading

    while (!wasKeyboardHit())

    {

        int changedStreamDummy;

        VideoStream* pStream = &depth;

        // A system of polling for stream access can be implemented by using the OpenNI::waitForAnyStream() function.

        // When called, it blocks until any of the streams in the list have new data available,or the timeout has passed.

        // It then returns a status code and indicates which stream has data available.

        rc = OpenNI::waitForAnyStream(&pStream, , &changedStreamDummy, SAMPLE_READ_WAIT_TIMEOUT);

        if (rc != STATUS_OK)

        {

            printf("Wait failed! (timeout is %d ms)\n%s\n", SAMPLE_READ_WAIT_TIMEOUT, OpenNI::getExtendedError());

            continue;

        }

        // Once a VideoStream has been created, data can be read from it directly with the VideoStream::readFrame() function.

        rc = depth.readFrame(&frame);

        if (rc != STATUS_OK)

        {

            printf("Read failed!\n%s\n", OpenNI::getExtendedError());

            continue;

        }

        // getVideoMode() can be used to determine the video mode settings of the sensor

        // This information includes the pixel format and resolution of the image, as well as the frame rate

        // PIXEL_FORMAT_DEPTH_1_MM: The values are in depth pixel with 1mm accuracy

        if (frame.getVideoMode().getPixelFormat() != PIXEL_FORMAT_DEPTH_1_MM && frame.getVideoMode().getPixelFormat() != PIXEL_FORMAT_DEPTH_100_UM)

        {

            printf("Unexpected frame format\n");

            continue;

        }

        // VideoFrameRef::getData() function that returns a pointer directly to the underlying frame data.

        // This will be a void pointer, so it must be cast using the data type of the individual pixels in order to be properly indexed.

        DepthPixel* pDepth = (DepthPixel*)frame.getData();

        // getHeight() and getWidth() functions are provided to easily determine the resolution of the frame

        int middleIndex = (frame.getHeight() + ) * frame.getWidth() / ;

        // getTimestamp: Provides timestamp of frame, measured in microseconds from an arbitrary zero

        printf("[%08llu] %8d\n", (long long)frame.getTimestamp(), pDepth[middleIndex]);

        // %md:m为指定的输出字段的宽度。如果数据的位数小于m,则左端补以空格,若大于m,则按实际位数输出

        // 0:有0表示指定空位填0,如省略表示指定空位不填。

        // u格式:以无符号十进制形式输出整数。对长整型可以用"%lu"格式输出

    }

    depth.stop();    // Stop the flow of data

    depth.destroy(); // Destroy the stream

    // The close() function properly shuts down the hardware device. As a best practice, any device

    // that is opened should be closed. This will leave the driver and hardware device in a known

    // state so that future applications will not have difficulty connecting to them.

    device.close();

    // When an application is ready to exit, the OpenNI::shutdown() function

    // should be called to shutdown all drivers and properly clean up.

    OpenNI::shutdown();

    return ;

}
2. 事件方式:
#include <stdio.h>

#include "OpenNI.h"

#include "OniSampleUtilities.h"

using namespace openni;

// VideoFrameRef class encapsulates all data related to a single frame read from a VideoStream

void analyzeFrame(const VideoFrameRef& frame)

{

    DepthPixel* pDepth;

    RGB888Pixel* pColor;  // This structure stores a single color pixel value(in 24-bit RGB format).

    int middleIndex = (frame.getHeight()+)*frame.getWidth()/;

    // getVideoMode() can be used to determine the video mode settings of the sensor

    // This information includes the pixel format and resolution of the image, as well as the frame rate

    switch (frame.getVideoMode().getPixelFormat())

    {

        case PIXEL_FORMAT_DEPTH_1_MM:

        case PIXEL_FORMAT_DEPTH_100_UM:

            // VideoFrameRef::getData() returns a pointer directly to the underlying frame data.

            pDepth = (DepthPixel*)frame.getData();

            printf("[%08llu] %8d\n", (long long)frame.getTimestamp(),

                pDepth[middleIndex]);

            break;

        case PIXEL_FORMAT_RGB888:

            pColor = (RGB888Pixel*)frame.getData();

            printf("[%08llu] 0x%02x%02x%02x\n", (long long)frame.getTimestamp(),

                pColor[middleIndex].r&0xff,

                pColor[middleIndex].g&0xff,

                pColor[middleIndex].b&0xff);

            break;

        default:

            printf("Unknown format\n");

    }

}

// The VideoStream::NewFrameListener class is provided to allow the implementation of event driven frame reading.

// To use it, create a class that inherits from it and implement override the onNewFrame() method

class PrintCallback : public VideoStream::NewFrameListener

{

public:

    void onNewFrame(VideoStream& stream)

    {

        // Once a VideoStream has been created, data can be read from it directly with the VideoStream::readFrame() function.

        stream.readFrame(&m_frame);

        // VideoFrameRef objects are obtained from calling VideoStream::readFrame()

        analyzeFrame(m_frame);

    }

private:

    VideoFrameRef m_frame;

};

class OpenNIDeviceListener : public OpenNI::DeviceConnectedListener,

                                    public OpenNI::DeviceDisconnectedListener,

                                    public OpenNI::DeviceStateChangedListener

{

public:

    // All three events provide a pointer to a openNI::DeviceInfo object. This object can be used to get

    // details and identification of the device referred to by the event

    virtual void onDeviceStateChanged(const DeviceInfo* pInfo, DeviceState state)

    {

        printf("Device \"%s\" error state changed to %d\n", pInfo->getUri(), state);

    }

    virtual void onDeviceConnected(const DeviceInfo* pInfo)

    {

        printf("Device \"%s\" connected\n", pInfo->getUri());

    }

    virtual void onDeviceDisconnected(const DeviceInfo* pInfo)

    {

        printf("Device \"%s\" disconnected\n", pInfo->getUri());

    }

};

int main()

{

    Status rc = OpenNI::initialize();

    if (rc != STATUS_OK)

    {

        printf("Initialize failed\n%s\n", OpenNI::getExtendedError());

        return ;

    }

    OpenNIDeviceListener devicePrinter;

    // OpenNI defines three events: onDeviceConnected, onDeviceDisconnected, and onDeviceStateChanged

    // Listener classes can be added or removed from the list of event handlers

    OpenNI::addDeviceConnectedListener(&devicePrinter);

    OpenNI::addDeviceDisconnectedListener(&devicePrinter);

    OpenNI::addDeviceStateChangedListener(&devicePrinter);

    openni::Array<openni::DeviceInfo> deviceList;

    // OpenNI::enumerateDevices() returns a list of all available devices connected to the system.

    openni::OpenNI::enumerateDevices(&deviceList);

    for (int i = ; i < deviceList.getSize(); ++i)

    {

        // DeviceInfo::getUri returns te divice URI. URI can be used by Device::open to open a specific device.

        printf("Device \"%s\" already connected\n", deviceList[i].getUri());

    }

    Device device;

    rc = device.open(ANY_DEVICE);

    if (rc != STATUS_OK)

    {

        printf("Couldn't open device\n%s\n", OpenNI::getExtendedError());

        return ;

    }

    VideoStream depth;

    if (device.getSensorInfo(SENSOR_DEPTH) != NULL)

    {

        rc = depth.create(device, SENSOR_DEPTH);

        if (rc != STATUS_OK)

        {

            printf("Couldn't create depth stream\n%s\n", OpenNI::getExtendedError());

        }

    }

    rc = depth.start();

    if (rc != STATUS_OK)

    {

        printf("Couldn't start the depth stream\n%s\n", OpenNI::getExtendedError());

    }

    PrintCallback depthPrinter;

    // Register your created class with an active VideoStream using the VideoStream::addNewFrameListener() function.

    // Once this is done, the event handler function you implemented will be called whenever a new frame becomes available.

    depth.addNewFrameListener(&depthPrinter);

    // Wait while we're getting frames through the printer

    while (!wasKeyboardHit())

    {

        Sleep();

    }

    // Removes a Listener from this video stream list. The listener removed will no longer receive new frame events from this stream

    depth.removeNewFrameListener(&depthPrinter);

    depth.stop();

    depth.destroy();

    device.close();

    OpenNI::shutdown();

    return ;

}
深度图像中每一个像素点所存储的数据就是这个像素点距离摄像头的距离,也就是深度,它可以看做一张由深度像素组成的一维矩阵,其大小为nXRes*nYRes(即X轴像素*Y轴像素)。如果输出模式为320*240、30帧的格式,当深度数据流开始时,就是以每秒30帧的速率产生一张像素为320*240的图。
代码中声明了一个DepthPixel类型的指针pDepth,实质是一个用于指向存放深度图的一维数组。则图像中心点的深度信息middleIndex可以由下式算出:
        // getHeight() and getWidth() functions are provided to easily determine the resolution of the frame

        int middleIndex = (frame.getHeight() + ) * frame.getWidth() / ;
这里需要注意,深度图中像素值直接代表深度,单位是mm。在通过convertDepthToWorld这个函数转换到真实坐标系(World coordinates)时Z坐标是不变的。函数会根据Depth坐标系下的(X, Y, Z),去计算World坐标系下的位置(X’, Y’, Z),X、Y是depth map的索引位置(X:为column ,Y:为row)。也就是说,在OpenNI里Depth坐标系和World坐标系下Z坐标的意义是相同的。所以,如果只想知道某个点的深度,其实不用转换到真实坐标系中,直接在投影坐标系对Z值做计算就可以了。但是如果想知道两点的距离,那就还是要进行转换,把真实坐标系的X、Y坐标计算出来。

OpenNI applications commonly use two different coordinate systems to represent depth. These two systems are referred to as Depth and World representation. Depth coordinates are the native data representation. In this system, the frame is a map (two dimensional array), and each pixel is assigned a depth value. This depth value represents the distance between the camera plane and whatever object is in the given pixel. The X and Y coordinates are simply the location in the map, where the origin is the top-left corner of the field of view.
World coordinates superimpose a more familiar 3D Cartesian coordinate system on the world, with the camera lens at the origin. In this system, every point is specified by 3 points – x, y and z. The x axis of this system is along a line that passes through the infrared projector and CMOS imager of the camera. The y axis is parallel to the front face of the camera, and perpendicular to the x axis (it will also be perpendicular to the ground if the camera is upright and level). The z axis runs into the scene, perpendicular to both the x and y axis. From the perspective of the camera, an object moving from left to right is moving along the increasing x axis. An object moving up is moving along the increasing y axis, and an object moving away from the camera is moving along the increasing z axis.

Mathematically, the Depth coordinate system is the projection of the scene on the CMOS. If the sensor's angular field of view and resolution are known, then an angular size can be calculated for each pixel. This is how the conversion algorithms work.

Note that converting from Depth to World coordinates is relatively expensive computationally. It is generally not practical to convert the entire raw depth map to World coordinates. A better approach is to have your computer vision algorithm work in Depth coordinates for as long as possible, and only converting a few specific points to World coordinates right before output. Note that when converting from Depth to World or vice versa, the Z value remains the same.
参考:
《OpenNI体感应用开发实战》 机械工业出版社
OpenNI 2 VideoStream 與 Device 的設定與使用
使用OpenNI 2获取RGBD摄像头深度信息的更多相关文章
- Kinect 开发 —— 深度信息(二)
转自(并致谢):http://www.cnblogs.com/yangecnu/archive/2012/04/05/KinectSDK_Depth_Image_Processing_Part2.ht ...
- Kinect 开发 —— 深度信息
转自:http://www.cnblogs.com/yangecnu/archive/2012/04/04/KinectSDK_Depth_Image_Processing_Part1.html 深度 ...
- RGB-D(深度图像) & 图像深度
RGB-D(深度图像) 深度图像 = 普通的RGB三通道彩色图像 + Depth Map 在3D计算机图形中,Depth Map(深度图)是包含与视点的场景对象的表面的距离有关的信息的图像或图 ...
- 调用手机在线API获取手机号码归属地信息
手机在线(www.showji.com)始创于2001年,发展至今已拥有国内最准确.号段容量最大的手机号码归属地数据库系统, 目前号段容量将近33万条,每月保持两次以上规模数据更新,合作伙伴包括:百度 ...
- php正则获取html图片标签信息(采集图片)
php获取html图片标签信息(采集图片),实现图片采集及其他功能,带代码如下: <?php $str="<img src='./a.jpg'/>111111<img ...
- asp.net C#获取程序文件相关信息
代码如下 复制代码 using System.Reflection;using System.Runtime.CompilerServices; //// 有关程序集的常规信息是通过下列// 属性集控 ...
- 使用navigator.geolocation来获取用户的地理位置信息
使用navigator.geolocation来获取用户的地理位置信息 W3C 中新添加了一个名为 Geolocation的 API 规范,Geoloaction API的作用就是通过浏览器获取用户的 ...
- .NET获取枚举DescriptionAttribute描述信息性能改进的多种方法
一. DescriptionAttribute的普通使用方式 1.1 使用示例 DescriptionAttribute特性可以用到很多地方,比较常见的就是枚举,通过获取枚举上定义的描述信息在UI上显 ...
- 获取Java系统相关信息
package com.test; import java.util.Properties; import java.util.Map.Entry; import org.junit.Test; pu ...
随机推荐
- Sutherland-Hodgeman多边形裁剪
原文地址:http://course.cug.edu.cn/cugFirst/computer_graphics/class/course/3-3-1-a.htm
- Spring配置中的"classpath:"与"classpath*:"的区别研究
概念解释及使用场景: classpath是指WEB-INF文件夹下的classes目录. 通常我们一般使用这种写法实在web.xml中,比如spring加载bean的上下文时,如下: <!--系 ...
- go语言之进阶篇正则表达式
正则表达式是一种进行模式匹配和文本操纵的复杂而又强大的工具.虽然正则表达式比纯粹的文本匹配效率低,但是它却更灵活.按照它的语法规则,随需构造出的匹配模式就能够从原始文本中筛选出几乎任何你想要得到的字符 ...
- 0mq 入门 (转)
最近做后台发现很多地方需要队列,我用东西一般有两个要求: 1) 够傻够简单. 2) 有源码,能看又能改. 最后相中了0mq,下面介绍如何安装和写个简单的例子.一. linux平台: ...
- css3新增样式介绍
在PC版开发中由于IE原因,我们很少用到css3,但随着平板和智能手机进入我们的生活,以及现在越来越流行,在手机版和平板版开发中我们就可以大胆的使用了,下面我们探讨常用几个css3属性: 1.css3 ...
- JavaScript 移动和触摸框架
jQuery Mobile : 是 jQuery 在手机上和平板设备上的版本号. jQuery Mobile 不仅会给主流移动平台带来jQuery核心库.而且会公布一个完整统一的jQuery移动UI ...
- SqlDateTime 溢出。必须介于 1/1/1753 12:00:00 AM 和 12/31/9999 11:59:59 PM 之间。
出现的错误:SqlDateTime 溢出.必须介于 1/1/1753 12:00:00 AM 和 12/31/9999 11:59:59 PM 之间. 错误的原因:.NET Framework dat ...
- [Algorithm] Reverse a linked list
It helps to understands how recursive calls works. function Node(val) { return { val, next: null }; ...
- [Canvas]碰撞球
观赏动态效果请点此下载并用Chrome/Firefox打开index.html 图例: 代码: <!DOCTYPE html> <html lang="utf-8" ...
- Elasticsearch之集群脑裂
https://www.cnblogs.com/zlslch/p/6477312.html
