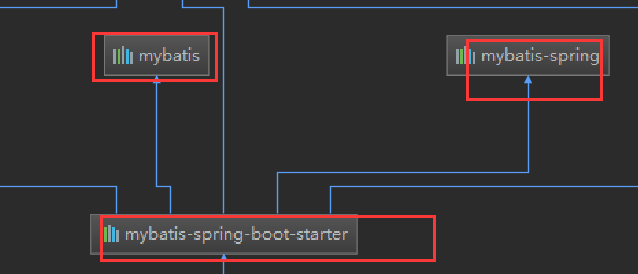
22、整合mybatis
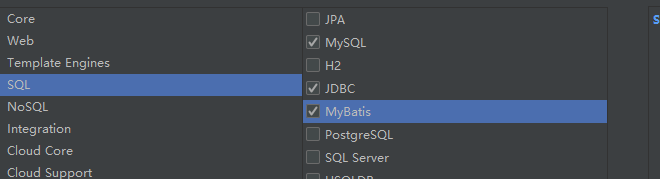
搭建环境:
1)、创建工程需要的maven坐标

<dependency>

    <groupId>com.alibaba</groupId>

    <artifactId>druid</artifactId>

    <version>1.1.</version>

</dependency>
spring.datasource.url=jdbc:mysql://127.0.0.1:3306/users?serverTimezone=GMT

spring.datasource.username=root

spring.datasource.password=

spring.datasource.driver-class-name=com.mysql.cj.jdbc.Driver

spring.datasource.type=com.alibaba.druid.pool.DruidDataSource

#其他配置

# 下面为连接池的补充设置,应用到上面所有数据源中

spring.datasource.initialSize=

spring.datasource.minIdle=

spring.datasource.maxActive=

# 配置获取连接等待超时的时间

spring.datasource.maxWait=

# 配置间隔多久才进行一次检测,检测需要关闭的空闲连接,单位是毫秒

spring.datasource.timeBetweenEvictionRunsMillis=

# 配置一个连接在池中最小生存的时间,单位是毫秒

spring.datasource.minEvictableIdleTimeMillis=

spring.datasource.validationQuery=SELECT  FROM DUAL

spring.datasource.testWhileIdle=true

spring.datasource.testOnBorrow=false

spring.datasource.testOnReturn=false

# 配置监控统计拦截的filters,去掉后监控界面sql无法统计,'wall'用于防火墙

spring.datasource.filters=stat,wall

spring.datasource.logSlowSql=true
4)、Druid的后台监控.......
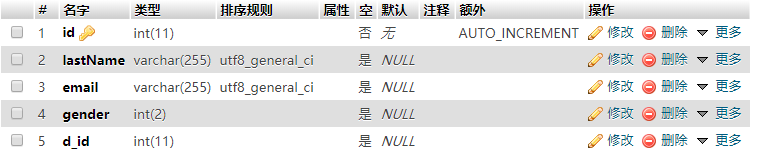
public class Employee {

    private Integer id;

    private String lastName;

    private Integer gender;

    private String email;

    private Integer dId;

...

}
public class Department {

    private Integer id;

    private String departmentName;

....

}

使用MyBatis
@Repository

//指定这是一个操作数据库的mapper

@Mapper

public interface DepartMapper {

    @Select("select * from department where id=#{id}")

    public Department getDeptById(Integer id);

    @Delete("delete from department where id=#{id}")

    public int deleteDeptById(Integer id);

    @Insert("insert into department(departmentName) values(#{departmentName})")

    public int insertDept(Department department);

    @Update("update department set department_name=#{departmentName} where id=#{id}")

    public int updateDept(Department department);

}
注解版本的都是用注解来进行标注,没有配置文件,所有的sql语句都在标签里面
controller类的实现方法:
@ResponseBody
@Controller
public class DeptController {
@Autowired
DepartMapper departMapper; //模拟查询
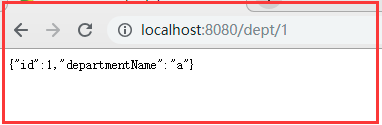
@RequestMapping("/dept/{id}")
public Department getDept(@PathVariable("id")Integer id){
Department dept = departMapper.getDeptById(id);
return dept;
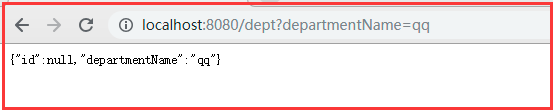
} //模拟插入
@RequestMapping("/dept")
public Department insertDept(Department department){
departMapper.insertDept(department);
return department;
}
}
测试模拟插入:
测试查询:
//使用自动生成的组件

@Options(useGeneratedKeys = true,keyProperty = "id")

@Insert("insert into department(departmentName) values(#{departmentName})")

public int insertDept(Department department);

问题:

此时的数据表列值发生改变
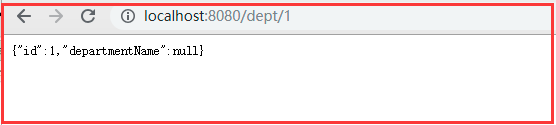
@Select("select * from department where id=#{id}")

public Department getDeptById(Integer id);
此时执行查询department_name是封装不到对象中的

@Bean

@ConditionalOnMissingBean

public SqlSessionFactory sqlSessionFactory(DataSource dataSource) throws Exception {

    SqlSessionFactoryBean factory = new SqlSessionFactoryBean();

    factory.setDataSource(dataSource);

    factory.setVfs(SpringBootVFS.class);

    if (StringUtils.hasText(this.properties.getConfigLocation())) {

        factory.setConfigLocation(this.resourceLoader.getResource(this.properties.getConfigLocation()));

    }

    org.apache.ibatis.session.Configuration configuration = this.properties.getConfiguration();

    if (configuration == null && !StringUtils.hasText(this.properties.getConfigLocation())) {

        configuration = new org.apache.ibatis.session.Configuration();

    }

    if (configuration != null && !CollectionUtils.isEmpty(this.configurationCustomizers)) {

        Iterator var4 = this.configurationCustomizers.iterator();

        while(var4.hasNext()) {

            ConfigurationCustomizer customizer = (ConfigurationCustomizer)var4.next();

            customizer.customize(configuration);

        }

    }

......

}
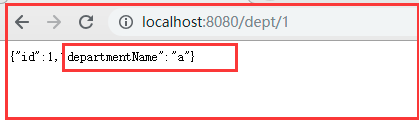
开启驼峰命名
自定义MyBatis的配置规则
@Configuration

public class MyBatisConfig {

    @Bean

    public ConfigurationCustomizer configurationCustomizer(){

        return new ConfigurationCustomizer() {

            @Override

            public void customize(org.apache.ibatis.session.Configuration configuration) {

                //开启驼峰命名发

                configuration.setMapUnderscoreToCamelCase(true);

            }

        };

    }

}
此时可以封装到对象
@MapperScan(value = "com.cr.mybatis.mapper")

@SpringBootApplication

public class MybatisApplication {

    public static void main(String[] args) {

        SpringApplication.run(MybatisApplication.class, args);

    }

}
2)、配置文件的方式
@Repository

public interface EmployeeMapper {

    public Employee getById(Integer id);

    public void insertEmp(Employee employee);

}
mybatis配置文件:
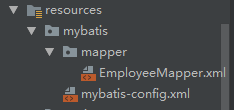
mybatis-config.xml
<?xml version="1.0" encoding="UTF-8" ?>

<!DOCTYPE configuration

        PUBLIC "-//mybatis.org//DTD Config 3.0//EN"

        "http://mybatis.org/dtd/mybatis-3-config.dtd">

<configuration>

    <settings>

        <setting name="mapUnderscoreToCamelCase" value="true"/>

    </settings>

</configuration>
EmployeeMapper.xml
<?xml version="1.0" encoding="UTF-8" ?>

<!DOCTYPE mapper

        PUBLIC "-//mybatis.org//DTD Mapper 3.0//EN"

        "http://mybatis.org/dtd/mybatis-3-mapper.dtd">

<mapper namespace="com.cr.mybatis.mapper.EmployeeMapper">

    <select id="getById"

            resultType="com.cr.mybatis.pojo.Employee">

        SELECT * FROM employee WHERE id=#{id}

    </select>

    <insert id="insertEmp">

        INSERT INTO employee(lastName,email,gender,d_id)

        VALUES (#{lastName},#{email},#{gender},#{dId})

    </insert>

</mapper>
#配置mybatis

#mybatis的配置文件

mybatis.config-location=classpath:mybatis/mybatis-config.xml

#mapper的配置文件

mybatis.mapper-locations=classpath:mybatis/mapper/*.xml
测试的controller类:
@ResponseBody
@Controller
public class EmpTest {
@Autowired
EmployeeMapper employeeMapper; //查询
@RequestMapping("/emp/{id}")
public Employee getEmp(@PathVariable("id") Integer id){
Employee emp = employeeMapper.getById(id);
return emp;
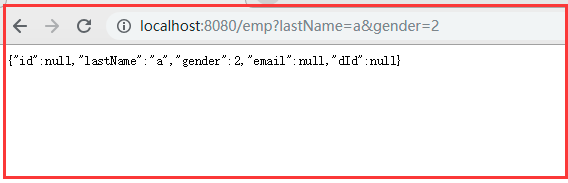
} @RequestMapping("/emp")
public Employee insert(Employee employee){
employeeMapper.insertEmp(employee);
return employee;
}
}
测试:

22、整合mybatis的更多相关文章
- Spring学习总结(六)——Spring整合MyBatis完整示例
为了梳理前面学习的内容<Spring整合MyBatis(Maven+MySQL)一>与<Spring整合MyBatis(Maven+MySQL)二>,做一个完整的示例完成一个简 ...
- 分析下为什么spring 整合mybatis后为啥用不上session缓存
因为一直用spring整合了mybatis,所以很少用到mybatis的session缓存. 习惯是本地缓存自己用map写或者引入第三方的本地缓存框架ehcache,Guava 所以提出来纠结下 实验 ...
- 2017年2月16日 分析下为什么spring 整合mybatis后为啥用不上session缓存
因为一直用spring整合了mybatis,所以很少用到mybatis的session缓存. 习惯是本地缓存自己用map写或者引入第三方的本地缓存框架ehcache,Guava 所以提出来纠结下 实验 ...
- SpringBoot整合Mybatis,多数据源,事务,支持java -jar 启动.
用了一段时间SpringBoot,之前配置MYBATIS ,在打包WAR 放到tomcat下正常,但是WAR已经过时了,现在流行直接打包JAR 丢到DOCKER 里,无奈JAR 启动的时候MAPPER ...
- Spring Boot 整合 Mybatis Annotation 注解的完整 Web 案例
摘要: 原创出处 www.bysocket.com 「泥瓦匠BYSocket 」欢迎转载,保留摘要,谢谢! 『 公司需要人.产品.业务和方向,方向又要人.产品.业务和方向,方向… 循环』 本文提纲一. ...
- 简单探讨spring整合mybatis时sqlSession不需要释放关闭的问题
https://blog.csdn.net/RicardoDing/article/details/79899686 近期,在使用spring和mybatis框架编写代码时,sqlSession不需要 ...
- SpringBoot整合mybatis、shiro、redis实现基于数据库的细粒度动态权限管理系统实例
1.前言 本文主要介绍使用SpringBoot与shiro实现基于数据库的细粒度动态权限管理系统实例. 使用技术:SpringBoot.mybatis.shiro.thymeleaf.pagehelp ...
- SpringBoot31 整合SpringJDBC、整合MyBatis、利用AOP实现多数据源
一.整合SpringJDBC 1 JDBC JDBC(Java Data Base Connectivity,Java 数据库连接)是一种用于执行 SQL 语句的 Java API,可以为多种关系数 ...
- SpringBoot进阶教程 | 第四篇:整合Mybatis实现多数据源
这篇文章主要介绍,通过Spring Boot整合Mybatis后如何实现在一个工程中实现多数据源.同时可实现读写分离. 准备工作 环境: windows jdk 8 maven 3.0 IDEA 创建 ...
- springboot整合mybatis(注解)
springboot整合mybatis(注解) 1.pom.xml: <?xml version="1.0" encoding="UTF-8"?> ...
随机推荐
- CentOS下输入输出重定向
nux重定向是指修改原来默认的一些东西,对原来系统命令的默认执行方式进行改变,比如说简单的我不想看到在显示器的输出而是希望输出到某一文件中就可以通过Linux重定向来进行这项工作. Linux默认输入 ...
- angularjs之UI Grid 的刷新 本地数据源及HTTP数据源
关键代码: 如果数据源是本地数据$("#hidJsonData").val("[]"); var myJsonData = []; if ($(&quo ...
- PLC编程逻辑思路
PLC编程逻辑思路 在整个执行过程的流程中,都是在不断地找启动条件,停止条件以及输出结果.当条件不够时,就得想办法如果添加标志位,根据已有条件去构造条件:当结果开发耦合时,就制造中间继电器去除耦合. ...
- 编写DBCP连接池
#配置数据库数据源package com.itang.utils; import java.io.InputStream; import java.sql.Connection; import jav ...
- express组件学习
一.express 可以做:web application.api... 特性: 适合写简单的路由系统 集成很多模板引擎 中间件系统 二.请求与响应 var express = require('ex ...
- 【转】mouseover和mouseenter的区别
一.当绑定着两个事件的元素里面没有子元素的时候,这两个事件的触发效果是一致的: x=0; y=0; $(document).ready(function(){ $("div.over&quo ...
- 将ReportingService 2008配置为匿名访问 - 转载
众所周知在ReportingService 2008中微软取消了匿名访问,我们再也不能像2005时那样靠修改IIS来实现匿名访问了.但在微软MSDN BLOG中还是提供了以下这种设置匿名访问的方式. ...
- Perl学习笔记(1)----入门
在UNIX/Linux 系统上,打开命令终端,输入 'rpm -q perl' 查看系统是否安装了 perl ---- 在自己的CentOS7 系统上,默认自带了 perl 软件: root@javi ...
- Caffe&Torch&Theano&TensorFlow
https://www.youtube.com/watch?v=Qynt-TxAPOs&index=12&list=PL16j5WbGpaM0_Tj8CRmurZ8Kk1gEBc7fg ...
- hdu 2063 过山车(模板)
题目链接:http://acm.hdu.edu.cn/showproblem.php?pid=2063 过山车 Time Limit: 1000/1000 MS (Java/Others) Me ...