拖拽TreeViewItem到OCX控件
由于C#在性能方面,和C++还是有不少的差距,所以在项目中有一块是用C++的OCX控件实现,然后包括在WPF项目中。由于C++,C#属于不同的体系架构,造成了许多问题,特使是拖拽TreeViewItem到OCX控件上面,两者的渲染方式不同,OCX控件一直显示在最前面,所以拖拽的时候,看不见拖拽的AdornerLayer,并且鼠标还显示禁止状态。下面的内容主要是解决这两个问题的经历:
1.解决拖拽TreeViewItem到OCX控件上面,鼠标是禁止状态。没有显示AdornerLayer,用户考虑到我们使用技术的原因,也还理解,只是这个禁止状态,用户接受不了,所以解决这个问题成为重中之重。
(1)刚刚看到禁止图标,一眼就以为是AllowDrop没有设置为True,然后就把这个控件有这个属性的地方都设置了一遍,结果鼠标拖拽的时候移上去还是禁止状态。
(2)依旧对AllowDrop属性不死心,让同事看OCX控件中有没有对应的属性,最终找到一个AcceptFile,虽然和AllowDrop不太一样,但是活马当死马医,只能要求同事生成ocx控件,给我试一把。最终结果还是不能解决问题。
(3)在没有什么好的想法的时候,依旧对OCX的属性设置还抱有一点希望,到处问同事,搜google,bing,msdn,最终一上午都没有看到有用的信息,只能无奈放弃。
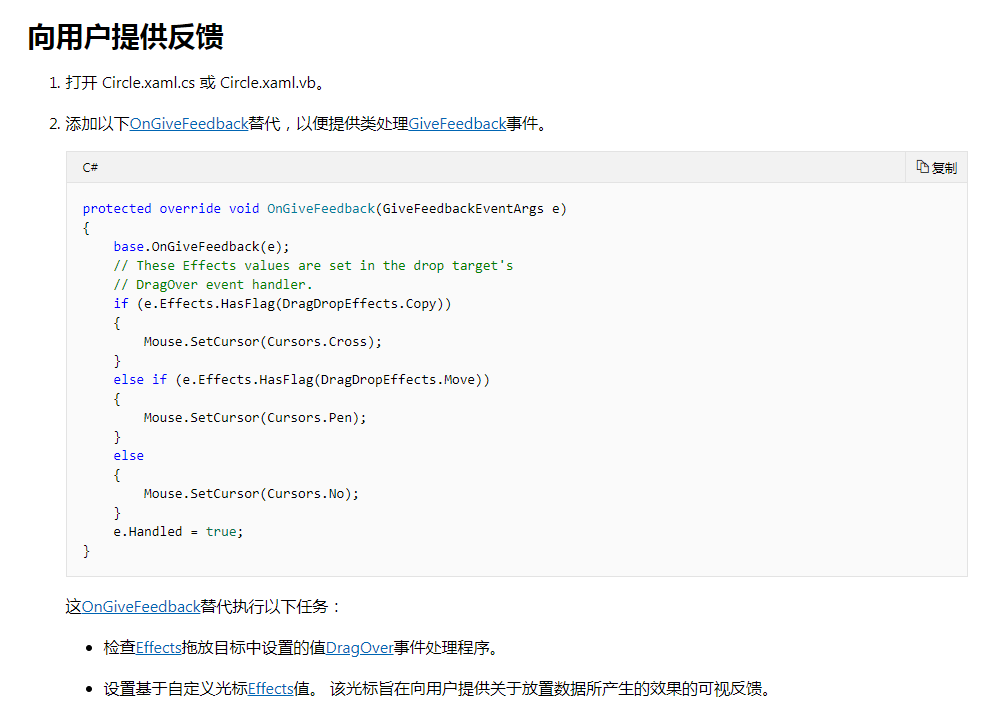
(4)后面也没有什么好的方法,就在博客园,msdn上面提问,具体可以见https://q.cnblogs.com/q/111134/,https://social.msdn.microsoft.com/Forums/zh-CN/02959b72-a46c-4a27-bef5-cf8e246e8977/22312wpf200132530225341treeviewitem21040ocx2551120214200136529240736?forum=wpfzhchs#c8c87cb0-6ed5-492f-9f3e-1c40857db1f1,然后根据msdn上面技术支持给的建议,参考https://docs.microsoft.com/zh-cn/dotnet/framework/wpf/advanced/walkthrough-enabling-drag-and-drop-on-a-user-control中的

在项目中的TreeView中,我也重写了该方法,强制将鼠标设置为箭头,结果启动程序试了一下,拖拽TreeViewItem到OCX控件上面,鼠标还是箭头,不是禁止状态。
 protected override void OnGiveFeedback(GiveFeedbackEventArgs e)

         {

             base.OnGiveFeedback(e);

             Mouse.SetCursor(Cursors.Arrow);

             e.Handled = true;

         }
2.解决拖拽项所在的AdornerLayer,被OCX控件遮挡的问题
由于OCX是通过WindowsFormsHost的方式加到WPF程序中,两者的渲染机制不同,导致OCX控件显示在最前面,WPF中ZIndex也就英雄无用武之地。
(1)考虑到窗口可以显示在OCX的前面,想过在鼠标进入OCX的时候,在鼠标下面添加一个窗口,跟随鼠标移动,这种想法是可行的,但是在OCX控件的Enter和Leave事件中都没有响应到拖拽过程中,鼠标的进入控件,离开控件的事件,导致这个没有向下执行下去。
(2)后面还考虑直接将鼠标式样改成拖拽项的图标,也因此放弃了。
(3)最后在拖拽的过程中,我发现拖拽到OCX控件的e.Effects == DragDropEffects.None,其他的WPF部分,可以直接在窗口上面将AllowDrop属性设置为True就行,因此可以根据这个区分拖拽是在WPF上面还是OCX上面,当在OCX上面的时候修改鼠标的式样。因为TreeViewItem是一张图片和其名称够成,平时设置鼠标式样的时候,是直接将图片设置为鼠标式样,看了一下Cursor里面的属性,没有发现可以设置文字的地方,只能先将字符串转化为图片,再将两张图片合并在一起。其中关键的代码如下所示:
 using System;

 using System.Drawing;

 using System.Runtime.InteropServices;

 using System.Windows.Input;

 using System.Windows.Interop;

 namespace ViewModels

 {

     public static class CursorHelper

     {

         public static Cursor CreateBitmapCursor(string filePath)

         {

             Bitmap bmp = null;

             try

             {

                 bmp = Bitmap.FromFile(filePath) as Bitmap;

                 if (bmp != null)

                 {

                     return BitmapCursor.CreateBmpCursor(bmp);

                 }

                 return Cursors.Arrow;

             }

             catch (Exception)

             {

                 return Cursors.Arrow;

             }

         }

         public static Cursor CreateBitmapCursor(string filePath, string name)

         {

             Bitmap bmp = null;

             try

             {

                 bmp = Bitmap.FromFile(filePath) as Bitmap;

                 if (bmp != null)

                 {

                     var nameBmp = StringToImg(name);

                     var mergeBmp = CombinImage(bmp, nameBmp);

                     if (mergeBmp != null)

                     {

                         return BitmapCursor.CreateBmpCursor(mergeBmp);

                     }

                 }

                 return Cursors.Arrow;

             }

             catch (Exception)

             {

                 return Cursors.Arrow;

             }

         }

         public static Bitmap StringToImg(string name)

         {

             Graphics g = Graphics.FromImage(new Bitmap(, ));

             Font font = new Font("宋体", );

             SizeF sizeF = g.MeasureString(name, font); //测量出字体的高度和宽度

             Brush brush = Brushes.White;

             PointF pf = new PointF(, );

             Bitmap img = new Bitmap(Convert.ToInt32(sizeF.Width), Convert.ToInt32(sizeF.Height));

             g = Graphics.FromImage(img);

             g.DrawString(name, font, brush, pf);

             return img;

         }

         public static Bitmap CombinImage(Image icoImg, Image stringImg)

         {

             int height = Math.Max(icoImg.Height, stringImg.Height);

             Bitmap bmp = new Bitmap(icoImg.Width + stringImg.Width + , height);

             Graphics g = Graphics.FromImage(bmp);

             g.Clear(Color.FromArgb(, , ));

             g.DrawImage(icoImg, , (height - icoImg.Height) / , icoImg.Width, icoImg.Height);

             g.DrawImage(stringImg, icoImg.Width + , (height - stringImg.Height) / , stringImg.Width, stringImg.Height);

             return bmp;

         }

         public static Cursor GetCursor(FASTreeViewItemViewModel data)

         {

             if (data.NodeType == NodeType.Camera)

             {

                 if (data.DeviceType == DeviceType.Normal)

                 {

                     if (data.State == TreeItemState.OnLine)

                     {

                         return CreateBitmapCursor(string.Format(@"{0}Device_IPC_on.png", AppViewModel.Instance.BaseDirectory), data.DisplayName);

                     }

                     else if (data.State == TreeItemState.OffLine)

                     {

                         return CreateBitmapCursor(string.Format(@"{0}Device_IPC_off.png", AppViewModel.Instance.BaseDirectory), data.DisplayName);

                     }

                 }

                 else if (data.DeviceType == DeviceType.PTZ)

                 {

                     if (data.State == TreeItemState.OnLine)

                     {

                         return CreateBitmapCursor(string.Format(@"{0}Device_ptzIPC_on.png", AppViewModel.Instance.BaseDirectory), data.DisplayName);

                     }

                     else if (data.State == TreeItemState.OffLine)

                     {

                         return CreateBitmapCursor(string.Format(@"{0}Device_ptzIPC_off.png", AppViewModel.Instance.BaseDirectory), data.DisplayName);

                     }

                 }

             }

             else if (data.NodeType == NodeType.PollingGroup)

             {

                 if (data.State == TreeItemState.Normal)

                 {

                     return CreateBitmapCursor(string.Format(@"{0}Device_patrol.png", AppViewModel.Instance.BaseDirectory), data.DisplayName);

                 }

                 else if (data.State == TreeItemState.Running)

                 {

                     return CreateBitmapCursor(string.Format(@"{0}Device_patrol_play.png", AppViewModel.Instance.BaseDirectory), data.DisplayName);

                 }

             }

             return Cursors.Arrow;

         }

     }

     internal class BitmapCursor : SafeHandle

     {

         public override bool IsInvalid

         {

             get

             {

                 return handle == (IntPtr)(-);

             }

         }

         public static Cursor CreateBmpCursor(Bitmap cursorBitmap)

         {

             BitmapCursor c = new BitmapCursor(cursorBitmap);

             return CursorInteropHelper.Create(c);

         }

         protected BitmapCursor(Bitmap cursorBitmap)

             : base((IntPtr)(-), true)

         {

             handle = cursorBitmap.GetHicon();

         }

         protected override bool ReleaseHandle()

         {

             bool result = DestroyIcon(handle);

             handle = (IntPtr)(-);

             return result;

         }

         [DllImport("user32")]

         private static extern bool DestroyIcon(IntPtr hIcon);

     }

 }
 protected override void OnGiveFeedback(GiveFeedbackEventArgs e)

         {

             base.OnGiveFeedback(e);

             if (e.Effects.HasFlag(DragDropEffects.Move))

             {

                 Mouse.SetCursor(Cursors.Arrow);

             }

             else

             {

                 var dataItem = this.SelectedItem as TreeViewItemViewModelBase;

                 if (dataItem != null)

                 {

                     Mouse.SetCursor(dataItem.GetCurrentCursor());

                 }

             }

             e.Handled = true;

         }
通过这两种方式,就解决上述的两个问题,可以满足项目的要求。
拖拽TreeViewItem到OCX控件的更多相关文章
- C#中引用第三方ocx控件引发的问题以及解决办法
调用OCX控件的步骤:1.在系统中注册该ocx控件,命令:regsvr32.exe 控件位置(加 /u 参数是取消注册)2.在.net的工具箱中添加该控件,拖到form中去就可以了. 不用工具箱的话, ...
- C#调用OCX控件的常用方法[转]
小伙伴们在使用ICP提供的各种能力进行集成开发时常常会遇到一些技术上的困扰,例如ICP中很多接口是通过OCX控件的方式提供的,如何调用这些接口,就成了一个不大不小的问题,毕竟开发指南上可没这些内容啊~ ...
- C#调用第三方ocx控件 (winform /aspx)
C#调用第三方ocx控件 1..net环境在工具箱上点右键,选择自定义工具箱,然后选择你需要的COM或者OCX控件就可以了. 2.在自定义工具箱中加入相应的控件,设置id,在客户端脚本中直接引用它 ...
- #include <objsafe.h>//OCX控件在IE8浏览器下不能使用问题
一.OCX控件开发常见的问题 1.OCX控件在IE8浏览器下不能使用问题 原因:IE8会拦截OCX控件的方法. 解决方法:在OCX控件开发时加入安全接口. (1)在有"Crtl"字 ...
- VC++注册,卸载OCX控件,以及判断是否注册
注册OCX控件 BOOL CYourClass::RegistOcx() { HINSTANCE hLib = LoadLibrary("NTGraph.ocx"); / ...
- [转]C#开发ActiveX控件,.NET开发OCX控件案例
引自:百度 http://hi.baidu.com/yanzuoguang/blog/item/fe11974edf52873aaec3ab42.html 讲下什么是ActiveX控件,到底有什么 ...
- VC2005从开发MFC ActiveX ocx控件到发布到.net网站的全部过程
开篇语:最近在弄ocx控件发布到asp.net网站上使用,就是用户在使用过程中,自动下载安装ocx控件.(此文章也是总结了网上好多人写的文章,我只是汇总一下,加上部分自己的东西,在这里感谢所有在网 ...
- 帮同事写了几行代码,在 安装/卸载 程序里 注册/卸载 OCX控件
写了个小控制台程序,这个程序用来注册 / 卸载OCX控件,用在Inno Setup做的安装卸载程序里. #include "stdafx.h" #include <windo ...
- 在Web上调用Ocx控件
原文:http://blog.csdn.net/goodadult2012/article/details/6343369 在HTML页面中使用ActiveX控件包含三个基本操作:将控件放入HTML中 ...
随机推荐
- Mockito学习1
Mockito学习1 junitmaven软件测试框架项目管理 Mockito是一个流行的Mocking框架.它使用起来简单,学习成本很低,而且具有非常简洁的API,测试代码的可读性很高.因此它十分 ...
- SpringBoot定制修改Servlet容器
1.如何修改Servlet容器的相关配置: 第一种:在application.properties中修改和server有关的配置(ServerProperties提供): server.port=80 ...
- JavaScript函数和内置对象
一.函数 function f1(){ console.log("666"); } f1(); //调用函数 1.普通函数定义 function f1(a,b){ console. ...
- oracle count 大表
刚从生产环境导了一个大表到测试环境,迫不及待的要好好玩弄一下. 1.coun(1) ) from table_name; 条数: 567979280 时间:4:47 2.count 索引字段 sele ...
- oracle 监视索引是否使用
公司的大数据产品已经升级了四个版本了,最新版本的数据计算,大部分从oracle迁移到hadoop中了. 但是也有客户使用旧版的系统,不过,不去管它.只说我管理的. 在我接过这个数据库管理的时候,发现有 ...
- 2018.12.31 NOIP训练 czy的后宫5(树形dp)
传送门 题意:给一棵有根树,树有点权,最多选出mmm个点,如果要选一个点必须先选其祖先,问选出来的点权和最大值是多少. 直接背包转移就行了. 代码
- 2018.11.01 bzoj4872: [Shoi2017]分手是祝愿(期望dp)
传送门 一道不错的题. 考虑n==kn==kn==k的时候怎么做. 显然应该从nnn到111如果灯是开着的就把它关掉这样是最优的. 不然如果乱关的话会互相影响肯定不如这种优. 于是就可以定义状态f[i ...
- msyql 主从配置
vim /etc/mysql/my.cnf; # 以下部分一定要配置在[mysqld]后面 [mysqld] log-bin=mysql-bin server-id= //设置数据库服务器唯一ID,这 ...
- ubuntu开启root登陆
1.安装openssh-server 在终端中输入: sudo apt-get install openssh-server 2.启动 service ssh start 3.查看查看ssh服务是否启 ...
- idea在相应的包下右键创建servlet,找不到servlet选项
开始pom.xml文件里面我是只引进了个servlet包,但是右键依旧没有servlet选项 <dependency> <groupId>javax.servlet</g ...
