10慕课网《进击Node.js基础(一)》初识promise
首先用最简单的方式实现一个动画效果
<!doctype>

<html>

<head>

<title>Promise animation</title>

<style type="text/css">

    .ball {

        width: 40px;

        height: 40px;

        border-radius: 20px;

    }

    .ball1 {

        background: red;

    }

    .ball2 {

        background: yellow;

    }

    .ball3 {

        background: green;

    }

</style>

</head>

<body>

    <div class="ball ball1" style="margin-left: 0"></div>

    <div class="ball ball2" style="margin-left: 0"></div>

    <div class="ball ball3" style="margin-left: 0"></div>

    <script type="text/javascript">

        //定义三个球

        var ball1 = document.querySelector('.ball1')

        var ball2 = document.querySelector('.ball2')

        var ball3 = document.querySelector('.ball3')

        //球,移动距离,回调函数

        function animate(ball, distance, cd){

            //每13毫秒改变一次圆球的位置,直到到达指定位置

            setTimeout(function(){

                var marginLeft = parseInt(ball.style.marginLeft,10)

                //球达到预期位置

                if(marginLeft === distance){

                    cd && cd()

                }else{

                    //球在左侧

                    if(marginLeft < distance){

                        marginLeft++

                    }else{

                        //球在右侧

                        marginLeft--

                    }

                    //调整球的位置

                    ball.style.marginLeft = marginLeft

                    animate(ball, distance, cd)

                }

            },13)

        }

        //控制动画

        animate(ball1, 100,function(){

            animate(ball2, 200, function(){

                animate(ball3, 150, function(){

                    animate(ball2, 150, function(){

                        animate(ball1, 150, function(){

                        })

                    })

                })

            })

        })

    </script>

</body>

</html>
使用promise实现相同功能
<!doctype>

<html>

<head>

<title>Promise animation</title>

<style type="text/css">

    .ball {

        width: 40px;

        height: 40px;

        border-radius: 20px;

    }

    .ball1 {

        background: red;

    }

    .ball2 {

        background: yellow;

    }

    .ball3 {

        background: green;

    }

</style>

<script src="./node_modules/bluebird/js/browser/bluebird.js" type="text/javascript"></script>

</head>

<body>

    <div class="ball ball1" style="margin-left: 0"></div>

    <div class="ball ball2" style="margin-left: 0"></div>

    <div class="ball ball3" style="margin-left: 0"></div>

    <script type="text/javascript">

        //定义三个球

        var ball1 = document.querySelector('.ball1')

        var ball2 = document.querySelector('.ball2')

        var ball3 = document.querySelector('.ball3')

        var Promise = window.Promise

        function promiseAnimate(ball, distance){

            return new Promise(function(resolve, reject){

                //球,移动距离,回调函数

                function _animate(){

                    //每13毫秒改变一次圆球的位置,直到到达指定位置

                    setTimeout(function(){

                        var marginLeft = parseInt(ball.style.marginLeft,10)

                        //球达到预期位置

                        if(marginLeft === distance){

                            resolve()

                        }else{

                            //球在左侧

                            if(marginLeft < distance){

                                marginLeft++

                            }else{

                                //球在右侧

                                marginLeft--

                            }

                            //调整球的位置

                            ball.style.marginLeft = marginLeft + 'px'

                            _animate()

                        }

                    },13)

                }

                _animate()

            })

        }

        promiseAnimate(ball1, 100)

            .then(function(){

                return promiseAnimate(ball2, 200)

            })

            .then(function(){

                return promiseAnimate(ball3, 150)

            })

            .then(function(){

                return promiseAnimate(ball2, 150)

            })

            .then(function(){

                return promiseAnimate(ball1, 150)

            })

    </script>

</body>

</html>
promise对象三种状态:
- -未完成(pending)
- -已完成(fulfiled)
- -失败(rejected)
promiseA与promiseA+不同点:
- -A+规范通过属于thenable来区分promise对象
- -A+定义onFulfilled/onRejected必须是作为函数来调用,而且调用过程必须是异步的
- -A+严格定义了then方法链式调用时onFulfilled/onRejected的调用顺序
promise then 方法
将异步执行的回调函数放入then方法中,规范链式书写
promiseObj.then(onFunction, onRejected)

onFulfilled = function(value){

  return promiseObj2

}

onRejected = function(err){}
promise库有很多
- bluebird
- Q
- then.js
- es6-promise
- ypromise
- async
- native-promise-only
使用promise重写爬虫
对比:07慕课网《进击Node.js基础(一)》HTTP小爬虫
var http = require('http')

var Promise = require('bluebird')

var cheerio =  require('cheerio') //使用模块

var baseUrl = 'http://www.imooc.com/learn/'

var videoIds = [728,637,348]

function filterChapters(html){

    //可以像jQuery一样使用

    var $ = cheerio.load(html)

    var chapters = $('.chapter')

    var title = $('.clearfix h2').text()

    var number = $('.js-learn-num').text()

    // courseData = {

    //         title : title,

    //         number : 0,

    //         videos : [{

    //             chapterTitle:'',

    //             videos:[{

    //             title:'',

    //             id:''

    //         }]

    //     }

    var courseData = {

        title : title,

        number : number,

        videos : []

    }

    chapters.each(function(item){

        var chapter = $(this)

        var chapterTitle = chapter.find('h3').text()

        var videos = chapter.find('.video').children('li')

        var chapterData = {

            chapterTitle :chapterTitle.trim(),

            videos:[]

        }

        videos.each(function(item){

            var video = $(this).find('a')

            var videoTile = video.text()

            var id = video.attr('href').split('video/')[1]

            chapterData.videos.push({

                title: videoTile.trim(),

                id : id

            })

        })

        courseData.videos.push(chapterData)

    })

    return courseData

}

function printCourseInfo(coursesData){

    coursesData.forEach(function(courseData){

        console.log(courseData.number + ' 人学过 ' + courseData.title + '\n')

    })

    coursesData.forEach(function(courseData){

        console.log('###' + courseData.title + '\n')

        courseData.videos.forEach(function(item){

            var chapterTitle = item.chapterTitle

            item.videos.forEach(function(video){

                console.log(' 【' + video.id + '】' + video.title + '\n')

            })

        })

    })

}

function getPageAsync(url){

    return new Promise(function(resolve,reject){

        console.log('正则爬取'+ url)

        http.get(url,function(res){

            var html = ''

            res.on('data',function(data){

                html += data

            })

            res.on('end',function(){

                resolve(html)

                //var courseData = filterChapters(html)

                //printCourseInfo(courseData)

            })

        }).on('errer',function(e){

            reject(e)

            //console.log('出错')

        })

    })

}

var fetchCourseArray = []

videoIds.forEach(function(id){

    fetchCourseArray.push(getPageAsync(baseUrl + id))

})

Promise

    .all(fetchCourseArray)

    .then(function(pages){

        //对多个数据处理

        var coursesData = []

        pages.forEach(function(html){

            var curses = filterChapters(html)

            coursesData.push(curses)

        })

        coursesData.sort(function(a,b){

            return a.number < b.number

        })

        printCourseInfo(coursesData)

    })
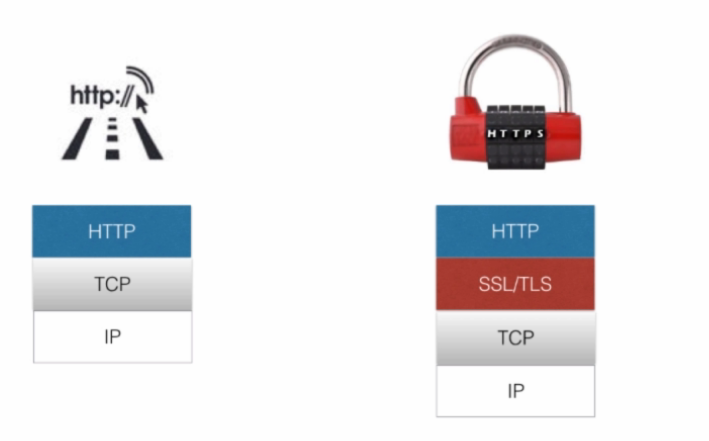
HTTP和HTTPS
HTTPS在http的基础上进行了加密
运行HTTPS服务,.pem文件还需要另外的方式创建
var https = require('https')

var fs = require('fs')

var options = {

    key: fs.readFileSync('ssh_key.pem'),//ssl 文件

    key: fs.readFileSync('ssh_cert.pem'),//证书文件

}

//运行HTTPS服务器

https.createServer(options, function(req,res){

    res.writeHead(200)

    res.end('hello world'+ req)

}).listen(8090)
10慕课网《进击Node.js基础(一)》初识promise的更多相关文章
- 01慕课网《进击Node.js基础(一)》Node.js安装,创建例子
版本:偶数位为稳定版本,基数为非稳定版本 - 0.6.x - 0.7.x - 0.8.x -0.9.x -0.10.x -0.11.x 概念:Node.js采用谷歌浏览器的V8引擎,用C ...
- 03慕课网《进击Node.js基础(一)》API-URL网址解析
url url.parse(url,query,host);解析域名 url必须,地址字符串 query可选 host 可选:在不清楚协议时正确解析 querystring 字符串和对象之间互相解析 ...
- 07慕课网《进击Node.js基础(一)》HTTP小爬虫
获取HTML页面 var http = require('http') var url='http://www.imooc.com/learn/348' http.get(url,function(r ...
- 进击Node.js基础(二)
一.一个牛逼闪闪的知识点Promise npm install bluebird 二.Promise实例 ball.html <!doctype> <!DOCTYPE html> ...
- 02慕课网《进击Node.js基础(一)》——CommonJs标准
是一套规范管理模块 每个js 为一个模块,多个模块作为一个包 node.js和Couchdb是对其的实现: 不同于jQuery 模块:定义.标识.引用(地址/模块名称) 模块类型: 核心模块http ...
- 进击Node.js基础(一)
一.前言 1:Node.js本质上是用chrome浏览器 v8引擎 使用c++编写的JS运行环境 2:相比于JS没有浏览器安全级的限制,额外提供了一些系统级的API:文件读写,进程管理,网络通信等. ...
- 11慕课网《进击Node.js基础(一)》Buffer和Stream
Buffer 用来保存原始数据 (logo.png) 以下代码读取logo.png为buffer类型 然后将buffer转化为string,新建png 可以将字符串配置: data:image/png ...
- 09慕课网《进击Node.js基础(一)》HTTP-get/request
get是对request封装 可以在后台发起http请求,获取远程资源,更新或者同步远程资源 http.request(options[,callback]) 以下代码灌水失败: var http = ...
- 08慕课网《进击Node.js基础(一)》事件events
引用events模块中的EventEmitter 事件的监听和发射 相同的事件发射数量有限,可以通过setMaxListeners设置峰值 var EventEmitter = require('ev ...
随机推荐
- 关于MVC开发时,无法找到area的问题记录
解决方法: 检查area=admin 的dll是否生成,一般都是admin域生成dll导致
- rpm -qa 查找文件
系统环境:centos6.6 yum install 安装的文件找不到安装路径,使用whereis和find -name都无效 rpm -qa | grep -i 关键字 查找 rpm -ql fi ...
- 简单的表格json控件
简单的表格json控件 由于最近做的项目一直有表格的形式展示数据,所以想写个简单的关于表格方面的控件出来,想用JSON数据直接渲染出来,因为开发给到我们前端的字段可能会叫不同的名字,所以我们前端渲染页 ...
- DB2创建function(一)
案例一:根据传入的值返回一个满足条件的值.适用于查询的字段(经过较复杂逻辑得出) CREATE FUNCTION "FAS"."GET_ALL_NAME" ( ...
- allegro中Autosilk top, Silkscreen top 和Assembly top三个什么区别(转)
allegro中Autosilk top, Silkscreen top 和Assembly top三个什么区别(转) Autosilk top, Silkscreen top 和Assembly t ...
- WCF来传递DataTable的Bug
Wcf,客户端与服务器之间在传递DataTable(由于数据库字段不确定暂时用DataTable而不是用实体对象传递)时,发现有的DataTable可以直接传递没有问题 解决方案: DataTable ...
- 20155238 实验四 Android程序设计
Android 安装Android Studio 按照教程依次完成安装步骤.安装所存的相应文件夹必须纯英文,不能出现特殊字符. 32位系统和64位系统是同一个安装文件.启动程序中32位与64位都有.根 ...
- 20155325 Exp2 后门原理与实践
基础问答 例举你能想到的一个后门进入到你系统中的可能方式? 乱点链接 学电脑小白不正确配置电脑 下载非官网软件 例举你知道的后门如何启动起来(win及linux)的方式? 软件:ncat socat ...
- VS编程,WPF单独更改TextBlock中部分文字格式的一种方法
原文:VS编程,WPF单独更改TextBlock中部分文字格式的一种方法 版权声明:我不生产代码,我只是代码的搬运工. https://blog.csdn.net/qq_43307934/articl ...
- Android开发——为EditText添加烟花效果的实现
)什么时候发射烟花:监听EditText的文字改变,获取文字数量的变化以确定风的方向,还有获取光标的位置确定爆炸的位置.光标的位置没有具体的方法确定坐标,要通过反射自己计算. 2. 主要实现类 库里 ...