Android实例-使用自定义字体文件(XE8+小米2)
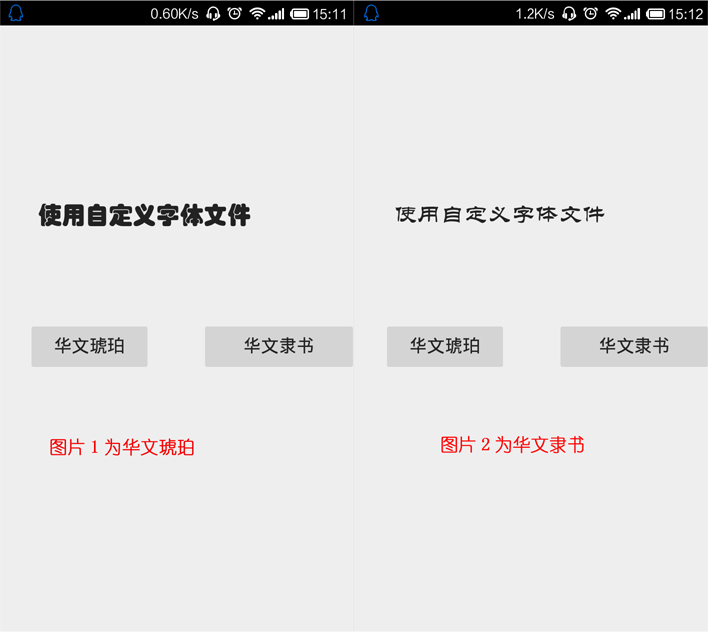
结果:
1.需要修改DELPHI自身的FMX.FontGlyphs.Android.pas,复制到程序的根目录下(红色部分为修改过的)。
2.字体文件从 C:\Windows\Fonts 直接拷贝到APP程序根目录后改名增加到Deployment即可,要什么字体,就拷贝什么字体。
3.注意字体文件的大小写。
修改后的FMX.FontGlyphs.Android.pas
 {*******************************************************}

 {                                                       }

 {             Delphi FireMonkey Platform                }

 {Copyright(c) 2013-2015 Embarcadero Technologies, Inc.}

 {                                                       }

 {*******************************************************}

 unit FMX.FontGlyphs.Android;

 interface

 {$SCOPEDENUMS ON}

 uses

   FMX.FontGlyphs, Androidapi.JNI.GraphicsContentViewText;

 type

   TAndroidFontGlyphManager = class(TFontGlyphManager)

   private

     FPaint: JPaint;

     //Current metrics

     FTop: Integer;

     FAscent: Integer;

     FDescent: Integer;

     FBottom: Integer;

     FLeading: Integer;

   protected

     procedure LoadResource; override;

     procedure FreeResource; override;

     function DoGetGlyph(const Char: UCS4Char; const Settings: TFontGlyphSettings): TFontGlyph; override;

     function DoGetBaseline: Single; override;

   public

     constructor Create;

     destructor Destroy; override;

   end;

 implementation

 uses

   System.Types, System.Math, System.Character, System.Generics.Collections, System.UIConsts, System.UITypes,

   System.Classes, System.SysUtils, FMX.Types, FMX.Surfaces, FMX.Graphics, Androidapi.JNI.JavaTypes, Androidapi.Bitmap,

   Androidapi.JNIBridge, Androidapi.Helpers,

   System.IOUtils;//引入System.IOUtils是为了能够获取Android的各种系统目录

 { TAndroidFontGlyphManager }

 constructor TAndroidFontGlyphManager.Create;

 begin

   inherited Create;

   FPaint := TJPaint.Create;

 end;

 destructor TAndroidFontGlyphManager.Destroy;

 begin

   FPaint := nil;

   inherited;

 end;

 procedure TAndroidFontGlyphManager.LoadResource;

 const

   BoldAndItalic = [TFontStyle.fsBold, TFontStyle.fsItalic];

 var

   TypefaceFlag: Integer;

   Typeface: JTypeface;

   FamilyName: JString;

   Metrics: JPaint_FontMetricsInt;

   sFontFile: string;//修改加入的

 begin

   FPaint.setAntiAlias(True);

   FPaint.setTextSize(CurrentSettings.Size * CurrentSettings.Scale);

   FPaint.setARGB(, , , );

   if TOSVersion.Check(, ) then

     FPaint.setHinting(TJPaint.JavaClass.HINTING_ON);

   //Font

   try

     FamilyName := StringToJString(CurrentSettings.Family);

     if (BoldAndItalic * CurrentSettings.Style) = BoldAndItalic then

       TypefaceFlag := TJTypeface.JavaClass.BOLD_ITALIC

     else

       if TFontStyle.fsBold in CurrentSettings.Style then

         TypefaceFlag := TJTypeface.JavaClass.BOLD

       else

         if TFontStyle.fsItalic in CurrentSettings.Style then

           TypefaceFlag := TJTypeface.JavaClass.ITALIC

         else

           TypefaceFlag := TJTypeface.JavaClass.NORMAL;

     { Fix Begin 修改开始.如果在下载目录中存在跟字体同名的.ttf 文件,那么优先使用 ttf 文件.

     我是放在 SD 卡的下载目录中.大家可以按需要任意改这个位置.

     甚至也可以放在 Asset 目录中,这样可以打包在 APK 中.}

     sFontFile := TPath.GetSharedDownloadsPath + PathDelim + CurrentSettings.Family + '.TTF';

     if FileExists(sFontFile) then

       Typeface := TJTypeface.JavaClass.createFromFile(StringToJString(sFontFile))

     else

     begin

       sFontFile := TPath.GetSharedDownloadsPath + PathDelim + CurrentSettings.Family + '.ttf';

       if FileExists(sFontFile) then

         Typeface := TJTypeface.JavaClass.createFromFile(StringToJString(sFontFile))

       else

         Typeface := TJTypeface.JavaClass.Create(FamilyName, TypefaceFlag);

     end;

     { Fix End 修改结束 }

     FPaint.setTypeface(Typeface);

     try

       Metrics := FPaint.getFontMetricsInt;

       //

       FTop := Metrics.top;

       FAscent := Metrics.ascent;

       FDescent := Metrics.descent;

       FBottom := Metrics.bottom;

       FLeading := Metrics.leading;

     finally

       Metrics := nil;

     end;

   finally

     FamilyName := nil;

     Typeface := nil;

   end;

 end;

 procedure TAndroidFontGlyphManager.FreeResource;

 begin

   if FPaint <> nil then

     FPaint.reset;

 end;

 function TAndroidFontGlyphManager.DoGetBaseline: Single;

 begin

   Result := Abs(FAscent);

 end;

 function TAndroidFontGlyphManager.DoGetGlyph(const Char: UCS4Char; const Settings: TFontGlyphSettings): TFontGlyph;

 var

   Text: JString;

   Bitmap: JBitmap;

   Canvas: JCanvas;

   GlyphRect: TRect;

   C, I, J, Width, Height, OriginY: Integer;

   Advance: Single;

   Bounds: JRect;

   GlyphStyle: TFontGlyphStyles;

   PixelBuffer: Pointer;

   Data: PIntegerArray;

   Path: JPath;

   PathMeasure: JPathMeasure;

   PathLength: Single;

   Coords: TJavaArray<Single>;

   StartPoint, LastPoint, Point: TPointF;

   NewContour, HasStartPoint: Boolean;

 begin

   Text := StringToJString(System.Char.ConvertFromUtf32(Char));

   try

     Advance := FPaint.measureText(Text);

     Height := Abs(FTop) + Abs(FBottom) + ;

     Width := Ceil(Abs(Advance)) + ;

     Bounds := TJRect.Create;

     try

       FPaint.getTextBounds(Text, , Text.length, Bounds);

       if Bounds.left <  then

         Width := Width - Bounds.left;

       Bitmap := TJBitmap.JavaClass.createBitmap(Width, Height, TJBitmap_Config.JavaClass.ARGB_);

       try

         Canvas := TJCanvas.JavaClass.init(Bitmap);

         try

           if Bounds.left <  then

             Canvas.drawText(Text, -Bounds.left, -FAscent, FPaint)

           else

             Canvas.drawText(Text, , -FAscent, FPaint);

         finally

           Canvas := nil;

         end;

         GlyphStyle := [];

         if ((FAscent = ) and (FDescent = )) or not HasGlyph(Char) then

           GlyphStyle := [TFontGlyphStyle.NoGlyph];

         if TFontGlyphSetting.Path in Settings then

           GlyphStyle := GlyphStyle + [TFontGlyphStyle.HasPath];

         // For some font sizes Ascent line is below Bounds.top, cuting off part of a glyph.

         // Do not use Y-value of the origin point in such cases.

         if FAscent > Bounds.top then

           OriginY :=

         else

           OriginY := Abs(FAscent - Bounds.top);

         Result := TFontGlyph.Create(TPoint.Create(Bounds.left, OriginY), Advance,

           Abs(FAscent) + Abs(FDescent) + Abs(FLeading), GlyphStyle);

         if (TFontGlyphSetting.Bitmap in Settings) and (HasGlyph(Char) or ((FAscent <> ) or (FDescent <> ))) and

            (AndroidBitmap_lockPixels(TJNIResolver.GetJNIEnv, (Bitmap as ILocalObject).GetObjectID, @PixelBuffer) = ) then

         begin

           Data := PIntegerArray(PixelBuffer);

           GlyphRect.Left := Bounds.left;

           GlyphRect.Right := Bounds.Right;

           GlyphRect.Top := OriginY;

           GlyphRect.Bottom := Abs(FAscent - Bounds.bottom);

           if (GlyphRect.Width > ) or (GlyphRect.Height > ) then

           begin

             Result.Bitmap.SetSize(GlyphRect.Width + , GlyphRect.Height + , TPixelFormat.BGRA);

             if TFontGlyphSetting.PremultipliedAlpha in Settings then

             begin

               for I := GlyphRect.Top to GlyphRect.Bottom do

                 Move(Data[I * Width + Max(GlyphRect.Left, )],

                   Result.Bitmap.GetPixelAddr(, I - GlyphRect.Top)^, Result.Bitmap.Pitch);

             end

             else

               for I := GlyphRect.Top to GlyphRect.Bottom -  do

                 for J := GlyphRect.Left to GlyphRect.Right -  do

                 begin

                   C := Data[I * Width + J];

                   if C <>  then

                   begin

                     C := ((C shr ) and $FF + (C shr ) and $FF + (C and $FF)) div ;

                     Result.Bitmap.Pixels[J - GlyphRect.Left, I - GlyphRect.Top] := MakeColor($FF, $FF, $FF, C);

                   end

                 end;

           end;

           AndroidBitmap_unlockPixels(TJNIResolver.GetJNIEnv, (Bitmap as ILocalObject).GetObjectID);

         end;

         //Path

         if TFontGlyphSetting.Path in Settings then

         try

           Path := TJPath.Create;

           FPaint.getTextPath(Text, , Text.length, Result.Origin.X, Result.Origin.Y, Path);

           PathMeasure := TJPathMeasure.Create;

           PathMeasure.setPath(Path, False);

           Coords := TJavaArray<Single>.Create();

           if PathMeasure.getLength >  then

           repeat

             PathLength := PathMeasure.getLength;

             NewContour := True;

             HasStartPoint := False;

             I := ;

             while I < PathLength do

             begin

               if PathMeasure.getPosTan(I, Coords, nil) then

               begin

                 Point := PointF(Coords[], Coords[]);

                 if NewContour then

                 begin

                   Result.Path.MoveTo(Point);

                   NewContour := False;

                   HasStartPoint := False;

                 end

                 else

                   if Point <> LastPoint then

                   begin

                     if HasStartPoint and (LastPoint <> StartPoint) then

                       if not SameValue(((Point.Y - StartPoint.Y) / (Point.X - StartPoint.X)), ((Point.Y - LastPoint.Y) / (Point.X - LastPoint.X)), Epsilon) then

                       begin

                         Result.Path.LineTo(Point);

                         HasStartPoint := False;

                       end

                       else

                     else

                       Result.Path.LineTo(Point);

                   end;

                 LastPoint := Point;

                 if not HasStartPoint then

                 begin

                   StartPoint := Point;

                   HasStartPoint := True;

                 end;

               end;

               Inc(I);

             end;

             if Result.Path.Count >  then

               Result.Path.ClosePath;

           until not PathMeasure.nextContour;

           Point := Result.Path.GetBounds.TopLeft;

           Result.Path.Translate(-Point.X + Result.Origin.X, -Point.Y + Result.Origin.Y);

         finally

           FreeAndNil(Coords);

           Path := nil;

           PathMeasure := nil;

         end;

       finally

         Bitmap.recycle;

         Bitmap := nil;

       end;

     finally

       Bounds := nil;

     end;

   finally

     Text := nil;

   end;

 end;

 end.
实例代码:
 unit Unit1;

 interface

 uses

   System.SysUtils, System.Types, System.UITypes, System.Classes, System.Variants,

   FMX.Types, FMX.Controls, FMX.Forms, FMX.Graphics, FMX.Dialogs,

   FMX.Controls.Presentation, FMX.StdCtrls;

 type

   TForm1 = class(TForm)

     Label1: TLabel;

     Button1: TButton;

     Button2: TButton;

     procedure FormCreate(Sender: TObject);

     procedure Button1Click(Sender: TObject);

     procedure Button2Click(Sender: TObject);

   private

     { Private declarations }

   public

     { Public declarations }

   end;

 var

   Form1: TForm1;

 implementation

 uses System.IOUtils;

 {$R *.fmx}

 {$R *.NmXhdpiPh.fmx ANDROID}

 procedure TForm1.Button1Click(Sender: TObject);

 begin

   Label1.Font.Family := 'STHUPO';

 end;

 procedure TForm1.Button2Click(Sender: TObject);

 begin

   Label1.Font.Family := 'STLITI';

 end;

 procedure TForm1.FormCreate(Sender: TObject);

 var

   fontfile, fontfilefrom: string;

 begin

   //文件名大小写敏感,切记

   //这是我们能够引用的字体文件的目标位置:

   fontfile := TPath.GetSharedDownloadsPath + PathDelim + 'STHUPO.TTF';

   //随程序安装后,字体文件位置,卸载程序时会被删除:

   fontfilefrom := TPath.Combine(TPath.GetDocumentsPath, 'STHUPO.TTF');

   if FileExists(fontfilefrom) and (not FileExists(fontfile)) then

   begin

     tfile.Copy(fontfilefrom, fontfile); //将字体文件拷贝到我们设定的目录

   end;

   //文件名大小写敏感,切记

   //这是我们能够引用的字体文件的目标位置:

   fontfile := TPath.GetSharedDownloadsPath + PathDelim + 'STLITI.TTF';

   //随程序安装后,字体文件位置,卸载程序时会被删除:

   fontfilefrom := TPath.Combine(TPath.GetDocumentsPath, 'STLITI.TTF');

   if FileExists(fontfilefrom) and (not FileExists(fontfile)) then

   begin

     tfile.Copy(fontfilefrom, fontfile); //将字体文件拷贝到我们设定的目录

   end;

 end;

 end.
Android实例-使用自定义字体文件(XE8+小米2)的更多相关文章
- Delphi XE5开发Android程序使用自定义字体文件.
万事大吉,只欠根据字体文件(.ttf文件)切换阅读字体,通常Android系统只带三种以下字体.一般用Java/Eclipse开发的话比较简单,typeface的createFromAsset,cre ...
- Android实例-屏幕操持常亮(XE8+小米2)
相关资料: http://www.bubuko.com/infodetail-163304.html 结果: 1.打开权限Wake lock为True. 第三方单元: unit Android.JNI ...
- Android实例-利用WebBrowser实现浏览器(XE8+小米2)
结果: 1.网络好的情况下,打开很快,很流畅. 2.地址栏真心不好使,如果真要做应用,这块必须自己优化一下. 实例代码: unit Unit1; interface uses System.SysUt ...
- Android实例-TRectangle加载图片(XE8+小米2)
结果: 1.加载图片很流畅,可以做背景用. 2.现在是加载了正形与圆形,其他形状能不能加载呢?自己测试哦,要多动手才行. 3.需要把图片打到包里哦(路径为“assets\internal\”). 实例 ...
- Android实例-多窗口的切换(XE8+小米2)
1.图片一是程序运行后的界面. 2.图片二是点击"非模态显示"的界面. 3.图片三是点击"模诚显示"的界面(提示平台不支持). unit Unit1; inte ...
- Android 开发使用自定义字体
有时候,系统自带的字体并不能满足我们特殊的需求,这时候就需要引用其他的字体了,可以把下载的字体文件放在 assets 目录下. 自定义字体文件不能使用xml代码读取而应该使用java代码: publi ...
- Android Studio设置自定义字体
Android Studio设置自定义字体 (1)进入设置页面,File->Settings (2)自定义字体Editor->Colors&Fonts->Font (3)点击 ...
- Android 中使用自定义字体的方法
1.Android系统默认支持三种字体,分别为:“sans”, “serif”, “monospace 2.在Android中可以引入其他字体 . <?xml version="1.0 ...
- Html 项目使用自定义字体文件问题
感谢大佬:https://zhidao.baidu.com/question/652711582735059245.html 1.首先在项目过程中新建文件夹fonts将准备好的ttf字体文件复制该文件 ...
随机推荐
- linux 5.5 开xmanager远程
http://bbs.cqsztech.com/dv_rss.asp?s=xhtml&boardid=3&id=11&page=9 linux 5.5 开xmanager远程 ...
- Android四大基本组件
Android四大基本组件分别是 Activity:整个应用程序的门面,负责与用户进行交互. Service:承担大部分工作. Content Provider内容提供者:负责对外提供数据,并允许需要 ...
- 97. Interleaving String
题目: Given s1, s2, s3, find whether s3 is formed by the interleaving of s1 and s2. For example,Given: ...
- POJ1328——Radar Installation
Radar Installation Description Assume the coasting is an infinite straight line. Land is in one side ...
- Call to undefined function pg_
网上普遍的解决方案: 1.修改php.ini文件, 添加php_pgsql.dll扩展 2.如果是wamp这样类似的软件,可以直接通过图形化操作 这样操作后,大部分RD都是没有问的...但是为什么还提 ...
- MSSQL复制功能实现与Oracle数据库同步
1.分别建立链接对数据库进行操作,SQLServer可以用ADO.NET,操作Oracle可以用OLEDB或者用System.Data.OracleClient(需要添加引用才能用) 这种方案的优点就 ...
- Self-Paced Training (2) - Docker Fundamentals
Agenda- Building Images Dockerfile Managing Images and Containers Distributing Images on Docker Hub ...
- 自己定制Linux发行版(资料)
/******************************************************************** * 自己定制Linux发行版(资料) * 声明: * 随着L ...
- jQuery Mobile 入门教程
你每天都会对着它讲话,和它玩游戏,用它看新闻——没错,它就是你裤兜里的智能手机.android,黑莓还是iphone?为了让你清楚意识到究竟哪些才算是智能手机,我在下面总结了一个智能手机系统/设备的列 ...
- GRIB格式转换心得(转自博客:http://windforestwing.blog.163.com/blog/static/19545412007103084743804/)
1.wgrib的使用 在cmd命令行下键入wgrib后即可察看wgrib相关命令参数,简要介绍如下: l Inventory/diagnostic–output selections 详 ...