使用FontAwesome
使用FontAwesome

https://github.com/PrideChung/FontAwesomeKit
为什么要使用FontAwesome呢,其实,它的字体就是矢量图,无论是放大还是缩小都不失真的矢量图哦.
1. 下载源码,导入文件夹FontAwesomeKit,然后引入头文件FontAwesomeKit.h

2. 使用
    // 取得固定的icon以及设定尺寸

    FAKZocial *twitterIcon = [FAKZocial stackoverflowIconWithSize:];

    // 设定相关的属性

    [twitterIcon addAttribute:NSForegroundColorAttributeName

                     value:[UIColor redColor]];

    // 在UILabel上显示

    UILabel *label = [[UILabel alloc] initWithFrame:CGRectMake(, , , )];

    label.attributedText = [twitterIcon attributedString];

    [self.view addSubview:label];

    label.center = self.view.center;
使用是非常简单的哦,效果如下:

3. 高级应用
你以为就显示出来就没了么?非也,你想过把字体转换为路径么,转换为路径后就可以执行各种CoreAnimation的动画了呢:)
先来试一下CAshapeLayer的动画路径:
    // 取得固定的icon以及设定尺寸

    FAKZocial *twitterIcon = [FAKZocial chromeIconWithSize:];

    // 设定相关的属性

    [twitterIcon addAttribute:NSForegroundColorAttributeName

                     value:[UIColor blackColor]];

    // 将icon转换为贝塞尔曲线

    UIBezierPath *path = [UIBezierPath pathFromAttributedString:[twitterIcon attributedString]];

    // 创建shapeLayer

    CAShapeLayer *shapeLayer = [CAShapeLayer layer];

    // 获取path

    shapeLayer.path = path.CGPath;

    // 根据这个path来设定尺寸

    shapeLayer.bounds = CGPathGetBoundingBox(shapeLayer.path);

    // 几何反转

    shapeLayer.geometryFlipped = YES;

    // 一些颜色的填充

    shapeLayer.fillColor = [UIColor clearColor].CGColor;

    shapeLayer.strokeColor = [UIColor cyanColor].CGColor;

    // 设定layer位置

    shapeLayer.position = self.view.center;

    [self.view.layer addSublayer:shapeLayer];

    // 定时器动画

    _timer = [[GCDTimer alloc] initInQueue:[GCDQueue mainQueue]];

    [_timer event:^{

        shapeLayer.strokeEnd = arc4random()%/.f;

    } timeInterval:NSEC_PER_SEC];

    [_timer start];

    // 取得固定的icon以及设定尺寸

    FAKZocial *twitterIcon = [FAKZocial chromeIconWithSize:];

    // 设定相关的属性

    [twitterIcon addAttribute:NSForegroundColorAttributeName

                     value:[UIColor blackColor]];

    // 将icon转换为贝塞尔曲线

    UIBezierPath *path = [UIBezierPath pathFromAttributedString:[twitterIcon attributedString]];

    // 创建shapeLayer

    CAShapeLayer *shapeLayer = [CAShapeLayer layer];

    // 获取path

    shapeLayer.path = path.CGPath;

    // 根据这个path来设定尺寸

    shapeLayer.bounds = CGPathGetBoundingBox(shapeLayer.path);

    // 几何反转

    shapeLayer.geometryFlipped = YES;

    // 一些颜色的填充

    shapeLayer.fillColor = [UIColor blackColor].CGColor;

    shapeLayer.strokeColor = [UIColor clearColor].CGColor;

    shapeLayer.position = CGPointMake(, );

    // 渐变颜色图层

    CAGradientLayer *colorLayer = [CAGradientLayer layer];

    colorLayer.bounds = CGRectMake(, , , );

    colorLayer.mask = shapeLayer;

    colorLayer.colors = @[(id)[UIColor redColor].CGColor,

                          (id)[UIColor greenColor].CGColor,

                          (id)[UIColor yellowColor].CGColor];

    colorLayer.position = self.view.center;

    // 设定layer位置

    [self.view.layer addSublayer:colorLayer];

    // 定时器动画

    _timer = [[GCDTimer alloc] initInQueue:[GCDQueue mainQueue]];

    [_timer event:^{

        colorLayer.speed = 0.5;

        colorLayer.colors = @[(id)[UIColor colorWithRed:arc4random()%/.f

                                                  green:arc4random()%/.f

                                                   blue:arc4random()%/.f

                                                  alpha:].CGColor,

                              (id)[UIColor colorWithRed:arc4random()%/.f

                                                  green:arc4random()%/.f

                                                   blue:arc4random()%/.f

                                                  alpha:].CGColor,

                              (id)[UIColor colorWithRed:arc4random()%/.f

                                                  green:arc4random()%/.f

                                                   blue:arc4random()%/.f

                                                  alpha:].CGColor,

                              (id)[UIColor colorWithRed:arc4random()%/.f

                                                  green:arc4random()%/.f

                                                   blue:arc4random()%/.f

                                                  alpha:].CGColor,

                              (id)[UIColor colorWithRed:arc4random()%/.f

                                                  green:arc4random()%/.f

                                                   blue:arc4random()%/.f

                                                  alpha:].CGColor];

    } timeInterval:NSEC_PER_SEC];

    [_timer start];

    // 取得固定的icon以及设定尺寸

    FAKZocial *twitterIcon = [FAKZocial chromeIconWithSize:];

    // 设定相关的属性

    [twitterIcon addAttribute:NSForegroundColorAttributeName

                     value:[UIColor blackColor]];

    // 将icon转换为贝塞尔曲线

    UIBezierPath *path = [UIBezierPath pathFromAttributedString:[twitterIcon attributedString]];

    // 创建shapeLayer

    CAShapeLayer *shapeLayer = [CAShapeLayer layer];

    // 获取path

    shapeLayer.path = path.CGPath;

    // 根据这个path来设定尺寸

    shapeLayer.bounds = CGPathGetBoundingBox(shapeLayer.path);

    // 几何反转

    shapeLayer.geometryFlipped = YES;

    // 一些颜色的填充

    shapeLayer.fillColor = [UIColor redColor].CGColor;

    shapeLayer.strokeColor = [UIColor clearColor].CGColor;

    shapeLayer.position = CGPointMake(, );

    // 渐变颜色图层

    CAGradientLayer *colorLayer = [CAGradientLayer layer];

    colorLayer.bounds = CGRectMake(, , , );

    colorLayer.mask = shapeLayer;

    colorLayer.colors = @[(id)[UIColor redColor].CGColor,

                          (id)[UIColor greenColor].CGColor,

                          (id)[UIColor yellowColor].CGColor];

    colorLayer.position = self.view.center;

    // 设定layer位置

    [self.view.layer addSublayer:colorLayer];

    // 旋转

    CABasicAnimation *basicAni = \

        [CABasicAnimationList animationWithRotationZFromValue:-*M_PI_2 toValue:*M_PI_2];

    basicAni.duration = 1.0f;

    basicAni.repeatCount = HUGE_VALF;

    [shapeLayer addAnimation:basicAni forKey:nil];

    // 定时器动画

    _timer = [[GCDTimer alloc] initInQueue:[GCDQueue mainQueue]];

    [_timer event:^{

        colorLayer.colors = @[(id)[UIColor colorWithRed:arc4random()%/.f

                                                  green:arc4random()%/.f

                                                   blue:arc4random()%/.f

                                                  alpha:].CGColor,

                              (id)[UIColor colorWithRed:arc4random()%/.f

                                                  green:arc4random()%/.f

                                                   blue:arc4random()%/.f

                                                  alpha:].CGColor,

                              (id)[UIColor colorWithRed:arc4random()%/.f

                                                  green:arc4random()%/.f

                                                   blue:arc4random()%/.f

                                                  alpha:].CGColor,

                              (id)[UIColor colorWithRed:arc4random()%/.f

                                                  green:arc4random()%/.f

                                                   blue:arc4random()%/.f

                                                  alpha:].CGColor,

                              (id)[UIColor colorWithRed:arc4random()%/.f

                                                  green:arc4random()%/.f

                                                   blue:arc4random()%/.f

                                                  alpha:].CGColor];

    } timeInterval:NSEC_PER_SEC];

    [_timer start];

附录:
FAKFontAwesome *starIcon = [FAKFontAwesome asteriskIconWithSize:50];
FAKFoundationIcons *bookmarkIcon = [FAKFoundationIcons bookmarkIconWithSize:15];
FAKZocial *twitterIcon = [FAKZocial twitterIconWithSize:15];
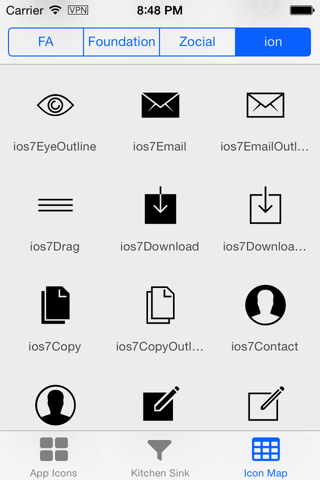
FAKIonIcons *mailIcon = [FAKIonIcons ios7EmailIconWithSize:48];
使用FontAwesome的更多相关文章
- 【三石jQuery视频教程】02.创建 FontAwesome 复选框和单选框
视频地址:http://v.qq.com/page/m/8/c/m0150izlt8c.html 大家好,欢迎来到[三石jQuery视频教程],我是您的老朋友 - 三生石上. 今天,我们要通过基本的H ...
- 直接在 CSS 中引用 FONTAWESOME 图标(附码表)
直接在 CSS 中引用 FONTAWESOME 图标(附码表) 因此我们如果不想用 Fontawesome 提供的类,只想在 css 里面引用图标的话,可以这样子,请自行脑补: .icon:befor ...
- 学习WPF——使用Font-Awesome图标字体
图标字体介绍 在介绍图标字体之前,不得不介绍图标格式ICON ICON是一种图标格式,我们操作系统中各种应用程序都包含一个图标 比如QQ程序的图标是一个可爱的企鹅,我的电脑是一个显示器图标 ----- ...
- 利用PhotoShop将Font-Awesome转为图片格式
介绍如何将Font-Awesome等字体图标转换为图片格式,使用PHOTPSHOP很简单. 网上找了很多,都比较麻烦.别问为什么要这么做,因为你还没遇到需要的时候. 下载Font-Awesome字体库 ...
- 用fontAwesome代替网页icon小图标
1. 引言 网页小图标到处可见,如果一个网页都是干巴巴的文字和图片,而没有小图标,会显得非常简陋.下面的小图标,你是不是会经常用到? 你可能说——“我们用的都是彩色的,不是黑白的”——别着急,下面会讲 ...
- IconFont和FontAwesome的区别?
一.[Iconfont] Iconfont支持所有低版本浏览器: Iconfont的图标库更大: Iconfont可以用自己上传的svg,但是要花费大量时间和耐心去设计AI图标: Iconfont的使 ...
- 分享我用Qt开发的应用程序【二】在Qt应用程序中使用字体图标fontawesome
为了使用简单,需要先写一个单件类,头文件的代码如下: 其中静态方法Instance保证IconHelper的实例全局唯一 (注意构造函数已经私有化了) #ifndefICONHELPER_H #def ...
- Adobe Illustrator里使用fontawesome矢量图标
简单教程:1.安装FontAwesome.otf字体2.打开http://fontawesome.io/cheatsheet/3.选中图标图片,ctrl+c4.粘贴到AI中5.选中粘贴的内容,修改字 ...
- 请用fontAwesome代替网页icon小图标
1. 引言 网页小图标到处可见,如果一个网页都是干巴巴的文字和图片,而没有小图标,会显得非常简陋.下面的小图标,你是不是会经常用到? 你可能说——“我们用的都是彩色的,不是黑白的”——别着急,下面会讲 ...
- fontAwesome代替网页icon小图标
引言 奥森图标(Font Awesome)提供丰富的矢量字体图标—通过CSS可以任意控制所有图标的大小 ,颜色,阴影. 网页小图标到处可见,如果一个网页都是干巴巴的文字和图片,而没有小图标,会显得非常 ...
随机推荐
- CNN理解与实现
CNN理解与实现 组成部分 Convolution Layer Pool Layer: Max-pooling layer Average-pooling layer Full Connected(F ...
- Django 中文文档地址
http://djangobook.py3k.cn/2.0/ MK一下
- 第6章 通过CrawlSpider对招聘网站进行整站爬取
通过前几章的2个项目的学习,其实本章的拉钩网项目还是挺容易理解的. 本章主要的还是对CrawlSpider源码的解析,其实我对源码还不是很懂,只是会基本的一些功能而已. 不分小节记录了,直接上知识点, ...
- js格式化文件大小,单位:Bytes、KB、MB、GB
原文出自:https://blog.csdn.net/seesun2012 // 格式化文件大小 function renderSize(value){ if(null==value||value== ...
- js post跳转
function clickFunc(id) { var params = new Array(); params.push({ name: "id", value: id}); ...
- del
Before writing it I spent a fair amount of time on reviewing our chat-log. How silly. asljdfajsodfss ...
- Java中HashSet的解读
一. HashSet源代码 HashSet 的实现 对于 HashSet 而言,它是基于 HashMap 实现的,HashSet 底层采用 HashMap 来保存所有元素,因此 HashSet 的 ...
- Vue2.0学习笔记:Vue事件修饰符的使用
事件处理 如果需要在内联语句处理器中访问原生DOM事件.可以使用特殊变量$event,把它传入到methods中的方法中. 在Vue中,事件修饰符处理了许多DOM事件的细节,让我们不再需要花大量的时间 ...
- Core.Java.Volume.I.Fundamentals.10th.Edition 14.5.8 Volatile域 中文版 章节勘误
今天重扫了corejava 14 并发的一章,在谈到volatile域代替synchronized 应用于并发更新时,看到如下内容,并发更新可用内部锁的方式但会带来阻塞问题,可用volatile域替代 ...
- HBase—列族数据库的术语
1. 列族数据库的基本组件 键空间,行键,列,列族 2. 什么是键空间 keyspace? 键空间 keyspace 是列族数据库的顶级数据结构,它在逻辑上能够容纳列族,行键以及与之相关的其他数据结构 ...