
基于Nginx 和 uwsgi 搭建 django.
第一篇博客,不是很懂语法之类的,希望通过多写点东西,记录自己的成长,早点成为一个pyer.
就写下这两天折腾的这个nginx-uwsgi-django.
首先附上官方文档链接 http://uwsgi-docs.readthedocs.io/en/latest/tutorials/Django_and_nginx.html
环境 python == Python 2.7.3, os == centos6.5 x86_64
django == 1.8.1
uwsgi == uWSGI 2.0.15 (64bit) #都是pip 直接安装的
nginx == 1.10.1 #yum install -y
1.刚刚创建的project
$django-admin startproject test_nginx_uwsgi

$cd test_nginx_uwsgi/

$tree

.

├── manage.py

└── test_nginx_uwsgi

    ├── __init__.py

    ├── settings.py

    ├── urls.py

    └── wsgi.py
2.当前目录下创建test.py文件,代码如下:
#test.py

def application(env, start_response):

    start_response('200 OK', [('Content-Type','text/html')])

    return "Hello World" #国际惯例,helloworld
运行代码:
$uwsgi --http : --wsgi-file test.py

##中间东西很多,又看不懂,乱七八糟的,我就不贴了##

*** uWSGI is running in multiple interpreter mode ***

spawned uWSGI worker  (and the only) (pid: , cores: )
参数含义简介:
- :9111 > 想必大家都知道,运行的端口
- wsgi-file > 指定加载的文件
- 报错[uwsgi: command not found]的话,ln -s /your-python-dir/bin/* /usr/bin/*
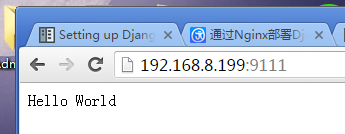 如图所示,第一步完成!
3.测试您的django 是否能够正常运行!ps:为了方便起见我们直接用admin网站测试好了~~
$python manage.py syncdb #创建superuser

$python manage.py makemigration

$python manage.py migrate

$python manage.py runserver 0.0.0.0:
 大家有目共睹
4.使用Uwsgi 跑 django项目
cmd: (其中test_nginx_uwsgi.wsgi指的就是test_nginx_uwsgi目录下的wsgi.py,django1.8自动生成)
$ uwsgi --http : --module test_nginx_uwsgi.wsgi
又成功了一步~可以对比上面的,同样的url,这里却很难看,是因为没有加载static文件

但是可以说明 web-client <-> Uwsgi <-> Django 是连通的,下面的就要看Nginx.
5.配置Nginx.
由于版本的问题,如果这里也用官方的源码就不行了。
- 收集静态文件
#首先setting.py中添加

STATIC_ROOT = '/root/django/test_nginx_uwsgi/static_root/'
------------------------------我是换行------------------------------

$python manage.py collectstatic

You have requested to collect static files at the destination

location as specified in your settings:

    /root/django/test_nginx_uwsgi/static_root

This will overwrite existing files!

Are you sure you want to do this?

Type 'yes' to continue, or 'no' to cancel: yes

#·······省略~

static files copied to '/root/django/test_nginx_uwsgi/static_root'. - nginx配置文件在 /etc/nginx/nginx.conf ,其中include -> /etc/nginx/conf.d/*.conf [这个,相信大多数linux服务如出一辙]
- vi /etc/nginx/conf.d/test_nginx_uwsgi.conf,代码如下
# test_nginx_uwsgi.conf

# the upstream component nginx needs to connect to

upstream django_test { #加上_test,因为和原来的冲突了,这里备注下

    # server unix:///path/to/your/mysite/mysite.sock; # for a file socket

    server 127.0.0.1:; # for a web port socket (we'll use this first) 类似uwsgi端口

}

# configuration of the server

server {

    # the port your site will be served on

    listen      ;  #nginx 运行端口

    # the domain name it will serve for

    server_name .example.com; # substitute your machine's IP address or FQDN

    charset     utf-;

    # max upload size

    client_max_body_size 75M;   # adjust to taste

    # Django media

    location /media  {

        alias /root/django/test_nginx_uwsgi/media;  # 加载你的meida,

    }

    location /static {

        alias /root/django/test_nginx_uwsgi/static_root; # 加载你的静态文件

    }

    # Finally, send all non-media requests to the Django server.

    location / {

        uwsgi_pass  django_test;

        include     /etc/nginx/uwsgi_params; #官方说要把文件cp到项目目录,感觉没必要

    }

} - 重启 nginx (不知道是我这机器有毛病还是····,光restart不行)
[root@lzy test_nginx_uwsgi]# /etc/init.d/nginx restart

stopping nginx.... Done.

starting nginx..

[root@lzy test_nginx_uwsgi]# nginx -c /etc/nginx/nginx.conf

[root@lzy test_nginx_uwsgi]# nginx -s reload

[root@lzy test_nginx_uwsgi]# lsof -i :

COMMAND  PID USER   FD   TYPE   DEVICE SIZE/OFF NODE NAME

nginx    root    9u  IPv4       0t0  TCP *: (LISTEN)

nginx    root    9u  IPv4       0t0  TCP *: (LISTEN)

nginx    root    9u  IPv4       0t0  TCP *: (LISTEN)

nginx    root    9u  IPv4       0t0  TCP *: (LISTEN)

nginx    root    9u  IPv4       0t0  TCP *: (LISTEN)

nginx    root    9u  IPv4       0t0  TCP *: (LISTEN)

nginx    root    9u  IPv4       0t0  TCP *: (LISTEN)

nginx    root    9u  IPv4       0t0  TCP *: (LISTEN)

nginx    root    9u  IPv4       0t0  TCP *: (LISTEN)

nginx    root    9u  IPv4       0t0  TCP *: (LISTEN)

nginx    root    9u  IPv4       0t0  TCP *: (LISTEN)

nginx    root    9u  IPv4       0t0  TCP *: (LISTEN)

nginx    root    9u  IPv4       0t0  TCP *: (LISTEN)

nginx    root    9u  IPv4       0t0  TCP *: (LISTEN)

nginx    root    9u  IPv4       0t0  TCP *: (LISTEN)

nginx    root    9u  IPv4       0t0  TCP *: (LISTEN)

nginx    root    9u  IPv4       0t0  TCP *: (LISTEN)

#可以看到8090端口已经在运行 nginx 了,说明配置文件有效果了
6.接下来官网Balala了一堆,我这种fish压根不懂,我也没按他的做,跳过这一步··
7.配置test_nginx_uwsgi_uwsgi.ini 启动配置文件
ps:参考了http://www.runoob.com/django/django-nginx-uwsgi.html
创建test_nginx_uwsgi_uwsgi.ini 就在项目根目录
#test_nginx_uwsgi.ini file

[uwsgi]

# Django-related settings

socket = :

# the base directory (full path)

chdir = /root/django/test_nginx_uwsgi

# Django s wsgi file

module = test_nginx_uwsgi.wsgi

# process-related settings

# master

master = true

# maximum number of worker processes

processes =

# ... with appropriate permissions - may be needed

chmod-socket =

# clear environment on exit

vacuum = true
8.配置完成,就剩下启动了
启动就很简单呢
#首先启动uwsgi 指定配置文件ini

$uwsgi --ini test_nginx_uwsgi.ini #也可以 nohup uwsgi --ini test_nginx_uwsgi.ini & 后台执行,无输出

#其次重启Nginx,参照上面重启步骤

#浏览器打开 192.168.8.199:/admin
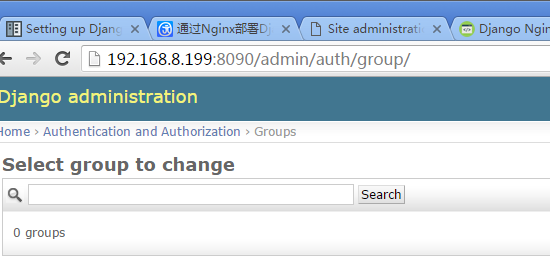
大功告成~现在就是通过nginx端口打开的django,如果nginx Listen 80,那么浏览器不用输端口也行呢
#error: /var/log/nginx/nginx.log提示 13 Pemmer deied【权限问题】,修改/etc/nginx/nginx.conf,user nginx -> user root
基于Nginx 和 uwsgi 搭建 django.的更多相关文章
- CentOS 环境下基于 Nginx uwsgi 搭建 Django 站点
因为我的个人网站 restran.net 已经启用,博客园的内容已经不再更新.请访问我的个人网站获取这篇文章的最新内容,CentOS 环境下基于 Nginx uwsgi 搭建 Django 站点 以下 ...
- python3.6 ubuntu部署nginx、 uwsgi、 django
ubuntu部署nginx. uwsgi. django 将项目上传到服务器 python manager.py runserver 0:80 在浏览器输入服务器的域名或者ip地址,访问成功. 安装u ...
- 基于Nginx和uWSGI在Ubuntu上部署Django项目
前言: 对于做Django web项目的童鞋,重要性不言而喻. 参考:https://www.cnblogs.com/alwaysInMe/p/9096565.html https://blog.cs ...
- 基于nginx和uWSGI在Ubuntu上部署Djan
http://www.jianshu.com/p/e6ff4a28ab5a 文/Gevin(简书作者)原文链接:http://www.jianshu.com/p/e6ff4a28ab5a著作权归作者所 ...
- 项目的发布(nginx、uwsgi、django、virtualenv、supervisor)
导论 WSGI是Web服务器网关接口.它是一个规范,描述了Web服务器如何与Web应用程序通信,以及Web应用程序如何链接在一起以处理一个请求,(接收请求,处理请求,响应请求) 基于wsgi运行的框架 ...
- linux上使用nginx、uwsgi部署django项目
参考:CentOS7下部署Django项目详细操作步骤 注意事项: 在虚拟环境中操作,虚拟环境中安装nginx.uwsgi,虚拟环境外需安装uwsgi -- 临时关闭防火墙:systemctl sto ...
- 基于nginx和uWSGI在Ubuntu上部署Django
转自: http://www.jianshu.com/p/e6ff4a28ab5a
- ubuntu服务器上用Nginx和Uwsgi部署django项目
开发环境:ubuntu系统,python3环境 django项目目录: fast_foot 为项目根目录,app为项目应用 现在,我们登陆远程服务器 安装Nginx 安装好了,我们看一下nginx的配 ...
- CentOS环境下使用GIT基于Nginx的私服搭建全过程
阅读本文前你必须预先装好CentOS并且已经安装和配置好Nginx了. 安装GIT私服套件 安装centos6.5-centos7.0 安装nginx yum install -y?git gitwe ...
随机推荐
- 20172328 2018-2019《Java软件结构与数据结构》第三周学习总结
20172328 2018-2019<Java软件结构与数据结构>第三周学习总结 概述 Generalization 本周学习了第五章:队列.主要内容包含队列的处理过程.如何用对例如求解问 ...
- WebSocket的Tomcat实现
一.WebSocket简单介绍 随着互联网的发展,传统的HTTP协议已经很难满足Web应用日益复杂的需求了.近年来,随着HTML5的诞生,WebSocket协议被提出,它实现了浏览器与服务器的全双工通 ...
- vue入门1(搭建项目)
安装node.js 安装cnpm npm install -g cnpm --registry=http://registry.npm.taobao.org 安装vue-cli脚手架构建工具 npm ...
- 移动端click事件清除
http://blog.csdn.net/zfy865628361/article/details/49512095
- VS2015编译FFMPEG,修改FFmpeg缓冲区大小解决实时流解码丢包问题,FFmpeg错误rtsp流地址卡死的问题,设置超时
之前尝试过很多网上利用Windows编译FFmpeg的文章,都没有办法编译X64位的FFmpeg,有些教程中有专门提到编译64位的FFmpeg需要下载mingw-w64-install,但是编译的过程 ...
- Tips_一级菜单栏实现
1.纵向 <!DOCTYPE html> <html lang="en"> <head> <meta charset="UTF- ...
- mobile_轮播图_transform 版本_transform 读写二合一
轮播图_transform 版本 关键点: 2D 变换 transform 不会改变 元素 在 文档流 中的位置 定位 position 会改变 元素 在 文档流 中的位置 语句解析太快,使用 set ...
- NetBeans配置subli
NetBeans主题设置: ①.去https://netbeansthemes.com/rank/网址下载喜欢的主题 ②.然后打开NetBeans-->工具->选项->外观-> ...
- 【C++】二叉树的构建、前序遍历、中序遍历
写在前面:本博客为本人原创,严禁任何形式的转载!本博客只允许放在博客园(.cnblogs.com),如果您在其他网站看到这篇博文,请通过下面这个唯一的合法链接转到原文! 本博客全网唯一合法URL:ht ...
- Linux Shell 用法
目录 Shell test 命令 数值测试 字符串测试 文件测试 函数返回值 Shell test 命令 Shell中的 test 命令用于检查某个条件是否成立,它可以进行数值.字符和文件三个方面的测 ...