
Ionic3,装饰器(@Input、@ViewChild)以及使用 Events 实现数据回调中的相关用法(五)
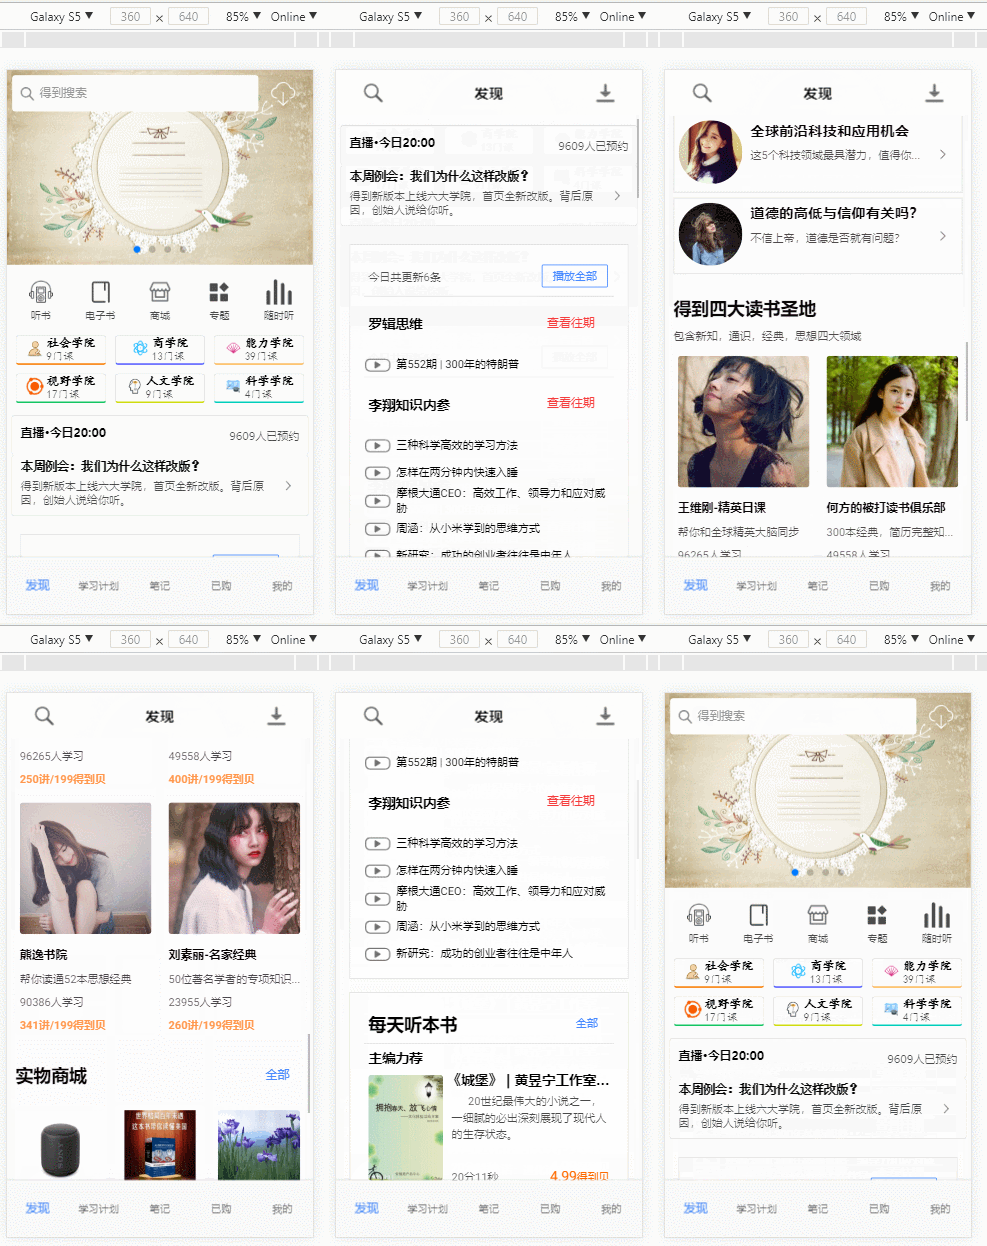
标题栏的渐变效果
使用到的相关装饰器、Class以及相关方法:@Input、@ViewChild、Content、ionViewDidLoad
① @Input 装饰器:用来获取页面元素自定义属性值。
<app-header search-show="false" title="发现"></app-header>

在页面 finder.html 页面中,通过调用的控件,并且定义了两个属性 search-show、title;
@Input("search-show")

  set setDefaultSearchStatus(value:boolean){

  }

  @Input("title")

  set setTitle(value:String){

    this.title = value;

  }
在组件关联的 .ts 页面中,通过使用 @Input 装饰器,并且实现其 set 方法,完成对 title 的赋值。
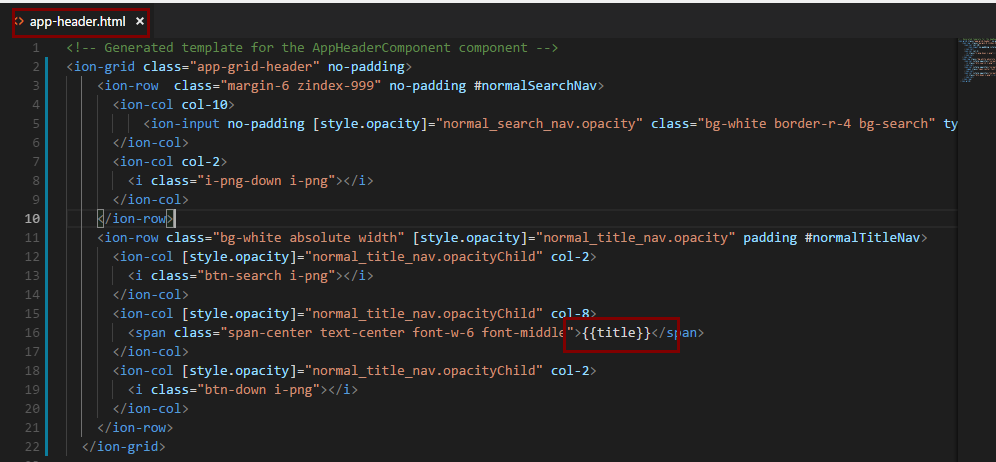
通过使用 {{title}},完成对页面数据的绑定
②通过 @Viewchild 和引用 Content 实现对 scroll 监听,Events 的订阅者模式完成数据的回调
在 finder.js 中,重载 ionViewDidLoad 方法
import { IonicPage, Content, Events} from 'ionic-angular';

import { Component, ViewChild } from '@angular/core';

@IonicPage()

@Component({

    templateUrl:'./finder.html',

    styles:['./finder.scss']

})

export class FinderPage{

    constructor(private events:Events){

    }

// 页面监听

@ViewChild(Content)content : Content;

ionViewDidLoad(){

    this.content.ionScroll.subscribe(($event:any)=>{

        this.events.publish("finder_scroll_status",[$event.scrollTop]);//finder_scroll_status 用于回调接收
}) }
在 app-header.ts 中通过 Events 完成接收:
 constructor(private events:Events,private ngzone :NgZone){

    // 获取【发现】页面中 scroll 监听数据

    // ngzone 用来进行页面重构

    this.events.subscribe('finder_scroll_status',(params)=>{// subscribe 订阅者模式,完成就收回调数据

    })

  }
③渐变效果的实现:通过回调得到的页面 scroll 的移动位置,计算标题的 opacity 元素属性,通过改变 opacity 来实现渐变效果。因为要动态的改变页面样式,所以还需要引用 ngZone 服务,用来及时的更新页面
app-header.ts完整代码:
import { Component, Input, ViewChild, NgZone } from '@angular/core';

import { IonicPage, Events } from '../../../node_modules/ionic-angular';

@IonicPage()

@Component({

  selector: 'app-header',

  templateUrl: 'app-header.html',

  styles:['./app-header.scss']

})

export class AppHeaderComponent {

  title : String = '';//默认标题

  private search_nav_height = ;//搜索框高度

  private normal_title_nav = {//普通的标题栏

    opacity:,

    opacityChild:

  };

  private normal_search_nav = {//普通的搜索栏

    opacity:

  };

  @Input("search-show")

  set setDefaultSearchStatus(value:boolean){

  }

  @Input("title")

  set setTitle(value:String){

    this.title = value;

  }

  @ViewChild('normalSearchNav') normal_search_el;//获取页面普通搜索框

  @ViewChild('normalTitleNav') normal_title_el;//普通的 title

  constructor(private events:Events,private ngzone :NgZone){

    // 获取【发现】页面中 scroll 监听数据

    // ngzone 用来进行页面重构

    this.events.subscribe('finder_scroll_status',(params)=>{

      if(this.normal_search_el && this.normal_search_el.nativeElement.offsetHeight>){

        this.search_nav_height = this.normal_search_el.nativeElement.offsetHeight;

      }

      this.ngzone.run(()=>{

        if(this.search_nav_height >= params[] ){//掩藏标题栏 || 显示search

          if(this.normal_search_nav.opacity >= ){

            this.normal_search_nav.opacity =  - (params[]/this.search_nav_height);

            this.normal_search_el.nativeElement.style.display = '';

            this.normal_title_nav.opacity = (params[]/this.search_nav_height);

            this.normal_title_nav.opacityChild = ;

          }

        }

        if(this.search_nav_height < params[]){//掩藏搜索栏 || 显示title

          this.normal_search_nav.opacity = ;

          this.normal_title_nav.opacity = ;

          this.normal_search_el.nativeElement.style.display = 'none';

          if(params[]-this.search_nav_height >= this.search_nav_height/){//子元素的一个延时显示

            this.normal_title_nav.opacityChild = ;

          }

        }

      })

    })

  }

}
app-header.html完整代码:
<!-- Generated template for the AppHeaderComponent component -->

<ion-grid class="app-grid-header" no-padding>

    <ion-row  class="margin-6 zindex-999" no-padding #normalSearchNav>

      <ion-col col->

          <ion-input no-padding [style.opacity]="normal_search_nav.opacity" class="bg-white border-r-4 bg-search" type="text" placeholder="得到搜索"></ion-input>

      </ion-col>

      <ion-col col->

        <i class="i-png-down i-png"></i>

      </ion-col>

    </ion-row>

    <ion-row class="bg-white absolute width" [style.opacity]="normal_title_nav.opacity" padding #normalTitleNav>

      <ion-col [style.opacity]="normal_title_nav.opacityChild" col->

        <i class="btn-search i-png"></i>

      </ion-col>

      <ion-col [style.opacity]="normal_title_nav.opacityChild" col->

        <span class="span-center text-center font-w-6 font-middle">{{title}}</span>

      </ion-col>

      <ion-col [style.opacity]="normal_title_nav.opacityChild" col->

        <i class="btn-down i-png"></i>

      </ion-col>

    </ion-row>

  </ion-grid>
先这样吧~
Ionic3,装饰器(@Input、@ViewChild)以及使用 Events 实现数据回调中的相关用法(五)的更多相关文章
- Angular 之装饰器@Input
Input 一个装饰器,用来把某个类字段标记为输入属性,并提供配置元数据. 该输入属性会绑定到模板中的某个 DOM 属性.当变更检测时,Angular 会自动使用这个 DOM 属性的值来更新此数据属性 ...
- 20.python笔记之装饰器
装饰器 装饰器是函数,只不过该函数可以具有特殊的含义,装饰器用来装饰函数或类,使用装饰器可以在函数执行前和执行后添加相应操作. 装饰器是一个很著名的设计模式,经常被用于有切面需求的场景,较为经典的有插 ...
- Python-迭代器&生成器&装饰器&软件目录结构规范-Day5
目录Day-Python-迭代器&生成器 21.生成器 21.1.生成器引入 21.2.生成器作用 31.3.创建生成器的方法 31.4.用函数来实现复杂的生成器 51.5.把函数变成生成器通 ...
- 【Angular专题】 (3)装饰器decorator,一块语法糖
目录 一. Decorator装饰器 二. Typescript中的装饰器 2.1 类装饰器 2.2 方法装饰器 2.3 访问器装饰器 2.4 属性装饰器 2.5 参数装饰器 三. 用ES5代码模拟装 ...
- 装饰器模式&&ES7 Decorator 装饰器
装饰器模式(Decorator Pattern)允许向一个现有的对象动态添加新的功能,同时又不改变其结构.相比JavaScript中通过鸡肋的继承来给对象增加功能来说,装饰器模式相比生成子类更为灵活. ...
- Python全栈开发记录_第五篇(装饰器)
单独记录装饰器这个知识点是因为这个知识点是非常重要的,必须掌握的(代码大约150行). 了解装饰器之前要知道三个知识点 作用域,上一篇讲到过顺序是L->E->G->B 高阶函数: 满 ...
- Python之路(第十一篇)装饰器
一.什么是装饰器? 装饰器他人的器具,本身可以是任意可调用对象,被装饰者也可以是任意可调用对象. 强调装饰器的原则:1 不修改被装饰对象的源代码 2 不修改被装饰对象的调用方式 装饰器的目标:在遵循1 ...
- day6 装饰器总结
装饰器:开放封闭原则,为一个函数加上新的功能,不改变原函数,不改变调用方式 def fun2(wtf): def fun3(): print('i am pythoner!!! ') wtf() re ...
- Python基础4 迭代器,生成器,装饰器,Json和pickle 数据序列化
本节内容 迭代器&生成器 装饰器 Json & pickle 数据序列化 软件目录结构规范 作业:ATM项目开发 1.列表生成式,迭代器&生成器 列表生成式 孩子,我现在有个需 ...
随机推荐
- elasticsearch-jdbc 使用
elasticsearch-jdbc是一个将关系型数据库(RDBMS)数据导入到ElasticSearch库中的一个工具包,支持mysql.oracle.postgrey.csv等存储列式数据的容器. ...
- org.eclipse.wst.common.project.facet.core.xml
Ctrl+Shift+R *core.xml 修改Dynamic Web module 由3.1 切至2.几
- (转)走进AngularJs(六) 服务
原文地址:http://www.cnblogs.com/lvdabao/p/3464015.html 今天学习了一下ng的service机制,作为ng的基本知识之一,有必要做一个了解,在此做个笔记记录 ...
- 编写高质量代码改善C#程序的157个建议——建议109:谨慎使用嵌套类
建议109:谨慎使用嵌套类 使用嵌套类的原则是:当某类型需要访问另一个类型的私有成员时,才将它实现为嵌套类.一个典型的例子是在实现集合时,要为集合实现迭代器,这时用到了嵌套类.代码如下所示: publ ...
- 编写高质量代码改善C#程序的157个建议——建议77: 正确停止线程
建议77: 正确停止线程 开发者总尝试对自己的代码有更多的控制.例如,“让那个还在工作的线程马上停止下来”.然而,并非我们想怎样就可以怎样的,这至少涉及两个问题. 第一个问题 正如线程不能立即启动一样 ...
- PyCharm社区版+Django搭建web开发环境-1
PyCharm开源社区版不像商业版那样可以直接通过Django来创建项目,必须通过以下几个步骤进行: 1. 创建项目:在cmd命令行下输入:django-admin startproject Demo ...
- delphi将工程文件转成dll
1.点击[File]—>[New]—>[Other]菜单项,打开[New Items],选择[New]: 2.选择[Dll Wizard]选项卡,点击ok,DLL工程创建成功. 3.点击[ ...
- .net EventHandler 事件处理
通常定义事件 都是通过自定义委托的方式来实现, 今天使用EventHandler 委托来定义事件: public class NewMailEventArgs : EventArgs { priv ...
- django 生命周期
客户端发送请求 客户端(浏览器) → 发送请求 → 服务器(wsgi) → 解析请求 → 服务器(Middleware) → process_request → 服务器(urls) → 通过路由寻vi ...
- [原创] 思维导图笔记(二):SQL
为了补一补知识体系上的缺漏,最近找了看完了Ben Forta写的<Sams Teach Yourself SQL in 10 Minutes>,翻译过来叫<SQL必知必会>.从 ...