Xamarin.Android广播接收器与绑定服务
一、前言
学习了前面的活动与服务后,你会发现服务对于活动而言似乎就是透明的,相反活动对于服务也是透明的,所以我们还需要一中机制能够将服务和活动之间架起一座桥梁,通过本节的学习,你将会学到广播与绑定服务,这两种方式恰恰是解决上面问题的关键。
二、简单的广播接收器
实现一个最简单的广播接收器需要继承BroadcastReceiver类,并且还要实现OnReceive方法,我们可以在项目中新建一个MainReceiver类,然后写入如下代码:
     public class MainReceiver : BroadcastReceiver

     {

         public override void OnReceive(Context context, Intent intent)

         {

         }

 }
上面其实已经实现了一个简单的广播接收器,并且可以使用。我们还需要注册广播接收器,否则广播接收器就无法接收广播,所以我们需要在MainActivity.cs中注册这个广播接收器。当然为了能够接近现实,我们需要在OnResume中注册,在OnPause中注销。
首先我们在OnResume中注册
         protected override void OnResume()

         {

             base.OnResume();

             receiver = new MainReceiver();

             RegisterReceiver(receiver, new IntentFilter("xamarin-cn.main.receiver"));

         }
接着我们在OnPause中注销
         protected override void OnPause()

         {

             base.OnPause();

             UnregisterReceiver(receiver);

         }
全部代码如下所示
     [Activity(Label = "BroadcastStudy", MainLauncher = true, Icon = "@drawable/icon")]

     public class MainActivity : Activity

     {

         private MainReceiver receiver;

         protected override void OnCreate(Bundle bundle)

         {

             base.OnCreate(bundle);

             SetContentView(Resource.Layout.Main);

         }

         protected override void OnResume()

         {

             base.OnResume();

             receiver = new MainReceiver();

             RegisterReceiver(receiver, new IntentFilter("xamarin-cn.main.receiver"));

         }

         protected override void OnPause()

         {

             base.OnPause();

             UnregisterReceiver(receiver);

         }

 }
注册好了广播接收器,我们还需要一个能够发送广播的地方,既然我们说了这节重点解决的是服务与活动的通信,那么我们就实现一个服务来发送广播。为了能够贴近现实,我们的服务中将会新建一个线程,让这个线程发送一个广播给这个广播接收器。
     [Service]

     public class MainService : Service

     {

         public override StartCommandResult OnStartCommand(Intent intent, StartCommandFlags flags, int startId)

         {

             new Thread(() =>

             {

                 Thread.Sleep();

                 var sintent = new Intent("xamarin-cn.main.receiver");

                 sintent.PutExtra("_str", "来自服务");

                 SendBroadcast(sintent);

             }).Start();

             return StartCommandResult.Sticky;

         }

         public override IBinder OnBind(Intent intent)

         {

             return null;

         }

 }
这里我们通过意图传递了一个参数,而在服务中发送广播的方法是SendBroadcast。其实我们可以看到在创建意图的时候传入了一个字符串,而这个字符串必须与注册广播接收器时指定的字符串一致,否则对应的广播接收器是无法接收到这个广播的,下面我们修改广播接收器的OnReceive方法,以便获取传递过来的字符串并显示。
         public override void OnReceive(Context context, Intent intent)

         {

             string str = intent.GetStringExtra("_str");

             new Handler().Post(() =>

             {

                 Toast.MakeText(Application.Context, str, ToastLength.Long).Show();

             });

         }
其中我们通过意图的GetXXXX方法获取传递过来的参数,然后创建了一个Handler对象并使用Toast发送了一个提示,这里使用Handler是为了与UI线程同步。因为前面讲过只用UI线程才能够访问控件等等对象,而这里并没有RunOnUiThread方法,所以我们需要使用Handler对象的Post方法来实现。
最后有了服务还不行,我们还需要开启这个服务。当然我们依然还是要在OnResume中开启,在OnPause中暂停。
         protected override void OnResume()

         {

             base.OnResume();

             receiver = new MainReceiver();

             RegisterReceiver(receiver, new IntentFilter("xamarin-cn.main.receiver"));

             StartService(new Intent(this, typeof(MainService)));

         }

         protected override void OnPause()

         {

             base.OnPause();

             UnregisterReceiver(receiver);

             StopService(new Intent(this, typeof(MainService)));

         }
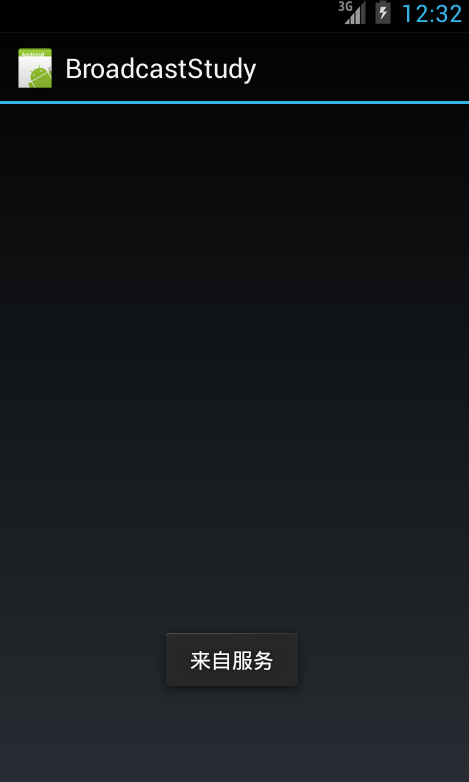
最后我们运行之后的结果如下所示
三、服务向活动发送消息
上面的例子我们仅仅只是打通了服务与广播接收器的通信,而我们今天的主题是服务与活动的双向通信,但是为了能够循序渐进学习,所以我们先学习了服务与广播接收器怎么通信,而这节我们将学习广播接收器如何与活动通信。
因为c#并没有java的部分语言的特性,所以我们没法直接通过匿名的方法创建一个继承自BroadcastReceiver类的实例,所以我们需要先创建一个继承自BroadcastReceiver的具体类,然后在其中定义活动需要响应的方法的委托(Action或者Func),这样我们可以在实例化这个具体类的同时将活动中的方法赋给广播接收器,这样广播接收器在OnReceive中就可以调用活动中的方法了,自然而言就打通了广播接收器与活动的通信。当然还有其他的方法,希望读者可以在留言中留下,以便更多的人进行学习。
首先修改MainReceiver类:
     public class MainReceiver : BroadcastReceiver

     {

         public Action<string> Alert;

         public override void OnReceive(Context context, Intent intent)

         {

             string str = intent.GetStringExtra("_str");

             if (Alert != null)

             {

                 Alert(str);

             }

         }

 }
在这里我们定义了一个委托(Action<string> Alert)以便活动可以重写,同时还修改了OnReceive中的代码,从而使用活动的方法来显示提示,有了接口之后,我们就可以回到活动中进行重写了。因为广播被实例化的步骤是在OnResume中,所以我们这里直接给出这个方法中的代码(这里我们使用了一个TextView控件tv读者可以需要自行添加下)。
         protected override void OnResume()

         {

             base.OnResume();

             receiver = new MainReceiver()

             {

                 Alert = (s) =>

                 {

                     RunOnUiThread(() =>

                     {

                         tv.Text = s;

                     });

                 }

             };

             RegisterReceiver(receiver, new IntentFilter("xamarin-cn.main.receiver"));

             StartService(new Intent(this, typeof(MainService)));

         }
现在我们就打通了广播接收器与活动的桥梁,如果有多个方法也是一样的道理,我们现在运行程序可以发现一切正常,下面笔者还要介绍另一种使用接口的方法,首先我们需要一个接口去规定活动需要实现哪些方法,然后在初始化广播接收器的同时将活动的实例赋广播接收器的对应接口变量。下面我们将上面的例子改写,先定义个含有Alert的接口。
     public interface IMainInterface

     {

         void Alert(string s);

 }
然后让活动实现该接口
    public class MainActivity : Activity, IMainInterface

    {

        private MainReceiver receiver;

        private TextView tv;

        public void Alert(string s)

        {

            RunOnUiThread(() =>

            {

                tv.Text = s;

            });

        }
接着我们修改广播接收器,公开一个该接收的属性,一遍在广播接收器被初始化的时候可以复制。
     public class MainReceiver : BroadcastReceiver

     {

         public IMainInterface mainInterface;

         public override void OnReceive(Context context, Intent intent)

         {

             string str = intent.GetStringExtra("_str");

             if (mainInterface != null)

             {

                 mainInterface.Alert(str);

             }

         }

 }
回到MainActivity中修改OnResume方法。
         protected override void OnResume()

         {

             base.OnResume();

             receiver = new MainReceiver()

             {

                 mainInterface = this

             };

             RegisterReceiver(receiver, new IntentFilter("xamarin-cn.main.receiver"));

             StartService(new Intent(this, typeof(MainService)));

         }
最后效果一样的,读者可以根据实际的情况选择。毕竟他们各自都有或多或少的缺点。
四、绑定服务
其实绑定服务就是将服务中的功能公开给活动,只有这样活动才能调用服务中的方法。而这一过程需要经过一个绑定。首先我们需要一个继承自Binder的类,这样才能将服务通过接口传递给活动。以下为继承自Binder的类,其中我们需要在初始化时将服务传入,然后公开一个方法将服务的实例返回。
     public class MainBinder : Binder

     {

         MainService mainService;

         public MainBinder(MainService ms)

         {

             mainService = ms;

         }

         public MainService GetService()

         {

             return mainService;

         }

 }
接下来我们打开MainService文件,实现OnBind方法,并将上面类返回。
     [Service]

     public class MainService : Service

     {

         public override StartCommandResult OnStartCommand(Intent intent, StartCommandFlags flags, int startId)

         {

             return StartCommandResult.Sticky;

         }

         public override IBinder OnBind(Intent intent)

         {

             return new MainBinder(this);

         }

     }
到此为止,服务这边已经做好了准备。既然是绑定自然不能通过简单的StartService方法开启,因为我们还需要OnBind返回的接口,否则活动无法与服务沟通。这就需要在活动中通过BindService方法进行绑定,但是该方法还需要一个实现了IserviceConnection接口的类,因为通过BindService方法进行绑定的操作是异步的,也就意味着不会阻塞当前调用该方法的线程,而是在服务成功开启并并且OnBind方法返回接口后会回调IserviceConnection中的方法,我们可以看下该接口的方法。
     public interface IServiceConnection : IJavaObject, IDisposable

     {

         void OnServiceConnected(ComponentName name, IBinder service);

         void OnServiceDisconnected(ComponentName name);

 }
关于接口的方法,大致的解释如下:
OnServiceConnected:当服务中的OnBind方法返回接口后将回调该方法,并且通过service参数将OnBind返回的值传递给这个方法。
OnServiceDisconnected:当服务被关闭或者主动断开连接后回调该方法,如果我们利用这个方法重新恢复连接,或者发出异常并关闭对应的活动。
下面我们实现该接口
     public class MainServiceConnection : Java.Lang.Object , IServiceConnection

     {

         public void OnServiceConnected(ComponentName name, Android.OS.IBinder service)

         {

         }

         public void OnServiceDisconnected(ComponentName name)

         {

         }

 }
这里我们没有实现任何代码,该类与活动还没有关联起来,所以我们需要在活动中新建一个公开的变量去保存服务的接口。
     [Activity(Label = "BroadcastStudy", MainLauncher = true, Icon = "@drawable/icon")]

     public class MainActivity : Activity

     {

         private TextView tv;

         public MainBinder mainBinder;
接着我们就可以实现MainServiceConnection类了。
     public class MainServiceConnection : Java.Lang.Object , IServiceConnection

     {

         MainActivity mainActivity;

         public MainServiceConnection(MainActivity ma)

         {

             mainActivity = ma;

         }

         public void OnServiceConnected(ComponentName name, Android.OS.IBinder service)

         {

             mainActivity.mainBinder = (MainBinder)service;

         }

         public void OnServiceDisconnected(ComponentName name)

         {

             mainActivity.mainBinder = null;

         }

 }
最后我们在活动中就可以进行绑定了。
     [Activity(Label = "BroadcastStudy", MainLauncher = true, Icon = "@drawable/icon")]

     public class MainActivity : Activity

     {

         private IServiceConnection serviceConnection;

         private TextView tv;

         public MainBinder mainBinder;

         protected override void OnCreate(Bundle bundle)

         {

             base.OnCreate(bundle);

             SetContentView(Resource.Layout.Main);

             tv = FindViewById<TextView>(Resource.Id.textView1);

         }

         protected override void OnResume()

         {

             base.OnResume();

             serviceConnection = new MainServiceConnection(this);

             BindService(new Intent(this, typeof(MainService)), serviceConnection, Bind.AutoCreate);

         }

         protected override void OnPause()

         {

             base.OnPause();

             UnbindService(serviceConnection);

         }

 }
通过上面的步骤我们还不能看到实际的效果,下面我们需要在服务中实现一个简单的方法,只是返回一段字符串。
         public string GetString()

         {

             return "来自服务";

         }
然后在Main.axml中拖放一个按钮,并在活动中进行绑定。
         protected override void OnCreate(Bundle bundle)

         {

             base.OnCreate(bundle);

             SetContentView(Resource.Layout.Main);

             Button btn = FindViewById<Button>(Resource.Id.button1);

             btn.Click += (e, s) =>

             {

                 if (mainBinder != null)

                 {

                     string str = mainBinder.GetService().GetString();

                     Toast.MakeText(this, str, ToastLength.Long).Show();

                 }

             };

         }
这样我们就完成了活动调用服务中的方法,但是现实开发中。如果是耗时的任务。都是活动调用服务公开的方法后立即返回,然后服务在完成之后通过广播将处理的结果返回给活动,整个过程都是异步的。
Xamarin.Android广播接收器与绑定服务的更多相关文章
- android广播接收器
Android程序创建广播接收器继承BroadcastReceiver Android广播接收器需要在AndroidManifest.xml文件中声明: <recevie android:nam ...
- Android应用中创建绑定服务使得用户可以与服务交互
原文:http://android.eoe.cn/topic/android_sdk 一个绑定的服务是客户服务器接口上的一个服务器.一个绑定的服务允许组件(如:活动)来绑定一个服务,传送请求,接收响应 ...
- Android广播接收器Broadcast Receiver-android学习之旅(十二)
首先继承BroadcastReceiver类,并在manifest中注册 public class MyReceiver extends BroadcastReceiver { public MyRe ...
- Android广播接收器和Activity间传递数据
Activity向广播接收器传递数据很简单,只需要在发送广播前将数据put进Intent中就行了. 广播接收器怎么向Activity传送数据?这里要用到接口,通过在广播接收器里定义一个接口,然后让接收 ...
- Android广播接收器里弹出对话框
不多说,直接上车... public class MyReceiver extends BroadcastReceiver { @Override public void onReceive(fina ...
- android广播接收器BroadcastReceiver
首先看一下什么是 BroadcastReceiver BroadcastReceiver:直译是"广播接收者",所以它的作用是用来接收发送过来的广播的. 那我们有必要知道:什么是广 ...
- Android广播接收器BroadcastRceiver
一.使用BroadcastRceiver 1.创建BroadcastRceiver(MyRceiver),重写OnReceiver: public void onReceive(Context con ...
- (八)Android广播接收器BroadcastReceiver
一.使用Broadcast Reciver 1.右击java文件夹,new->other->Broadcast Receiver后会在AndroidManifest.xml文件中生成一个r ...
- Xamarin.Android开发实践(七)
Xamarin.Android广播接收器与绑定服务 一.前言 学习了前面的活动与服务后,你会发现服务对于活动而言似乎就是透明的,相反活动对于服务也是透明的,所以我们还需要一中机制能够将服务和活动之间架 ...
随机推荐
- VM(虚拟机安装win7 提示 :units specified don't exist, SHSUCDX can't install)解决方法
改成IDE的模式
- 【小程序分享篇 二 】web在线踢人小程序,维持用户只能在一个台电脑持登录状态
最近离职了, 突然记起来还一个小功能没做, 想想也挺简单,留下代码和思路给同事做个参考. 换工作心里挺忐忑, 对未来也充满了憧憬与担忧.(虽然已是老人, 换了N次工作了,但每次心里都和忐忑). 写写代 ...
- 页面嵌入dom与被嵌入iframe的攻防
1.情景一:自己的页面被引入(嵌入)至别人的页面iframe中 if(window.self != window.top){ //url是自己页面的url window.top.location.hr ...
- .NET基础拾遗(5)多线程开发基础
Index : (1)类型语法.内存管理和垃圾回收基础 (2)面向对象的实现和异常的处理基础 (3)字符串.集合与流 (4)委托.事件.反射与特性 (5)多线程开发基础 (6)ADO.NET与数据库开 ...
- 跟我一起云计算(5)——Shards
什么是sharding Sharding的基本思想就要把一个数据库切分成多个部分放到不同的数据库 (server)上,从而缓解单一数据库的性能问题.不太严格的讲,对于海量数据的数据库,如果是因为表多而 ...
- Redis数据库
Redis是k-v型数据库的典范,设计思想及数据结构实现都值得学习. 1.数据类型 value支持五种数据类型:1.字符串(strings)2.字符串列表(lists)3.字符串集合(sets)4.有 ...
- 在Ubuntu 16.10 安装 git 并上传代码至 git.oschina.net
1. 注册一个账号和创建项目 先在git.oschina.net上注册一个账号和新建一个project ,如project name 是"myTest". 2.安装git sudo ...
- EntityFramework Core 1.1是如何创建DbContext实例的呢?
前言 上一篇我们简单讲述了在EF Core1.1中如何进行迁移,本文我们来讲讲EF Core1.1中那些不为人知的事,细抠细节,从我做起. 显式创建DbContext实例 通过带OnConfiguri ...
- javascript表单的Ajax 提交插件的使用
Ajax 提交插件 form.js 表单的下载地址:官方网站:http://malsup.com/jquery/form/ form.js 插件有两个核心方法:ajaxForm()和ajaxSubmi ...
- 关键帧动画:@keyframes
关键帧动画:@keyframes: <!DOCTYPE html> <html> <head> <meta charset="UTF-8" ...