Android简单登录系统
很长时间没有写博客了,最近一直在写android for gis方面的项目。不过这篇博客就不写gis方面的了,今天刚刚做的一个简单的android登录系统。数据库是android自带的sqlite,sqlite的优势就不用我说了哈。下面进入正题。
1.数据库Help类
我们需要编写一个数据库辅助类来访问sqlite数据库。在数据库辅助类中,可以完成数据库的创建,表的增加、删除、修改、查询等操作。
 public class DBHelper extends SQLiteOpenHelper {

       public static final String TB_NAME = "user";

         public static final String ID = "id";

         public static final String NAME = "userid";

         public static final String UerPwd = "userpwd";

     public DBHelper(Context context, String name, CursorFactory factory,

             int version) {

         super(context, name, factory, version);

         this.getWritableDatabase();

         // TODO Auto-generated constructor stub

     }

     @Override

     //建立表

     public void onCreate(SQLiteDatabase arg0) {

         // TODO Auto-generated method stub

         arg0.execSQL("CREATE TABLE IF NOT EXISTS "

                 + TB_NAME + " ("

                 + ID + " INTEGER PRIMARY KEY,"

                 + NAME + " VARCHAR,"

                 + UerPwd + " VARCHAR)");

     }

     @Override

     public void onUpgrade(SQLiteDatabase db, int oldVersion, int newVersion) {

         // TODO Auto-generated method stub

     }

     //关闭数据库

     public void close()

     {

         this.getWritableDatabase().close();

     }

     //添加新用户

     public boolean AddUser(String userid,String userpwd)

     {

         try

         {

         ContentValues cv = new ContentValues();

         cv.put(this.NAME, userid);//添加用户名

         cv.put(this.UerPwd,userpwd);//添加密码

         this.getWritableDatabase().insert(this.TB_NAME,null,cv);

         return true;

         }

         catch(Exception ex)

         {

             return false;

         }

     }

 }
DBHelper
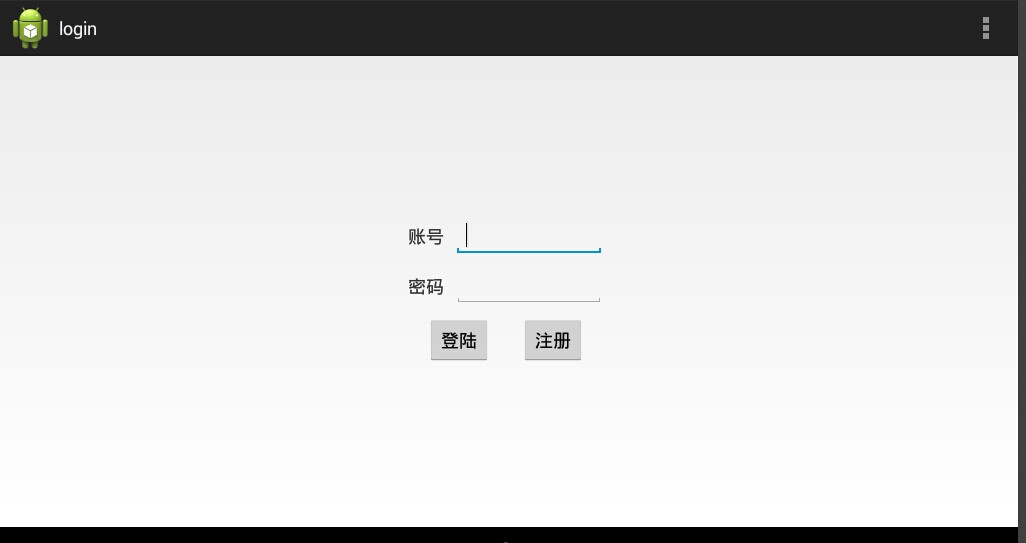
2.登录页面
这个登录系统比较简单,我们只是简单的验证用户名和密码。
 <RelativeLayout xmlns:android="http://schemas.android.com/apk/res/android"

     xmlns:tools="http://schemas.android.com/tools"

     android:layout_width="match_parent"

     android:layout_height="match_parent"

     android:gravity="center"

     android:paddingBottom="@dimen/activity_vertical_margin"

     android:paddingLeft="@dimen/activity_horizontal_margin"

     android:paddingRight="@dimen/activity_horizontal_margin"

     android:paddingTop="@dimen/activity_vertical_margin"

     tools:context=".MainActivity" >

     <LinearLayout

         android:layout_width="fill_parent"

         android:layout_height="150dp"

         android:layout_alignParentTop="true"

         android:layout_centerHorizontal="true"

         android:orientation="vertical" >

         <LinearLayout

             android:id="@+id/lluser"

             android:layout_width="match_parent"

             android:layout_height="wrap_content"

             android:layout_gravity="center"

             android:gravity="center"

             android:orientation="horizontal" >

             <TextView

                 android:id="@+id/tv_user"

                 android:layout_width="wrap_content"

                 android:layout_height="match_parent"

                 android:layout_gravity="center"

                 android:gravity="center"

                 android:text="@string/tv_loginnum"

                 android:textSize="18sp" />

             <EditText

                 android:id="@+id/ed_user"

                 android:layout_width="150dp"

                 android:layout_height="40dp"

                 android:layout_marginLeft="10dp"

                 android:inputType="text"

                 android:textSize="18sp"

                 android:textStyle="normal"

                 android:typeface="normal" >

                 <requestFocus />

             </EditText>

         </LinearLayout>

         <LinearLayout

             android:id="@+id/llpwd"

             android:layout_width="match_parent"

             android:layout_height="wrap_content"

             android:layout_gravity="center"

             android:layout_marginTop="10dp"

             android:gravity="center"

             android:orientation="horizontal" >

             <TextView

                 android:id="@+id/tv_pwd"

                 android:layout_width="wrap_content"

                 android:layout_height="match_parent"

                 android:gravity="center"

                 android:text="@string/tv_password"

                 android:textSize="18sp" />

             <EditText

                 android:id="@+id/ed_pwd"

                 android:layout_width="150dp"

                 android:layout_height="40dp"

                 android:layout_marginLeft="10dp"

                 android:inputType="textPassword"

                 android:textSize="18sp"

                 android:textStyle="normal" />

         </LinearLayout>

         <LinearLayout

             android:layout_width="match_parent"

             android:layout_height="wrap_content"

             android:layout_gravity="center"

             android:layout_marginTop="10dp"

             android:gravity="center"

             android:orientation="horizontal" >

             <Button

                 android:id="@+id/btnlogin"

                 android:layout_width="wrap_content"

                 android:layout_height="match_parent"

                 android:text="@string/txlogin" />

             <Button

                 android:id="@+id/btnreg"

                 android:layout_width="wrap_content"

                 android:layout_height="match_parent"

                 android:layout_gravity="center"

                 android:layout_marginLeft="30dp"

                 android:text="@string/txregister" />

 </LinearLayout>

     </LinearLayout>

 </RelativeLayout>
登录页面
这个登录界面没有任何的修饰,而且我最近喜欢用RelativeLayout和LinearLayout搭配使用。RelativeLayout是相对布局,LinearLayout是绝对布局。登录页面只有两个输入框和两个按钮,一个用于提交,另一个用于注册。
 package com.example.login;

 import android.os.Bundle;

 import android.app.Activity;

 import android.content.Intent;

 import android.database.Cursor;

 import android.database.sqlite.SQLiteDatabase;

 import android.view.Menu;

 import android.view.View;

 import android.widget.Button;

 import android.widget.EditText;

 import android.widget.Toast;

 public class MainActivity extends Activity {

     EditText ed_id;

     EditText ed_pwd;

     DBHelper database;

     @Override

     protected void onCreate(Bundle savedInstanceState) {

         super.onCreate(savedInstanceState);

         setContentView(R.layout.activity_main);

         ed_id=(EditText)findViewById(R.id.ed_user);

         ed_pwd=(EditText)findViewById(R.id.ed_pwd);

         Button btnlogin=(Button)findViewById(R.id.btnlogin);

          database = new DBHelper(MainActivity.this,"LoginInfo",null,1);//这段代码放到Activity类中才用this

         btnlogin.setOnClickListener(new View.OnClickListener() {

             @Override

             public void onClick(View v) {

                 // TODO Auto-generated method stub

                 getUser();

             }

         });

         Button btnreg=(Button)findViewById(R.id.btnreg);

         btnreg.setOnClickListener(new View.OnClickListener() {

             @Override

             public void onClick(View v) {

                 // TODO Auto-generated method stub

                 Intent intent=new Intent();

                 intent.setClass(MainActivity.this, UserRegister.class);

                 startActivity(intent);

             }

         });

     }

      public void getUser()

      {

          String sql="select * from user where userid=?";

             Cursor cursor=database.getWritableDatabase().rawQuery(sql, new String[]{ed_id.getText().toString()});

             if(cursor.moveToFirst())

             {

               if(ed_pwd.getText().toString().equals(cursor.getString(cursor.getColumnIndex("userpwd"))))

               {

                   Toast.makeText(this, "登录成功", 5000).show();

               }

               else

               {

                   Toast.makeText(this, "用户名或者密码错误", 5000).show();

               }

             }

              database.close();

      }

         @Override

     public boolean onCreateOptionsMenu(Menu menu) {

         // Inflate the menu; this adds items to the action bar if it is present.

         getMenuInflater().inflate(R.menu.main, menu);

         return true;

     }

 }
登录界面代码
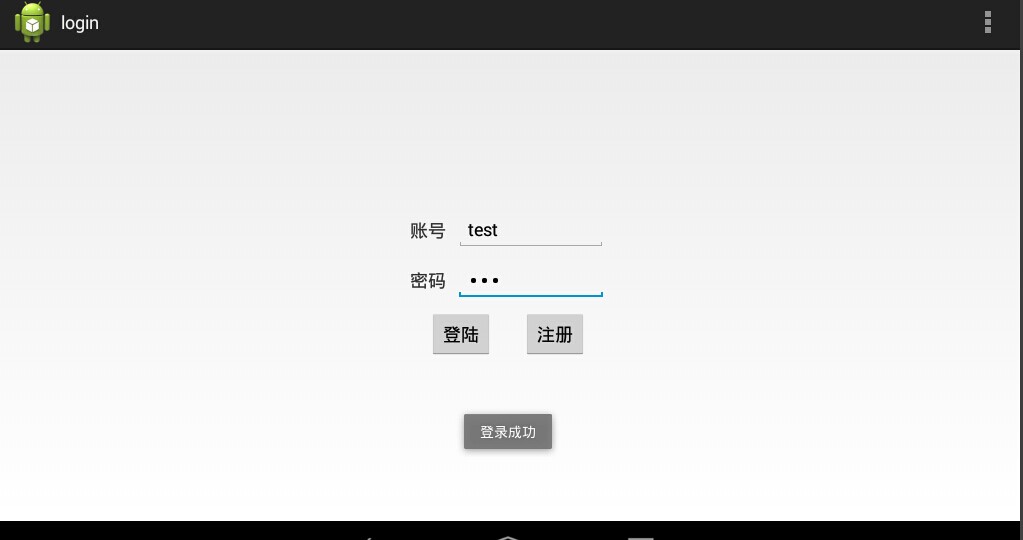
在后台,我们主要做的就是对用户名和密码的验证。通过前面定义的辅助类来实现。
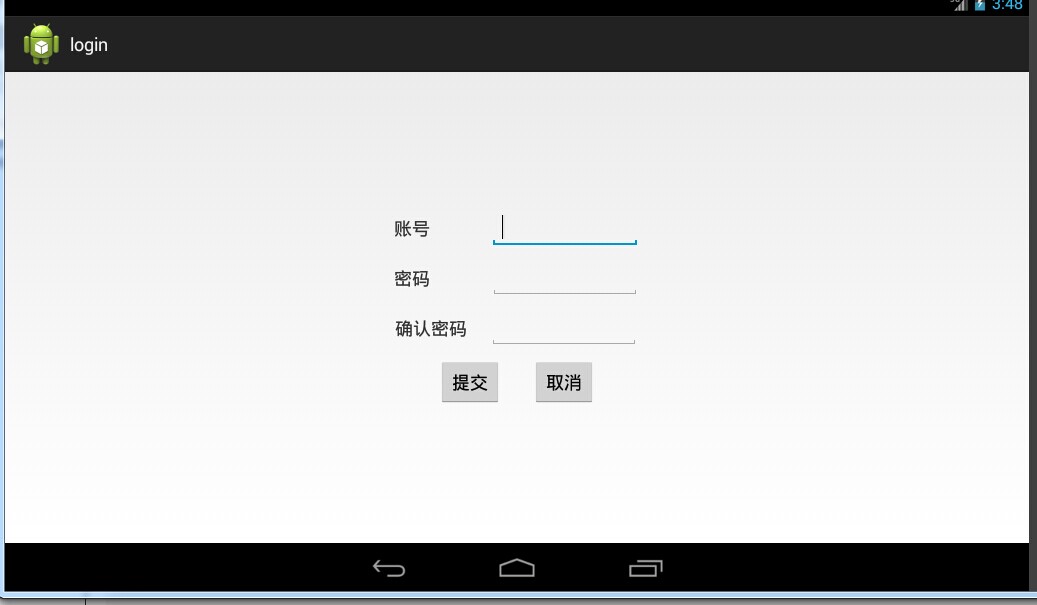
3.注册页面
注册用户,提供新用户的注册。只要用户名和密码,以及对密码的确认。
 <?xml version="1.0" encoding="utf-8"?>

 <RelativeLayout xmlns:android="http://schemas.android.com/apk/res/android"

     android:layout_width="match_parent"

     android:layout_height="match_parent"

     android:gravity="center" >

      <LinearLayout

          android:layout_width="fill_parent"

          android:layout_height="200dp"

          android:layout_alignParentTop="true"

          android:layout_centerHorizontal="true"

          android:gravity="center"

          android:orientation="vertical" >

         <LinearLayout

             android:id="@+id/lluserreg"

             android:layout_width="match_parent"

             android:layout_height="wrap_content"

             android:layout_gravity="center"

             android:orientation="horizontal" >

             <TextView

                 android:id="@+id/tv_userreg"

                 android:layout_width="wrap_content"

                 android:layout_height="match_parent"

                 android:layout_gravity="center"

                 android:gravity="center"

                 android:text="@string/tv_loginnum"

                 android:textSize="18sp" />

             <EditText

                 android:id="@+id/ed_userreg"

                 android:layout_width="150dp"

                 android:layout_height="40dp"

                 android:layout_marginLeft="60dp"

                 android:inputType="text"

                 android:textSize="18sp"

                 android:textStyle="normal"

                 android:typeface="normal" >

                 <requestFocus />

             </EditText>

         </LinearLayout>

         <LinearLayout

             android:id="@+id/llpwdreg"

             android:layout_width="match_parent"

             android:layout_height="wrap_content"

             android:layout_gravity="center"

             android:layout_marginTop="10dp"

             android:orientation="horizontal" >

             <TextView

                 android:id="@+id/tv_pwdreg"

                 android:layout_width="wrap_content"

                 android:layout_height="match_parent"

                 android:gravity="center"

                 android:text="@string/tv_password"

                 android:textSize="18sp" />

             <EditText

                 android:id="@+id/ed_pwdreg"

                 android:layout_width="150dp"

                 android:layout_height="40dp"

                 android:layout_marginLeft="60dp"

                 android:inputType="textPassword"

                 android:textSize="18sp"

                 android:textStyle="normal" />

         </LinearLayout>

                <LinearLayout

                    android:id="@+id/llpwdreg2"

                    android:layout_width="match_parent"

                    android:layout_height="wrap_content"

                    android:layout_gravity="center"

                    android:layout_marginTop="10dp"

                    android:orientation="horizontal" >

                    <TextView

                        android:id="@+id/tv_pwdreg2"

                        android:layout_width="wrap_content"

                        android:layout_height="match_parent"

                        android:gravity="center"

                        android:text="@string/tv_conregpwd"

                        android:textSize="18sp" />

             <EditText

                 android:id="@+id/ed_pwdreg2"

                 android:layout_width="150dp"

                 android:layout_height="40dp"

                 android:layout_marginLeft="22dp"

                 android:inputType="textPassword"

                 android:textSize="18sp"

                 android:textStyle="normal" />

         </LinearLayout>

         <LinearLayout

             android:layout_width="match_parent"

             android:layout_height="wrap_content"

             android:layout_gravity="center"

             android:layout_marginTop="10dp"

             android:gravity="center"

             android:orientation="horizontal" >

             <Button

                 android:id="@+id/btnsub"

                 android:layout_width="wrap_content"

                 android:layout_height="match_parent"

                 android:text="@string/txsubmit" />

             <Button

                 android:id="@+id/btncancel"

                 android:layout_width="wrap_content"

                 android:layout_height="match_parent"

                 android:layout_gravity="center"

                 android:layout_marginLeft="30dp"

                 android:text="@string/txcancel" />

 </LinearLayout>

     </LinearLayout>

 </RelativeLayout>
用户注册
界面包括:用户名、密码、确认密码、提交和取消。
 package com.example.login;

 import android.app.Activity;

 import android.content.Intent;

 import android.database.Cursor;

 import android.os.Bundle;

 import android.view.View;

 import android.widget.Button;

 import android.widget.EditText;

 import android.widget.Toast;

 public class UserRegister extends Activity {

     EditText edtext;

     EditText edpwd;

     EditText edpwd2;

     protected void onCreate(Bundle savedInstanceState)

     {

         super.onCreate(savedInstanceState);

         setContentView(R.layout.user_add);

         Button btnsub=(Button)findViewById(R.id.btnsub);

         edtext=(EditText)findViewById(R.id.ed_userreg);

         edpwd=(EditText)findViewById(R.id.ed_pwdreg);

         edpwd2=(EditText)findViewById(R.id.ed_pwdreg2);

         btnsub.setOnClickListener(new View.OnClickListener() {

             @Override

             public void onClick(View v) {

                 // TODO Auto-generated method stub

                 setUser();

             }

         });

     Button btncancel=(Button)findViewById(R.id.btncancel);

     btncancel.setOnClickListener(new View.OnClickListener() {

         @Override

         public void onClick(View v) {

             // TODO Auto-generated method stub

             finish();

         }

     });

     }

     private void setUser()

     {

         DBHelper database=new DBHelper(UserRegister.this,"LoginInfo",null,1);

         if(edtext.getText().toString().length()<=0||edpwd.getText().toString().length()<=0||edpwd2.getText().toString().length()<=0)

         {

             Toast.makeText(this, "用户名或密码不能为空", 5000).show();

             return;

         }

         if(edtext.getText().toString().length()>0)

         {

             String sql="select * from user where userid=?";

             Cursor cursor=database.getWritableDatabase().rawQuery(sql, new String[]{edtext.getText().toString()});

             if(cursor.moveToFirst())

             {

                 Toast.makeText(this, "用户名已经存在", 5000).show();

                 return;

             }

         }

         if(!edpwd.getText().toString().equals(edpwd2.getText().toString()))

         {

             Toast.makeText(this, "两次输入的密码不同", 5000).show();

             return;

         }

         if(database.AddUser(edtext.getText().toString(), edpwd.getText().toString()))

         {

             Toast.makeText(this, "用户注册成功", 5000).show();

             Intent intent=new Intent();

             intent.setClass(this, MainActivity.class);

             startActivity(intent);

         }

         else

         {

             Toast.makeText(this, "用户注册失败", 5000).show();

         }

         database.close();

     }

 }
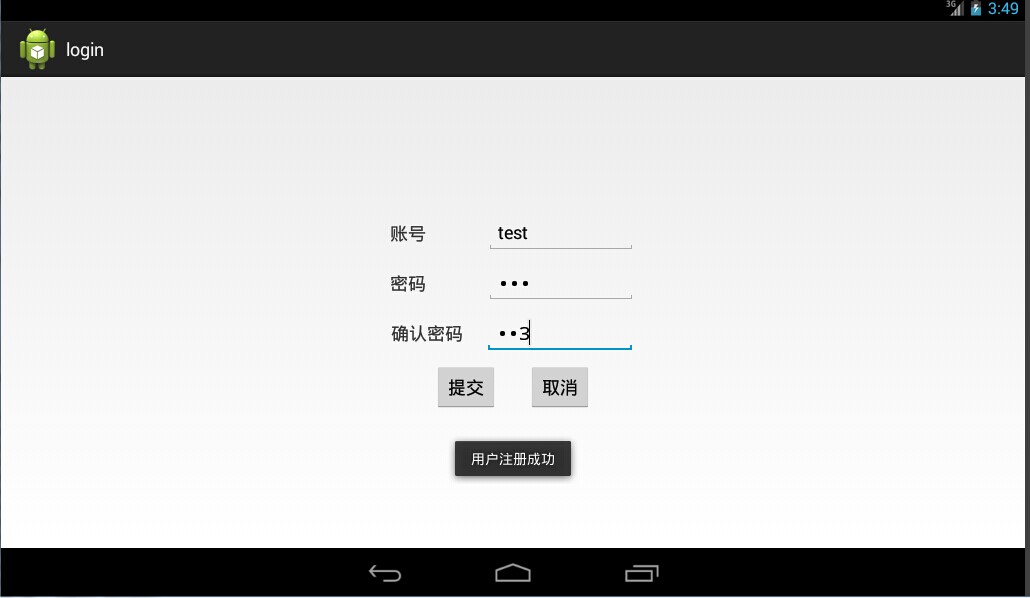
界面注册
后台代码主要完成用户的添加。为了确保用户的唯一性,需要对用户的账号进行验证,看表中是否已经存在相同的账号。同时,还需要确保两次输入密码的一致性。
4.界面截图
5.Sqlite相关知识
SQLiteOpenHelper是SQLiteDatabase的一个帮助类,用来管理数据库的创建和版本的更新。一般是建立一个类继承它,并实现它的onCreate和onUpgrade方法。
| 方法名 | 方法描述 |
|---|---|
| SQLiteOpenHelper(Context context,String name,SQLiteDatabase.CursorFactory factory,int version) | 构造方法,一般是传递一个要创建的数据库名称那么参数 |
| onCreate(SQLiteDatabase db) | 创建数据库时调用 |
| onUpgrade(SQLiteDatabase db,int oldVersion , int newVersion) | 版本更新时调用 |
| getReadableDatabase() | 创建或打开一个只读数据库 |
| getWritableDatabase() | 创建或打开一个读写数据库 |
SQLiteDatabase类为我们提供了很多种方法,而较常用的方法如下
| (返回值)方法名 | 方法描述 |
|---|---|
| (int) delete(String table,String whereClause,String[] whereArgs) | 删除数据行的便捷方法 |
| (long) insert(String table,String nullColumnHack,ContentValues values) | 添加数据行的便捷方法 |
| (int) update(String table, ContentValues values, String whereClause, String[] whereArgs) | 更新数据行的便捷方法 |
| (void) execSQL(String sql) | 执行一个SQL语句,可以是一个select或其他的sql语句 |
| (void) close() | 关闭数据库 |
| (Cursor) query(String table, String[] columns, String selection, String[] selectionArgs, String groupBy, String having, String orderBy, String limit) | 查询指定的数据表返回一个带游标的数据集 |
| (Cursor) rawQuery(String sql, String[] selectionArgs) | 运行一个预置的SQL语句,返回带游标的数据集(与上面的语句最大的区别就是防止SQL注入) |
Android简单登录系统的更多相关文章
- mvc架构的简单登录系统,jsp
文件结构 三个jsp文件负责前段界面的实现 login.jsp <%@ page language="java" import="java.util.*" ...
- java单点登录系统CAS的简单使用
转:http://blog.csdn.net/yunye114105/article/details/7997041 背景 有几个相对独立的java的web应用系统, 各自有自己的登陆验证功能,用户在 ...
- Springboot - 建立简单的用户登录系统
在开始编码前,先建立几个Package(可以按个人习惯命名),如图 1.Controllers 用于存放控制器类 2.Models 用于存放数据实体类 3.Repositories 用于存放数据库操作 ...
- Python 做简单的登录系统
案例 之 登录系统原创作品1 该随笔 仅插入部分代码:全部py文件源代码请从百度网盘自行下载! 链接:https://pan.baidu.com/s/1_sTcDvs5XEGDcnpoQEIrMg 提 ...
- Android应用与系统安全防御
来源:HTTP://WWW.CNBLOGS.COM/GOODHACKER/P/3864680.HTML ANDROID应用安全防御 Android应用的安全隐患包括三个方面:代码安全.数据安全和组件安 ...
- Androidの共享登录之方案研究
由于最近公司提到了一个需求是,一个应用登录成功了,另一个自动登录. 绞尽脑汁想了好几天,看起来很容易但是想深点就漏洞百出,有的时候代码都写完了测试都成功了突然发现给一个假设就完全失效. 先前几个同事之 ...
- TODO:Laravel 内置简单登录
TODO:Laravel 内置简单登录 1. 激活Laravel的Auth系统Laravel 利用 PHP 的新特性 trait 内置了非常完善好用的简单用户登录注册功能,适合一些不需要复杂用户权限管 ...
- 教你开发asp.net的单点登录系统
单点登录系统,简称SSO.以下是我花了几个小时写的一个简单实现.特把实现思路和大家分享. 背景:某项目使用ASP.NET MemberShip来做会员系统,需要同时登录多个系统.而项目的开发人员无法在 ...
- 纯jsp用户登录系统
用纯jsp技术实现用户登录系统,需要用到三个.jsp文件.在文本目录下新建三个.jsp文件,分别命名为login.jsp,logincl.jsp和wel.jsp. 1.login.jsp文件用来放界面 ...
随机推荐
- 深入浅出NodeJS——异步I/O
底层操作系统,异步通过信号量.消息等方式有着广泛的应用. PHP语言从头到尾都是以同步堵塞方式执行,利于程序猿顺序编写业务逻辑. 异步I/O.事件驱动.单线程构成Node的基调. why异步I/O ( ...
- UBUNTU系统root帐号解锁
UBUNTU系统启动时默认以安装系统时输入的用户名进行登录.如:以非root帐号rusky登录系统,当我们做某些操作时系统提示需要输入root密码.但我们并没有设置过root密码.此时,可按如下操作为 ...
- Input输入字体颜色改变js(兼容IE)
从网上找的代码,自己封装了一下(前提:引用jQuery库) 方法1: HTML: <div class="box"> <div class="ipt1& ...
- css系列教程--margin padding column(完结)
margin/margin-left/margin-right/margin-top/margin-bottom设置边距属性margin:0;--所有外边距0margin:0 1px;--margin ...
- Android studio教程:[6]创建多个Activity
通常来说,一个android应用程序不止一个Activity(活动),更不止一个界面.于是需要创建多个Activity来满足应用程序的要求,这里我将告诉大家如何添加新的Activity,并实现Acti ...
- ios9基础知识总结(一)
I--load 类被加载时自动调用,只要类的项目中,运行时就会加载.类一加载,此方法就会调用 //类被加载时调用,只要类的项目中,运行时就会加载,类一加载,此方法就调用 + (void)load { ...
- 转:C#整数三种强制类型转换int、Convert.ToInt32()、int.Parse()的区别
1.int适合简单数据类型之间的转换,C#的默认整型是int32(不支持bool型); 2.int.Parse(string sParameter)是个构造函数,参数类型只支持string类型; 3. ...
- 设计模式之桥接模式(Bridge)--结构模型
1.意图 将抽象部分与它的实现部分分离,使它们可以独立地变化. 2.适用性 你不希望在抽象和它的实现部分之间有一个固定的绑定关系. 类的抽象与它的实现都应该可以通过子类的方式加以扩展. 抽象部分与实现 ...
- zz[C++]合理的设计和使用消息队列
http://www.cnblogs.com/egmkang/archive/2012/11/17/2763295.html 生产者消费者问题,是永远的经典. 单纯让多个线程去竞争,占有资源然后处理, ...
- 踩坑学php(1)
前言: 为什么要学php 呢?作为一个前端,一直有着了解后台的好奇心:作为一个计算机毕业的,一直有着实践更多设计模式和数据库相关的东西:而php 非常流行,拥有非常多的资源,入门应该容易: 为什么叫& ...