cell展开的几种方式
一.插入新的cell
原理:
(1)定义是否展开,和展开的cell的下标
@property (assign, nonatomic) BOOL isExpand; //是否展开

@property (strong, nonatomic) NSIndexPath *selectedIndexPath;//展开的cell的下标
(2)创建两个不同的cell

- (UITableViewCell *)tableView:(UITableView *)tableView cellForRowAtIndexPath:(NSIndexPath *)indexPath {

    UITableViewCell *cell;

    if (self.isExpand && self.selectedIndexPath.row < indexPath.row && indexPath.row <= self.selectedIndexPath.row + ExpandCount) {   // Expand cell

        cell = [tableView dequeueReusableCellWithIdentifier:@"CsutomExpansionCell" forIndexPath:indexPath];

    } else {    // Normal cell

        cell = [tableView dequeueReusableCellWithIdentifier:@"CustomCell" forIndexPath:indexPath];

    }

    return cell;

}
(3)创建你需要的cell的数量
 if (self.isExpand) {

        return CellCount + ExpandCount;

    }

    return CellCount;
(4)点击的时候向点击的cell下面插入你需要展示的cell(可展开多个),再次点击删除
- (void)tableView:(UITableView *)tableView didSelectRowAtIndexPath:(NSIndexPath *)indexPath {

    if (!self.selectedIndexPath) {

        self.isExpand = YES;

        self.selectedIndexPath = indexPath;

        [self.tavleView beginUpdates];

        [self.tavleView insertRowsAtIndexPaths:[self indexPathsForExpandRow:indexPath.row] withRowAnimation:UITableViewRowAnimationTop];

        [self.tavleView endUpdates];

    } else {

        if (self.isExpand) {

            if (self.selectedIndexPath == indexPath) {

                self.isExpand = NO;

                [self.tavleView beginUpdates];

                [self.tavleView deleteRowsAtIndexPaths:[self indexPathsForExpandRow:indexPath.row] withRowAnimation:UITableViewRowAnimationTop];

                [self.tavleView endUpdates];

                self.selectedIndexPath = nil;

            } else if (self.selectedIndexPath.row < indexPath.row && indexPath.row <= self.selectedIndexPath.row + ExpandCount) {

            } else {

                self.isExpand = NO;

                [self.tavleView beginUpdates];

                [self.tavleView deleteRowsAtIndexPaths:[self indexPathsForExpandRow:self.selectedIndexPath.row] withRowAnimation:UITableViewRowAnimationTop];

                [self.tavleView endUpdates];

                self.selectedIndexPath = nil;

            }

        }

    }

}

#pragma mark - other

- (NSArray *)indexPathsForExpandRow:(NSInteger)row {

    NSMutableArray *indexPaths = [NSMutableArray array];

    for (int i = ; i <= ExpandCount; i++) {

        NSIndexPath *idxPth = [NSIndexPath indexPathForRow:row + i inSection:];

        [indexPaths addObject:idxPth];

    }

    return [indexPaths copy];

}
二.在不同的section里插入cell
原理:
(1)定义是否展开,和展开的cell的下标
(2)创建两个不同的cell
- (UITableViewCell *)tableView:(UITableView *)tableView cellForRowAtIndexPath:(NSIndexPath *)indexPath {

    UITableViewCell *cell;

    if (self.isExpand && self.selectedIndexPath.section == indexPath.section) {     // Expand Cell

        cell = [tableView dequeueReusableCellWithIdentifier:@"CsutomExpansionCell" forIndexPath:indexPath];

    } else {    // Normal Cell

        cell = [tableView dequeueReusableCellWithIdentifier:@"CustomCell" forIndexPath:indexPath];

    }

    return cell;

}
(3)创建你需要展示普通状态下cell,section的数量
- (NSInteger)numberOfSectionsInTableView:(UITableView *)tableView {

    return SectionCount;

}
(4)改变你展开的时候,展开的section的cell的数量
- (NSInteger)tableView:(UITableView *)tableView numberOfRowsInSection:(NSInteger)section {

    if (self.isExpand && self.selectedIndexPath.section == section) {

        return  + ExpandCount; //多个数量

    }

    return ;

}
(5)点击的时候向点击的cell的section内插入你需要展示的cell(可展开多个),再次点击删除
- (void)tableView:(UITableView *)tableView didSelectRowAtIndexPath:(NSIndexPath *)indexPath {

    if (!self.selectedIndexPath) {

        self.isExpand = YES;

        self.selectedIndexPath = indexPath;

        [self.tableView beginUpdates];

        [self.tableView insertRowsAtIndexPaths:[self indexPathsForExpandSection:indexPath.section] withRowAnimation:UITableViewRowAnimationTop];

        [self.tableView endUpdates];

    } else {

        if (self.isExpand) {

            if (self.selectedIndexPath == indexPath) {

                self.isExpand = NO;

                [self.tableView beginUpdates];

                [self.tableView deleteRowsAtIndexPaths:[self indexPathsForExpandSection:indexPath.section] withRowAnimation:UITableViewRowAnimationTop];

                [self.tableView endUpdates];

                self.selectedIndexPath = nil;

            } else if (self.selectedIndexPath.row != indexPath.row && indexPath.section <= self.selectedIndexPath.section) {

                // Select the expand cell, do the relating dealing.

            } else {

                self.isExpand = NO;

                [self.tableView beginUpdates];

                [self.tableView deleteRowsAtIndexPaths:[self indexPathsForExpandSection:self.selectedIndexPath.section] withRowAnimation:UITableViewRowAnimationTop];

                [self.tableView endUpdates];

                self.selectedIndexPath = nil;

            }

        }

    }

}

- (NSArray *)indexPathsForExpandSection:(NSInteger)section {

    NSMutableArray *indexPaths = [NSMutableArray array];

    for (int i = ; i <= ExpandCount; i++) {

        NSIndexPath *idxPth = [NSIndexPath indexPathForRow:i inSection:section];

        [indexPaths addObject:idxPth];

    }

    return [indexPaths copy];

}
三.更改cell的高度
原理:
(1)定义是否展开,和展开的cell的下标
(2)创建一个的cell,分上半部分和下半部分
(3)创建cell的高度,分普通情况下的高度和展开后的高度
- (CGFloat)tableView:(UITableView *)tableView heightForRowAtIndexPath:(NSIndexPath *)indexPath {

    if (self.isExpand && self.selectedIndexPath == indexPath) {

        return ;

    } else {

        return ;

    }

}
(4)点击的时候向点击的cell刷新点击的cell
- (void)tableView:(UITableView *)tableView didSelectRowAtIndexPath:(NSIndexPath *)indexPath {

    if (!self.selectedIndexPath) {

        self.isExpand = YES;

        self.selectedIndexPath = indexPath;

        [self.tableView beginUpdates];

        [self.tableView reloadRowsAtIndexPaths:@[indexPath] withRowAnimation:UITableViewRowAnimationFade];

        [self.tableView endUpdates];

    } else {

        if (self.isExpand) {

            if (self.selectedIndexPath == indexPath) {

                self.isExpand = NO;

                [self.tableView beginUpdates];

                [self.tableView reloadRowsAtIndexPaths:@[indexPath] withRowAnimation:UITableViewRowAnimationFade];

                [self.tableView endUpdates];

                self.selectedIndexPath = nil;

            } else {

                self.isExpand = NO;

                [self.tableView beginUpdates];

                [self.tableView reloadRowsAtIndexPaths:@[self.selectedIndexPath] withRowAnimation:UITableViewRowAnimationFade];

                [self.tableView endUpdates];

                self.selectedIndexPath = nil;

            }

        }

    }

}
四.自定义section,点击展开相应的cell(下午有空写...)
demo链接
http://pan.baidu.com/s/1c0YQDNE
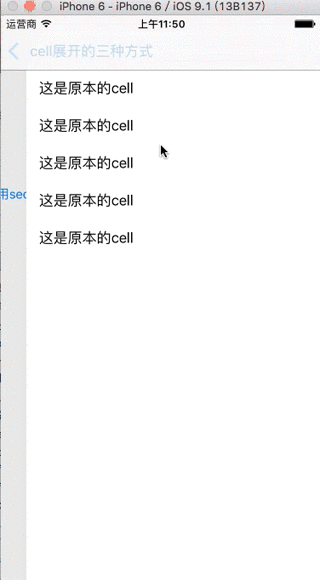
效果图
cell展开的几种方式的更多相关文章
- cell重用的几种方式
1.使用xib重用 //ios6 之后推荐大家使用的重用方式 //动态的使用self获得当前类名,来作为唯一的标示 NSString * identifier = NSStringFromClass( ...
- .NET环境下导出Excel表格的两种方式和导入两种类型的Excel表格
一.导出Excel表格的两种方式,其中两种方式指的是导出XML数据类型的Excel(即保存的时候可以只需要修改扩展名为.xls)和真正的Excel这两种. using System; using Sy ...
- Android数据存储五种方式总结
本文介绍Android平台进行数据存储的五大方式,分别如下: 1 使用SharedPreferences存储数据 2 文件存储数据 3 SQLite数据库存储数据 4 使用Cont ...
- Excel导出的几种方式
1.html 前台html与js代码(文件:ExportExcelByHtml.aspx): <html xmlns="http://www.w3.org/1999/xhtml&quo ...
- C++创建对象的两种方式
C++创建对象有两种方式,在栈上创建对象(Objects on the Stack)和在堆上创建对象(Objects on the Heap). 假设我们有以下的类: #include <str ...
- Linux就这个范儿 第15章 七种武器 linux 同步IO: sync、fsync与fdatasync Linux中的内存大页面huge page/large page David Cutler Linux读写内存数据的三种方式
Linux就这个范儿 第15章 七种武器 linux 同步IO: sync.fsync与fdatasync Linux中的内存大页面huge page/large page David Cut ...
- 实现顶部轮播,下部listview经典布局的两种方式
开头: 在做android开发的时候,我们经常会遇到这样的布局,上面是一个图片轮播图,下面是一些列表的项目.很多新闻app,视频类app都采用这样的布局.起初的时候 由于没有很多参考,我自己想到了一种 ...
- java开发webservice的几种方式(转载)
webservice的应用已经越来越广泛了,下面介绍几种在Java体系中开发webservice的方式,相当于做个记录. 1.Axis2方式 Axis是apache下一个开源的webservice开发 ...
- 加载xib文件的两种方式
一.加载xib文件的两种方式 1.方法一(NewsCell是xib文件的名称) NSArray *objects = [[NSBundle mainBundle] loadNibNamed:@&quo ...
随机推荐
- 16年毕业的前端er在杭州求职ing
来杭州也有一两个星期了,这个周末下雨,是在没地去,还是习惯性的打开电脑逛技术论坛,想想也是好久没有更新博文了... 背景 因为曾经看过一篇文章面试分享:一年经验初探阿里巴巴前端社招所以来杭州也是带有目 ...
- log日志应用 自定义的log
package com.kxd.utils; import java.util.Hashtable; import android.util.Log; /** * The class for prin ...
- RK3288开发过程中遇到的问题点和解决方法之Devices
分区大小和“多用户支持” \device\rockchip\common\BoardConfig.mk BUILD_WITH_UMS ?= true改为BUILD_WITH_UMS ?= false ...
- Android属性系统简介
1.简介 在android 系统中,为统一管理系统的属性,设计了一个统一的属性系统.每个属性都有一个名称和值,他们都是字符串格式.属性被大量使用在Android系统中,用来记录系统设置或进程之间的信息 ...
- MFC技术积累——基于MFC对话框类的那些事儿3
3.3.2 创建图形画刷来实现位图加载 1.首先在Resource View中导入一幅位图,位图大小96×96像素: 2.其次在主对话框中添加一个静态文本资源,ID号是IDC_BITMAPAREA,添 ...
- ubuntu 16.04 国内源安装docker
1. 通过curl命令安装 检查是否安装curl root@ros-OptiPlex-3050:~# which curlroot@ros-OptiPlex-3050:~# 更新安装 root@ros ...
- Cairo Drawing Model
Cairo Drawing Model Cairo是一个强力的2D绘图库. Destination 是你最终绘图的目标, 可以是一系列Pixel或者绑定到SVG或PDF文件上. Source 是实际在 ...
- 编程中什么是「Context(上下文)」?
https://www.zhihu.com/question/26387327 每一段程序都有很多外部变量.只有像Add这种简单的函数才是没有外部变量的.一旦你的一段程序有了外部变量,这段程序就不完整 ...
- 基于Python的Web应用开发实战——2 程序的基本结构
2.1 初始化 所有Flaks程序都必须创建一个程序实例. Web服务器使用一种名为Web服务器网关接口(Web Server Gateway Interface,WSGI)的协议,把接收自客户端的所 ...
- Bootstrap 网格系统(Grid System)实例3
Bootstrap 网格系统(Grid System)实例:堆叠水平 <!DOCTYPE html><html><head><meta http-equiv= ...