cell展开的几种方式
一.插入新的cell
原理:
(1)定义是否展开,和展开的cell的下标
@property (assign, nonatomic) BOOL isExpand; //是否展开

@property (strong, nonatomic) NSIndexPath *selectedIndexPath;//展开的cell的下标
(2)创建两个不同的cell

- (UITableViewCell *)tableView:(UITableView *)tableView cellForRowAtIndexPath:(NSIndexPath *)indexPath {

    UITableViewCell *cell;

    if (self.isExpand && self.selectedIndexPath.row < indexPath.row && indexPath.row <= self.selectedIndexPath.row + ExpandCount) {   // Expand cell

        cell = [tableView dequeueReusableCellWithIdentifier:@"CsutomExpansionCell" forIndexPath:indexPath];

    } else {    // Normal cell

        cell = [tableView dequeueReusableCellWithIdentifier:@"CustomCell" forIndexPath:indexPath];

    }

    return cell;

}
(3)创建你需要的cell的数量
 if (self.isExpand) {

        return CellCount + ExpandCount;

    }

    return CellCount;
(4)点击的时候向点击的cell下面插入你需要展示的cell(可展开多个),再次点击删除
- (void)tableView:(UITableView *)tableView didSelectRowAtIndexPath:(NSIndexPath *)indexPath {

    if (!self.selectedIndexPath) {

        self.isExpand = YES;

        self.selectedIndexPath = indexPath;

        [self.tavleView beginUpdates];

        [self.tavleView insertRowsAtIndexPaths:[self indexPathsForExpandRow:indexPath.row] withRowAnimation:UITableViewRowAnimationTop];

        [self.tavleView endUpdates];

    } else {

        if (self.isExpand) {

            if (self.selectedIndexPath == indexPath) {

                self.isExpand = NO;

                [self.tavleView beginUpdates];

                [self.tavleView deleteRowsAtIndexPaths:[self indexPathsForExpandRow:indexPath.row] withRowAnimation:UITableViewRowAnimationTop];

                [self.tavleView endUpdates];

                self.selectedIndexPath = nil;

            } else if (self.selectedIndexPath.row < indexPath.row && indexPath.row <= self.selectedIndexPath.row + ExpandCount) {

            } else {

                self.isExpand = NO;

                [self.tavleView beginUpdates];

                [self.tavleView deleteRowsAtIndexPaths:[self indexPathsForExpandRow:self.selectedIndexPath.row] withRowAnimation:UITableViewRowAnimationTop];

                [self.tavleView endUpdates];

                self.selectedIndexPath = nil;

            }

        }

    }

}

#pragma mark - other

- (NSArray *)indexPathsForExpandRow:(NSInteger)row {

    NSMutableArray *indexPaths = [NSMutableArray array];

    for (int i = ; i <= ExpandCount; i++) {

        NSIndexPath *idxPth = [NSIndexPath indexPathForRow:row + i inSection:];

        [indexPaths addObject:idxPth];

    }

    return [indexPaths copy];

}
二.在不同的section里插入cell
原理:
(1)定义是否展开,和展开的cell的下标
(2)创建两个不同的cell
- (UITableViewCell *)tableView:(UITableView *)tableView cellForRowAtIndexPath:(NSIndexPath *)indexPath {

    UITableViewCell *cell;

    if (self.isExpand && self.selectedIndexPath.section == indexPath.section) {     // Expand Cell

        cell = [tableView dequeueReusableCellWithIdentifier:@"CsutomExpansionCell" forIndexPath:indexPath];

    } else {    // Normal Cell

        cell = [tableView dequeueReusableCellWithIdentifier:@"CustomCell" forIndexPath:indexPath];

    }

    return cell;

}
(3)创建你需要展示普通状态下cell,section的数量
- (NSInteger)numberOfSectionsInTableView:(UITableView *)tableView {

    return SectionCount;

}
(4)改变你展开的时候,展开的section的cell的数量
- (NSInteger)tableView:(UITableView *)tableView numberOfRowsInSection:(NSInteger)section {

    if (self.isExpand && self.selectedIndexPath.section == section) {

        return  + ExpandCount; //多个数量

    }

    return ;

}
(5)点击的时候向点击的cell的section内插入你需要展示的cell(可展开多个),再次点击删除
- (void)tableView:(UITableView *)tableView didSelectRowAtIndexPath:(NSIndexPath *)indexPath {

    if (!self.selectedIndexPath) {

        self.isExpand = YES;

        self.selectedIndexPath = indexPath;

        [self.tableView beginUpdates];

        [self.tableView insertRowsAtIndexPaths:[self indexPathsForExpandSection:indexPath.section] withRowAnimation:UITableViewRowAnimationTop];

        [self.tableView endUpdates];

    } else {

        if (self.isExpand) {

            if (self.selectedIndexPath == indexPath) {

                self.isExpand = NO;

                [self.tableView beginUpdates];

                [self.tableView deleteRowsAtIndexPaths:[self indexPathsForExpandSection:indexPath.section] withRowAnimation:UITableViewRowAnimationTop];

                [self.tableView endUpdates];

                self.selectedIndexPath = nil;

            } else if (self.selectedIndexPath.row != indexPath.row && indexPath.section <= self.selectedIndexPath.section) {

                // Select the expand cell, do the relating dealing.

            } else {

                self.isExpand = NO;

                [self.tableView beginUpdates];

                [self.tableView deleteRowsAtIndexPaths:[self indexPathsForExpandSection:self.selectedIndexPath.section] withRowAnimation:UITableViewRowAnimationTop];

                [self.tableView endUpdates];

                self.selectedIndexPath = nil;

            }

        }

    }

}

- (NSArray *)indexPathsForExpandSection:(NSInteger)section {

    NSMutableArray *indexPaths = [NSMutableArray array];

    for (int i = ; i <= ExpandCount; i++) {

        NSIndexPath *idxPth = [NSIndexPath indexPathForRow:i inSection:section];

        [indexPaths addObject:idxPth];

    }

    return [indexPaths copy];

}
三.更改cell的高度
原理:
(1)定义是否展开,和展开的cell的下标
(2)创建一个的cell,分上半部分和下半部分
(3)创建cell的高度,分普通情况下的高度和展开后的高度
- (CGFloat)tableView:(UITableView *)tableView heightForRowAtIndexPath:(NSIndexPath *)indexPath {

    if (self.isExpand && self.selectedIndexPath == indexPath) {

        return ;

    } else {

        return ;

    }

}
(4)点击的时候向点击的cell刷新点击的cell
- (void)tableView:(UITableView *)tableView didSelectRowAtIndexPath:(NSIndexPath *)indexPath {

    if (!self.selectedIndexPath) {

        self.isExpand = YES;

        self.selectedIndexPath = indexPath;

        [self.tableView beginUpdates];

        [self.tableView reloadRowsAtIndexPaths:@[indexPath] withRowAnimation:UITableViewRowAnimationFade];

        [self.tableView endUpdates];

    } else {

        if (self.isExpand) {

            if (self.selectedIndexPath == indexPath) {

                self.isExpand = NO;

                [self.tableView beginUpdates];

                [self.tableView reloadRowsAtIndexPaths:@[indexPath] withRowAnimation:UITableViewRowAnimationFade];

                [self.tableView endUpdates];

                self.selectedIndexPath = nil;

            } else {

                self.isExpand = NO;

                [self.tableView beginUpdates];

                [self.tableView reloadRowsAtIndexPaths:@[self.selectedIndexPath] withRowAnimation:UITableViewRowAnimationFade];

                [self.tableView endUpdates];

                self.selectedIndexPath = nil;

            }

        }

    }

}
四.自定义section,点击展开相应的cell(下午有空写...)
demo链接
http://pan.baidu.com/s/1c0YQDNE
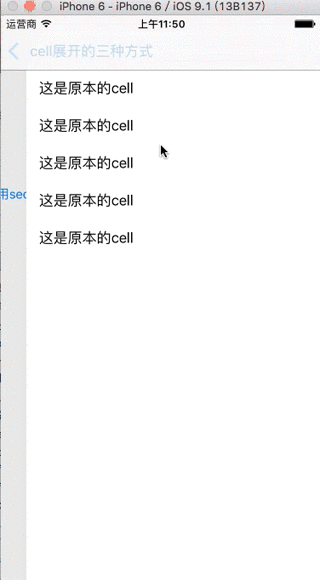
效果图
cell展开的几种方式的更多相关文章
- cell重用的几种方式
1.使用xib重用 //ios6 之后推荐大家使用的重用方式 //动态的使用self获得当前类名,来作为唯一的标示 NSString * identifier = NSStringFromClass( ...
- .NET环境下导出Excel表格的两种方式和导入两种类型的Excel表格
一.导出Excel表格的两种方式,其中两种方式指的是导出XML数据类型的Excel(即保存的时候可以只需要修改扩展名为.xls)和真正的Excel这两种. using System; using Sy ...
- Android数据存储五种方式总结
本文介绍Android平台进行数据存储的五大方式,分别如下: 1 使用SharedPreferences存储数据 2 文件存储数据 3 SQLite数据库存储数据 4 使用Cont ...
- Excel导出的几种方式
1.html 前台html与js代码(文件:ExportExcelByHtml.aspx): <html xmlns="http://www.w3.org/1999/xhtml&quo ...
- C++创建对象的两种方式
C++创建对象有两种方式,在栈上创建对象(Objects on the Stack)和在堆上创建对象(Objects on the Heap). 假设我们有以下的类: #include <str ...
- Linux就这个范儿 第15章 七种武器 linux 同步IO: sync、fsync与fdatasync Linux中的内存大页面huge page/large page David Cutler Linux读写内存数据的三种方式
Linux就这个范儿 第15章 七种武器 linux 同步IO: sync.fsync与fdatasync Linux中的内存大页面huge page/large page David Cut ...
- 实现顶部轮播,下部listview经典布局的两种方式
开头: 在做android开发的时候,我们经常会遇到这样的布局,上面是一个图片轮播图,下面是一些列表的项目.很多新闻app,视频类app都采用这样的布局.起初的时候 由于没有很多参考,我自己想到了一种 ...
- java开发webservice的几种方式(转载)
webservice的应用已经越来越广泛了,下面介绍几种在Java体系中开发webservice的方式,相当于做个记录. 1.Axis2方式 Axis是apache下一个开源的webservice开发 ...
- 加载xib文件的两种方式
一.加载xib文件的两种方式 1.方法一(NewsCell是xib文件的名称) NSArray *objects = [[NSBundle mainBundle] loadNibNamed:@&quo ...
随机推荐
- plpgsql: 动态插入数据 1
--目标:1.建立一个函数实现 输入一个表名(tableName)tableName,一个JSON串{feildName1:feildVale1,feildName2:feildVale2} -- 然 ...
- 详解HTML中的表格标签
详细代码如下: <!DOCTYPE html> <html> <head> <meta http-equiv="Content-Type" ...
- 基于H5+ API手机相册图片压缩上传
// 母函数 function App(){} /** * 图片压缩,默认同比例压缩 * @param {Object} path * pc端传入的路径可以为相对路径,但是在移动端上必须传入的路径是照 ...
- Openjudge 1.13-21:最大质因子序列
总时间限制: 1000ms 内存限制: 65536kB 描述 任意输入两个正整数m, n (1 < m < n <= 5000),依次输出m到n之间每个数的最大质因子(包括m和n ...
- make 与makefile(会不会写 makefile,从一个侧面说明了一个人是否具备完成大型工程的能力。)
跟我一起写 Makefile /**/ 陈皓 (CSDN) 概述 —— 什么是makefile?或许很多Winodws的程序员都不知道这个东西,因为那些Windows的IDE都为你做了这个工作,但我觉 ...
- vector的基本用法
#include<iostream> #include<vector> #include<algorithm> using namespace std; int m ...
- 手把手教你写 Vue UI 组件库
最近在研究 muse-ui 的实现,发现网上很少有关于 vue 插件具体实现的文章,官方的文档也只是一笔带过,对于新手来说并不算友好. 笔者结合官方文档,与自己的摸索总结,以最简单的 FlexBox ...
- 分布式文件系统ceph介绍
ceph哲学思想 1. 每个组件必须支持扩展 2.不存在单点故障 3.解决方案必须是基于软件的.开源的.适应能力强 4.任何可能的一切必须自我管理 存在的意义:帮助企业摆脱昂贵的专属硬件 ceph目标 ...
- 数据库_8_SQL基本操作——数据操作
SQL基本操作——数据操作 一.新增数据(两种方案) 方案1: 给全表字段插入数据,不需要指定字段列表,要求数据的值出现的顺序必须与表中设计的字段出现的顺序一致,凡是非数值数据,都需要使用引号(建议是 ...
- 搭建SSI开发框架原理
Spring2.5.Struts2.Ibatis开发框架搭建(一) ssi, ibatis 一.框架下载 1.1 Struts2框架 Struts2框架发展于WebWork,现在捐献给了Apach ...