
springcloud微服务搭建demo
| 软件 | 版本 |
|---|---|
| IDEA | 2022.3.1 <兼容maven 3.8.1及之前的所用版本> |
| JDK | 1.8_64 |
| Maven | 3.8.2 |
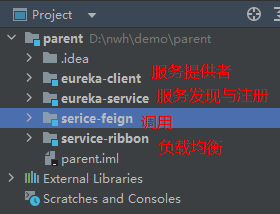
| 本demo只使用了服务发现与注册、Feign调用及负载均衡。不涉及熔断与网关等模块。demo可通过百度云盘下载:链接:https://pan.baidu.com/s/1kfrBffhhQJhkpsJ8rbeQ7Q | |
| 提取码:yics | |
 |
新建工程
新建eureka服务发现与注册模块
EurekaServer注册中心,里面有一个注册表,保存了各个服务所在的机器和端口号
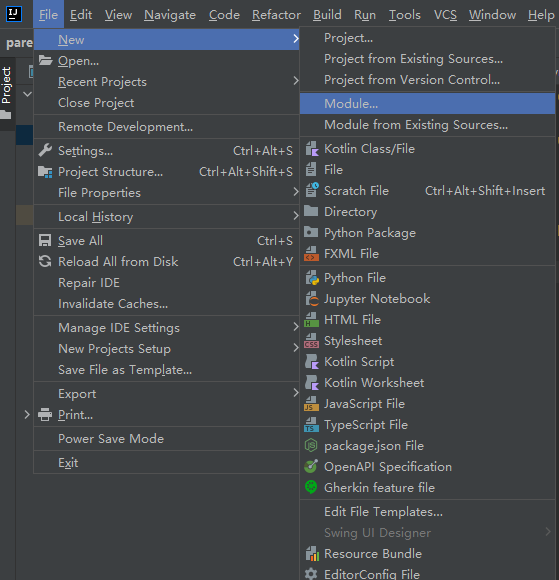
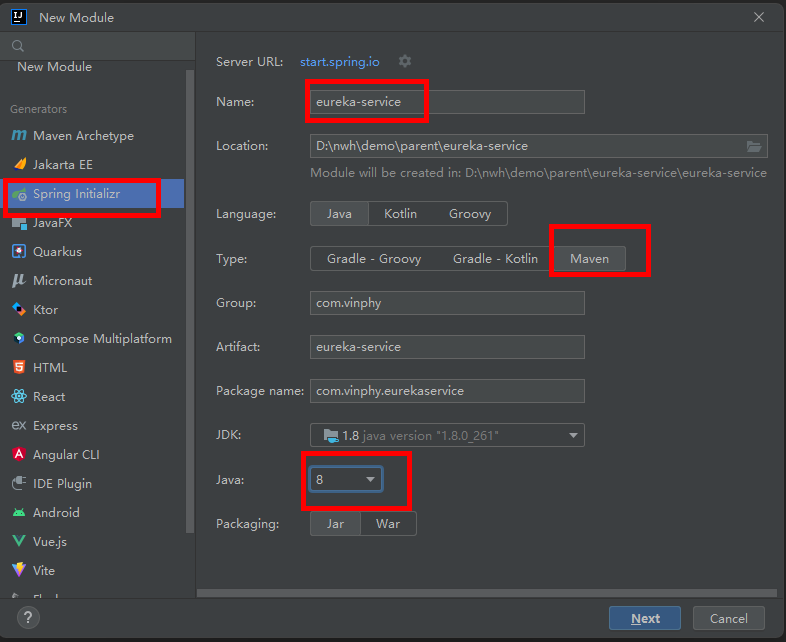
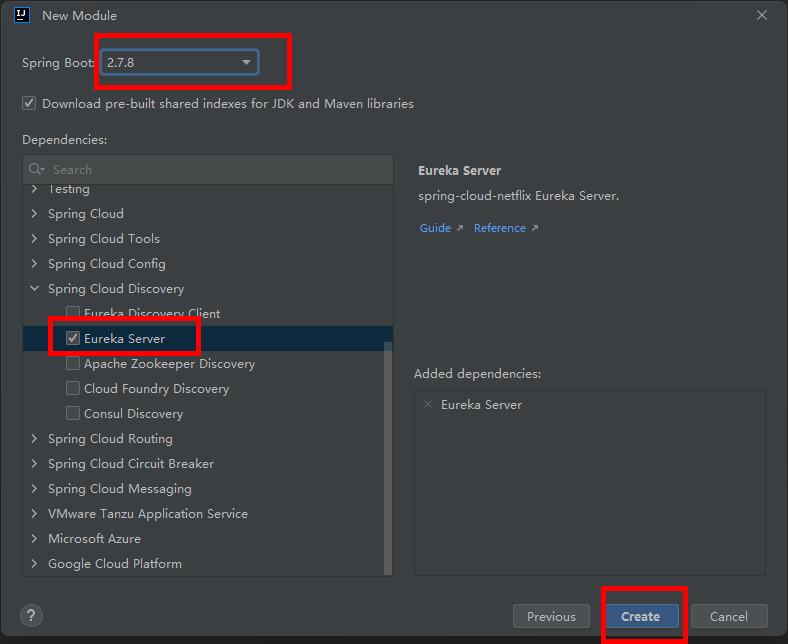
新建一个模块,选择Eureka Server依赖
pom.xml配置如下:
`
4.0.0
org.springframework.boot
spring-boot-starter-parent
2.7.8
com.vinphy
eureka-service
0.0.1-SNAPSHOT
eureka-service
eureka-service
<java.version>1.8</java.version>
<spring-cloud.version>2021.0.5</spring-cloud.version>
org.springframework.cloud
spring-cloud-starter-netflix-eureka-server
    <dependency>

        <groupId>org.springframework.boot</groupId>

        <artifactId>spring-boot-starter-test</artifactId>

        <scope>test</scope>

    </dependency>

</dependencies>

<dependencyManagement>

    <dependencies>

        <dependency>

            <groupId>org.springframework.cloud</groupId>

            <artifactId>spring-cloud-dependencies</artifactId>

            <version>${spring-cloud.version}</version>

            <type>pom</type>

            <scope>import</scope>

        </dependency>

    </dependencies>

</dependencyManagement>

<build>

    <plugins>

        <plugin>

            <groupId>org.springframework.boot</groupId>

            <artifactId>spring-boot-maven-plugin</artifactId>

        </plugin>

    </plugins>

</build>
`
application.yml配置如下:
`server:
port: 8761
eureka:
instance:
hostname: localhost
client:
registerWithEureka: false
fetchRegistry: false
serviceUrl:
defaultZone: http://${eureka.instance.hostname}:${server.port}/eureka`
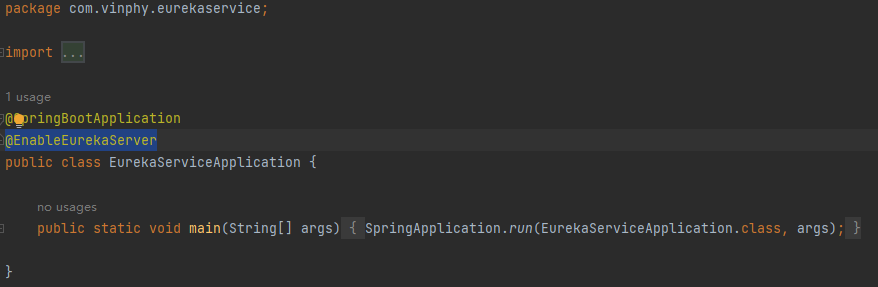
启动类添加@EnableEurekaServer注解
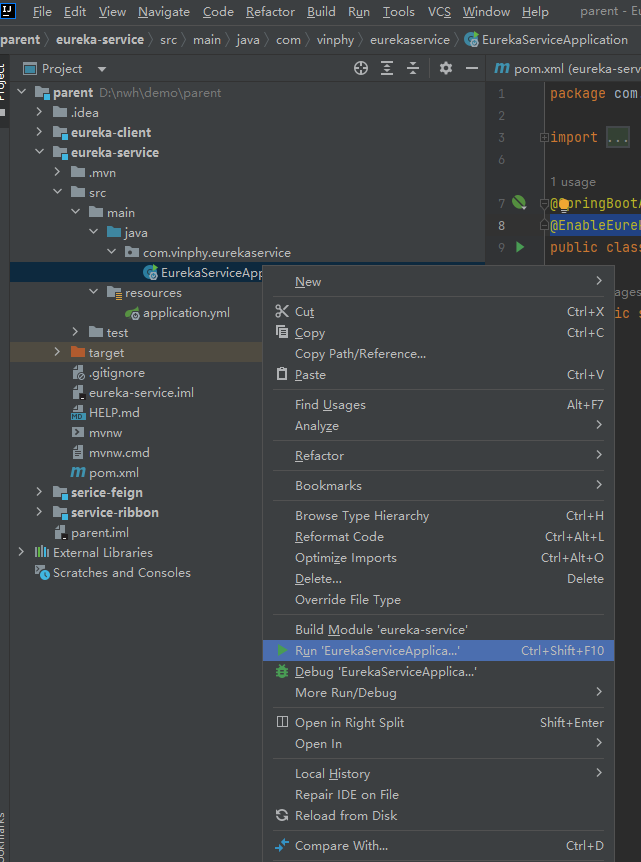
启动eureka服务
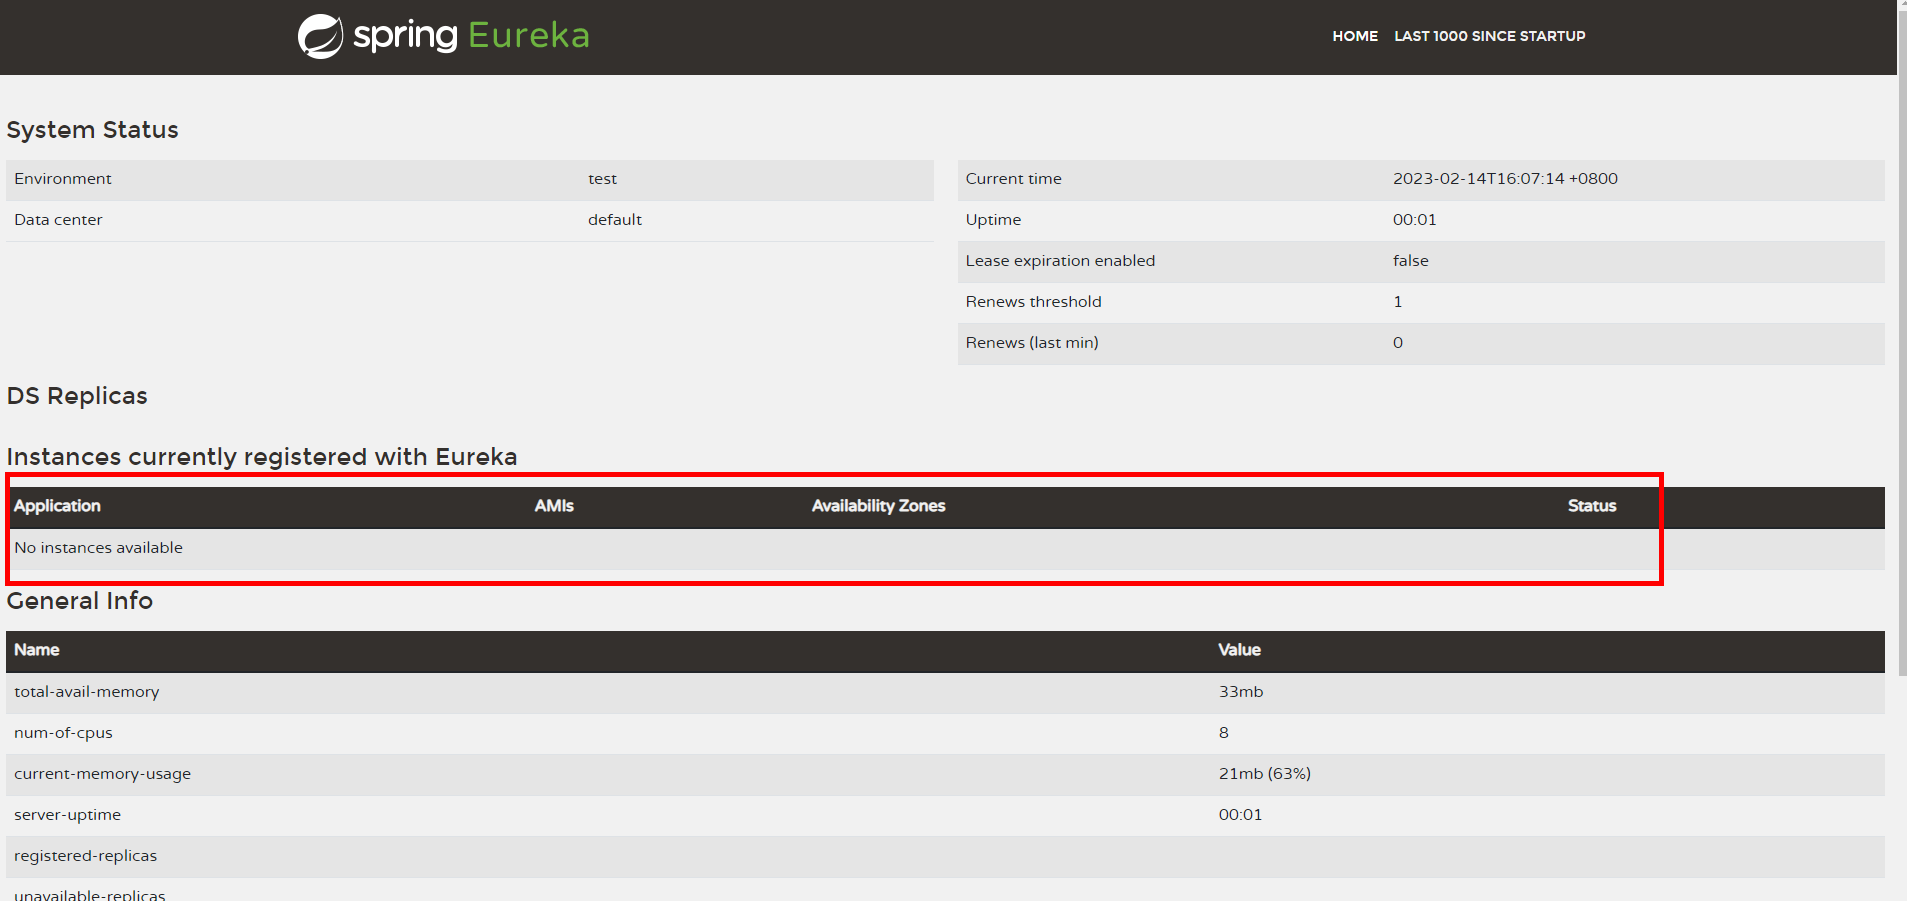
访问 http://localhost:8761/ 网址,可看到Eureka页面,暂无Application
新建一个服务提供者
将这个服务的信息注册到EurekaServer中,别的服务可以在不知道IP和端口的情况下调用该服务。
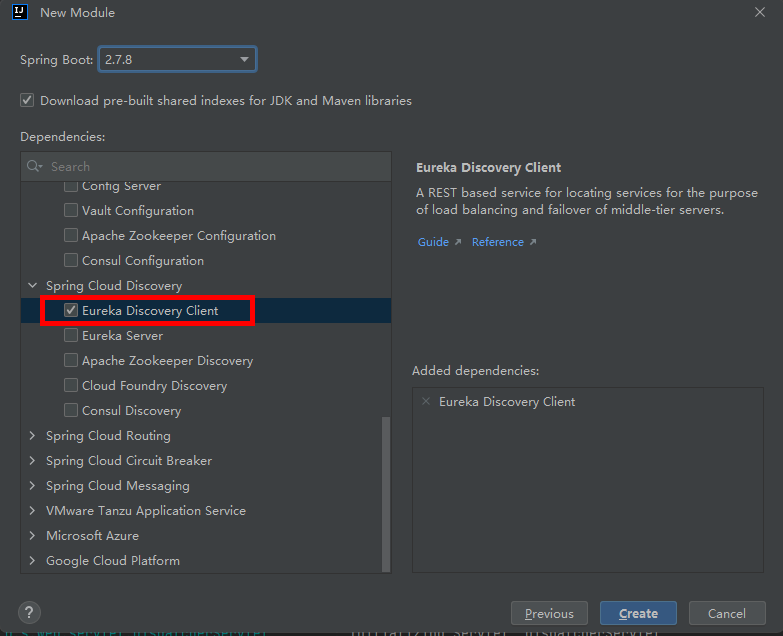
新建一个模块,引入Eureka Discovery Client 依赖
pom.xml配置文件如下:
`
4.0.0
org.springframework.boot
spring-boot-starter-parent
2.7.8
com.vinphy
eureka-client
0.0.1-SNAPSHOT
eureka-client
eureka-client
<java.version>1.8</java.version>
<spring-cloud.version>2021.0.5</spring-cloud.version>
org.springframework.cloud
spring-cloud-starter-netflix-eureka-client
org.springframework.boot
spring-boot-starter-web
    <dependency>

        <groupId>org.springframework.boot</groupId>

        <artifactId>spring-boot-starter-test</artifactId>

        <scope>test</scope>

    </dependency>

</dependencies>

<dependencyManagement>

    <dependencies>

        <dependency>

            <groupId>org.springframework.cloud</groupId>

            <artifactId>spring-cloud-dependencies</artifactId>

            <version>${spring-cloud.version}</version>

            <type>pom</type>

            <scope>import</scope>

        </dependency>

    </dependencies>

</dependencyManagement>

<build>

    <plugins>

        <plugin>

            <groupId>org.springframework.boot</groupId>

            <artifactId>spring-boot-maven-plugin</artifactId>

        </plugin>

    </plugins>

</build>
`
该服务可部署多个,建立一个公共配置文件,然后在子配置文件中配置不同端口,如本示例中8762、8763两个端口。
application.yml配置文件如下:
`spring:
application:
name: service-support
profiles:
active: server1`
application-server1.yml配置文件如下:
`server:
port: 8762
eureka:
instance:
hostname: server1
client:
serviceUrl:
defaultZone: http://localhost:8761/eureka/`
application-server2.yml配置文件如下:
`server:
port: 8763
eureka:
instance:
hostname: server2
client:
serviceUrl:
defaultZone: http://localhost:8761/eureka/
`
启动类加上@EnableEurekaClient注解
`package com.vinphy.eurekaclient;
import org.springframework.boot.SpringApplication;
import org.springframework.boot.autoconfigure.SpringBootApplication;
import org.springframework.cloud.netflix.eureka.EnableEurekaClient;
@SpringBootApplication
@EnableEurekaClient
public class EurekaClientApplication {
public static void main(String[] args) {

    SpringApplication.run(EurekaClientApplication.class, args);

}
}
新建一个TestController类,定义/support方法package com.vinphy.eurekaclient;
import org.springframework.beans.factory.annotation.Value;
import org.springframework.stereotype.Controller;
import org.springframework.web.bind.annotation.RequestMapping;
import org.springframework.web.bind.annotation.RequestMethod;
import org.springframework.web.bind.annotation.RequestParam;
import org.springframework.web.bind.annotation.RestController;
@RestController
public class TestController {
@Value("${server.port}")

String port;

@RequestMapping(value = "/support",method = RequestMethod.GET)

public String home(@RequestParam String name)

{

    return "hi " + name + ",i am from port:" + port;

}
}
`
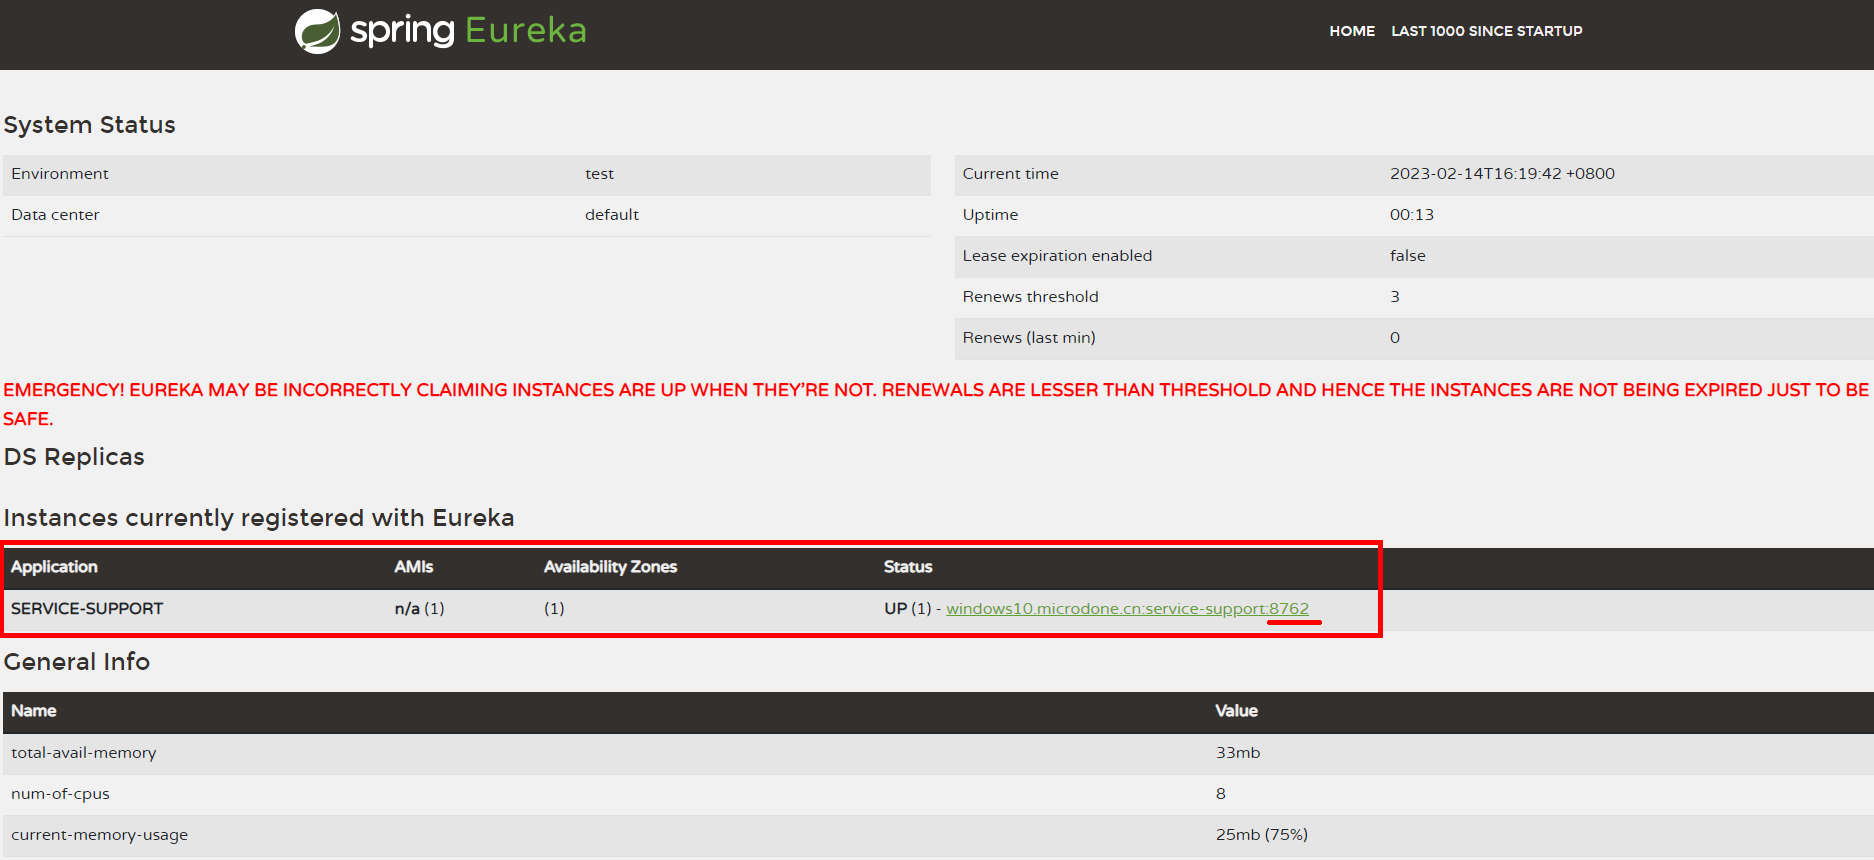
启动服务,可以在Eureka网站上看到SERVICE-SUPPORT服务端口为8762
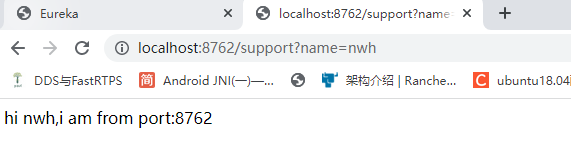
访问网址 http://localhost:8762/support?name=nwh 可得到support方法打印内容
再启动一次service-support服务
修改application.yml配置文件中active配置为server2
spring: application: name: service-support profiles: active: server2
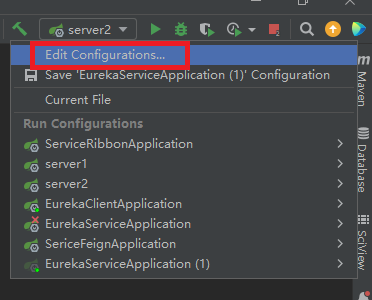
添加一个启动配置,并启动
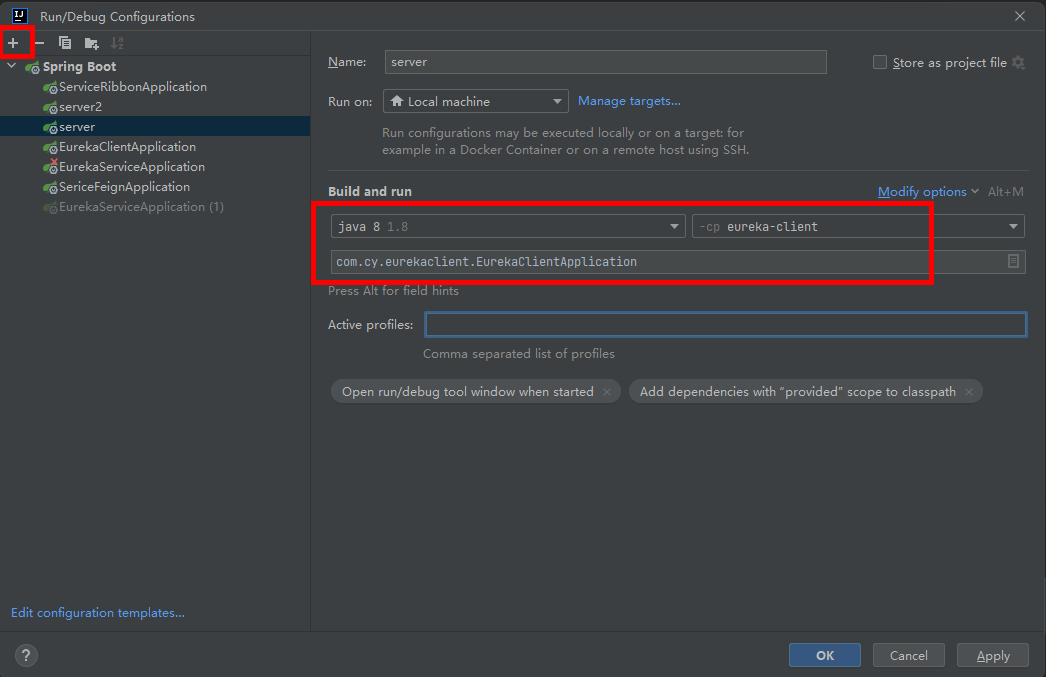
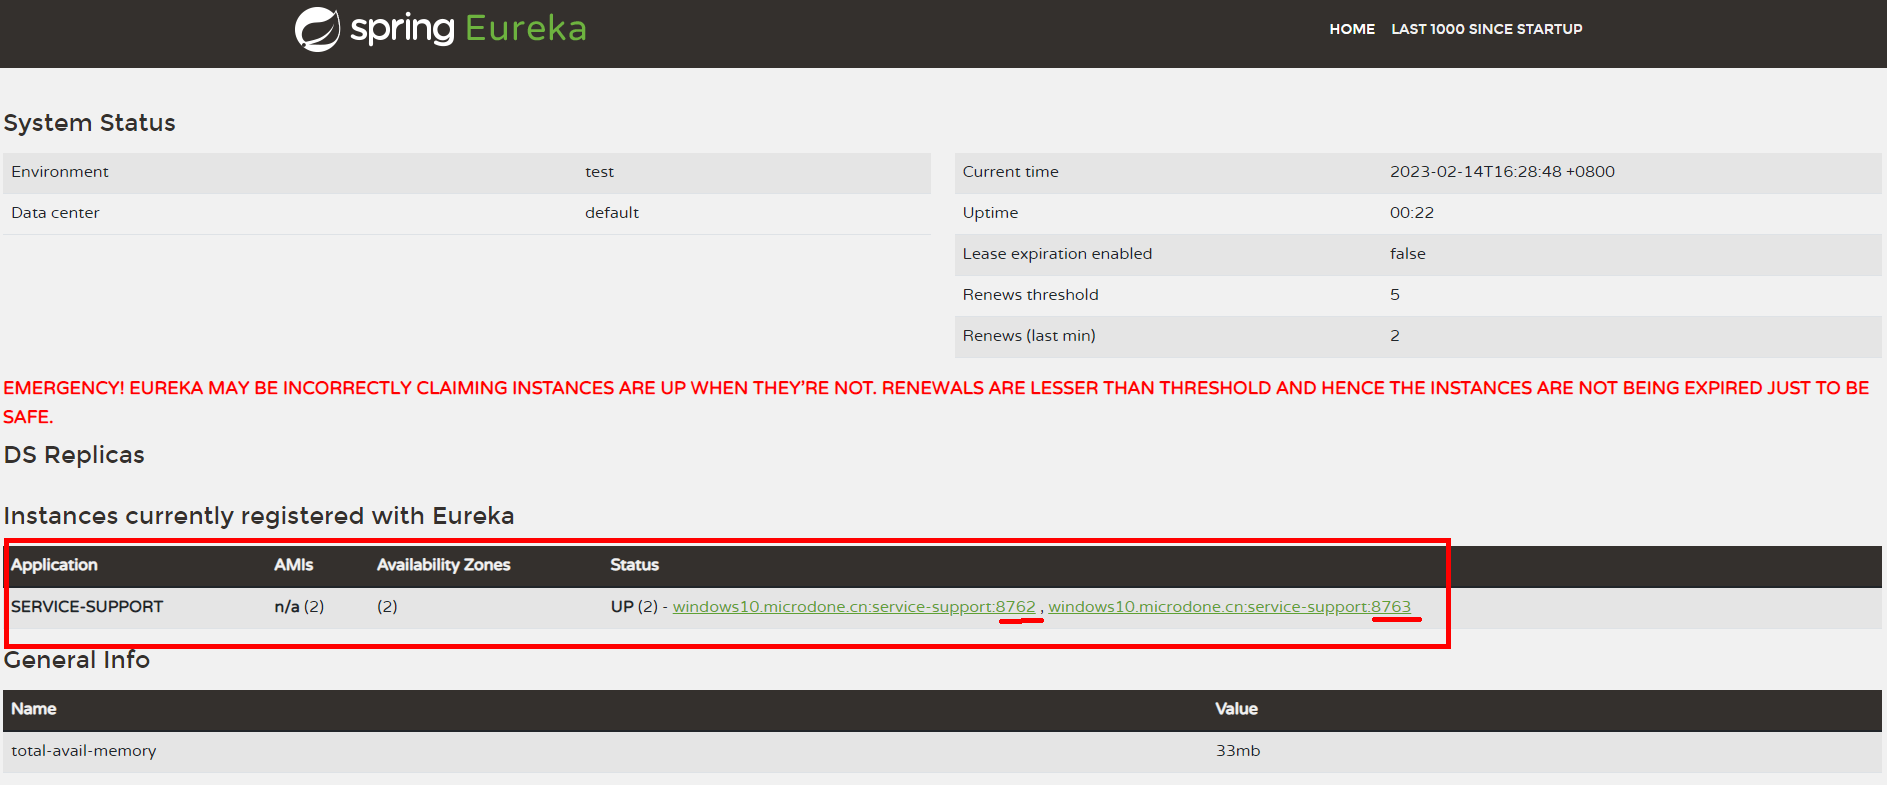
访问Eureka网页,可以看到service-support启了两个实例,端口分别为8762、8763
新建feign动态代理
Feign使用了动态代理,用注解定义一个FeignClient接口,然后调用这个接口就可以了。FeignClient会在底层根据注解,与指定的服务建立连接、构建请求地址、发起请求、获取响应、解析响应等等。
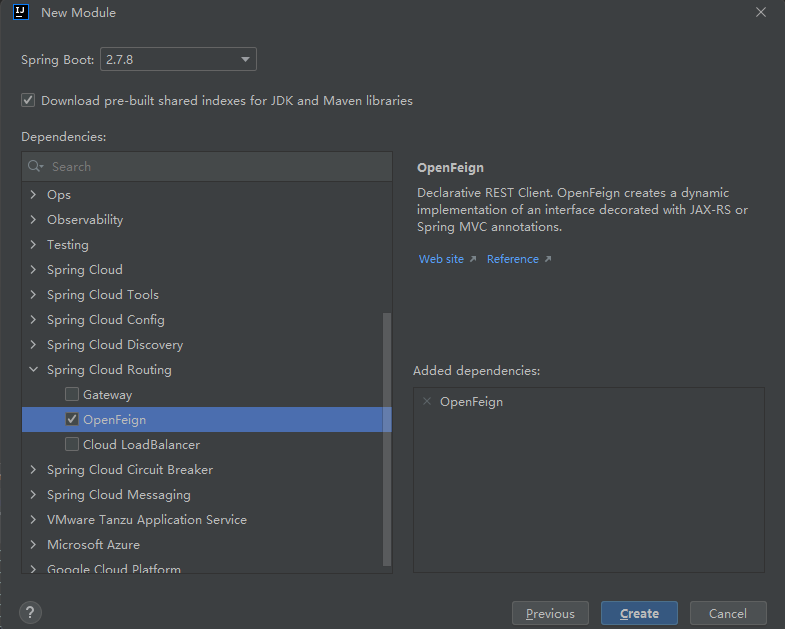
新建一个模块,引入OpenFeign依赖
pom.xml配置文件如下:
`
4.0.0
org.springframework.boot
spring-boot-starter-parent
2.7.8
com.vinphy
serice-feign
0.0.1-SNAPSHOT
serice-feign
serice-feign
<java.version>1.8</java.version>
<spring-cloud.version>2021.0.5</spring-cloud.version>
org.springframework.boot
spring-boot-starter-web
org.springframework.cloud
spring-cloud-starter-netflix-eureka-client
org.springframework.cloud
spring-cloud-starter-openfeign
    <dependency>

        <groupId>org.springframework.boot</groupId>

        <artifactId>spring-boot-starter-test</artifactId>

        <scope>test</scope>

    </dependency>

</dependencies>

<dependencyManagement>

    <dependencies>

        <dependency>

            <groupId>org.springframework.cloud</groupId>

            <artifactId>spring-cloud-dependencies</artifactId>

            <version>${spring-cloud.version}</version>

            <type>pom</type>

            <scope>import</scope>

        </dependency>

    </dependencies>

</dependencyManagement>

<build>

    <plugins>

        <plugin>

            <groupId>org.springframework.boot</groupId>

            <artifactId>spring-boot-maven-plugin</artifactId>

        </plugin>

    </plugins>

</build>
`
application.yml配置文件如下:
`server:
port: 8765
eureka:
client:
serviceUrl:
defaultZone: http://localhost:8761/eureka/
spring:
application:
name: service-feign`
启动类加上@EnableDiscoveryClient、@EnableFeignClients注解
`package com.vinphy.sericefeign;
import org.springframework.boot.SpringApplication;
import org.springframework.boot.autoconfigure.SpringBootApplication;
import org.springframework.cloud.client.discovery.EnableDiscoveryClient;
import org.springframework.cloud.openfeign.EnableFeignClients;
/**
动态代理进行调用
*/
@SpringBootApplication
@EnableDiscoveryClient
@EnableFeignClients
public class SericeFeignApplication {public static void main(String[] args) {
SpringApplication.run(SericeFeignApplication.class, args);
}
}
定义一个HiController类,和hi方法package com.vinphy.sericefeign;
import org.springframework.beans.factory.annotation.Autowired;
import org.springframework.web.bind.annotation.RequestMapping;
import org.springframework.web.bind.annotation.RequestMethod;
import org.springframework.web.bind.annotation.RequestParam;
import org.springframework.web.bind.annotation.RestController;
@RestController
public class HiController {
@Autowired
SchedualServiceHi schedualServiceHi;
@RequestMapping(value = "/hi",method = RequestMethod.GET)

public String sayHi(@RequestParam String name){

    return schedualServiceHi.sayHiFromClientOne(name);

}
}
定义一个SchedualServiceHi接口,通过@FeignClient注解绑定service-support服务。package com.vinphy.sericefeign;
import org.springframework.cloud.openfeign.FeignClient;
import org.springframework.web.bind.annotation.RequestMapping;
import org.springframework.web.bind.annotation.RequestMethod;
import org.springframework.web.bind.annotation.RequestParam;
/**绑定service-support服务,调用该服务的support方法*/
@FeignClient(value = "service-support")
public interface SchedualServiceHi {
@RequestMapping(value = "/support", method = RequestMethod.GET)
String sayHiFromClientOne(@RequestParam(value = "name") String name);
}
`
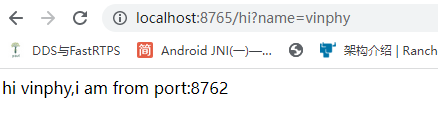
启动服务,此时可以通过访问8765端口实际调用service-support服务的support方法,因为service-support服务有两个端口,不断访问 http://localhost:8765/hi?name=vinphy ,会交替打印862、8763端口

新建Ribbon负载均衡服务
Ribbon会帮你在每次请求时选择一台机器均匀的把你的请求分发到各个机器上
新建service-ribbon模块
eureka包含了ribbon,所以不需要单独引入ribbon依赖
pom.xml配置文件如下:
`
4.0.0
org.springframework.boot
spring-boot-starter-parent
2.7.8
com.vinphy
service-ribbon
0.0.1-SNAPSHOT
service-ribbon
service-ribbon
<java.version>1.8</java.version>
<spring-cloud.version>2021.0.5</spring-cloud.version>
org.springframework.boot
spring-boot-starter-web
org.springframework.cloud
spring-cloud-starter-netflix-eureka-client
    <dependency>

        <groupId>org.springframework.cloud</groupId>

        <artifactId>spring-cloud-starter-netflix-hystrix</artifactId>

        <version>2.1.0.RELEASE</version>

    </dependency>

    <dependency>

        <groupId>org.springframework.boot</groupId>

        <artifactId>spring-boot-starter-test</artifactId>

        <scope>test</scope>

    </dependency>

</dependencies>

<dependencyManagement>

    <dependencies>

        <dependency>

            <groupId>org.springframework.cloud</groupId>

            <artifactId>spring-cloud-dependencies</artifactId>

            <version>${spring-cloud.version}</version>

            <type>pom</type>

            <scope>import</scope>

        </dependency>

    </dependencies>

</dependencyManagement>

<build>

    <plugins>

        <plugin>

            <groupId>org.springframework.boot</groupId>

            <artifactId>spring-boot-maven-plugin</artifactId>

        </plugin>

    </plugins>

</build>
`
application.xml配置文件如下:
`server:
port: 8764
spring:
application:
name: service-ribbon
eureka:
client:
registerWithEureka: true
fetchRegistry: true
serviceUrl:
defaultZone: http://localhost:8761/eureka/`
启动类加入@EnableDiscoveryClient、@EnableHystrix注解。并添加restTemplate方法
`package com.vinphy.serviceribbon;
import org.springframework.boot.SpringApplication;
import org.springframework.boot.autoconfigure.SpringBootApplication;
import org.springframework.cloud.client.discovery.EnableDiscoveryClient;
import org.springframework.cloud.client.loadbalancer.LoadBalanced;
import org.springframework.cloud.netflix.hystrix.EnableHystrix;
import org.springframework.context.annotation.Bean;
import org.springframework.web.client.RestTemplate;
/**
负载均衡
*/
@SpringBootApplication
@EnableDiscoveryClient
@EnableHystrix
public class ServiceRibbonApplication {public static void main(String[] args) {
SpringApplication.run(ServiceRibbonApplication.class, args);
}@Bean
@LoadBalanced
RestTemplate restTemplate()
{
return new RestTemplate();
}
}
新建HelloControler类,定义hi方法package com.vinphy.serviceribbon;
import org.springframework.beans.factory.annotation.Autowired;
import org.springframework.web.bind.annotation.RequestMapping;
import org.springframework.web.bind.annotation.RequestMethod;
import org.springframework.web.bind.annotation.RequestParam;
import org.springframework.web.bind.annotation.RestController;
@RestController
public class HelloControler {
@Autowired
HelloService helloService;
@RequestMapping(value = "/hi",method = RequestMethod.GET)
public String hi(@RequestParam String name)
{
return helloService.hiService(name);
}
}
新建HelloService类,自动注入restTemplate。通过restTemplate的getForObject方法去用http方式访问其他服务。不需要知道被访问服务的IP和端口,只需要知道被访问服务的注册服务名。package com.vinphy.serviceribbon;
import com.netflix.hystrix.contrib.javanica.annotation.HystrixCommand;
import org.springframework.beans.factory.annotation.Autowired;
import org.springframework.stereotype.Service;
import org.springframework.web.client.RestTemplate;
@Service
public class HelloService {
@Autowired
RestTemplate restTemplate;
@HystrixCommand(fallbackMethod = "hiError")
public String hiService(String name)
{
return restTemplate.getForObject("http://service-support/"+"support?name=" + name, String.class);
}
public String hiError(String name) {

    return "hi," + name + ",sorry,error!";

}
}
`
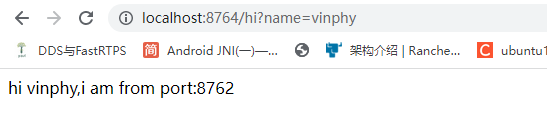
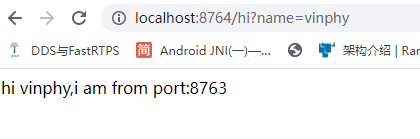
启动服务,访问网址 http://localhost:8765/hi?name=vinphy ,会在876、8763两个不同服务间交替调用。
springcloud微服务搭建demo的更多相关文章
- 十一、Docker搭建部署SpringCloud微服务项目Demo
环境介绍 技术选型:SpringCloud&SpringCloud Alibaba&Docker 微服务模块划分: 员工模块:ems-employees 部门模块:ems-depart ...
- springcloud微服务架构搭建
SpringCloud微服务框架搭建 一.微服务架构 1.1什么是分布式 不同模块部署在不同服务器上 作用:分布式解决网站高并发带来问题 1.2什么是集群 多台服务器部署相同应用构成一个集群 作用:通 ...
- 【微服务】之二:从零开始,轻松搞定SpringCloud微服务系列--注册中心(一)
微服务体系,有效解决项目庞大.互相依赖的问题.目前SpringCloud体系有强大的一整套针对微服务的解决方案.本文中,重点对微服务体系中的服务发现注册中心进行详细说明.本篇中的注册中心,采用Netf ...
- SpringCloud微服务(基于Eureka+Feign+Hystrix+Zuul)
一.搭建注册中心 1.1.创建一个cloud-service项目 1.2:POM文件依赖 1 <?xml version="1.0" encoding="UTF-8 ...
- 从零开始,轻松搞定SpringCloud微服务系列
本系列博文目录 [微服务]之一:从零开始,轻松搞定SpringCloud微服务系列–开山篇(spring boot 小demo) [微服务]之二:从零开始,轻松搞定SpringCloud微服务系列–注 ...
- 【微服务】之六:轻松搞定SpringCloud微服务-API网关zuul
通过前面几篇文章的介绍,我们可以轻松搭建起来微服务体系中比较重要的几个基础构建服务.那么,在本篇博文中,我们重点讲解一下,如何将所有微服务的API同意对外暴露,这个就设计API网关的概念. 本系列教程 ...
- java~springcloud微服务目录索引
回到占占推荐博客索引 最近写了不过关于java,spring,微服务的相关文章,今天把它整理一下,方便大家学习与参考. java~springcloud微服务~目录索引 springcloud~服务注 ...
- SpringCloud微服务负载均衡与网关
1.使用ribbon实现负载均衡ribbon是一个负载均衡客户端 类似nginx反向代理,可以很好的控制htt和tcp的一些行为.Feign默认集成了ribbon. 启动两个会员服务工程,端口号分别为 ...
- SpringCloud微服务之跨服务调用后端接口
SpringCloud微服务系列博客: SpringCloud微服务之快速搭建EurekaServer:https://blog.csdn.net/egg1996911/article/details ...
- springcloud微服务实战:Eureka+Zuul+Feign/Ribbon+Hystrix Turbine+SpringConfig+sleuth+zipkin
相信现在已经有很多小伙伴已经或者准备使用springcloud微服务了,接下来为大家搭建一个微服务框架,后期可以自己进行扩展.会提供一个小案例: 服务提供者和服务消费者 ,消费者会调用提供者的服务,新 ...
随机推荐
- 大数据下一代变革之必研究数据湖技术Hudi原理实战双管齐下-上
@ 目录 概述 定义 发展历史 特性 使用场景 编译安装 编译环境 编译Hudi 关键概念 TimeLine(时间轴) File Layouts(文件布局) 索引 表类型 查询类型 概述 定义 Apa ...
- Java自定义排序
实现Comparator接口 实现该接口需要重写compare()方法 Arrays.sort(students, new Comparator<Student>() { @Overrid ...
- os模块、sys模块、json模块、json模块实战
目录 os模块 创建目录(文件夹) 删除目录(文件夹) 列举指定路径下内容名称 删除/重命名文件 获取/切换当前工作目录 动态获取项目根路径(重要) 判断路径是否存在(文件.目录) 路径拼接(重要) ...
- 森林野火故事2.0:一眼看穿!使用 Panel 和 hvPlot 可视化 ⛵
作者:韩信子@ShowMeAI 数据分析实战系列:https://www.showmeai.tech/tutorials/40 本文地址:https://www.showmeai.tech/artic ...
- x=x+=x-=x-x;
int x=10; x=x+=x-=x-x; // x=x+(x-(x-x)) System.out.println(x); 输出结果20
- Duplicate property mapping of xxx found in xx 嵌套异常,重复的属性在映射中发现。
该异常的原意是因为在映射文件中出现了两个一样的属性名: <property name="相同的属性名出现了两次以上" > <property name=" ...
- Windows 下 OpenSSH 安装使用
OpenSSH 是安全 Shell (SSH) 工具的开放源代码版本,Linux 及其他非 Windows 系统的管理员使用此类工具跨平台管理远程系统. OpenSSH 在 2018 年秋季已添加至 ...
- MySQL进阶实战1,数据类型与三范式
一.选择优化的数据类型 MySQL支持的数据类型非常多,选择正确的数据类型对于获得高性能至关重要. 1.更小的 一般情况下,应该尽量使用较小的数据类型,更小的数据类型通常更快,因为占用更少的磁盘.内存 ...
- uni 结合vuex 编写动态全局配置变量 this.baseurl
在日常开发过程,相信大家有遇到过各种需求,而我,在这段事件便遇到了一个,需要通过用户界面配置动态接口,同时,因为是app小程序开发,所以接口中涉及到了http以及websocket两个类型的接口. 同 ...
- 使用NPOI core插入图片
闲的无聊,封装一个NPOI core插入图片,下面贴上代码,有注释,我就不讲解了 public class ExcelHelper { /// <summary> /// excel插入图 ...