3.2 Lucene实战:一个简单的小程序
在讲解Lucene索引和检索的原理之前,我们先来实战Lucene:一个简单的小程序!
一、索引小程序
首先,new一个java project,名字叫做LuceneIndex。
然后,在project里new一个class,名字叫做Indexer。这个类用来给文件建索引(建好索引以后就可以高效检索了)。
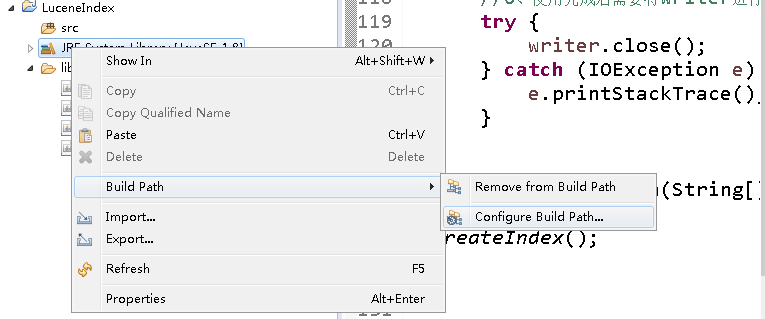
在写代码之前,我们要先引入一下lucene包。分为三步:
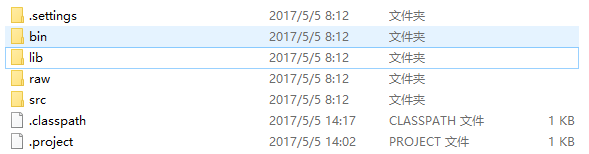
1. 创建lib文件夹。
2. 将所需要的lucene包复制到lib文件夹中。
3. Build path-> lib->Configure Build Path->Add JARS,选择LuceneIndex工程下lib文件夹下的所有jar包并添加到路径,连续点击两次ok。

步骤2 步骤3
在这些准备工作完成后我们就可以开始写代码了。
1. 首先在LuceneIndex里new一个class,名字叫做Indexer。
2. 然后,在LuceneIndex工程里新建一个文件夹,叫做raw。
3. 接下来,在raw文件夹里新建两个utf-8编码的txt文件。比如第一个文件命名为hello.txt,内容为"Hello",第二个文件命名为nihao.txt,内容为"你好"。这里要注意的是,上面的代码是针对中文搜索的问题使用了utf-8编码,所以要求文件也是utf-8的编码。如图:

4. 写入如下代码:
import java.nio.charset.StandardCharsets;

import java.nio.file.Files;

import java.nio.file.Paths;

import java.io.*;

import org.apache.lucene.analysis.standard.StandardAnalyzer;

import org.apache.lucene.document.Document;

import org.apache.lucene.document.Field;

import org.apache.lucene.document.StringField;

import org.apache.lucene.document.TextField;

import org.apache.lucene.index.IndexWriter;

import org.apache.lucene.index.IndexWriterConfig;

import org.apache.lucene.store.Directory;

import org.apache.lucene.store.FSDirectory;

import org.apache.lucene.util.Version;

/**

 * @author csl

 * @description:

 * 依赖jar:Lucene-core,lucene-analyzers-common,lucene-queryparser

 * 作用:简单的索引建立

 */

public class Indexer {

    public static Version luceneVersion = Version.LATEST;

    /**

     * 建立索引

     */

    public static void createIndex(){

        IndexWriter writer = null;

        try{

            //1、创建Directory

            //Directory directory = new RAMDirectory();//创建内存directory

            Directory directory = FSDirectory.open(Paths.get("index"));//在硬盘上生成Directory00

            //2、创建IndexWriter

            IndexWriterConfig iwConfig = new IndexWriterConfig( new StandardAnalyzer());

            writer = new IndexWriter(directory, iwConfig);

            //3、创建document对象

            Document document = null;

            //4、为document添加field对象

            File f = new File("raw");//索引源文件位置

            for (File file:f.listFiles()){

                    document = new Document();

                    document.add(new StringField("path", f.getName(),Field.Store.YES));

                    System.out.println(file.getName());

                    document.add(new StringField("name", file.getName(),Field.Store.YES));

                    InputStream stream = Files.newInputStream(Paths.get(file.toString()));

                    document.add(new TextField("content", new BufferedReader(new InputStreamReader(stream, StandardCharsets.UTF_8))));//textField内容会进行分词

                    //document.add(new TextField("content", new FileReader(file)));  如果不用utf-8编码的话直接用这个就可以了

                    writer.addDocument(document);

            }

        }catch(Exception e){

            e.printStackTrace();

        }finally{

            //6、使用完成后需要将writer进行关闭

            try {

                writer.close();

            } catch (IOException e) {

                e.printStackTrace();

            }

        }

    }

    public static void main(String[] args) throws IOException

    {

        createIndex();

    }

}
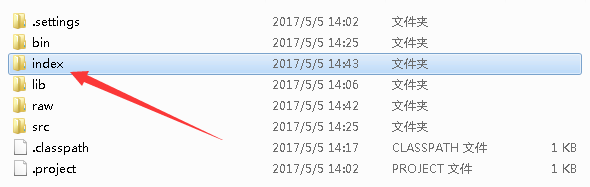
5. 最后,运行Indexer.java。会看到索引建立完成。LuceneIndex工程下多了一个index文件夹。
二、检索小程序
下面我们就要用这个index来检索了。
1. new一个class,命名为Searcher。然后在里面写入如下代码:
 import java.nio.file.Paths;

 import java.io.*;

 import org.apache.lucene.analysis.standard.StandardAnalyzer;

 import org.apache.lucene.document.Document;

 import org.apache.lucene.index.DirectoryReader;

 import org.apache.lucene.queryparser.classic.QueryParser;

 import org.apache.lucene.search.IndexSearcher;

 import org.apache.lucene.search.Query;

 import org.apache.lucene.search.ScoreDoc;

 import org.apache.lucene.search.TopDocs;

 import org.apache.lucene.store.Directory;

 import org.apache.lucene.store.FSDirectory;

 import org.apache.lucene.util.Version;

 /**

  * @author csl

  * @description:

  * 依赖jar:Lucene-core,lucene-analyzers-common,lucene-queryparser

  * 作用:使用索引搜索文件

  */

 public class Searcher {

     public static Version luceneVersion = Version.LATEST;

     /**

      * 查询内容

      */

     public static String indexSearch(String keywords){

         String res = "";

         DirectoryReader reader = null;

         try{

 //            1、创建Directory

              Directory directory = FSDirectory.open(Paths.get("index"));//在硬盘上生成Directory

 //            2、创建IndexReader

              reader = DirectoryReader.open(directory);

 //            3、根据IndexWriter创建IndexSearcher

              IndexSearcher searcher =  new IndexSearcher(reader);

 //            4、创建搜索的query

 //            创建parse用来确定搜索的内容,第二个参数表示搜索的域

              QueryParser parser = new QueryParser("content",new StandardAnalyzer());//content表示搜索的域或者说字段

              Query query = parser.parse(keywords);//被搜索的内容

 //            5、根据Searcher返回TopDocs

              TopDocs tds = searcher.search(query, 20);//查询20条记录

 //            6、根据TopDocs获取ScoreDoc

              ScoreDoc[] sds = tds.scoreDocs;

 //            7、根据Searcher和ScoreDoc获取搜索到的document对象

              int cou=0;

              for(ScoreDoc sd:sds){

                  cou++;

                  Document d = searcher.doc(sd.doc);

 //                    8、根据document对象获取查询的字段值

                  /**  查询结果中content为空,是因为索引中没有存储content的内容,需要根据索引path和name从原文件中获取content**/

                  res+=cou+". "+d.get("path")+" "+d.get("name")+" "+d.get("content")+"\n";

              }

         }catch(Exception e){

             e.printStackTrace();

         }finally{

             //9、关闭reader

             try {

                 reader.close();

             } catch (IOException e) {

                 e.printStackTrace();

             }

         }

         return res;

     }

     public static void main(String[] args) throws IOException

     {

         System.out.println(indexSearch("你好")); //搜索的内容可以修改

     }

 }
2.
 public static void main(String[] args) throws IOException

     {

         System.out.println(indexSearch("你好")); //搜索的内容可以修改

     }
搜索内容为"你好"时,搜索结果为内容包含"你好"的nihao.txt

3.
 public static void main(String[] args) throws IOException

     {

         System.out.println(indexSearch("Hello")); //搜索的内容可以修改

     }
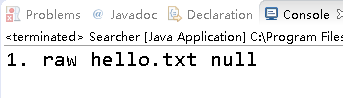
搜索内容为"Hello"时,搜索结果为内容包含"Hello"的hello.txt
至此,我们已经进行了Lucene实战,学会了简单的建立索引和检索了!
三、工程源码
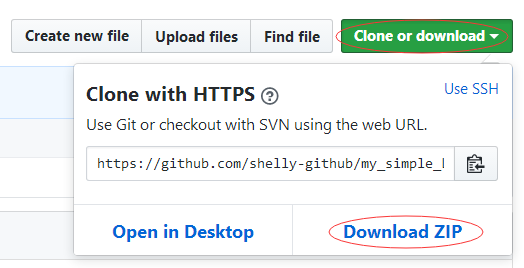
可以先试一下我的项目:https://github.com/shelly-github/my_simple_Lucenetest
1. 下载这个工程
2. 然后解压
3. 导入Eclipse
首先,打开Eclipse,选定一个workspace。
然后,点击File->import->Existing Projects into workspace
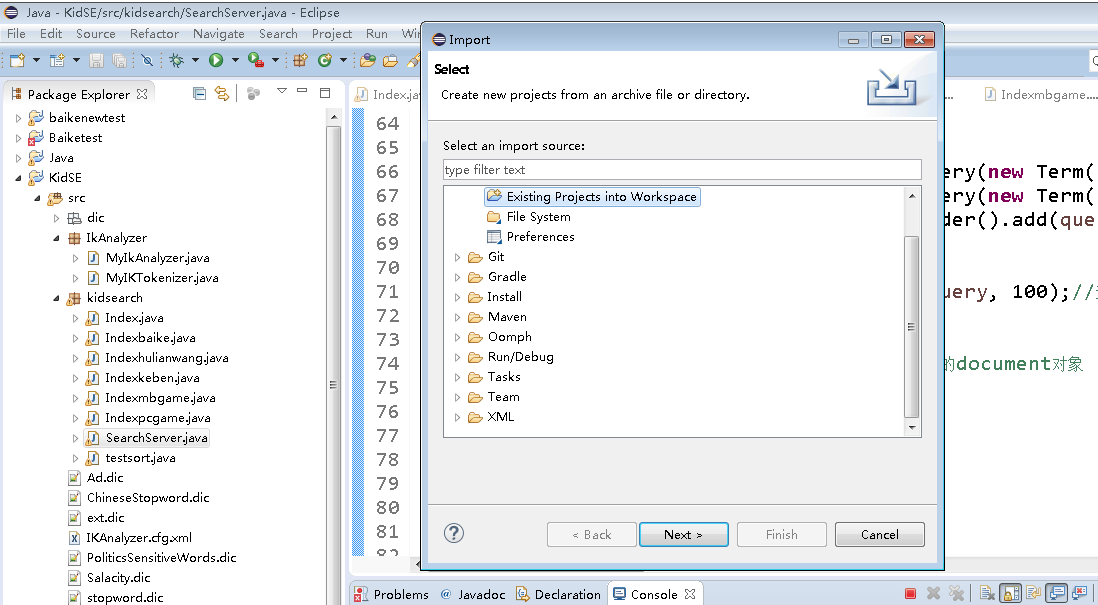
双击Existing Projects into workspace,选择工程所在目录

点击确定->finish,完成工程的导入。
接下来就可以运行程序了,注意这个工程里没有包含Index,你需要先运行Indexer建立索引,然后再用Searcher进行检索。
四、遍历文件系统
这是一个简单的Lucene演示程序,只能索引同一目录下的txt文件,下面我来介绍一种遍历文件系统并且索引.txt文件的方法。
这个方法很简单,就是一个递归实现的深度优先遍历。
 import java.nio.charset.StandardCharsets;

 import java.nio.file.Files;

 import java.nio.file.Paths;

 import java.io.*;

 import org.apache.lucene.analysis.standard.StandardAnalyzer;

 import org.apache.lucene.document.Document;

 import org.apache.lucene.document.Field;

 import org.apache.lucene.document.StringField;

 import org.apache.lucene.document.TextField;

 import org.apache.lucene.index.IndexWriter;

 import org.apache.lucene.index.IndexWriterConfig;

 import org.apache.lucene.store.Directory;

 import org.apache.lucene.store.FSDirectory;

 import org.apache.lucene.util.Version;

 public class Indexer {

     static int numIndexed=0;

     //索引

     private static void indexFile(IndexWriter writer,File f) throws IOException

     {

         if(f.isHidden()||!f.exists()||!f.canRead())

         {

             return;

         }

         System.out.println("Indexing"+f.getCanonicalPath());

         Document document = new Document();

         document.add(new StringField("path", f.getName(),Field.Store.YES));

         System.out.println(f.getName());

         document.add(new StringField("name", f.getName(),Field.Store.YES));

         InputStream stream = Files.newInputStream(Paths.get(f.toString()));

         document.add(new TextField("content", new BufferedReader(new InputStreamReader(stream, StandardCharsets.UTF_8))));//textField内容会进行分词

         //document.add(new TextField("content", new FileReader(file)));  如果不用utf-8编码的话直接用这个就可以了

         writer.addDocument(document);

     }

     //深度优先遍历文件系统并索引.txt文件

     private static int indexDirectory(IndexWriter writer,File dir) throws IOException

     {

         File[] files=dir.listFiles();

         for(int i=0;i<files.length;i++)

         {

             File f=files[i];

             System.out.println(f.getAbsolutePath());

             if(f.isDirectory())

             {

                 indexDirectory(writer,f);

             }

             else if(f.getName().endsWith(".txt"))

             {

                 indexFile(writer,f);//递归

                 numIndexed+=1;

             }

         }

         return numIndexed;

     }

     //创建IndexWriter并开始文件系统遍历

     public static int index(File indexDir,File dataDir) throws IOException

     {

         if(!dataDir.exists()||!dataDir.isDirectory())

         {

             throw new IOException(dataDir+"does not exist or is not a directory!");

         }

         Directory directory = FSDirectory.open(Paths.get("index"));

         IndexWriterConfig iwConfig = new IndexWriterConfig( new StandardAnalyzer());

         IndexWriter writer = new IndexWriter(directory, iwConfig);

         int numIndexed=indexDirectory(writer,dataDir);

         writer.close();

         return numIndexed;

     }

     public static void main(String[] args) throws Exception

     {

         File indexDir=new File("index");

         File dataDir=new File("raw");

         int numIndexed=index(indexDir,dataDir);

         System.out.println("Indexing " + numIndexed + " files");

     }

 }
这个程序的源代码可以到这里下载:https://github.com/shelly-github/my_simple_Lucenetest
下载及导入方法同上,同样注意的是,我没有上传Index文件,需要先运行Indexer建立索引,然后再利用Searcher进行检索~
现在,我们已经学会了遍历一个文件系统来建立索引,是不是很简单呢?
下一节,我们来深入了解一下Lucene的检索原理~~
3.2 Lucene实战:一个简单的小程序的更多相关文章
- 输出多行字符的一个简单JAVA小程序
public class JAVA { public static void main(String[] args) { System.out.println("-------------- ...
- python -----一个简单的小程序(监控电脑内存,cpu,硬盘)
一个简单的小程序 用函数实现!~~ 实现: cpu 使用率大于百分之50 时 , C 盘容量不足5 G 时, 内存 低于2G 时. 出现以上其中一种情况,发送自动报警邮件! 主要运用 到了两个 模 ...
- Python3的tkinter写一个简单的小程序
一.这个学期开始学习python,但是看了python2和python3,最后还是选择了python3 本着熟悉python的原因,并且也想做一些小程序来增加自己对python的熟练度.所以写了一个简 ...
- 【mpvue】使用Mpvue撸一个简单的小程序
一.快速创建一个mpvue项目 全局安装 vue-cli (如果有就不需要装了) 创建一个基于mpvue-quickstart模板的新项目,记得选择安装vuex vue init mpvue/ ...
- cpp学习笔记 1一个简单的小程序以及一些的知识点
今天买的cpp到了从今天開始又一次学习cpp如今发现学校发的书真的不怎莫样. <em>#include<stdio.h>//预处理命令 int main()/*第一个被调用的函 ...
- 一个简单的flask程序
初始化 所有Flask程序都必须创建一个程序实例. 程序实例是Flask类的对象,经常使用下述代码创建: from flask import Flask app = Flask(__name__) F ...
- 两周撸一个掘金微信小程序
利益相关 无 声明 这并不是掘金官方小程序(貌似没有搜到掘金 APP 对应的官方小程序),完全为第三者开发者开发,仅用于学习交流,禁止用于其他用途.若要使用官方正版,可访问掘金 官方网站,或下载掘金官 ...
- Android | 教你如何用代码开发一个拍照翻译小程序
引子 想必有很多小伙伴喜欢外出旅游,能去海外玩一圈那是更好不过了,旅游前大家一定会对吃.穿.住.行.游玩路线做各种攻略,然后满怀期待的出发- 想象中的旅游 出发前,想象中的旅游目的地可能有漂亮 ...
- 使用Go开发一个简单的服务器程序
最近有个小项目,需要一个简单的后台程序来支撑,本来想用Nodejs来做,但是由于本人js一直很菜,并且很讨厌callback,虽然我也很喜欢异步模型,但我一直都觉得JS是反人类的.后台就用了go处理, ...
随机推荐
- 服务器缺少vcruntime140.dll,无法运行
Redis用了一段时间,有的时候,调试的时候,RedisDesktop是个不错的工具 当我想在服务器上安装的时候,才发现服务器64位的环境里面运行出错了 百度上有共享dll出来的,但是基本都没法用,虽 ...
- java-反射和代理
1.类的编译和运行简易过程: java的源码文件(也称为编译单元,以.java为后缀的文件) ↓ 文件内最多只能有一个public修饰的类,否则编译器报错:某个类被public修饰,该类名必需与文件名 ...
- PHP提取奇数或偶数下标元素
该功能主要用到 array_filter() 函数,这个函数可以用回调函数过滤数组中的单元.用法: array array_filter ( array $array [, callable $cal ...
- Facebook Reporting API -- Facebook 数据导出API
1.获取token 浏览器打开 "访问口令工具" (FB链接请FQ) https://developers.facebook.com/tools/accesstoken/ App ...
- 深度CNN
[具体参考可以看这里(https://cloud.tencent.com/developer/article/1369425)
- python分布式爬虫--房天下
第一步安装redis redis在windows系统中的安装与启动: 下载:redis官方是不支持windows操作系统的.但是微软的开源部门将redis移植到了windows上.因此下载地址不是在r ...
- 4、spring boot 配置文件之profile
Profile 1.多Profile文件 我们在主配置文件编写的时候,文件名可以是 application-{profile}.properties/yml 默认使用application.prop ...
- 27-Middleware管道介绍
1-Middleware管道介绍,. 如果匹配上/task,则界面只会显示i am task. public void Configure(IApplicationBuilder app, IHost ...
- PHP代码审计2-常用超全局变量,常用命令注入,常用XSS漏洞审计,文件包含
超全局变量 $GLOBALS — 引用全局作用域中可用的全部变量$_SERVER — 服务器和执行环境信息$_GET — HTTP GET 变量$_POST — HTTP POST 变量$_FILES ...
- 绑定host域名 修改手机hosts域名
windows: C:\Windows\System32\drivers\etc\hosts # 在这儿输入你需要绑定的 hosts 116.31.72.421129 bro-user.flyme.c ...