PyTorch从入门到放弃之张量模块
张量(Tensor)是PyTorch最基本的操作对象。在几何定义中,张量是基于标量、向量和矩阵概念的眼神。通俗理解,可以讲标量视为0维张量,向量视为1维张量,矩阵视为2维张量。在深度学习领域,可以将张量视为一个数据的水桶,当水桶中只放一滴水时就是0维张量,多滴水排成一排就是1维张量,联排成面就是2维张量,以此类推,扩展到n维向量。
张量的数据类型
PyTorch中创建张量的方法有两种,一种是通过Python数组创建,另一种是从列表中创建。创建张量的代码如下:
import torch

# 从python数组构建

a = [[1, 2, 3],[4, 5, 6]]

x = torch.Tensor(a)

print(a, x)

# 从列表构建张量

x = torch.Tensor([[1, 2]])

print(x)

torch.rand()函数
torch.rand()函数的用法为torch.rand(\*sizes,out=None)->Tensor,返回一个张量,服从区间为[0,1)的均匀分布,形状有参数sizes定义,代码如下:
tensor1 = torch.rand(4)

tensor2 = torch.rand(2, 3)

print(tensor1, tensor2)

torch.randn()函数
torch.randn()函数的用法为torch.randn(*size,out=None)->Tensor,返回一个张量(高斯白噪声),服从均值为0,方差为1的标准正态分布,形状由参数sizes定义,代码如下:
tensor1 = torch.randn(5)

tensor2 = torch.randn(2, 4)

print(tensor1, tensor2)

torch.normal()函数
torch.normal()函数的第一种用法为torch.normal(means, std, out=None)。
如果没有size参数,返回一个张量,服从指定均值means和标准差std的正态分布,均值means是一个张量,包含每个输出元素相关的正态分布的均值。标准差std是一个张量,包含每个输出元素相关的正态分布的标准差。均值和标准差的形状无需匹配,但每个张量的元素须相同。
tensor = torch.normal(mean=torch.arange(1., 11.), std= torch.arange(1, 0, -0.1))

print(tensor)

torch.arange(1, 0, -0.1)

tensor = torch.normal(mean=0.5, std=torch.arange(1., 6.))

print(tensor)

tensor = torch.normal(mean=torch.arange(1., 6.), std=1.0)

print(tensor)

torch.normal()的第二种用法为torch.normal(mean, std, size*, out=None),共享均值和方程
tensor = torch.normal(2, 3, size=(1, 4))

print(tensor)

该代码中产生的所有的数服从均值为2,方差为3的正态分布,形状为(1,4)
torch.linspace()函数
torch.linspace()函数的用法为torch.linspace(start,end,step=100,out=None)->Tensor,返回一个1维张量,包含在区间start和end上均匀间隔的steps个点。
tensor = torch.linspace(1, 10, steps=5)

print(tensor)

torch.manual_seed()函数
torch.manual_seed()函数用于固定随机种子,下面生成的随机数序列都是相同的,仅作用于最接近的随机数产生语句。
torch.manual_seed(1)

temp1 = torch.rand(5)

print(temp1)

torch.manual_seed(1)

temp2 = torch.rand(5)

print(temp2)

temp3 = torch.rand(5)

print(temp3)

temp1和temp2是相同的,temp3是不同的,因为seed仅作用于最接近的那句随机数产生语句。torch中toech.seed()函数没有参数,用来将随机数的种子设置为随机数,一般不使用。
torch.ones()、torch.zeros()、torch.eye()
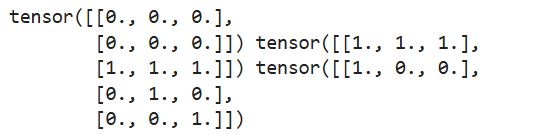
torch.ones()函数用来生成全1数组,torch.zeros()函数用来生成全0数组,torch.eye()函数用来生产对角线为1,其余部分全为0的二维数组。
tensor1 = torch.zeros(2, 3)

tensor2 = torch.ones(2, 3)

tensor3 = torch.eye(3)

print(tensor1, tensor2, tensor3)
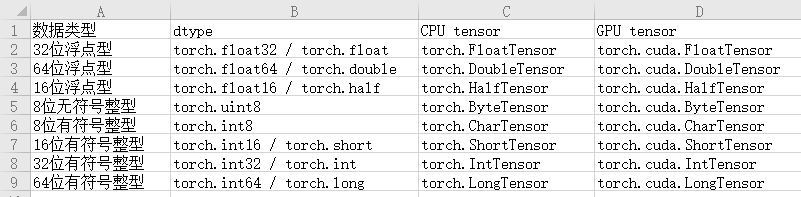
在PyTorch中默认的数据类型为32位浮点型(torch.FloatTensor),如果想要规定张量的数据类型,可以在创建时指定类型,或者创建完之后对张量的数据类型进行转换。
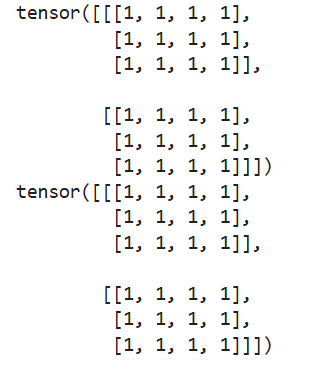
# 第一种方法:在创建张量时指定数据类型

x = torch.ones((2, 3, 4), dtype=torch.int64)  # 生成全1数组

print(x)

# 第二种方法:张量创建完成后,对数据类型进行转换

x = torch.ones(2, 3, 4)  # 生成全1数组

x = x.type(torch.int64)

print(x)
张量的基本操作
PyTorch中,张量的操作分为结构操作和数学运算,结构操作就是改变张量本身的结构,数学操作就是对张量的元素值进行数学运算。常用的结构操作包括改变张量的形状、增加和删除维度、交换维度、拼接和分隔、堆叠和分解、索引和切片,数学运算包括基本数学运算、向量运算、矩阵运算。
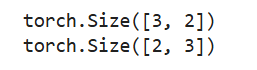
torch.view()函数可以改Tensor的形状,但是必须保证前后元素总数一致。
x = torch.rand(3, 2)

print(x.shape)  # torch.Size([3, 2])

y = x.view(2, 3)

print(y.shape)  # torch.Size([6])
增加和删除维度
unsqueeze()函数可以对数据维度进行扩充,给指定位置加上维度为1的维度。用法:torch.unsqueeze(a,N),或者a.unsqueeze(N),在a中指定位置N加上一个维度为1的维度。
# 增加维度
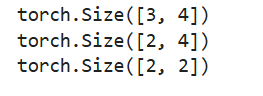
a = torch.rand(3, 4)
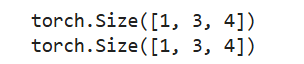
b = torch.unsqueeze(a, 0)
c = a.unsqueeze(0)
print(b.shape)
print(c.shape)
squeeze()函数可以对张量进行维度的压缩,去掉维数为1的维度。用法:torch.squeeze(a)将a中所有维数为1的维度都删除,或者a.squeeze(1)是去掉a中指定维数为1的维度。
# 删除维度
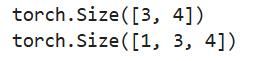
a = torch.rand(1, 1, 3, 4)
b = torch.squeeze(a)
c = a.squeeze(1)
print(b.shape)
print(c.shape)
交换维度
在运用各种模型的过程中,经常会遇到交换维度的问题。PyTorch中有两种交换维度的方法。torch.transpose()函数用于交换两个维度,torch.permute()函数可以自由交换任意位置。
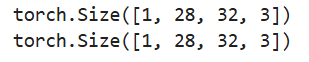
a = torch.rand(1, 3, 28, 32)  # torch.Size([1, 3, 28, 32]

# 第一种方法

b = a.transpose(1, 3).transpose(1, 2)  # torch.Size([1, 28, 32, 3])

print(b.shape)

# 第二种方法

c = a.permute(0, 2, 3, 1)

print(c.shape)  # torch.Size([1, 28, 32, 3])
拼接和分割
可以用torch.cat()函数将多个张量合并,torch.cat()函数是链接,不会增加维度;也可以用torch.split()函数把一个张量分割为多个张量。torch.split()函数可以看做torch.cat()函数的逆运算。split()函数的作用是将张量拆分为多个块,每个块都是原始张量的视图。
# torch.cat()拼接方法的代码如下:
a = torch.rand(1, 2)
b = torch.rand(1, 2)
c = torch.rand(1, 2)
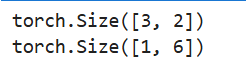
output1 = torch.cat([a, b, c], dim=0) # dim=0为按列拼接
print(output1.shape) # torch.Size([3, 2])
output2 = torch.cat([a, b, c], dim=1) # dim=1为按行拼接
print(output2.shape) # torch.Size([1, 6])
# torch.split()分割方法的代码如下:

a = torch.rand(3, 4)

output1 = torch.split(a, 2)

print(output1)

output2 = torch.split(a, [2, 2], dim=1)

print(output2)

堆叠和分解
可以用torch.stack()函数将多个张量合并,torch.stack()函数和torch.cat()函数有略微的差别,torch.stack()函数用于进行堆叠操作,会增加一个维度。torch.chunk()函数可以看做torch.cat()函数的逆运算。torch.chunk()函数的作用是将Tensor按dim(行或列)分割成chunks个Tensor块,返回的是一个元组。
# torch.stack()堆叠方法

a = torch.rand(1, 2)

b = torch.rand(1, 2)

c = torch.rand(1, 2)

output1 = torch.stack([a, b, c], dim=0)  # dim=0为按列拼接

print(output1.shape)

output2 = torch.stack([a, b, c], dim=1)  # dim=1为按行拼接

print(output2.shape)

# torch.chunk()分解方法的代码如下:

a = torch.rand(3, 4)

output1 = torch.chunk(a, 2, dim=0)

print(output1)

output2 = torch.chunk(a, 2, dim=1)

print(output2)

索引和切片
Torch张量的索引以及切片规则与Numpy基本一致,比较简单。
x = torch.rand(2, 3, 4)

print(x[1].shape)

y = x[1, 0:2, :]

print(y.shape)

z = x[:, 0, ::2]

print(z.shape)
基本数学运算
张量基本的数学运算包括张量求和、张量元素乘积、对张量求均值、方差和极值。
元素求和
按元素求和的第一种方法为torch.sum(input)->float,返回输入向量input中所有的元素的和。
# 元素求和第一种方法

a = torch.rand(4, 3)

b = torch.sum(a)

print(b)  # tensor(6.4069)

按元素求和的第二种方法为torch.sum(input,dim,keepdim=False,out=None)->Tensor,其中input为输入张量,dim为指定维度,keep(bool)表示输出张量是否保持与输入张量有相同数量的维度,ruokeepdim值为True,则在输出张量中,出了被操作的dim维度值降为1,其他维度与输入张量input相同。否则,dim维度相当于被执行torch.squeeze()维度压缩,导致此维度消失,最终输出张量会比输入张量少一个维度。
# 元素求和第二种方法

a = torch.rand(4, 3)

b = torch.sum(a, dim=1, keepdim=False)

print(b, b.shape)

按索引求和
按索引求和是指按索引参数index中所确定的顺序,将参数张量Tensor中的元素与执行本方法的张量的元素逐个相加。参数Tensor的尺寸必须严格执行方法的张量匹配,否则会发生错误。按索引求和的方法为torch.Tensor.index_add_(dim,index,tensor)->Tensor,dim为索引index所指向的维度,index为包含索引数的张量,Tensor为含有相加元素的张量。
# 按索引求和,不常用
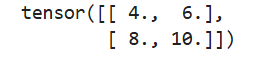
x = torch.Tensor([[1, 2],[3, 4]])
y = torch.Tensor([[3, 4],[5, 6]])
index = torch.LongTensor([0, 1])
output = x.index_add_(0, index, y)
print(output)
元素乘积
元素乘积的第一种方法为torch.prod(input)->float,返回输入张量input所有元素的乘积。
# 元素乘积第一种方法

a = torch.rand(4, 3)

b = torch.prod(a)

print(b)

元素乘积的第二种方法为torch.prod(input,dim,keepdim=False,out=None)->Tensor,其中input为输入张量,dim为指定维度,keepdim(bool)表示输出张量是否保持与输入张量有相同数量的维度,若keepdim值为True,则在输出张量中,除了被操作的dim维度值降为1,其他维度与输入张量input相同。否则,dim维度相当于被执行torch.squeeze()函数进行维度压缩操作,导致此维度消失,最终输出张量回避输入张量少一个维度。
# 元素乘积第二种方法

a = torch.rand(4, 3)

b = torch.prod(a, 1, True)

print(b, b.shape)

求平均数
求平均数的第一种方法为torch.mean(input),返回输入张量input中每个元素的平均值。
# 求平均数的第一种方法

a = torch.rand(4, 3)

b = torch.mean(a)

print(b)

求平均数的第二种方法为torch.mean(input,dim,keepdim=False,out=None),其中参数的含义与元素求和、元素乘积的含义相同。
# 求平均数的第二种方法

a = torch.rand(4, 3)

b = torch.mean(a, 1, True)

print(b, b.shape)

求方差
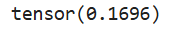
求方差的第一种方法为torch.var(input,unbiased=True)->float,返回输入向量input中所有元素的方差,unbiased(bool)表示是否使用基于修正贝塞尔函数的无偏估计。
# 求方差的第一种方法

a = torch.rand(4, 3)

b = torch.var(a)

print(b)
求方差的第二种方法为torch.var(input,dim,keepdim=False,unbiased=True,out=None)->Tensor,unbiased(bool)表示是否使用基于修正贝塞尔函数的无偏估计,其余参数含义与元素求和、元素乘积含义相同。
# 求方差的第二种方法

a = torch.rand(4, 3)

b = torch.var(a, 1, True)

print(b, b.shape)

求最大值
求最大值的第一种方法为torch.max(input)->float,返回输入张量所有元素的最大值。
# 求最大值的第一种方法

a = torch.rand(4, 3)

b = torch.max(a)

print(b)
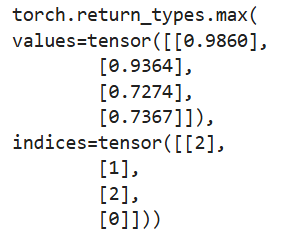
求最大值的第二种方法为torch(input,dim,keepdim=False,out=None)->(Tensor,LongTensor),返回新的张量input中指定维度dim中每行的最大值,同时返回每个最大值的位置索引。
# 求最大值的第二种方法

a = torch.rand(4, 3)

b = torch.max(a, 1, True)

print(b)
求最小值
求最小值的第一种方法为torch.min(input)->float,返回输入张量的最小值。
# 求最小值的第一种方法

a = torch.rand(4,3)

b = torch.min(a)

print(b)
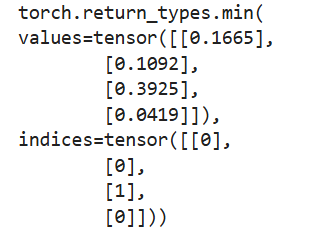
求最小值的第二种方法为torch.min(input,dim,keepdim=False,out=None)->(Tensor,LongTensor),与求最大值的第二种方法类似。
# 求最小值的第二种方法

a = torch.rand(4, 3)

b = torch.min(a, 1, True)

print(b)
向量运算和矩阵运算
向量的线性代数运算包括点乘(dot(a,b))、内积(inner(a,b))、叉乘(matmul(a,b))等。
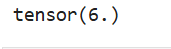
向量的点乘
向量的待你橙又称为向量的内积或数量积,对两个向量执行点乘运算,就是对这两个向量对应位一一相乘之后求和的操作。
# 向量的点乘,a和b必须为一维

a = torch.Tensor([1, 2, 3])

b = torch.Tensor([1, 1, 1])

output = torch.dot(a, b)

print(output) # 等价于 1*1+2*1+3*1,tensor(6.)

向量的叉乘
两个向量的外积,又叫叉乘、叉积向量积,其运算结果是一个向量而不是一个标量。
# 向量的叉乘

a = torch.Tensor([1, 2, 3])

b = torch.Tensor([1, 1, 1])

output = torch.multiply(a, b)

print(output)

矩阵的内积
两个维度相同的矩阵a和b,a和b矩阵的内积是相同位置的向量的内积。
# 矩阵的内积

a = torch.Tensor([1, 2, 3])

b = torch.Tensor([1, 1, 1])

output = torch.inner(a, b)

print(output)
矩阵的外积
矩阵的外积就是通常意义的一般矩阵乘积。一般矩阵乘积是矩阵相乘最重要的方法,它只有在第一个矩阵的列数(column)和第二个矩阵的行数(row)相同时才有意义。
# 矩阵的外积:矩阵乘法

a = torch.Tensor([[1, 2, 3], [4, 5, 6]])

b = torch.Tensor([[1, 1], [2, 2], [3, 3]])

output = torch.matmul(a, b)

print(output)
# 按批量相乘

a = torch.randn(10, 3, 4)

b = torch.randn(10, 4, 5)

output = torch.bmm(a, b)

print(output.shape)

# tensor([[14., 14.],

#         [32., 32.]])

torch.einsum():爱因斯坦求和约定是一个非常神奇的函数,号称可以满足你的一切需求!功能强大,
张量与Numpy数组
由于使用Numpy中ndarray处理数据非常方便,经常会将张量与Numpy数组进行相互转换,所以掌握两者之间的转换方法很有必要。但是需要注意一点:相互转换后所产生的张量和Numpy中的数组共享相同的内存(所以他们之间的转换很快),改变其中一个时另一个也会改变。将张量转换为Numpy数组使用tensor.numpy()方法,将Numpy数组转换为张量使用torch.from_numpy(ndarry)方法。
张量转Numpy数组
使用numpy()函数将张量转换成Numpy数组。
a = torch.ones(1, 2)

b = a.numpy()  # 进行转换

print(a, b)

a += 2

print(a, b)

b += 2  # 在a改变后,b也已经改变

print(a, b)
Numpy数组转张量
使用from_numpy()函数将Numpy数组转换成张量。
import numpy as np

a = np.ones([1, 2])

b = torch.from_numpy(a)  # 进行转换

print(a, b)

a += 2

print(a, b)

b += 2  # 在a改变后,b也已经改变

print(a, b)

Cuda张量与CPU张量
在深度学习过程中,GPU能起到加速的作用。PyTorch中的张量默认存放在CPU设备中,如果GPU可用,可以将张量转移到GPU中。CPU张量转换为Cuda张量有两种方法。一般情况下,可以使用.cuda方法将Tensor移动到GPU;在有多个GPU的情况下,可以使用to方法来确定使用哪个设备。也可以使用.cpu方法将Tensor移动到CPU。
x = torch.rand(2, 4)

print(x.device)  # cpu

# 第一种方法

x = x.cuda()

print(x.device)  # cuda:0

# 第二种方法

device = torch.device("cuda" if torch.cuda.is_available() else "cpu")

if torch.cuda.is_available():

    x = x.to(device)

    print(x.device)  #cuda:0

# 转化为cpu

x = x.cpu()

print(x.device)  # cpu
欢迎关注公众号:愚生浅末。

PyTorch从入门到放弃之张量模块的更多相关文章
- pytorch从入门到放弃(目录)
目录 前置基础 Pytorch从入门到放弃 推荐阅读 前置基础 Python从入门到放弃(目录) 人工智能(目录) Pytorch从入门到放弃 01_pytorch和tensorflow的区别 02_ ...
- python全栈开发从入门到放弃之常用模块和正则
什么是模块? 常见的场景:一个模块就是一个包含了python定义和声明的文件,文件名就是模块名字加上.py的后缀. 但其实import加载的模块分为四个通用类别: 1 使用python编写的代码(.p ...
- MySQL数据库从入门到放弃(目录)
目录 MySQL数据库从入门到放弃 推荐阅读 MySQL数据库从入门到放弃 193 数据库基础 194 初识MySQL 195 Windows安装MySQL 196 Linux安装MySQL 197 ...
- OpenStack从入门到放弃
OpenStack从入门到放弃 目录: 为何选择云计算/云计算之前遇到的问题 什么是云计算 云服务模式 云应用形式 传统应用与云感知应用 openstack及其相关组件介绍 flat/vlan/gre ...
- 绕过校园网的共享限制 win10搭建VPN服务器实现--从入门到放弃
一.开篇立论= =.. 上次说到博主在电脑上搭建了代理服务器来绕过天翼客户端的共享限制,然而经过实际测试还不够完美,所以本着生命不息,折腾不止的精神,我又开始研究搭建vpn服务器= =... (上次的 ...
- 从入门到放弃,.net构建博客系统(二):依赖注入
文章目录:<从入门到放弃,.net构建博客系统> 从入门到放弃,.net构建博客系统(一):系统构建 从入门到放弃,.net构建博客系统(二):依赖注入 上一篇中有讲到项目启动时会进行io ...
- Xen的入门到放弃
Xen的入门到放弃 作者:尹正杰 版权声明:原创作品,谢绝转载!否则将追究法律责任. Xen 是一个开放源代码虚拟机监视器(VMM),由剑桥大学的"Ina Pratt"和" ...
- iOS 即时通讯,从入门到 “放弃”?
原文链接:http://www.jianshu.com/p/2dbb360886a8 本文会用实例的方式,将 iOS 各种 IM 的方案都简单的实现一遍.并且提供一些选型.实现细节以及优化的建议. — ...
- Flask从入门到放弃1:路由app.route()
Flask从入门到放弃1: Flask中的路由app.route(): 参考来源:http://python.jobbole.com/80956/ https://www.raspberrypi.or ...
- webpack 配置 Vue 多页应用 —— 从入门到放弃
webpack 配置 Vue 多页应用 -- 从入门到放弃 一直以来,前端享有无需配置,一个浏览器足矣的优势,直到一大堆构建工具的出现,其中 webpack 就是其中最复杂的一个,因此出现了一个新兴职 ...
随机推荐
- BZOJ 1461 题解
考虑设计一个哈希函数 \(hash(x) = f(x) \times base^x\). 其中 \(f(x)\) 表示 \(\sum_{j=1}^{i-1} [j <i]\). 然后类似于滑动窗 ...
- 请解释一下 JavaScript 的同源策略?
概念:同源策略是客户端脚本(尤其是Netscape Navigator2.0,其目的是防止某个文档或脚本从多个不同源装载.这里的同源策略指的是: 协议,域名,端口 相同,同源策略是一种安全协议.指一 ...
- k8s 实战 3----标签
如果你对k8s还不了解,可以看下前文k8s 实战 1 ---- 初识 (https://www.cnblogs.com/jilodream/p/18245222)k8s 实战 2 ---- pod 基 ...
- SMOTE与SMOGN算法R语言代码
本文介绍基于R语言中的UBL包,读取.csv格式的Excel表格文件,实现SMOTE算法与SMOGN算法,对机器学习.深度学习回归中,训练数据集不平衡的情况加以解决的具体方法. 在之前的文章S ...
- 【干货】顶级 Java 源码教程项目大汇总!
大家好,我是鱼皮,今天分享几个 GitHub 上顶级的 Java 源码教程项目. 区别于书籍.文档.视频等形式的教程,这些项目几乎都是由 精简的代码片段 和 Demo 组成的,能够轻松地在本地执行,非 ...
- [oeasy]python0074[专业选修]字节序_byte_order_struct_pack_大端序_小端序
进制转化 回忆上次内容 上次 总结了 计算字符串值的函数 eval 四种进制的转化函数 bin oct int hex 函数名 前缀 目标字符串所用进制 bin 0b 二进制 oct 0o ...
- [oeasy]python0120_英语的崛起_英文字符_小写字母的由来_不列颠帝国
各语言字符编码 回忆上次内容 罗马 承袭了 希腊的文化 学习了 希腊的字符 拥有 罗马帝国的战力 基督教文化的影响 添加图片注释,不超过 140 字(可选) 这个时候 不列颠 ...
- Spectre.Console.Cli注入服务的几种姿势
Spectre.Console大家可能都不陌生,写控制台程序美化还是不错的,支持着色,表格,图标等相当nice,如果对这个库不熟悉我强烈推荐你了解一下,对于写一些CLI小工具还是相当方便的, 本文主要 ...
- 2023/4/17 SCRUM个人博客
1.我昨天的任务 学习了easydict库的基本操作 2.遇到了什么困难 没有找到合适的人脸识别库 3.我今天的任务 初步学习dlib的安装,了解dlib的基础组件
- java进行文件搜索的一个小案例
分享一个小demo,可以查询某个文件目录下的某个文件并启动,来自黑马的IO教程 import java.io.File; import java.io.IOException; public clas ...