如何运行开源的React Native项目?
如何运行开源的RN项目?
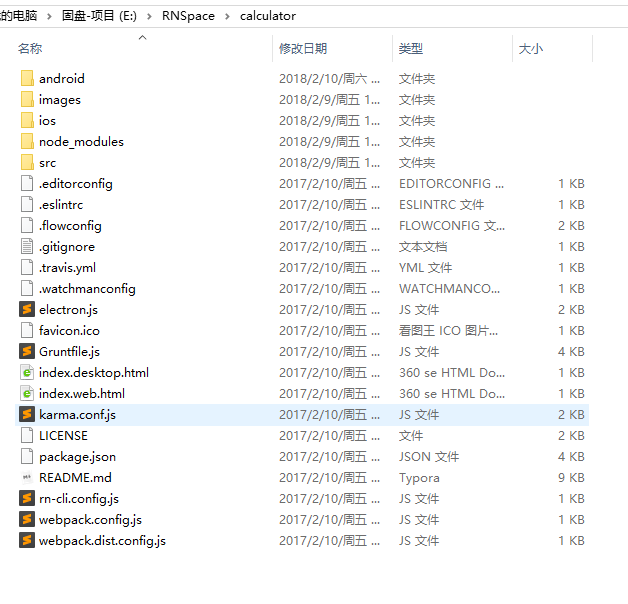
1.下载
2.解压
3.配置本地sdk位置
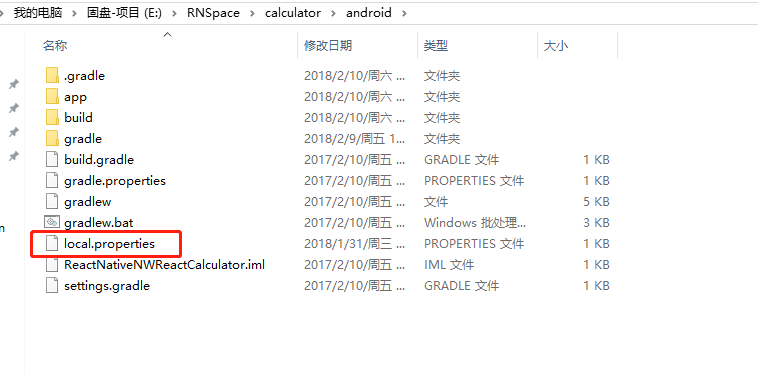
sdk.dir = D\:\\Android\\SDK
4.调整gradle版本
apply plugin: "com.android.application"

import com.android.build.OutputFile

/**

 * The react.gradle file registers a task for each build variant (e.g. bundleDebugJsAndAssets

 * and bundleReleaseJsAndAssets).

 * These basically call `react-native bundle` with the correct arguments during the Android build

 * cycle. By default, bundleDebugJsAndAssets is skipped, as in debug/dev mode we prefer to load the

 * bundle directly from the development server. Below you can see all the possible configurations

 * and their defaults. If you decide to add a configuration block, make sure to add it before the

 * `apply from: "react.gradle"` line.

 *

 * project.ext.react = [

 *   // the name of the generated asset file containing your JS bundle

 *   bundleAssetName: "index.android.bundle",

 *

 *   // the entry file for bundle generation

 *   entryFile: "index.android.js",

 *

 *   // whether to bundle JS and assets in debug mode

 *   bundleInDebug: false,

 *

 *   // whether to bundle JS and assets in release mode

 *   bundleInRelease: true,

 *

 *   // whether to bundle JS and assets in another build variant (if configured).

 *   // See http://tools.android.com/tech-docs/new-build-system/user-guide#TOC-Build-Variants

 *   // The configuration property can be in the following formats

 *   //         'bundleIn${productFlavor}${buildType}'

 *   //         'bundleIn${buildType}'

 *   // bundleInFreeDebug: true,

 *   // bundleInPaidRelease: true,

 *   // bundleInBeta: true,

 *

 *   // the root of your project, i.e. where "package.json" lives

 *   root: "../../",

 *

 *   // where to put the JS bundle asset in debug mode

 *   jsBundleDirDebug: "$buildDir/intermediates/assets/debug",

 *

 *   // where to put the JS bundle asset in release mode

 *   jsBundleDirRelease: "$buildDir/intermediates/assets/release",

 *

 *   // where to put drawable resources / React Native assets, e.g. the ones you use via

 *   // require('./image.png')), in debug mode

 *   resourcesDirDebug: "$buildDir/intermediates/res/merged/debug",

 *

 *   // where to put drawable resources / React Native assets, e.g. the ones you use via

 *   // require('./image.png')), in release mode

 *   resourcesDirRelease: "$buildDir/intermediates/res/merged/release",

 *

 *   // by default the gradle tasks are skipped if none of the JS files or assets change; this means

 *   // that we don't look at files in android/ or ios/ to determine whether the tasks are up to

 *   // date; if you have any other folders that you want to ignore for performance reasons (gradle

 *   // indexes the entire tree), add them here. Alternatively, if you have JS files in android/

 *   // for example, you might want to remove it from here.

 *   inputExcludes: ["android/**", "ios/**"]

 * ]

 */

apply from: "react.gradle"

/**

 * Set this to true to create two separate APKs instead of one:

 *   - An APK that only works on ARM devices

 *   - An APK that only works on x86 devices

 * The advantage is the size of the APK is reduced by about 4MB.

 * Upload all the APKs to the Play Store and people will download

 * the correct one based on the CPU architecture of their device.

 */

def enableSeparateBuildPerCPUArchitecture = false

/**

 * Run Proguard to shrink the Java bytecode in release builds.

 */

def enableProguardInReleaseBuilds = false

android {

    compileSdkVersion 26 // 23

    buildToolsVersion "26.0.2" // 23

    defaultConfig {

        applicationId "com.reactnativenwreactcalculator"

        minSdkVersion 16

        targetSdkVersion 22

        versionCode 1

        versionName "1.0"

        ndk {

            abiFilters "armeabi-v7a", "x86"

        }

    }

    splits {

        abi {

            reset()

            enable enableSeparateBuildPerCPUArchitecture

            universalApk false  // If true, also generate a universal APK

            include "armeabi-v7a", "x86"

        }

    }

    buildTypes {

        release {

            minifyEnabled enableProguardInReleaseBuilds

            proguardFiles getDefaultProguardFile("proguard-android.txt"), "proguard-rules.pro"

        }

    }

    // applicationVariants are e.g. debug, release

    applicationVariants.all { variant ->

        variant.outputs.each { output ->

            // For each separate APK per architecture, set a unique version code as described here:

            // http://tools.android.com/tech-docs/new-build-system/user-guide/apk-splits

            def versionCodes = ["armeabi-v7a":1, "x86":2]

            def abi = output.getFilter(OutputFile.ABI)

            if (abi != null) {  // null for the universal-debug, universal-release variants

                output.versionCodeOverride =

                        versionCodes.get(abi) * 1048576 + defaultConfig.versionCode

            }

        }

    }

}

dependencies {

    compile fileTree(dir: "libs", include: ["*.jar"])

    compile "com.android.support:appcompat-v7:23.0.1"

    compile "com.facebook.react:react-native:+"  // From node_modules

}
调成本地存在的。
5.安装一些依赖
npm i 或者 npm install
6.运行

react-native run-android

如何运行开源的React Native项目?的更多相关文章
- React Native 项目运行在 Web 浏览器上面
React Native 的出现,让前端工程师拥有了使用 JavaScript 编写原生 APP 的能力.相比之前的 Web app 来说,对于性能和用户体验提升了非常多. 但是 React Nati ...
- 安装android Studio和运行react native项目(基础篇)
ANDROID_HOME环境变量 确保ANDROID_HOME环境变量正确地指向了你安装的Android SDK的路径. 打开控制面板 -> 系统和安全 -> 系统 -> 高级系统设 ...
- 【腾讯Bugly干货分享】React Native项目实战总结
本文来自于腾讯bugly开发者社区,非经作者同意,请勿转载,原文地址:http://dev.qq.com/topic/577e16a7640ad7b4682c64a7 “8小时内拼工作,8小时外拼成长 ...
- Expo大作战(三)--针对已经开发过react native项目开发人员有针对性的介绍了expo,expo的局限性,开发时项目选型注意点等
简要:本系列文章讲会对expo进行全面的介绍,本人从2017年6月份接触expo以来,对expo的研究断断续续,一路走来将近10个月,废话不多说,接下来你看到内容,讲全部来与官网 我猜去全部机翻+个人 ...
- 技术实践丨React Native 项目 Web 端同构
摘要:尽管 React Native 已经进入开源的第 6 个年头,距离发布 1.0 版本依旧是遥遥无期."Learn once, write anywhere",完全不影响 Re ...
- React Native 项目整合 CodePush 全然指南
版权声明:本文为博主原创文章,未经博主同意不得转载. https://blog.csdn.net/y4x5M0nivSrJaY3X92c/article/details/81976844 作者 | 钱 ...
- 第一个React Native项目
1>下图操作创建第一个React Native项目: 用Xcode运行界面如下: 记住: 在使用项目文件期间,终端记住不要关闭的哟!!! 改变了程序代码,需要刷新运行,使用快捷键: Comman ...
- React Native 项目实战-Tamic
layout: post title: React Native 项目实战 date: 2016-10-18 15:02:29 +0800 comments: true categories: Rea ...
- react native项目启动需要做的操作
一.启动: 1.查看端口(默认8081是否被占用) netstat -ano 可以查看所有的进程 2.netstat -ano | findstr "8081" 查看某个端口 ...
随机推荐
- Android Unable to add window -- token android.os.BinderProxy@3a067204 is not valid错误分析记录
打开APP时,出现闪退的情况,查看android studio报错信息,主要为: Unable to add window -- token android.os.BinderProxy@3a0672 ...
- ndk书写位置的问题
defaultConfig { applicationId "com.chenql.helloandroidjni" minSdkVersion 22 targetSdkVersi ...
- R 连接数据库长数字被科学计数法解决方法
数据库中的订单编号
- shell编程之grep命令的使用
大家在学习正则表达式之前,首先要明确一点,并把它牢牢记在心里,那就是: 在linux中,通配符是由shell解释的,而正则表达式则是由命令解释的,不要把二者搞混了.切记!!! 通常有三种文本处理工具/ ...
- Django 更新字段
Django在1.7以后的版本提供数据迁移命令,用来在修改模型中的字段,更新到数据库 1. python manager.py makemigrations 命令用来创建迁移文件版本的 2. pyth ...
- (转) Arcgis for js之WKT和GEOMETRY的相互转换
http://blog.csdn.net/gisshixisheng/article/details/44057453 1.wkt简介 WKT(Well-known text)是一种文本标记语言,用于 ...
- HDU_1026_Ignatius and the Princess I_BFS(保存路径)
Ignatius and the Princess I Time Limit: 2000/1000 MS (Java/Others) Memory Limit: 65536/32768 K (J ...
- 四次挥手与tcp标志位
鉴于tcp的标志位可以同时置位,在相应端无数据传输时,四次握手可以用三次报文完成.
- JS 获得节点
var ele = ev.parentNode; var elem_child = ele.childNodes; in elem_child) { //遍历子元素数组 if (elem_child[ ...
- react typescript 父组件调用子组件
//父组件import * as React from 'react'import { Input } from 'antd'const Search = Input.Searchimport &qu ...