SpringMVC基础02——HelloWorld
1、搭建环境
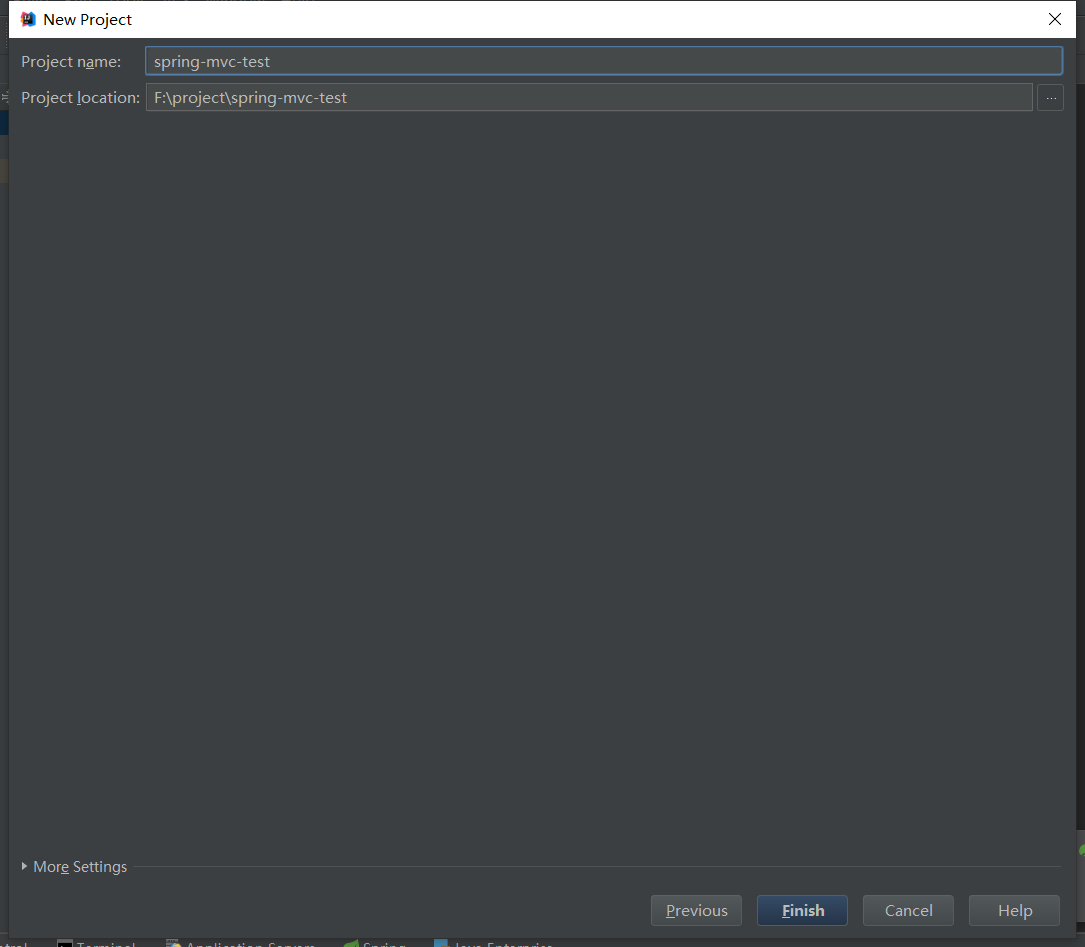
博主使用的环境是IDEA2017.3,首先我们需要创建一个maven项目父项目,创建一个project,选择maven,之后点击next

添写当前项目的坐标,之后点击next

填写项目名点击finsh
创建好父项目之后我们删除它的src文件夹,因为我们仅仅使用它的pom文件而不需要编写代码。

之后对父项目的pom文件进行编写,并且引入相关依赖,下面贴出来相应的pom.xml文件
 <?xml version="1.0" encoding="UTF-8"?>

 <project xmlns="http://maven.apache.org/POM/4.0.0"

          xmlns:xsi="http://www.w3.org/2001/XMLSchema-instance"

          xsi:schemaLocation="http://maven.apache.org/POM/4.0.0 http://maven.apache.org/xsd/maven-4.0.0.xsd">

     <modelVersion>4.0.0</modelVersion>

     <groupId>com.wzy</groupId>

     <artifactId>spring-mvc-test</artifactId>

     <!--打包为一个pom文件,这里默认的打包方式jar-->

     <packaging>pom</packaging>

     <version>1.0-SNAPSHOT</version>

     <modules>

         <module>spring-mvc</module>

     </modules>

     <name>Spring MVC Test</name>

     <description>This SpringMVC project</description>

     <!--自定义属性-->

     <properties>

         <spring.version>5.1.1.RELEASE</spring.version>

     </properties>

     <dependencies>

         <!--引入spring-context模块-->

         <dependency>

             <groupId>org.springframework</groupId>

             <artifactId>spring-context</artifactId>

             <version>${spring.version}</version>

         </dependency>

         <!--引入springmvc-->

         <dependency>

             <groupId>org.springframework</groupId>

             <artifactId>spring-webmvc</artifactId>

             <version>${spring.version}</version>

         </dependency>

         <!--引入spring-core模块-->

         <dependency>

             <groupId>org.springframework</groupId>

             <artifactId>spring-core</artifactId>

             <version>${spring.version}</version>

         </dependency>

         <!-- 引入junit-->

         <dependency>

             <groupId>junit</groupId>

             <artifactId>junit</artifactId>

             <version>4.12</version>

             <scope>test</scope>

         </dependency>

         <!--引入servlet api-->

         <dependency>

             <groupId>javax.servlet</groupId>

             <artifactId>javax.servlet-api</artifactId>

             <version>3.1.0</version>

             <scope>provided</scope>

         </dependency>

     </dependencies>

 </project>
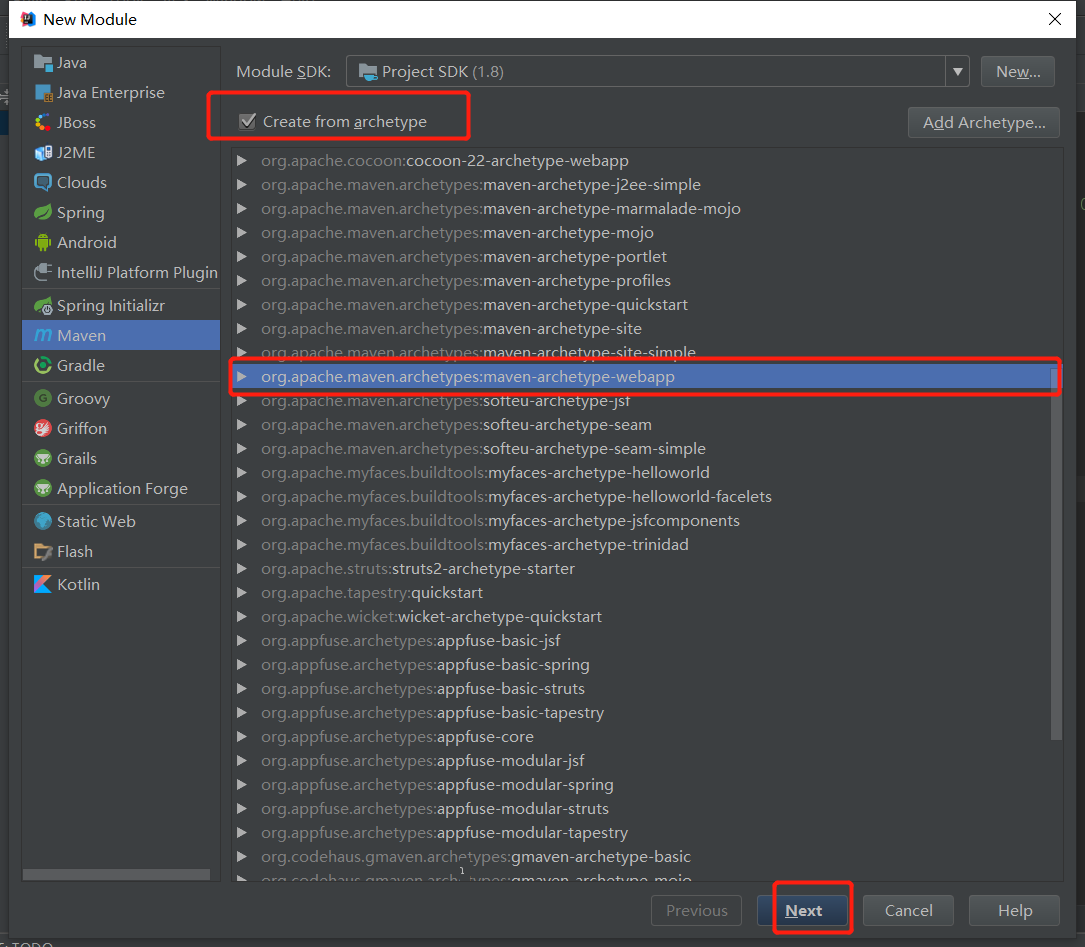
在父项目spring-mvc-test上新建一个子模块,并且这个子模块也是一个maven项目,这里选择的是webapp,一定要看好不要选错,选择好之后点击next。
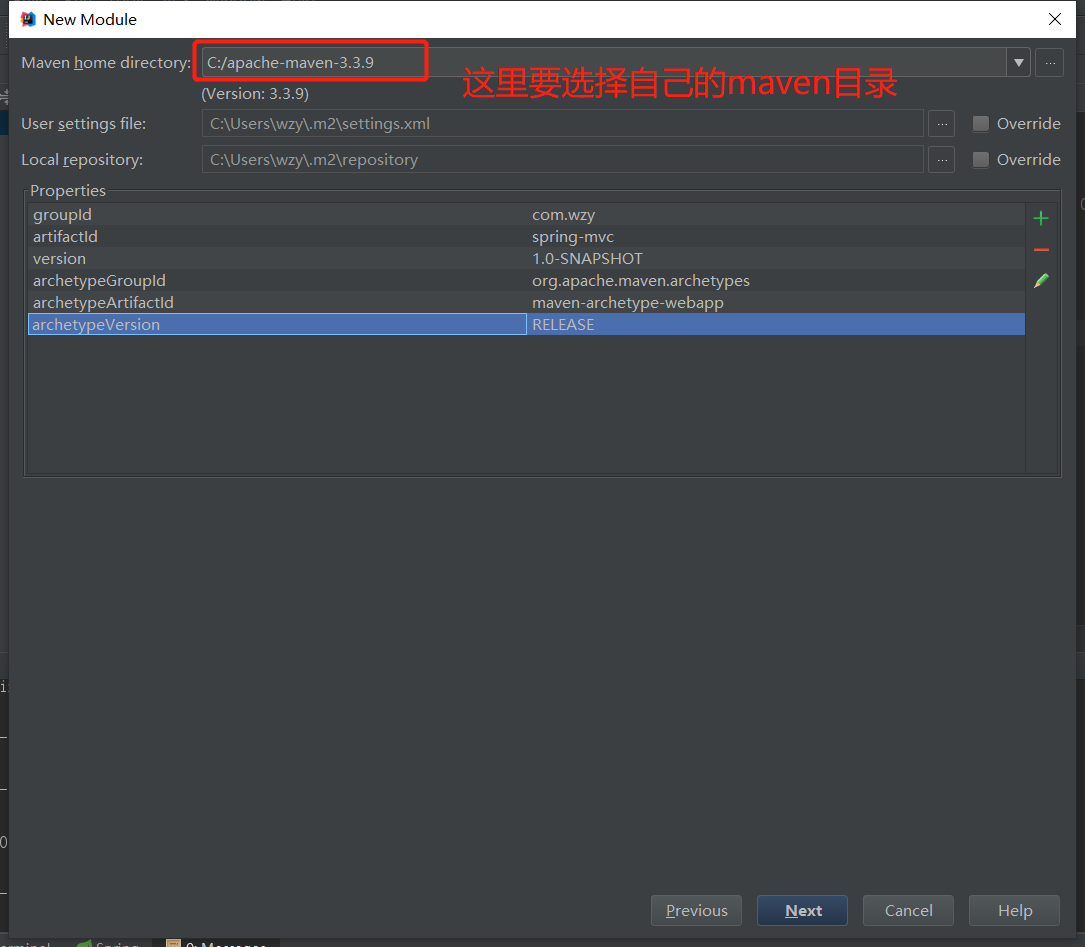
填写坐标,点击next

选择你电脑上maven的配置文件位置和仓库的位置,一般来说idea会为你自动选择,之后点击next
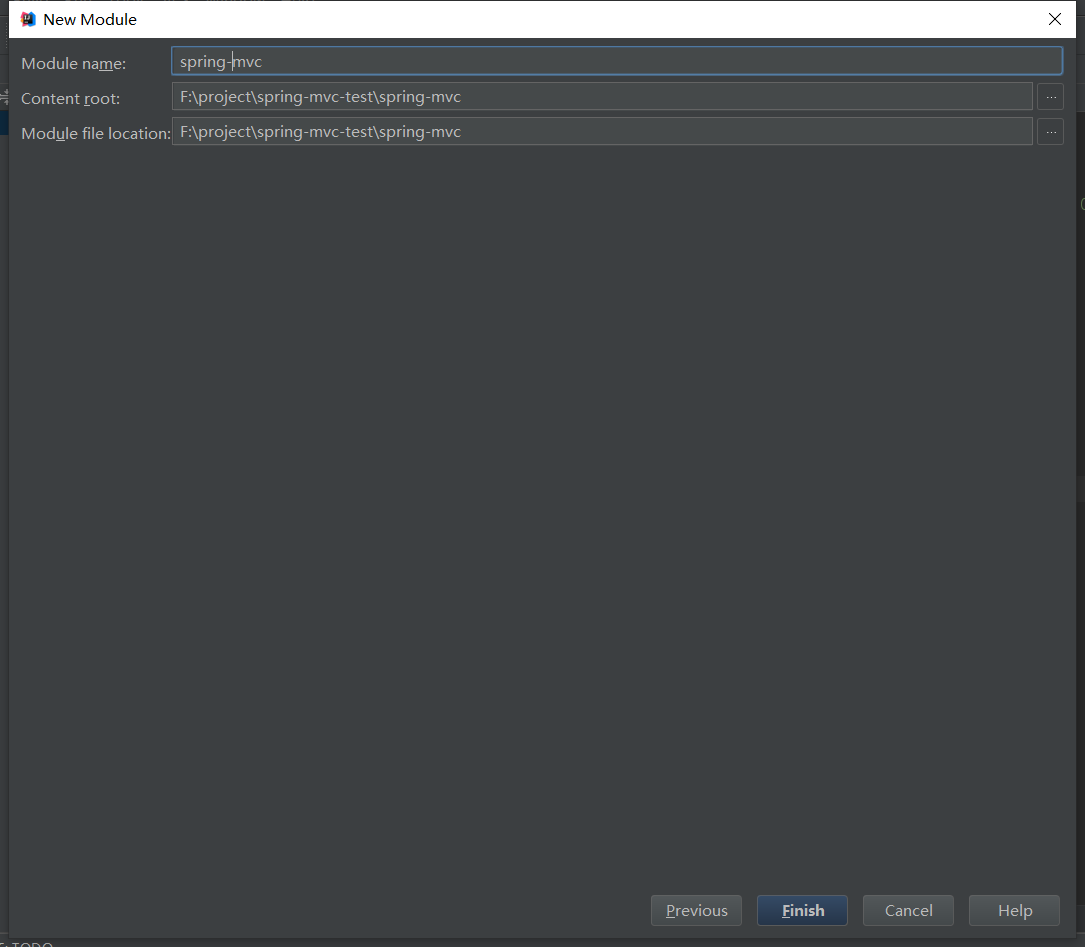
输入项目名,点击finsh,之后等待maven构建项目。
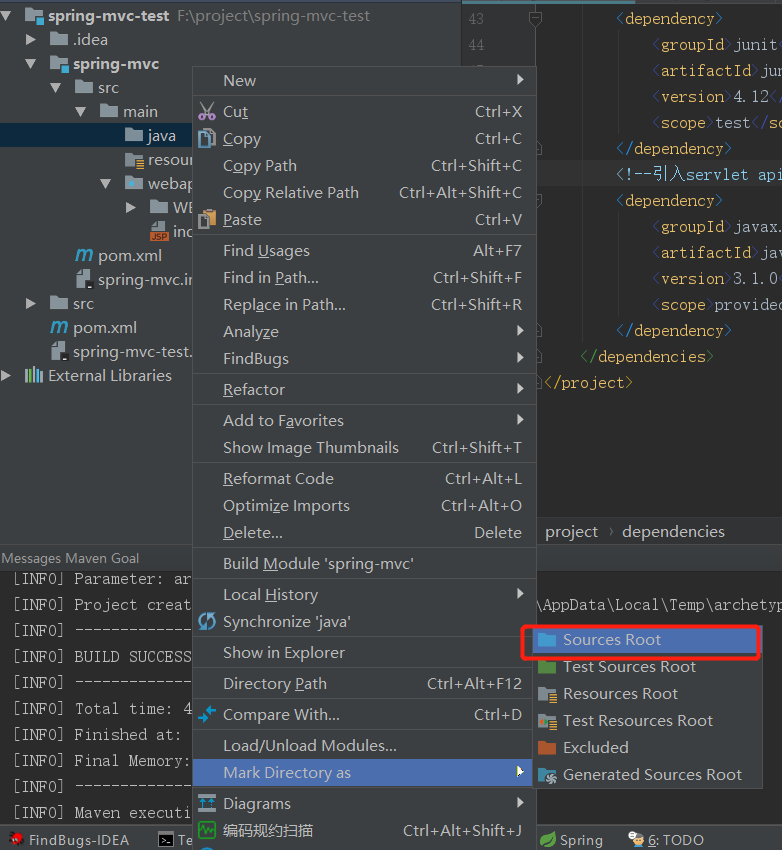
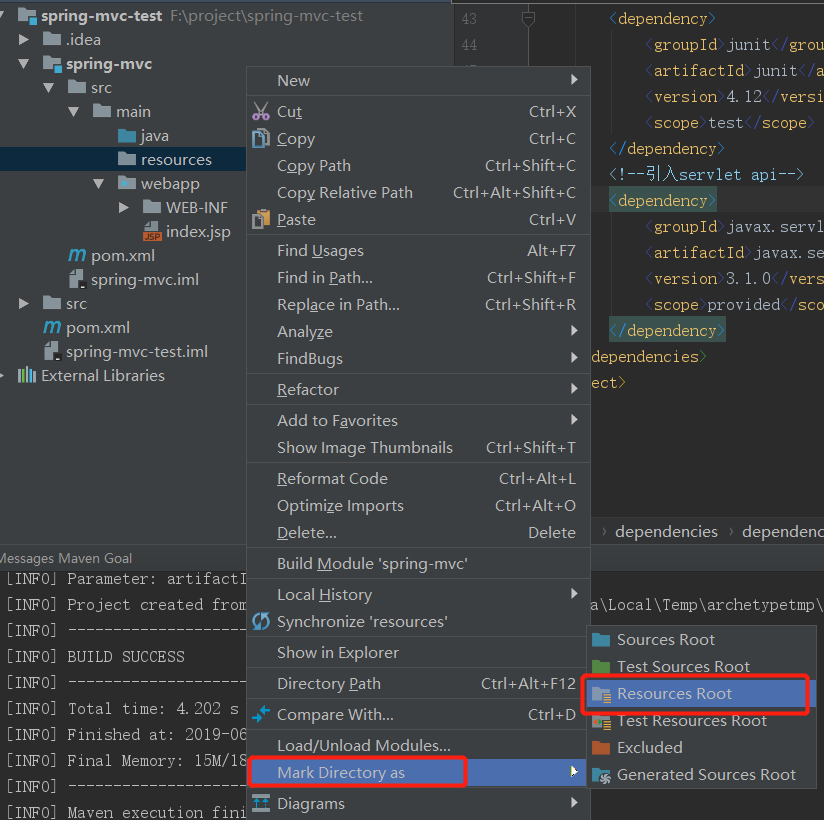
之后main文件夹下新建一个java文件夹并标注为源码Sources文件夹,用来存放java文件,创建一个resources文件夹标注为Resources文件夹,用来存放配置文件
2.配置项目
接下来,我们在resources目录下创建springmvc.xml配置文件

编写springmvc.xml配置文件
 <?xml version="1.0" encoding="UTF-8"?>

 <beans xmlns="http://www.springframework.org/schema/beans"

        xmlns:mvc="http://www.springframework.org/schema/mvc"

        xmlns:xsi="http://www.w3.org/2001/XMLSchema-instance"

        xmlns:context="http://www.springframework.org/schema/context"

        xsi:schemaLocation="http://www.springframework.org/schema/beans http://www.springframework.org/schema/beans/spring-beans.xsd

        http://www.springframework.org/schema/mvc http://www.springframework.org/schema/mvc/spring-mvc.xsd

        http://www.springframework.org/schema/context http://www.springframework.org/schema/context/spring-context.xsd">

     <!--1.配置视图解析器-->

     <bean id="resourceViewResolver" class="org.springframework.web.servlet.view.InternalResourceViewResolver">

         <!--设置解析视图的前缀-->

         <property name="prefix" value="/WEB-INF/view/"/>

         <!--设置解析视图的后缀-->

         <property name="suffix" value=".jsp"/>

     </bean>

     <!--2.配置自动扫描组件-->

     <context:component-scan base-package="com.wzy"/>

     <!--3.配置springmvc注解驱动-->

     <mvc:annotation-driven />

 </beans>
之后我们创建com.wzy.hanlder包

接下来,编写web.xml文件
 <web-app xmlns="http://java.sun.com/xml/ns/javaee"

          xmlns:xsi="http://www.w3.org/2001/XMLSchema-instance"

          xsi:schemaLocation="http://java.sun.com/xml/ns/javaee

           http://java.sun.com/xml/ns/javaee/web-app_3_0.xsd"

          version="3.0">

   <display-name>Archetype Created Web Application</display-name>

   <!--配置springmvc核心控制器-->

   <servlet>

     <servlet-name>dispatcherServlet</servlet-name>

     <servlet-class>org.springframework.web.servlet.DispatcherServlet</servlet-class>

     <init-param>

       <!--初始化参数引入spring配置文件-->

       <param-name>contextConfigLocation</param-name>

       <param-value>classpath:springmvc.xml</param-value>

     </init-param>

   </servlet>

   <servlet-mapping>

     <servlet-name>dispatcherServlet</servlet-name>

     <!--这里一定要写/而不能是/*-->

     <url-pattern>/</url-pattern>

   </servlet-mapping>

 </web-app>
之后在controller包下创建一个Controller类,并编写一个方法,通过我们返回的逻辑视图success,说明我们想跳转到/WEB-INF/view/success.jsp这个页面
 package com.wzy.handler;

 import org.springframework.stereotype.Controller;

 import org.springframework.web.bind.annotation.RequestMapping;

 /**

  * @author wzy

  * @version 1.0

  * @date 2019/6/14 0:30

  */

 @Controller

 public class SpringMVCTest {

     private static final String SUCCESS = "success";

     @RequestMapping("/helloworld")

     public String helloWorld() {

         return SUCCESS;

     }

 }
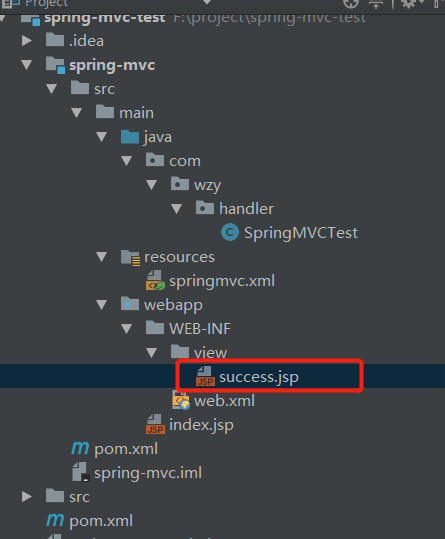
接下来我们要在/WEB-INFO下创建view文件夹,并在下面创建success.jsp文件
 <%@ page language="java" contentType="text/html; charset=utf-8" pageEncoding="utf-8" isELIgnored="false" %>

 <html>

 <head>

     <title>success page</title>

 </head>

 <body>

 <h1>Hello Spring MVC</h1>

 </body>

 </html>
3.测试
首先我们要配置tomcat服务器,首先我们要找到并点击这个按钮,选择Edit Configurations选项

之后再左上角点击+号,按图示进行选择
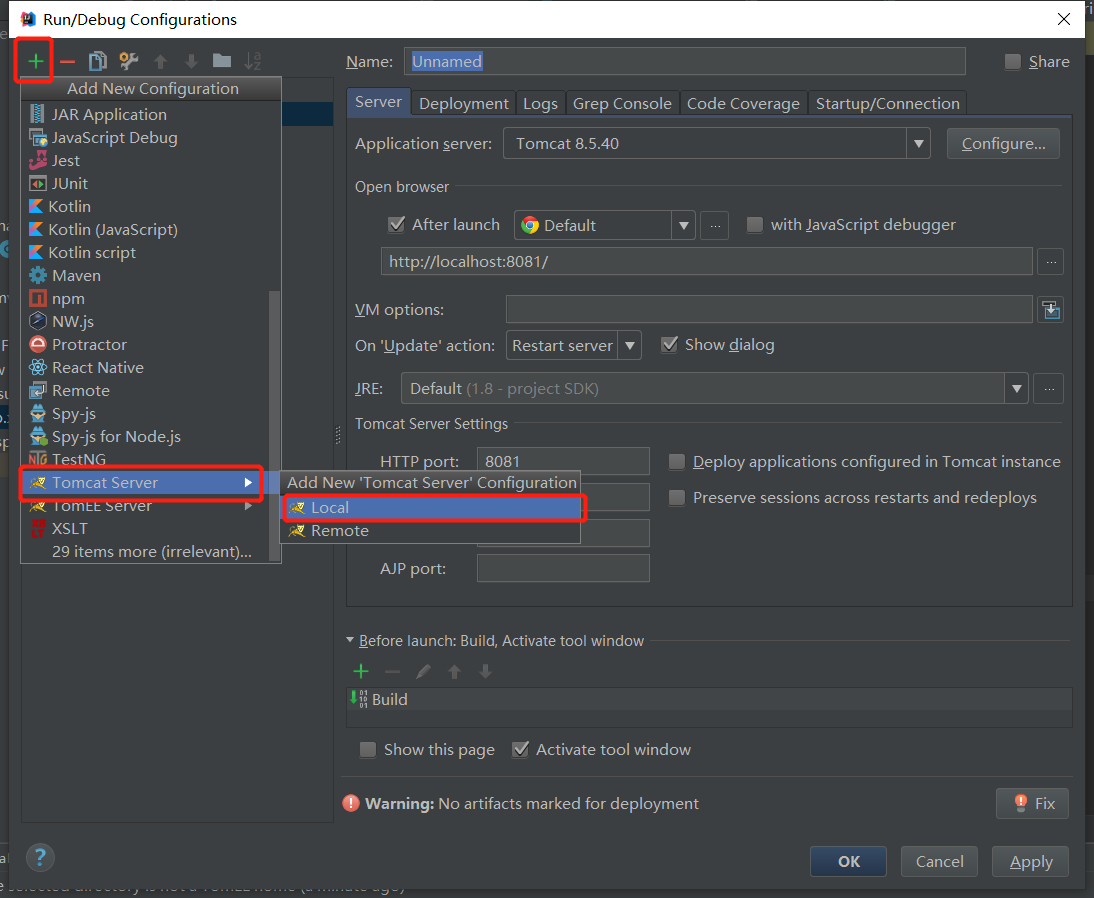
配置tomcat服务器,点击apply,之后点击ok,配置完成

在这个位置,选择刚刚配置好的tomcat服务器,之后点击启动按钮

待tomcat启动成功,从浏览器中访问http://localhost:8090/helloworld,可以看到在浏览器上访问成功,测试完成!

SpringMVC基础02——HelloWorld的更多相关文章
- SpringMVC基础入门,创建一个HelloWorld程序
ref:http://www.admin10000.com/document/6436.html 一.SpringMVC基础入门,创建一个HelloWorld程序 1.首先,导入SpringMVC需要 ...
- SpringMVC基础入门
一.SpringMVC基础入门,创建一个HelloWorld程序 1.首先,导入SpringMVC需要的jar包. 2.添加Web.xml配置文件中关于SpringMVC的配置 1 2 3 4 5 6 ...
- SpringMVC基础配置及使用
SpringMVC基础配置及使用 SpringMVC:1.SpringMVC和Spring的关系: 软件开发的三层架构: web层[表示层.表现层]---->Service层----> ...
- springMVC基础controller类
此文章是基于 搭建SpringMVC+Spring+Hibernate平台 功能:设置请求.响应对象:session.cookie操作:ajax访问返回json数据: 创建springMVC基础con ...
- javascript基础02
javascript基础02 1.数据类型 数据类型的描述在上篇的扩展中有写到链接 由于ECMAScript数据类型具有动态性,因此的确没有再定义其他数据类型的必要.这句话很重要. 如果以后再数据类型 ...
- javaSE基础02
javaSE基础02 一.javac命令和java命令做什么事情? javac:负责编译,当执行javac时,会启动java的编译程序,对指定扩展名的.java文件进行编译,生成了jvm可以识别的字节 ...
- java基础学习05(面向对象基础02)
面向对象基础02 实现的目标 1.String类的使用2.掌握this关键字的使用3.掌握static关键字的使用4.了解内部类 String类 实例化String对象一个字符串就是一个String类 ...
- SpringMVC基础01——SpringMVC的知识结构体系
1.前言 目前在各大互联网公司使用最热门的技术莫过于SpringBoot以及在其基础之上的SpringCloud,然而学习这些技术的基础在于学好Spring和SpringMVC,准确来说SpringM ...
- 085 01 Android 零基础入门 02 Java面向对象 01 Java面向对象基础 02 构造方法介绍 04 构造方法调用
085 01 Android 零基础入门 02 Java面向对象 01 Java面向对象基础 02 构造方法介绍 04 构造方法调用 本文知识点:构造方法调用 说明:因为时间紧张,本人写博客过程中只是 ...
随机推荐
- 标准C++常用头文件及描述
#include <algorithm> //STL 通用算法 #include <bitset> //STL 位集容器 #include <cctype> //字 ...
- redis的日常操作(1)
一.简介 [概述] redis是一种nosql数据库,他的数据是保存在内存中,同时redis可以定时把内存数据同步到磁盘,即可以将数据持久化,并且他比memcached支持更多的数据结构(string ...
- koa cookie使用
1 .Koa 中设置 Cookie 的值 ctx.cookies.set(name, value, [options]) 通过 options 置 设置 cookie name 的 value : ...
- asp.net文件夹上传下载控件分享
用过浏览器的开发人员都对大文件上传与下载比较困扰,之前遇到了一个需要在.net环境下大文件上传的问题,无奈之下自己开发了一套文件上传控件,在这里分享一下.希望能对你有所帮助. 以下是此例中各种脚本文件 ...
- springboot子模块 @Autowired无法找到其他模块的接口和类的解决方法
在main的启动类上添加 @SpringBootApplication(scanBasePackages = {"com.shangsheng"})或者@ComponentScan ...
- C学习笔记-typedef
typedef是一种高级数据特性,它能使某一类型创建自己的名字 typedef unsigned char BYTE; typedef struct man MAN; BYTE b = 0x12; 与 ...
- 网站性能优化(website performance optimization)2
我们先研究下构建渲染树前的几个步骤:也就是DOM和CSSOM,通常这些步骤的效果最差使你的网页呈现速度非常慢,我们是讨论尽可能快的将HTML流式传输给客户端,使浏览器能够开始构建DOM,还有其他注意事 ...
- jmeter-JDBC 连接池设置
- Docker 运行的 应用程序无法连接Oracle数据库的解决办法
1. 最近公司使用docker化部署运行 app 发现一个部门的 多数据源取数的功能连接不上 oracle数据库 报错提示为: 2. 公司平台部同事给出两个解决方案: https://blog.cs ...
- # C++中对PI的引用
#include <iostream> #include <cmath> using namespace std; int main(){ printf("%.10l ...