微信小程序上传图片及本地测试
前端(.wxml)
<view id="view1">

  <view id="btns">

    <image id="ima1" mode="aspectFitf" src="{{src}}"></image>

    <button type="primary" bindtap="btntakephoto">拍摄照片</button>

    <button type="primary" bindtap="btnchoosephoto">选择照片</button>

    <button type="primary" bindtap="btnupload">上传</button>

  </view>

</view>
样式(wxss)
button{

  margin: 8rpx;

  padding: 0rpx;

  font-size: 30rpx;

  width: 200rpx;

  float: left;

}

#view1

{

  width: %;

  height: %;

}

#btns

{

  margin:  50rpx;

  padding: 0rpx;

}

image{

  width: 650rpx;

  height: 1050rpx;

  background-color: lavender;

}
js(.js)
Page({

  data: {

    filepath:"",

  },

  onLoad: function (options) {

    this.ctx = wx.createCameraContext()

  },

  //拍摄照片

  btntakephoto: function () {

    this.ctx.takePhoto({

      quality: 'high',

      success: (res) => {

        this.setData({

          src: res.tempImagePath,

          filepath: res.tempImagePath[],

        })

      }

    })

  },

  //选择照片

  btnchoosephoto: function() {

    wx.chooseImage({

      count: , // 默认9

      sizeType: ['original'],

      sourceType: ['camera'],

      success:(res) => {

        this.setData({

          src: res.tempFilePaths[],

          filepath: res.tempFilePaths[],

        });

      }

    })

  },

  //上传图片

  btnupload: function () {

    if (this.data.filepath == "")

    {

      wx.showToast({

        title: '没有选择图片',

        icon: 'none',

        duration:

      })

    }

    else

    {

      wx.uploadFile({

        url: 'http://localhost:9965/api/image/WxPostFile',

        filePath: this.data.filepath,

        name: 'file',

        formData: {

          filename: ''

        },

        success(res) {

          console.log(res);

          wx.showToast({

            title: "上传成功",

            icon: 'success',

            duration:

          })

        }

      })

    }

  }

})
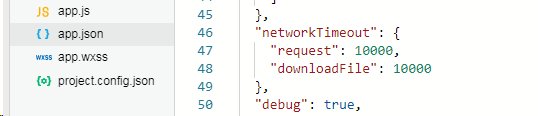
json配置(.json)
{

  "navigationBarTitleText": "上传图片",

  "navigationBarBackgroundColor": "#003a9b",

  "navigationBarTextStyle": "white"

}
后台c#
 #region 测试微信小程序图片上传

        [HttpPost]

        public HttpResponseMessage WxPostFile()

        {

            bool isSuccess = false;

            try

            {

                HttpPostedFile file = HttpContext.Current.Request.Files[];

                var filename = HttpContext.Current.Request["filename"];

                string path = AppDomain.CurrentDomain.BaseDirectory + "Out";

                if (!Directory.Exists(path))

                    Directory.CreateDirectory(path);

                //var mapPath = HttpContext.Current.Server.MapPath(path); //硬盘物理目录

                var fileExt = Path.GetExtension(file.FileName);//文件后缀名(.png)

                var mapPathFullPath = path + "\\" + filename + fileExt; //硬盘物理路径

                file.SaveAs(mapPathFullPath);

                isSuccess = true;

            }

            catch (Exception ex)

            {

                isSuccess = false;

            }

            var resultObj = JsonConvert.SerializeObject(isSuccess);

            HttpResponseMessage result = new HttpResponseMessage

            {

                Content = new StringContent(resultObj, Encoding.GetEncoding("UTF-8"), "application/json")

            };

            return result;

        }

        #endregion
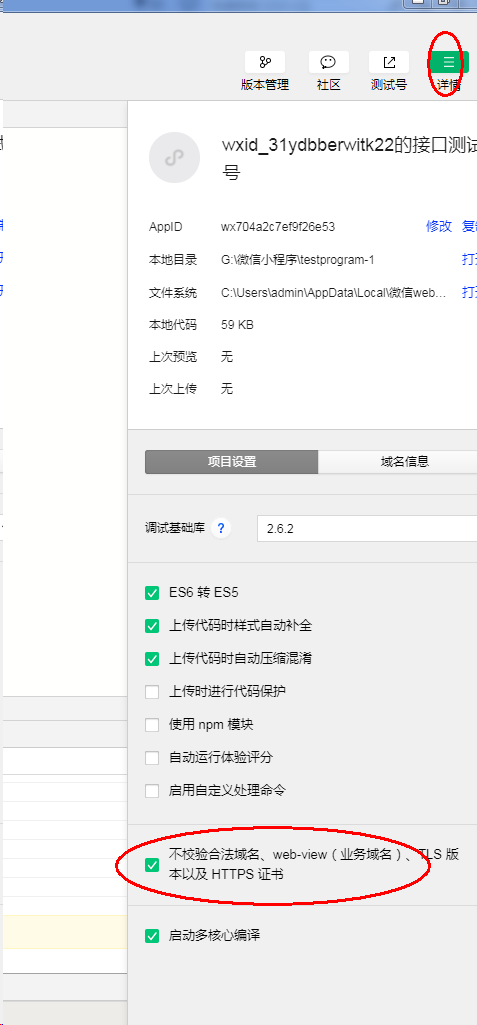
本地测试
微信小程序上传图片及本地测试的更多相关文章
- H5本地存储技术和微信小程序中的本地存储
1.H5的本地存储 <!DOCTYPE html> <html lang="en"> <head> <meta charset=" ...
- 微信小程序 上传图片并等比列压缩到指定大小
微信小程序官方API中 wx.chooseImage() 是可以进行图片压缩的,可惜的是不能压缩到指定大小. 实际开发中需求可能是压缩到指定大小: 原生js可以使用canvas来压缩,但由于微信小程 ...
- 微信小程序环境搭建(本地,测试,生产)
1.本地 官网文档链接:https://cloud.tencent.com/document/product/619/11442#.E6.9C.AC.E5.9C.B0.E5.A6.82.E4.BD.9 ...
- 微信小程序如何进行本地调试
1.下载并使用微信开发者工具 2.将项目导入工具 3.在项目中修改请求http地址 4.在工具上点击“测试号”,跳转到测试号管理界面设置request合法域名. 注意这里输入的测试域名要和上一步相同. ...
- 微信小程序上传图片(附后端代码)
几乎每个程序都需要用到图片. 在小程序中我们可以通过image组件显示图片. 当然小程序也是可以上传图片的,微信小程序文档也写的很清楚. 上传图片 首先选择图片 通过wx.chooseImage(OB ...
- .NET开发微信小程序-上传图片到服务器
1.上传图片分为几种: a:上传图片到本地(永久保存) b:上传图片到本地(临时保存) c:上传图片到服务器 a和b在小程序的api文档里面有.直接说C:上传图片到服务器 前端代码: /* 上传图片到 ...
- 微信小程序加载本地图片方法
目录结构如下,只要图片按正确的方式放入小程序的开发工具的项目中,即可在wxml文件中用内联样式或者image标签都可以引用本地的图片. 步骤一:微信开发工具 打开项目 步骤二:新建个文件夹(放项目的一 ...
- (十)微信小程序---上传图片chooseImage
官方文档 示例一 wxml <view bindtap="uploadImage">请上传图片</view> <image wx:for=" ...
- 微信小程序上传图片(前端+PHP后端)
一.wxml文件 <text>上传图片</text> <view> <button bindtap="uploadimg">点击选择 ...
随机推荐
- Ubuntu配置ISCSI
target端: 1.安装 iscsi target相关的软件 $ sudo apt-get install iscsitarget iscsitarget-source iscsitarget- ...
- Qt自定义窗口部件
QtDesigner自定义窗口部件有两种方法:改进法(promotion)和插件法(plugin) 改进法 1.改进法之前,要先写好子类化QSpinBox后的HexspinBox.h和Hexs ...
- spark MLlib的 pipeline方式
spark mllib的pipeline,是指将多个机器学习的算法串联到一个工作链中,依次执行各种算法. 在Pipeline中的每个算法被称为"PipelineStage",表示其 ...
- C++ STL——set和multiset
目录 一 set和multiset 二 对组pair 注:原创不易,转载请务必注明原作者和出处,感谢支持! 注:内容来自某培训课程,不一定完全正确! 一 set和multiset set和multis ...
- hibernate中session的管理方式
package loaderman.c_session; import loaderman.b_second_cache.Dept; import loaderman.b_second_cache.E ...
- ApkUtils
import android.content.Context; import android.content.Intent; import android.content.pm.PackageInfo ...
- 配置了configuration.xml之后提示找不到映射关系
在启动类里面单独增加一个Bean即可解决 @Bean public DatabaseIdProvider getDatabaseIdProvider(){ DatabaseIdProvider dat ...
- [hibernate]save()与persist()区别
Hibernate 之所以提供与save()功能几乎完全类似的persist()方法,一方面是为了照顾JPA的用法习惯.另一方面,save()和 persist()方法还有一个区别:使用 save() ...
- ECLIPSE 安卓项目 迁移 android stiod
JNI 处理 http://www.cnblogs.com/flyme/p/4431762.html 导入ECLIPSE项目 http://blog.csdn.net/molei1991/articl ...
- React Native初始化项目后执行react-native run-ios,构建失败
今天是肿么了......一上班创建React Native项目,react-native run-ios运行就报错,运行不了...呜呜...... 一开始以为自己react-native run-io ...