
React Native 中的 Flex Box 的用法(水平布局、垂直布局、水平居中、垂直居中、居中布局)
CSS 中 Flex-Box 语法链接 http://www.ruanyifeng.com/blog/2015/07/flex-grammar.html
Flex 是 Flexible Box 的缩写,意为”弹性布局”,用来为盒状模型提供最大的灵活性。任何一个容器都可以指定为 Flex 布局。
布局源码
import React, { Component } from 'react';

import {

  Platform,

  StyleSheet,

  View,

  Image,

} from 'react-native';

const instructions = Platform.select({

  ios: 'Press Cmd+R to reload,\n' +

    'Cmd+D or shake for dev menu',

  android: 'Double tap R on your keyboard to reload,\n' +

    'Shake or press menu button for dev menu',

});

export default class App extends Component {

  render() {

    return (

      <View style={styles.container}>

        <Image style={styles.image} source={require('./img/point.png')}/>

        <Image style={styles.image} source={require('./img/point.png')}/>

        <Image style={styles.image} source={require('./img/point.png')}/>

      </View>

    );

  }

}
水平布局(不设置朝向,则默认为竖直布局)
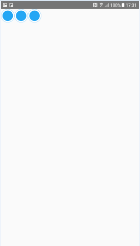
const styles = StyleSheet.create({

    container: {

        flexDirection: 'row',

    },

    image: {

        width: 40,

        height: 40,

        padding: 20,

    }

});
竖直布局(不设置朝向,则默认为竖直布局)
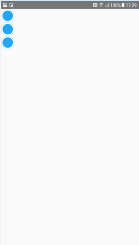
const styles = StyleSheet.create({

    container: {

        flexDirection: 'column',

    },

    image: {

        width: 40,

        height: 40,

        padding: 20,

    }

});
默认样式 顶部 水平居左/左上角
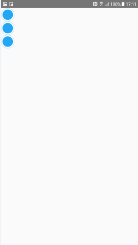
const styles = StyleSheet.create({

  container: {

  },

  image: {

    width: 40,

    height: 40,

    padding: 20,

    background: '#00000033'

  }

});
或
const styles = StyleSheet.create({

  container: {

    flex: 1,

    justifyContent: 'flex-start',

  },

  image: {

    width: 40,

    height: 40,

    padding: 20,

    background: '#00000033'

  }

});
顶部 水平居中
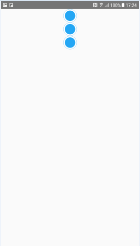
const styles = StyleSheet.create({

  container: {

    flex: 1,

    alignItems: 'center',

  },

  image: {

    width: 40,

    height: 40,

    padding: 20,

  }

});
顶部 水平居右/右上角
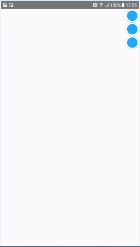
const styles = StyleSheet.create({

  container: {

    flex: 1,

    alignItems: 'flex-end',

  },

  image: {

    width: 40,

    height: 40,

    padding: 20,

  }

});
居左 竖直居中
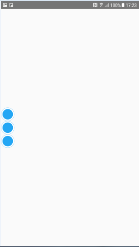
const styles = StyleSheet.create({

  container: {

    flex: 1,

    justifyContent: 'center',

  },

  image: {

    width: 40,

    height: 40,

    padding: 20,

  }

});
水平且垂直居中(显示在屏幕中央)
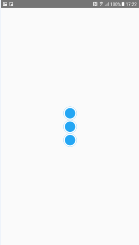
const styles = StyleSheet.create({

  container: {

    flex: 1,

    justifyContent: 'center',

    alignItems: 'center',

  },

  image: {

    width: 40,

    height: 40,

    padding: 20,

  }

});
居右 竖直居中
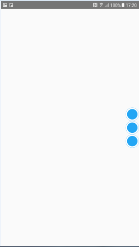
const styles = StyleSheet.create({

  container: {

    flex: 1,

    justifyContent: 'center',

    alignItems: 'flex-end',

  },

  image: {

    width: 40,

    height: 40,

    padding: 20,

  }

});
底部 水平居左/左下角
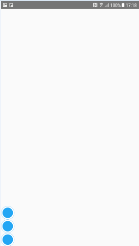
const styles = StyleSheet.create({

  container: {

    flex: 1,

    justifyContent: 'flex-end',

  },

  image: {

    width: 40,

    height: 40,

    padding: 20,

  }

});
底部 水平居中
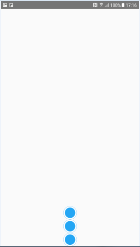
const styles = StyleSheet.create({

  container: {

    flex: 1,

    justifyContent: 'flex-end',

    alignItems: 'center',

  },

  image: {

    width: 40,

    height: 40,

    padding: 20,

  }

});
底部 水平居右/右下角
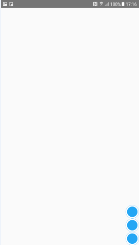
const styles = StyleSheet.create({

  container: {

    flex: 1,

    justifyContent: 'flex-end',

    alignItems: 'flex-end',

  },

  image: {

    width: 40,

    height: 40,

    padding: 20,

  }

});
设置 flexDirection 属性,改变的是主轴的方向,如果不设置 flexDirection 属性,则默认布局朝向是竖直方向的,上面的例子是 flexDirection: column(竖直朝向)的效果,可以用 flexDirection: row(水平朝向) 和 flexDirection: column(竖直朝向) 来设置布局朝向。如果在 style 中添加 flexDirection: row 属性,则上述效果会改变,如下述例子(建议尝试上述样式基础上、添加 flexDirection: row 后的效果)
理解:flexDirection: column(竖直朝向)时, x 轴为主轴,justifyContent 属性控制子控件相对 x 轴的 上/中/下 位置,y 轴为副轴,alignItems 属性控制子控件相对 y 轴的 左/中/右 位置;flexDirection: row(水平朝向)时, y 轴为主轴,justifyContent 属性控制子控件相对 y 轴的 左/中/右 位置,x 轴为副轴,alignItems 属性控制子控件相对 x 轴的 上/中/下 位置
默认或设置为 flexDirection: column 时
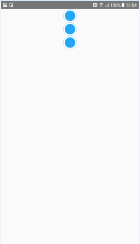
const styles = StyleSheet.create({

    container: {

        flex: 1,

        justifyContent: 'flex-start',

        alignItems: 'center',

    },

    image: {

        width: 40,

        height: 40,

        padding: 20,

    }

});
或
const styles = StyleSheet.create({

    container: {

        flex: 1,

        flexDirection: 'column',

        justifyContent: 'flex-start',

        alignItems: 'center',

    },

    image: {

        width: 40,

        height: 40,

        padding: 20,

    }

});
设置为 flexDirection: row 时
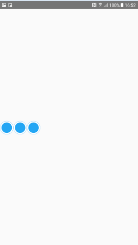
const styles = StyleSheet.create({

    container: {

        flex: 1,

        flexDirection: 'row',

        justifyContent: 'flex-start',

        alignItems: 'center',

    },

    image: {

        width: 40,

        height: 40,

        padding: 20,

    }

});
justifyContent 的属性值
上述代码中用到了 justifyContent 属性的 flex-start(默认值):左对齐、center: 居中、flex-end:右对齐,但 justifyContent 还有2个属性值
下面的这两个属性值,可以搭配 alignItems 的 flex-start、flex-end、center 三个属性搭配使用‘space-between’:两端对齐,项目之间的间隔都相等
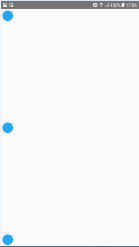
const styles = StyleSheet.create({

    container: {

        flex: 1,

        justifyContent: 'space-between'

    },

    image: {

        width: 40,

        height: 40,

        padding: 20,

    }

});
‘space-around’:每个项目两侧的间隔相等。所以,项目之间的间隔比项目与边框的间隔大一倍
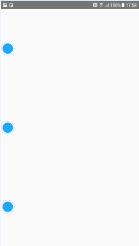
const styles = StyleSheet.create({

    container: {

        flex: 1,

        justifyContent: 'space-around'

    },

    image: {

        width: 40,

        height: 40,

        padding: 20,

    }

});
alignItems 的属性值
上述代码中用到了 alignItems 属性的 flex-start(默认值):上对齐、center: 居中、flex-end:下对齐,但 alignItems 还有2个属性值
下面的这两个属性值,可以搭配 justifyContent 的 flex-start、flex-end、center 三个属性搭配使用‘baseline’: 项目的第一行文字的基线对齐
//TODO 没看到效果呢
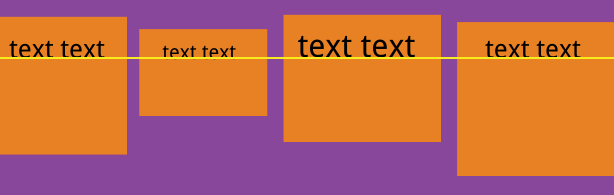
const styles = StyleSheet.create({

    container: {

        flex: 1,

        alignItems: 'baseline'

    },

    image: {

        width: 40,

        height: 40,

        padding: 20,

    }

});
‘stretch’(默认值):如果项目未设置高度或设为auto,将占满整个容器的高度
//TODO 没看到效果呢

const styles = StyleSheet.create({

    container: {

        flex: 1,

        alignItems: 'stretch'

    },

    image: {

        width: 40,

        height: 40,

        padding: 20,

    }

});
flex-grow 的属性值:定义项目的放大比例
默认为0,如果所有 item 的 flex-grow 属性都为1,则它们将等分剩余空间。如果某一个 item 的flex-grow属性为2,其他 item 都为1,则该 item 占据的剩余空间将比其他 item 多一倍
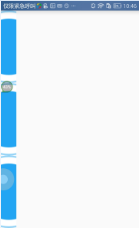
const styles = StyleSheet.create({

    container: {

        flex: 1,

    },

    image: {

        flexGrow: 1,

        width: 40,

        height: 40,

        padding: 20,

    }

});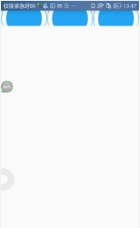
const styles = StyleSheet.create({

    container: {

        flexDirection: 'row',

        flex: 1,

    },

    image: {

        flexGrow: 1,

        width: 40,

        height: 40,

        padding: 20,

    }

});
flex-wrap 的属性值:如果一条轴线排不下,换行。默认情况下,项目都排在一条线上(又称”主轴线”)。flex-wrap 属性定义
有三个属性值:nowrap(默认):不换行;wrap:换行、第一行在前;wrap-reverse:换行、第一行在后
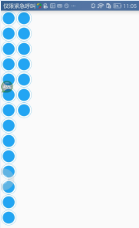
const styles = StyleSheet.create({

    container: {

        flex: 1,

        flexWrap: 'wrap',

    },

    image: {

        width: 40,

        height: 40,

        padding: 20,

    }

});
React Native 中的 Flex Box 的用法(水平布局、垂直布局、水平居中、垂直居中、居中布局)的更多相关文章
- [转] 「指尖上的魔法」 - 谈谈 React Native 中的手势
http://gold.xitu.io/entry/55fa202960b28497519db23f React-Native是一款由Facebook开发并开源的框架,主要卖点是使用JavaScrip ...
- React Native中的网络请求fetch和简单封装
React Native中的网络请求fetch使用方法最为简单,但却可以实现大多数的网络请求,需要了解更多的可以访问: https://segmentfault.com/a/1190000003810 ...
- [转] 在React Native中使用ART
http://bbs.reactnative.cn/topic/306/%E5%9C%A8react-native%E4%B8%AD%E4%BD%BF%E7%94%A8art 前半个月捣腾了一下Rea ...
- react native中使用echarts
开发平台:mac pro node版本:v8.11.2 npm版本:6.4.1 react-native版本:0.57.8 native-echarts版本:^0.5.0 目标平台:android端收 ...
- 在React Native中,使用fetch网络请求 实现get 和 post
//在React Native中,使用fetch实现网络请求 /* fetch 是一个封装程度更高的网络API, 使用了Promise * Promise 是异步编程的一种解决方案 * Promise ...
- React Native中加载指示器组件ActivityIndicator使用方法
这里讲一下React Native中的一个组件——ActivityIndicator,这是一个加载指示器,俗称菊花,很常见的,效果如下所示: 可以看到图中有两个加载指示器,一大一小,这是尺寸不是我设置 ...
- [RN] React Native中使用 react-native-scrollable-tab-view嵌套在ScrollView里,导致 子内容 在安卓上无法显示
React Native中使用 react-native-scrollable-tab-view嵌套在ScrollView里,导致 子内容 在安卓上无法显示 问题: 0.9.0 或 0.8.0 版本的 ...
- React Native 中 CSS 的使用
首先声明,此文原作者为黎 跃春 React Native中CSS 内联样式 对象样式 使用Stylesheet.Create 样式拼接 导出样式对象 下面的代码是index.ios.js中的代码: / ...
- react native中的欢迎页(解决首加载白屏)
参照网页: http://blog.csdn.net/fengyuzhengfan/article/details/52712829 首先是在原生中写一些方法,然后通过react native中js去 ...
随机推荐
- python中部分数据类型及其使用方法
1.数据类型: int:整数 str:字符串,一般不存放大量的数据 bool:布尔值,用来判断 只有两个值 True False list:列表,用来存放大量数据[]来表示,里面可以放任何数据类型 ...
- C++重温历史
这是一篇C#开发重新学习C++的体验文章. 作为一个C#开发为什么要重新学习C++呢?因为在C#在很多业务场景需要调用一些C++编写的COM组件,如果不了解C++,那么,很容易注定是要被C++同事忽悠 ...
- 深入理解JavaScript之实现继承的7种方式
1.原型链继承 核心:将父类的实例作为子类的原型 首先,要知道构造函数.原型和实例之间的关系:构造函数都有一个原型对象,原型对象都包含一个指向构造函数的指针,而实例都包含一个原型对象的指针. func ...
- spark读文件写入mysql(scala版本)
package com.zjlantone.hive import java.util.Properties import com.zjlantone.hive.SparkOperaterHive.s ...
- 采用非常规方法(非gprecoverseg) 恢复greenplum数据库
greenplum数据库中mirror的作用就是作为primary的备份存在.那么恢复down掉的mirror或primary时,是否可以直接复制文件从primary或mirror到对应的mirror ...
- 002_Python3 基础语法
1.注释 实例1: #!/usr/bin/python3 # 第一个注释 print("Hello, Python!") # 第二个注释 ****************** ...
- 使用 Java 创建聊天客户端-1
1.聊天客户端文本框的搭建. 项目截图:java project 代码: (1).ChatManager.java package com.nantian.javachatclient.main; i ...
- for循环实战性能优化
完成同样的功能,用不同的代码来实现,性能上可能会有比较大的差别,所以对于一些性能敏感的模块来说,对代码进行一定的优化还是很有必要的.今天就来说一下java代码优化的事情,今天主要聊一下对于for(wh ...
- Hibernate用到HQL查询时的错误
Exception in thread "main" org.hibernate.hql.internal.ast.QuerySyntaxException: student is ...
- sqlserver数据库查询语句
--数据库所有表select * from sysobjects where type='u'; --指定表的所有列select name from syscolumns where id=(sele ...