想实现效果:
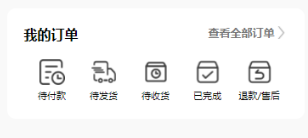
点击后跳转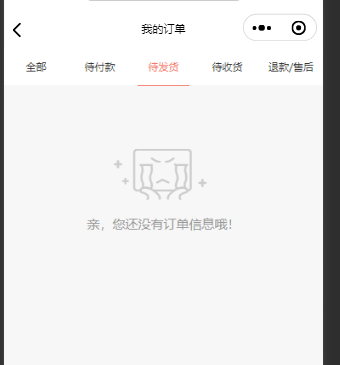
wxml:
<view class="fiveson">
<view class="fiveson-son" bindtap="onepay">
<view class="son-icon">
<image src="../../images/icon/oneimg.png"></image>
</view>
<view class="son-name">待付款</view>
</view>
<view class="fiveson-son" bindtap="twopay">
<view class="son-icon">
<image src="../../images/icon/secondimg.png"></image>
</view>
<view class="son-name">待发货</view>
</view>
<view class="fiveson-son" bindtap="threepay">
<view class="son-icon">
<image src="../../images/icon/thirdimg.png"></image>
</view>
<view class="son-name">待收货</view>
</view>
<view class="fiveson-son" bindtap="fourpay">
<view class="son-icon">
<image src="../../images/icon/fourthimg.png"></image>
</view>
<view class="son-name">已完成</view>
</view>
<view class="fiveson-son" bindtap="fivepay">
<view class="son-icon">
<image src="../../images/icon/fivethimg.png"></image>
</view>
<view class="son-name">退款/售后</view>
</view>
</view>
对应的js:
// 点击待付款跳转
onepay:function(e) {
wx.navigateTo({
url: '/pages/order-lists/index?cid=1',
})
},
// 点击待发货跳转
twopay:function(e) {
wx.navigateTo({
url: '/pages/order-lists/index?cid=2',
})
},
// 点击待收货跳转
threepay:function(e) {
wx.navigateTo({
url: '/pages/order-lists/index?cid=3',
})
},
// 点击已完成跳转
fourpay:function(e) {
wx.navigateTo({
url: '/pages/order-lists/index',
})
},
// 点击退款/售后跳转
fivepay:function(e) {
wx.navigateTo({
url: '/pages/order-lists/index?cid=4',
})
},
跳转后的页面wxml:
<!-- tab栏 -->
<view class="header f-28 col-3">
<view catchtap="bindHeaderTap" class="{{dataType==='all'?'active':''}}" data-type="all">
<text>全部</text>
</view>
<view bindtap="bindHeaderTap" class="{{dataType==='payment'?'active':''}}" data-type="payment">
<text>待付款</text>
</view>
<view bindtap="bindHeaderTap" class="{{dataType==='delivery'?'active':''}}" data-type="delivery">
<text>待发货</text>
</view>
<view bindtap="bindHeaderTap" class="{{dataType==='received'?'active':''}}" data-type="received">
<text>待收货</text>
</view>
<view bindtap="bindHeaderTap" class="{{dataType==='comment'?'active':''}}" data-type="comment">
<text>退款/售后</text>
</view>
</view>
js:
onLoad(options) {
let _this = this;
// 设置scroll-view高度
_this.setListHeight();
//获取索引
let pagecid = options.cid;
console.log(pagecid);
if ( pagecid == 1 ) {
_this.setData({
dataType: options.type || 'payment'
});
} else if ( pagecid == 2 ) {
_this.setData({
dataType: options.type || 'delivery'
});
} else if ( pagecid == 3 ) {
_this.setData({
dataType: options.type || 'received'
});
} else if ( pagecid == 4 ) {
_this.setData({
dataType: options.type || 'comment'
});
} else {
_this.setData({
dataType: options.type || 'all'
});
}
this.setData({
// dataType: e.currentTarget.dataset.type,
list: {},
isLoading: true,
page: 1,
no_more: false,
});
// 获取订单列表
this.getOrderList(options.type);
},
切换的代码(跟这题无关)
/**
* 切换标签
*/
bindHeaderTap(e) {
this.setData({
dataType: e.currentTarget.dataset.type,
list: {},
isLoading: true,
page: 1,
no_more: false,
});
// 获取订单列表
this.getOrderList(e.currentTarget.dataset.type);
},
/**
* 获取订单列表(跟这题无关)
*/
getOrderList(isPage, page) {
let _this = this;
App._get('user.order/lists', {
page: page || 1,
dataType: _this.data.dataType
}, result => {
let resList = result.data.list,
dataList = _this.data.list;
if (isPage == true) {
_this.setData({
'list.data': dataList.data.concat(resList.data),
isLoading: false,
});
} else {
_this.setData({
list: resList,
isLoading: false,
});
}
});
},
参考链接:https://q.cnblogs.com/q/125957/
- 小程序点击跳转外部链接 微信小程序提示:不支持打开非业务域名怎么办 使用web-view 配置业务域名
小程序点击跳转外部页面 1.index.wxml 添加点击事件 标签可以是小程序支持的 <!-- 邀请好友 --> <cover-image src='/img/invitat ...
- 微信小程序之 页面跳转 及 调用本地json的假数据调试
一.微信小程序 跳转页面 小程序页面有2种跳转,可以在wxml页面或者js中: (1)在wxml页面中: <navigator url="../index/index"> ...
- 微信小程序和微信小程序之间的跳转和传参示例代码附讲解
一:微信小程序跳转 使用限制 需要用户触发跳转 从 2.3.0 版本开始,若用户未点击小程序页面任意位置,则开发者将无法调用此接口自动跳转至其他小程序. 需要用户确认跳转 从 2.3.0 版本开始,在 ...
- 微信小程序 - Request | 路由跳转 | 本地存储
Request 官方文档 wx.request相当于发送ajax请求 参数 属性 类型 默认值 必填 说明 url string 是 开发者服务器接口地址 data string/object/A ...
- 微信小程序页面-页面跳转失败WAService.js:3 navigateTo:fail url not in app.json
微信小程序新建页面的要素一是新建的文件名称和其子文件的名称最好一致,不然容易出问题,在小程序页面跳转中如果出现WAService.js:3 navigateTo:fail url not in app ...
- 微信小程序页面无法跳转
推荐网址:https://www.jianshu.com/p/e56b55334585 1.无法跳转原因分析 要跳转的路径在app.js里未注册过或路径写错 要跳转的路径是否位于TabBar中 页 ...
- 微信小程序——navigator无法跳转
今天在做小程序的时候,发现用navigator无法进行跳转.url 路径也是对的. 后面发现是因为我需要跳转的页面定义在了tabBar里面的.如下图: 如果需要跳转到tabBar里面定义的这些页面,需 ...
- 微信小程序:页面跳转时传递数据到另一个页面
一.功能描述 页面跳转时,同时把当前页面的数据传递给跳转的目标页面,并在跳转后的目标页面进行展示 二.功能实现 1. 代码实现 test1页面 // pages/test1/test1.js Page ...
- 关于微信小程序的动态跳转
最近在研究微信小程序.在做一个简单的购物小程序时,遇到一个问题:如何通过扫码实现动态的跳转页面功能, 通过研究终于找到了解决方法: 首先当然要实现扫码解析功能js的代码: click: functio ...
随机推荐
- STS中创建 javaweb 项目?
package com.aaa.readme; /* * 一. * 1.安装Tomcat 版本8.5 * * 2.file---->new------>dynamic java web p ...
- Git配置用户信息和SSH免密
一.配置用户信息 1.查看配置信息 # 查看所有配置 $ git config -l/--list # 查看系统配置 $ git config --system -l/--list # 查看用户配置 ...
- 人工智能与智能系统2-> 机器人学2 | 时间与运动
<Robotics, Vision and Control>学习到第三章,我才发现这本书是有配套视频的,第二章看的好辛苦,很多地方生硬理解了一下,现在打算把视频再好好看一看,作为补充,也会 ...
- Programiz C 语言教程·翻译完成
原文:Programiz 协议:CC BY-NC-SA 4.0 欢迎任何人参与和完善:一个人可以走的很快,但是一群人却可以走的更远. 在线阅读 ApacheCN 学习资源 目录 C 简介 C 关键字和 ...
- webpack搭建react+ts+eslint项目
[初始化项目] mkdir react_ts_eslint cd react_ts_eslint npm init [生成ts配置文件] tsc --init [安装相关依赖] npm install ...
- Ubuntu16.04的PHP开发环境配置
\3c a { text-decoration: none } 自从换了php开发之后发现还是开源语言才是长久之道,开发环境搭建方便,支持的平台也多,性能也好,考虑到这些,其他一些不如意也就不足为虑了 ...
- iOS中播放音效
#import "ViewController.h" #import <AVFoundation/AVFoundation.h> @interface ViewCont ...
- springboot实现分布式锁(spring integration,redis)
Springboot实现分布式锁(Spring Integration+Redis) 一.在项目的pom.xml中添加相关依赖 1)Spring Integration依赖 <dependenc ...
- java中的成员变量和局部变量的区别
成员变量: 在类体里面定义的变量叫做成员变量: 如果在变量有static关键字修饰,就叫作静态变量或类变量: 如果该变量没有static关键字修饰,就叫作非静态变量或实例变量: 局部变量: 方法内定义 ...
- 通过示例学习PYTORCH
注意:这是旧版本的PyTorch教程的一部分.你可以在Learn the Basics查看最新的开始目录. 该教程通过几个独立的例子较少了PyTorch的基本概念. 核心是:PyTorch提供了两个主 ...